2008 AUDI A4 seats
[x] Cancel search: seatsPage 80 of 342
Seats and storage 78belts, the head restraints offer effective protection, provided they
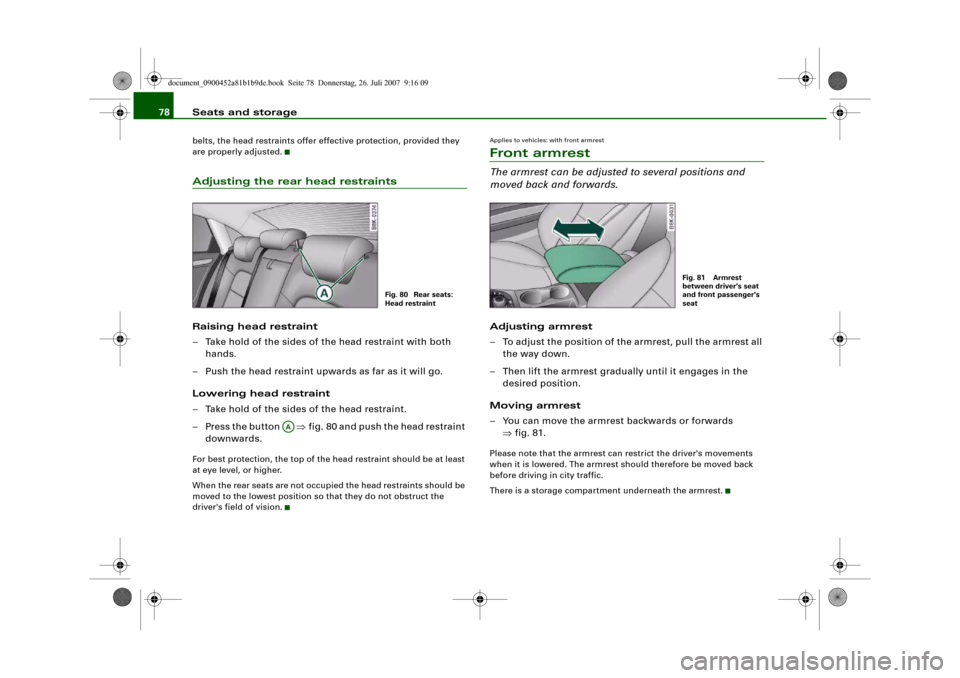
are properly adjusted.Adjusting the rear head restraintsRaising head restraint
– Take hold of the sides of the head restraint with both
hands.
– Push the head restraint upwards as far as it will go.
Lowering head restraint
– Take hold of the sides of the head restraint.
– Press the button ⇒fig. 80 and push the head restraint
downwards.For best protection, the top of the head restraint should be at least
at eye level, or higher.
When the rear seats are not occupied the head restraints should be
moved to the lowest position so that they do not obstruct the
driver's field of vision.
Applies to vehicles: with front armrestFront armrestThe armrest can be adjusted to several positions and
moved back and forwards.Adjusting armrest
– To adjust the position of the armrest, pull the armrest all
the way down.
– Then lift the armrest gradually until it engages in the
desired position.
Moving armrest
– You can move the armrest backwards or forwards
⇒fig. 81.Please note that the armrest can restrict the driver's movements
when it is lowered. The armrest should therefore be moved back
before driving in city traffic.
There is a storage compartment underneath the armrest.
Fig. 80 Rear seats:
Head restraint
AA
Fig. 81 Armrest
between driver's seat
and front passenger's
seat
document_0900452a81b1b9de.book Seite 78 Donnerstag, 26. Juli 2007 9:16 09
Page 81 of 342
Seats and storage79
Controls
Safety
Driving tips
General maintenance
Self-help
Technical data
Luggage compar tmentLoading the luggage compartment
Loads in the luggage compartment should be safely
secured.To maintain safe handling on the road, please observe the
following points:
– Distribute the weight as evenly as possible.
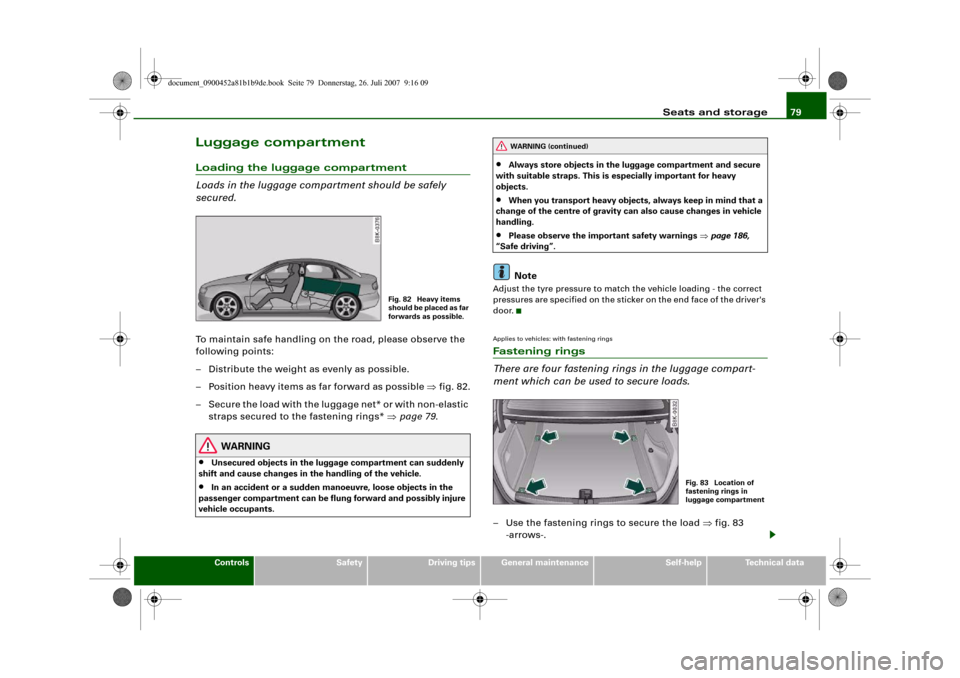
– Position heavy items as far forward as possible ⇒fig. 82.
– Secure the load with the luggage net* or with non-elastic
straps secured to the fastening rings* ⇒page 79.
WARNING
•
Unsecured objects in the luggage compartment can suddenly
shift and cause changes in the handling of the vehicle.
•
In an accident or a sudden manoeuvre, loose objects in the
passenger compartment can be flung forward and possibly injure
vehicle occupants.
•
Always store objects in the luggage compartment and secure
with suitable straps. This is especially important for heavy
objects.
•
When you transport heavy objects, always keep in mind that a
change of the centre of gravity can also cause changes in vehicle
handling.
•
Please observe the important safety warnings ⇒page 186,
“Safe driving”.Note
Adjust the tyre pressure to match the vehicle loading - the correct
pressures are specified on the sticker on the end face of the driver's
door.Applies to vehicles: with fastening ringsFastening rings
There are four fastening rings in the luggage compart-
ment which can be used to secure loads.– Use the fastening rings to secure the load ⇒fig. 83
-arrows-.
Fig. 82 Heavy items
s h o u l d b e p l a c e d a s fa r
forwards as possible.
WARNING (continued)
Fig. 83 Location of
fastening rings in
luggage compartment
document_0900452a81b1b9de.book Seite 79 Donnerstag, 26. Juli 2007 9:16 09
Page 82 of 342
Seats and storage 80
– Please refer to the safety notes ⇒page 193.Applies to vehicles: with stretch netStretch net / retaining net
The stretch net / retaining net can be used to secure light
items in the luggage compartment.Stretch net
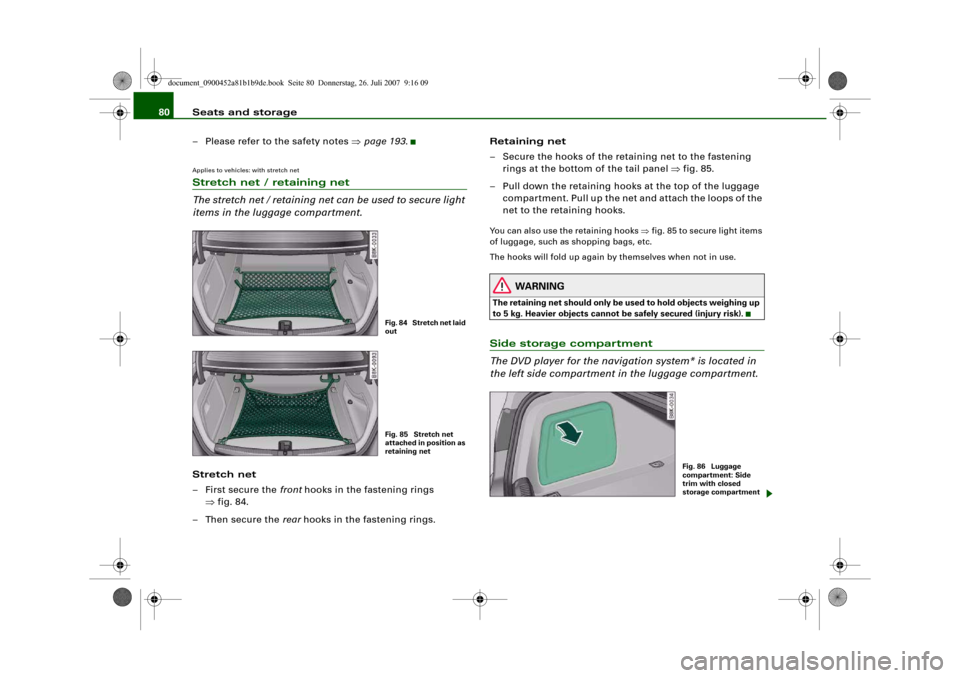
– First secure the front hooks in the fastening rings
⇒fig. 84.
–Then secure the rear hooks in the fastening rings.Retaining net
– Secure the hooks of the retaining net to the fastening
rings at the bottom of the tail panel ⇒fig. 85.
– Pull down the retaining hooks at the top of the luggage
compartment. Pull up the net and attach the loops of the
net to the retaining hooks.
You can also use the retaining hooks ⇒fig. 85 to secure light items
of luggage, such as shopping bags, etc.
The hooks will fold up again by themselves when not in use.
WARNING
The retaining net should only be used to hold objects weighing up
to 5 kg. Heavier objects cannot be safely secured (injury risk).Side storage compartment
The DVD player for the navigation system* is located in
the left side compartment in the luggage compartment.
Fig. 84 Stretch net laid
outFig. 85 Stretch net
attached in position as
retaining net
Fig. 86 Luggage
compartment: Side
trim with closed
storage compartment
document_0900452a81b1b9de.book Seite 80 Donnerstag, 26. Juli 2007 9:16 09
Page 83 of 342
Seats and storage81
Controls
Safety
Driving tips
General maintenance
Self-help
Technical data
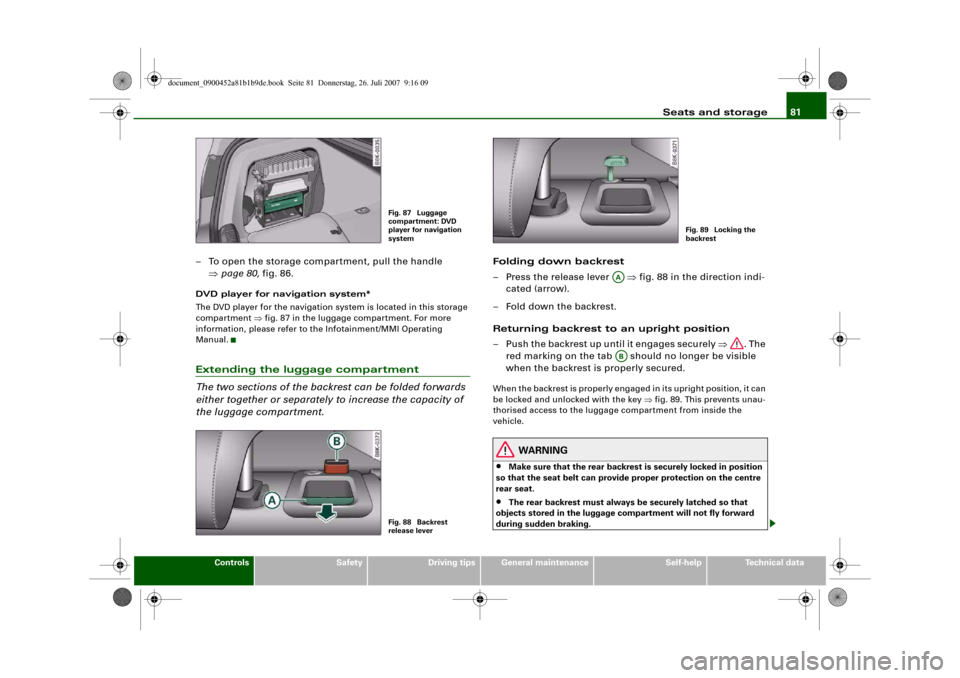
– To open the storage compartment, pull the handle
⇒page 80, fig. 86.DVD player for navigation system*
The DVD player for the navigation system is located in this storage
compartment ⇒fig. 87 in the luggage compartment. For more
information, please refer to the Infotainment/MMI Operating
Manual.Extending the luggage compartment
The two sections of the backrest can be folded forwards
either together or separately to increase the capacity of
the luggage compartment.
Folding down backrest
– Press the release lever ⇒fig. 88 in the direction indi-
cated (arrow).
– Fold down the backrest.
Returning backrest to an upright position
– Push the backrest up until it engages securely ⇒. The
red marking on the tab should no longer be visible
when the backrest is properly secured.When the backrest is properly engaged in its upright position, it can
be locked and unlocked with the key ⇒fig. 89. This prevents unau-
thorised access to the luggage compartment from inside the
vehicle.
WARNING
•
Make sure that the rear backrest is securely locked in position
so that the seat belt can provide proper protection on the centre
rear seat.
•
The rear backrest must always be securely latched so that
objects stored in the luggage compartment will not fly forward
during sudden braking.
Fig. 87 Luggage
compartment: DVD
player for navigation
systemFig. 88 Backrest
release lever
Fig. 89 Locking the
backrest
AAAB
document_0900452a81b1b9de.book Seite 81 Donnerstag, 26. Juli 2007 9:16 09
Page 84 of 342
Seats and storage 82
CautionWhen returning the backrest to an upright position, make sure that
the seat belts for the outer rear seats are in their guides so that they
cannot be caught up and damaged in the catches for the backrest.Storage shelf
The storage shelf behind the rear backrest should only be
used to store light articles of clothing.
WARNING
Do not store any heavy or hard objects on the storage shelf. They
could cause injury if the brakes are applied suddenly.
Caution
Please note that hard objects could chafe against the wires of the
heating element in the rear window and cause damage.
Note
Make sure that the slots between the rear window and the storage
shelf are kept clear to ensure unimpaired ventilation.
Applies to vehicles: with load-through hatchLoad-through hatch with transport bag
You can use the load-through hatch and the removable
ski bag to transport skis or other extra-long objects safely
inside the vehicle without soiling or damaging the uphol-
stery.Loading
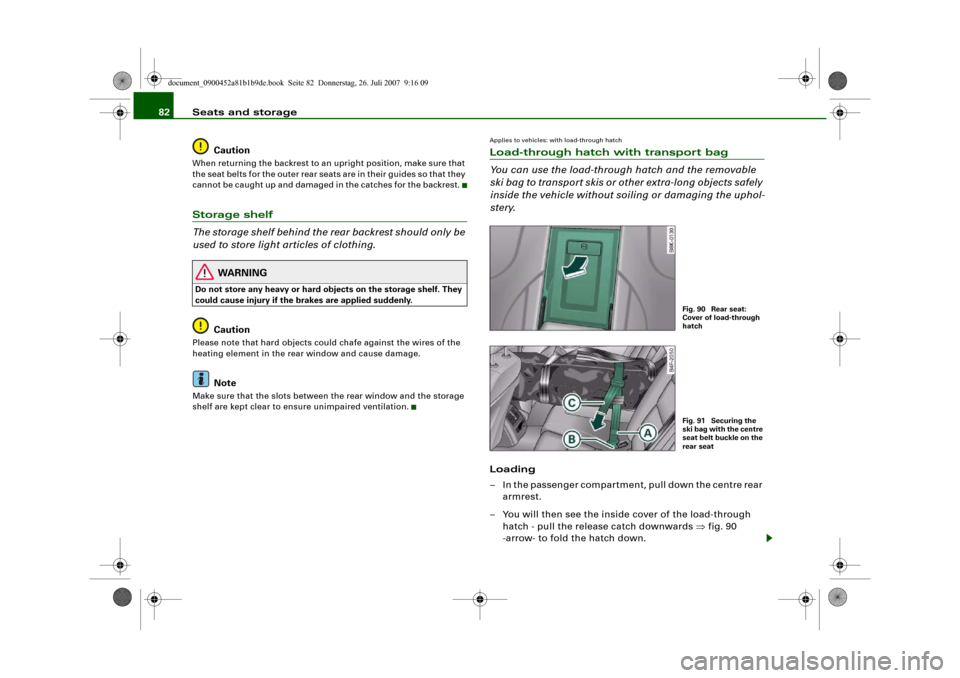
– In the passenger compartment, pull down the centre rear
armrest.
– You will then see the inside cover of the load-through
hatch - pull the release catch downwards ⇒fig. 90
-arrow- to fold the hatch down.
Fig. 90 Rear seat:
Cover of load-through
hatchFig. 91 Securing the
ski bag with the centre
seat belt buckle on the
rear seat
document_0900452a81b1b9de.book Seite 82 Donnerstag, 26. Juli 2007 9:16 09
Page 85 of 342
Seats and storage83
Controls
Safety
Driving tips
General maintenance
Self-help
Technical data
– Open the boot lid.
– Open out the ski bag and fill it with the items you wish to
transport.
– Push the ski bag from the luggage compartment into the
passenger compartment through the opening in the
backrest ⇒.
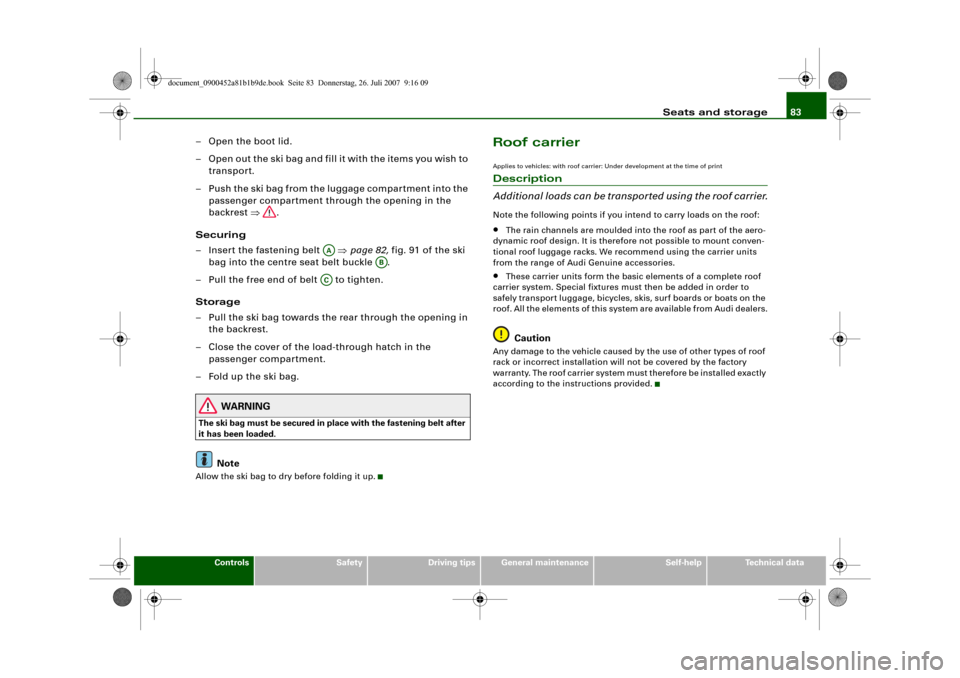
Securing
– Insert the fastening belt ⇒page 82, fig. 91 of the ski
bag into the centre seat belt buckle .
– Pull the free end of belt to tighten.
Storage
– Pull the ski bag towards the rear through the opening in
the backrest.
– Close the cover of the load-through hatch in the
passenger compartment.
–Fold up the ski bag.
WARNING
The ski bag must be secured in place with the fastening belt after
it has been loaded.
Note
Allow the ski bag to dry before folding it up.
Roof carrierApplies to vehicles: with roof carrier: Under development at the time of printDescription
Additional loads can be transported using the roof carrier.Note the following points if you intend to carry loads on the roof:•
The rain channels are moulded into the roof as part of the aero-
dynamic roof design. It is therefore not possible to mount conven-
tional roof luggage racks. We recommend using the carrier units
from the range of Audi Genuine accessories.
•
These carrier units form the basic elements of a complete roof
carrier system. Special fixtures must then be added in order to
safely transport luggage, bicycles, skis, surf boards or boats on the
roof. All the elements of this system are available from Audi dealers.Caution
Any damage to the vehicle caused by the use of other types of roof
rack or incorrect installation will not be covered by the factory
warranty. The roof carrier system must therefore be installed exactly
according to the instructions provided.
AA
AB
AC
document_0900452a81b1b9de.book Seite 83 Donnerstag, 26. Juli 2007 9:16 09
Page 86 of 342
Seats and storage 84Attachment points
The roof carrier must be attached at the marked points
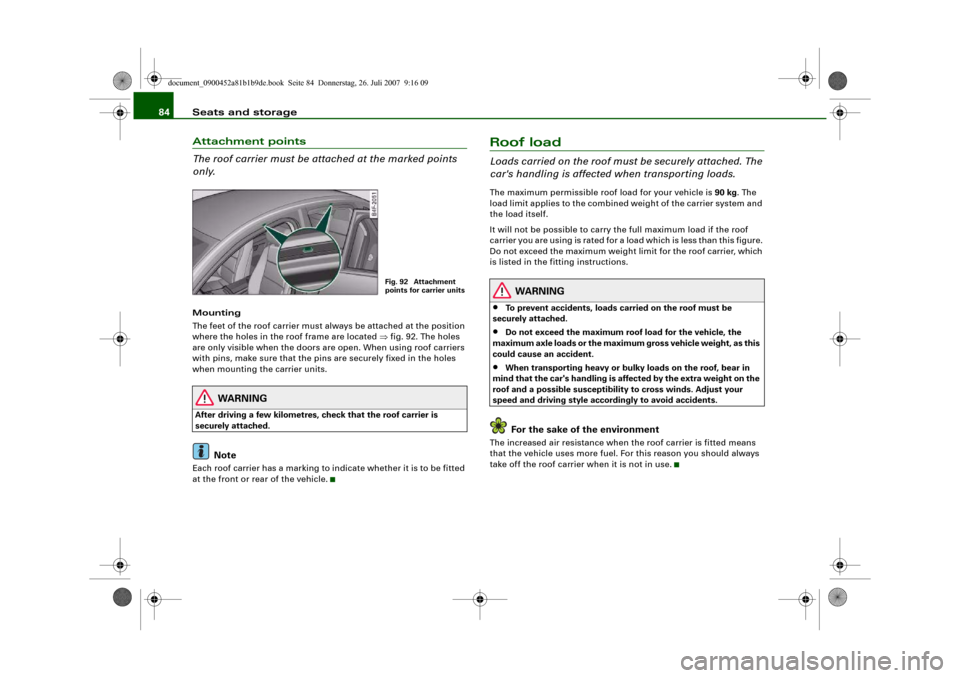
only.Mounting
The feet of the roof carrier must always be attached at the position
where the holes in the roof frame are located ⇒fig. 92. The holes
are only visible when the doors are open. When using roof carriers
with pins, make sure that the pins are securely fixed in the holes
when mounting the carrier units.
WARNING
After driving a few kilometres, check that the roof carrier is
securely attached.
Note
Each roof carrier has a marking to indicate whether it is to be fitted
at the front or rear of the vehicle.
Roof loadLoads carried on the roof must be securely attached. The
car's handling is affected when transporting loads.The maximum permissible roof load for your vehicle is 90 kg. The
load limit applies to the combined weight of the carrier system and
the load itself.
It will not be possible to carry the full maximum load if the roof
carrier you are using is rated for a load which is less than this figure.
Do not exceed the maximum weight limit for the roof carrier, which
is listed in the fitting instructions.
WARNING
•
To prevent accidents, loads carried on the roof must be
securely attached.
•
Do not exceed the maximum roof load for the vehicle, the
maximum axle loads or the maximum gross vehicle weight, as this
could cause an accident.
•
When transporting heavy or bulky loads on the roof, bear in
mind that the car's handling is affected by the extra weight on the
roof and a possible susceptibility to cross winds. Adjust your
speed and driving style accordingly to avoid accidents.For the sake of the environment
The increased air resistance when the roof carrier is fitted means
that the vehicle uses more fuel. For this reason you should always
take off the roof carrier when it is not in use.
Fig. 92 Attachment
points for carrier units
document_0900452a81b1b9de.book Seite 84 Donnerstag, 26. Juli 2007 9:16 09
Page 87 of 342
Seats and storage85
Controls
Safety
Driving tips
General maintenance
Self-help
Technical data
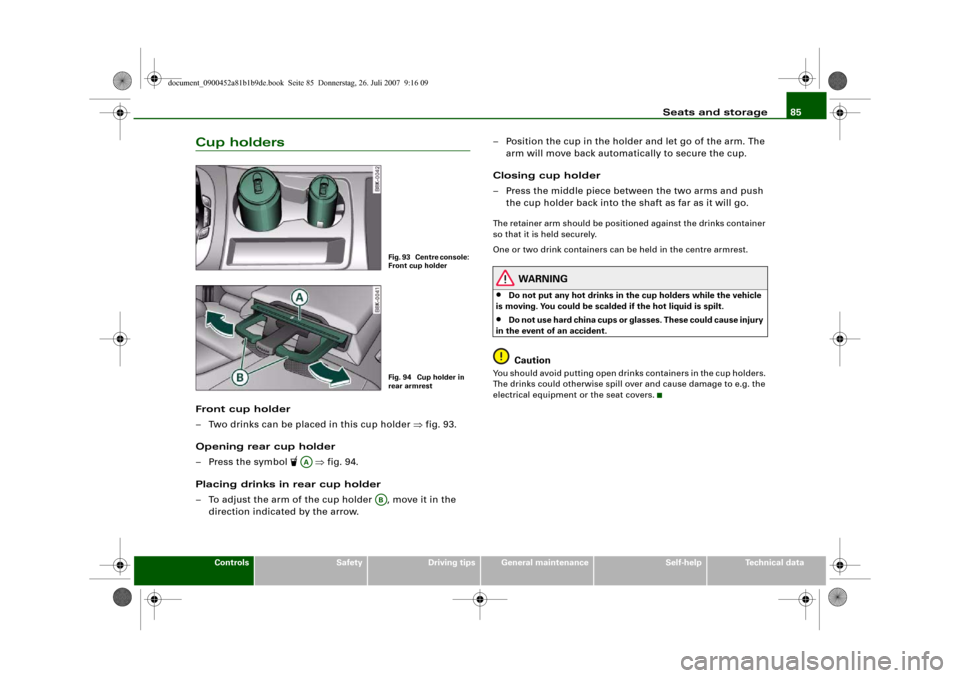
Cup holdersFront cup holder
– Two drinks can be placed in this cup holder ⇒fig. 93.
Opening rear cup holder
– Press the symbol
⇒fig. 94.
Placing drinks in rear cup holder
– To adjust the arm of the cup holder , move it in the
direction indicated by the arrow.– Position the cup in the holder and let go of the arm. The
arm will move back automatically to secure the cup.
Closing cup holder
– Press the middle piece between the two arms and push
the cup holder back into the shaft as far as it will go.
The retainer arm should be positioned against the drinks container
so that it is held securely.
One or two drink containers can be held in the centre armrest.
WARNING
•
Do not put any hot drinks in the cup holders while the vehicle
is moving. You could be scalded if the hot liquid is spilt.
•
Do not use hard china cups or glasses. These could cause injury
in the event of an accident.Caution
You should avoid putting open drinks containers in the cup holders.
The drinks could otherwise spill over and cause damage to e.g. the
electrical equipment or the seat covers.
Fig. 93 Centre console:
Front cup holderFig. 94 Cup holder in
rear armrest
AA
AB
document_0900452a81b1b9de.book Seite 85 Donnerstag, 26. Juli 2007 9:16 09