2007 VOLVO XC90 ECO mode
[x] Cancel search: ECO modePage 147 of 268

2007 Volvo XC90
Towing a trailer
The maximum weights recommended by Volvo for trailers with brakes are shown in the table below.
NOTE:
l Recommended hitch tongue load: not more than 10% of the trailer's weight\
. The trailer load should be positioned
so that it does not shift and the tongue load should be 10% of the trail\
er's weight. However, the tongue load should not
exceed the maximum permissible weights indicated in the table above.
l When towing trailers without brakes, the maximum permissible trailer weight is 1,700 lbs (750 kg).\
l If necessary, redistribute the weight of any cargo in the trailer to avo\
id excessive weight on the trailer hitch.
l The maximum trailer weight listed in the table for All Wheel Drive model\
s, 5,000 lbs (2250 kg) is only applicable when
there are not more than two occupants in the vehicle, in the front seats\
, with a combined weight of 300 lbs (135 kg), with
no other cargo in the vehicle.
l The maximum weight listed for Front Wheel Drive models, 4,000 lbs (1800\
kg) is only applicable when there are not
more than four occupants in the vehicle, in the front seats and second r\
ow of seats, with a combined weight of 600 lbs (270
kg), with no other cargo in the vehicle.
pg. 138 Starting and driving
Towing a trailer
l Please be aware that the load on the trailer hitch is part of the vehicl\
e's total load carrying capacity. The amount of cargo
in the vehicle and the trailer must be limited so that the gross vehicle\
weight and maximum permissible rear axle weight
(see
page 209) are not exceeded.
l Vehicles used for towing a trailer on a regular basis, or for long-dista\
nce highway towing should be equipped with an
automatic transmission oil cooler and Volvo's automatic self-leveling sy\
stem for the rear suspension. Consult your Volvo
retailer.
l Volvo recommends the use of Volvo trailer hitches that are specially des\
igned for the vehicle.
l All Volvo models are equipped with energy-absorbing shock-mounted bumper\
s. Trailer hitch installation should not
interfere with the proper operation of this bumper system.
l Increase tire pressure to recommended full inflation pressure. See chapt\
er "Wheels and tires."
l When your vehicle is new, avoid towing heavy trailers during the first 6\
20 miles (1,000 km).
l Engine and transmission are subject to increased loads. Therefore, engin\
e coolant temperature should be closely
file:///K|/ownersdocs/2007/2007_XC90/07xc90_06.htm (23 of 32)12/30/200\
6 5:53:44 PM
Page 148 of 268

2007 Volvo XC90
watched when driving in hot climates or hilly terrain. Use a lower gear \
and turn off the air conditioner if the temperature
gauge needle enters the red range.
l If the automatic transmission begins to overheat, a message will be disp\
layed in the text window.
l Hauling a trailer affects handling, durability, and economy.
l It is necessary to balance trailer brakes with the towing vehicle brakes\
to provide a safe stop (check and observe state/
local regulations).
l Do not connect the trailer's brake system directly to the vehicle's brak\
e system.
l Remove the ball and drawbar assembly when the hitch is not being used.
l Volvo recommends the use of synthetic engine oil when towing a trailer o\
ver long distances or in mountainous areas.
NOTE:
l When parking the vehicle with a trailer on a hill, apply the parking bra\
ke before putting the gear selector in (P)ark.
When starting on a hill, put the gear selector in (D)rive before relea\
sing the parking brake. Always follow the trailer
manufacturer's recommendations for wheel chocking.
l If you use the manual (Geartronic) shift positions while towing a trai\
ler, make sure the gear you select does not put too
much strain on the engine (using too high a gear).
WARNING!
l Bumper-attached trailer hitches must not be used on Volvos, nor should s\
afety chains be attached to the bumper.
l Trailer hitches attaching to the vehicle rear axle must not be used.
l Never connect a trailer's hydraulic brake system directly to the vehicle\
brake system, nor a trailer's lighting system
directly to the vehicle lighting system. Consult your nearest authorized\
Volvo retailer for correct installation.
l When towing a trailer, the trailer's safety wire must be correctly faste\
ned to the hole or hook provided in the trailer
hitch on the vehicle. The safety wire should never be fastened to or wou\
nd around the drawbar ball.
pg. 139 Starting and driving
Towing a trailer
Smoother starts with a trailer
Models equipped with the V8-engine and the 6-speed automatic transmissio\
n have a built-in function that reduces
acceleration slightly in first gear when the vehicle is towing a trailer\
. This is done to help avoid wheel spin and to make
starting off smoother.
l This function is activated when the trailer's electrical connector is pl\
ugged into the electrical socket mounted near the
trailer hitch.
l The function is automatically deactivated when the trailer's wiring is d\
isconnected from the socket. The vehicle will
then accelerate normally.
NOTE: Since this function is activated when a connector is plugged into the e\
lectrical socket near the trailer hitch, it will
be activated by any electrical equipment (e.g. bicycle racks with light\
ing, etc) that is plugged in, and will remain active
until the equipment is unplugged from the socket.
Leveling
If your vehicle is equipped with automatic leveling, the rear suspension\
always retains the correct ride height regardless of
the load.
l The system adjusts the rear suspension to the correct level after the ve\
hicle has been driven a short distance.
file:///K|/ownersdocs/2007/2007_XC90/07xc90_06.htm (24 of 32)12/30/200\
6 5:53:44 PM
Page 162 of 268

2007 Volvo XC90
- Add air to reach the recommended air pressure.
- Replace the valve cap.
- Repeat this procedure for each tire, including the spare.
- Visually inspect the tires to make sure there are no nails or other ob\
jects embedded that could puncture
the tire and cause an air leak.
- Check the sidewalls to make sure there are no gouges, cuts, bulges or \
other irregularities.
NOTE:
l If you overfill the tire, release air by pushing on the metal stem in th\
e center of the valve. Then
recheck the pressure with your tire gauge.
l Some spare tires require higher inflation pressure than the other tires.\
Consult the tire inflation table
on
page 154 or see the inflation pressure placard.
pg. 154 Wheels and tires
Tire inflation pressure tables - U.S. models
The following tire pressures are recommended by Volvo for your vehicle. \
Refer to the tire inflation
placard for information specific to the tires installed on your vehicle \
at the factory.
Cold tire pressures up to five persons
Tire size Front, psi
(kPa) Rear, psi (kPa)
XC90
235/65R17
235/60R18
255/50R19 36 (250)
36 (250)
Temporary spare tire
T155/85R18 61 (420)
61 (420)
Load ratings
The load ratings in the tables above translate as follows:
91 = 1365 lbs (615 kg), 93 = 1433 lbs (650 kg), 99 = 1709 lbs (755 \
kg)
Speed ratings
The speed ratings in the tables translate as follows:
M = 81 mph (130 km/h), V= 149 mph (240 km/h), W= 168 mph (270 km/h)\
See also
page 159 for an explanation of the designations on the sidewall of the tire.
file:///K|/ownersdocs/2007/2007_XC90/07xc90_07.htm (6 of 23)12/30/2006\
5:53:47 PM
Page 163 of 268

2007 Volvo XC90
pg. 155 Wheels and tires
Tire inflation pressure tables - Canadian models
The following tire pressures are recommended by Volvo for your vehicle. \
Refer to the tire inflation
placard for information specific to the tires installed on your vehicle \
at the factory.
Tire size Cold tire pressures
up to five persons psi (kPa) Optional pressure
up to three persons psi (kPa)
FrontRear Front Rear
225/70R16
235/65R17
235/60R18
255/50R19 39 (270
39 (270) 32 (220) 32 (220)
Temporary spare tire
T155/85R18 61 (420)
61 (420) 61 (420) 61 (420)
pg. 156 Wheels and tires
Tire Pressure Monitoring System (TPMS) - option
The tire pressure monitoring system uses sensors mounted in the tire val\
ves to check inflation pressure
levels. When the vehicle is moving at a speed of approximately 20 mph (\
30 km/h) or faster, these
sensors transmit inflation pressure data to a receiver located in the ve\
hicle.
USA - FCC ID: MRXTG315AM04
This device complies with part 15 of the FCC rules. Operation is subject\
to the following conditions:
(1) This device may not cause harmful interference, and (2) this dev\
ice must accept any interference
received, including interference that may cause undesired operation.
When low inflation pressure is detected, TPMS will light up the tire pre\
ssure warning light (
) (also
referred to as a telltale) in the instrument panel, and will display a \
message in the text window. The
wording of this message is determined by the degree of inflation pressur\
e loss.
NOTE: If a fault occurs in TPMS, the tire pressure warning light will flash f\
or approximately 1 minute
and TIRE PRESS SYST SERVICE REQUIRED will be displayed.
file:///K|/ownersdocs/2007/2007_XC90/07xc90_07.htm (7 of 23)12/30/2006\
5:53:47 PM
Page 168 of 268

2007 Volvo XC90
pg. 160 Wheels and tires
Glossary of tire terminology
l Tire information placard: A placard showing the OE (Original Equipment) tire sizes, recommende\
d
inflation pressure, and the maximum weight the vehicle can carry.
l Tire Identification Number (TIN): A number on the sidewall of each tire providing information
about the tire brand and manufacturing plant, tire size and date of manu\
facturer.
l Inflation pressure: A measure of the amount of air in a tire.
l Standard load: A class of P-metric or Metric tires designed to carry a maximum load a\
t 35 psi [37
psi (2.5 bar) for Metric tires]. Increasing the inflation pressure bey\
ond this pressure will not increase the
tires load carrying capability.
l Extra load: A class of P-metric or Metric tires designed to carry a heavier maximu\
m load at 41 psi
[43 psi (2.9 bar) for Metric tires]. Increasing the inflation pressure\
beyond this pressure will not increase
the tires load carrying capability.
l kPa: Kilopascal, a metric unit of air pressure.
l PSI: Pounds per square inch, a standard unit of air pressure.
l B-pillar: The structural member at the side of the vehicle behind the front door\
.
l Bead area of the tire: Area of the tire next to the rim.
l Sidewall of the tire: Area between the bead area and the tread.
l Tread area of the tire: Area of the perimeter of the tire that contacts the road when mounted \
on the
vehicle.
l Rim: The metal support (wheel) for a tire or a tire and tube assembly upo\
n which the tire beads are
seated.
l Maximum load rating: a figure indicating the maximum load in pounds and kilograms that can \
be
carried by the tire. This rating is established by the tire manufacturer\
.
l Maximum permissible inflation pressure: the greatest amount of air pressure that should ever be
put in the tire. This limit is set by the tire manufacturer.
l Recommended tire inflation pressure: inflation pressure, established by Volvo, which is based on
the type of tires that are mounted on a vehicle at the factory. This inf\
lation pressure is affected by the
number of occupants in the vehicle, the amount of cargo, and the speed a\
t which the vehicle will be
driven for a prolonged period. This information can be found on the tire\
inflation placard(s) located on
the driver's side B-pillar or on the inside of the fuel filler door on C\
anadian models, and in the tire
inflation table in this chapter.
l Cold tires: The tires are considered to be cold when they have the same temperatur\
e as the
surrounding (ambient) air. This temperature is normally reached after \
the vehicle has been parked for at
least 3 hours.
pg. 161 Wheels and tires
Vehicle loading
file:///K|/ownersdocs/2007/2007_XC90/07xc90_07.htm (12 of 23)12/30/200\
6 5:53:47 PM
Page 174 of 268

2007 Volvo XC90
NOTE: The rear section of the crank is enclosed in a protective sleeve that s\
hould be slid off before the
crank is used. We recommend reinserting the crank into this sleeve befor\
e the crank is stowed.
If the vehicle is equipped with the optional grocery bag holder: Fold up\
the rear section of the cargo area
floor, disconnect the grocery bag holder's retaining cords and fold up t\
he lower section of the floor to
access the tool bag.
Location of jack, seven-seat models
The jack is located in the center under the rear hatch in the cargo area\
floor. Lift this hatch and release
the retaining strap to slide out the jack.
The rear section of the jack's crank and the tool bag are stowed to the \
left under the hatch. The front
section of the crank is stored in the tool bag.
NOTE: The rear section of the crank is enclosed in a protective sleeve that s\
hould be slid off before the
crank is used. We recommend reinserting the crank into this sleeve befor\
e the crank is stowed.
If the vehicle is equipped with the optional grocery bag holder: Fold up\
the rear section of the cargo area
floor, disconnect the grocery bag holder's retaining cords and fold up t\
he lower section of the floor.
pg. 167 Wheels and tires
Changing wheels
CAUTION!
Seven-seat models: Do not store objects in the area for the rear seat cushions (when the\
backrests are
to be folded down). This could damage the cushions.
Lowering the spare wheel
The spare wheel is located under the floor of the rear cargo compartment\
. It can be lowered using the
crank (see previous page for location).
WARNING!
When raising or lowering the spare wheel, please keep in mind that compo\
nents in the exhaust system
may be very hot.
To lower the spare wheel:
- Fold down the lower section of the tailgate.
- Fold up the rear section of the floor in the cargo compartment.
file:///K|/ownersdocs/2007/2007_XC90/07xc90_07.htm (18 of 23)12/30/200\
6 5:53:47 PM
Page 237 of 268

2007 Volvo XC90
Use the menus as follows:
l Use the menu arrow keys (3) to navigate up or down in the menus. Dots \
in the display indicate that
there are more menu selections from which to choose.
l Press ENTER to confirm or cancel a menu selection.
l One long press on EXIT/CLEAR exits menu mode.
l A short press on the EXIT/CLEAR enables you to cancel, undo, or answer n\
o to a menu selection, or
to go back in the menu structure.
Shortcut
The menu alternatives are numbered and can be accessed directly by press\
ing the respective keys on the
numbered keypad on the left side of the audio panel.
MY KEY - programming a shortcut
Use the MY KEY button to program a favorite function from the menu, such\
as RANDOM, etc.
- Use the MENU buttons to scroll among the functions.
- Select the desired function from the menu by pressing the MY KEY butto\
n for more than two seconds.
- When MY KEY STORED is shown in the display, the function has been stor\
ed.
pg. 222 Audio
Audio system controls
- Activate the function by briefly pressing the MY KEY button.
Repeat steps 1-4 to store new functions on the MY KEY buttons.
NOTE: The MY KEY buttons can only be programmed for one shortcut function at \
a time.
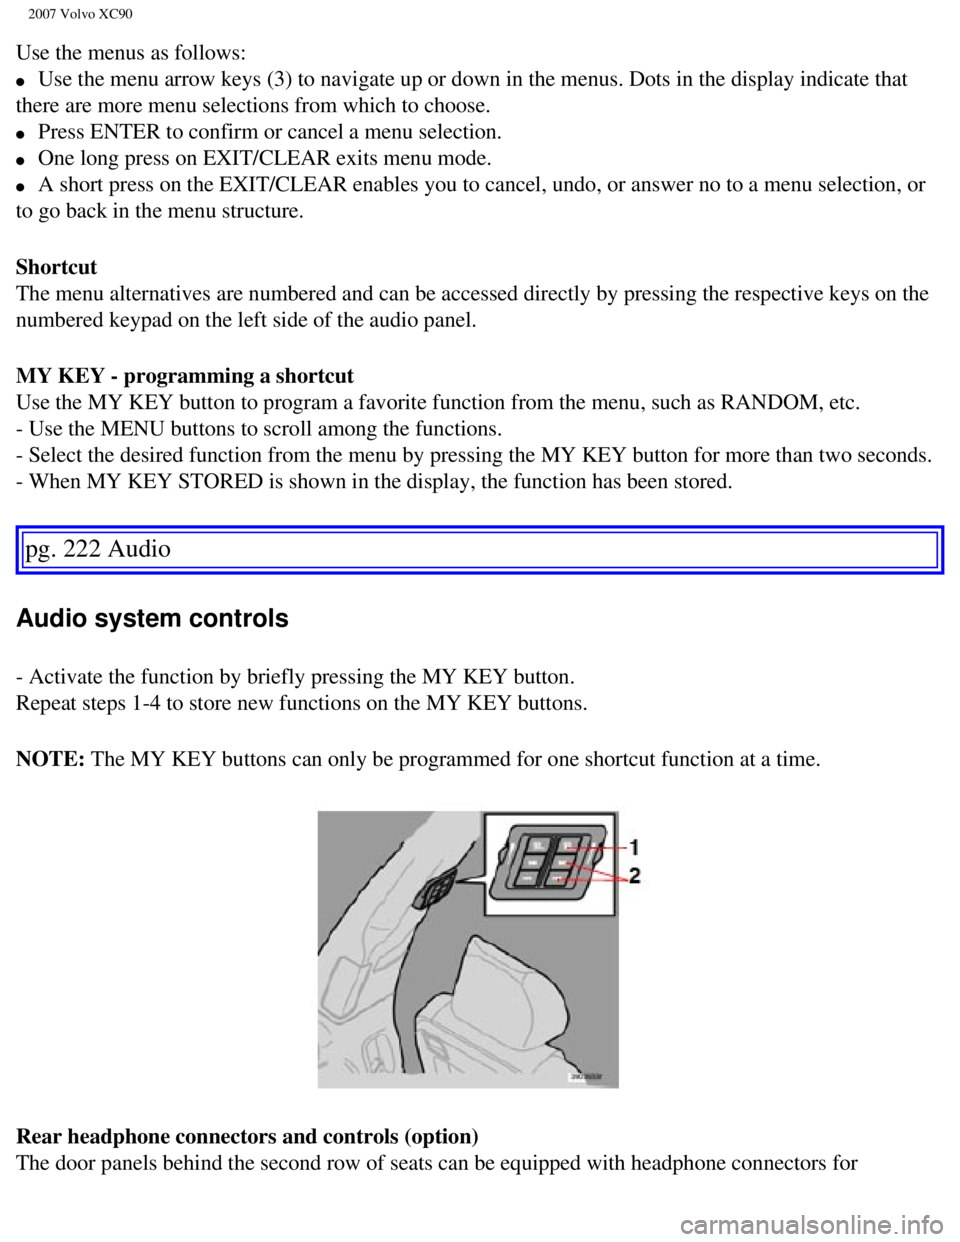
Rear headphone connectors and controls (option)
The door panels behind the second row of seats can be equipped with head\
phone connectors for
file:///K|/ownersdocs/2007/2007_XC90/07xc90_11.htm (4 of 26)12/30/2006\
5:53:54 PM
Page 242 of 268

2007 Volvo XC90
Surround sound settings are used to balance sound levels throughout the \
vehicle. Surround settings for
the various sound sources are made separately.
There are three settings for surround sound.
l PRO LOGIC II
l 3-CHANNEL
l OFF (2-channel stereo)
The
symbol in the display indicates that Dolby Surround Pro Logic II is acti\
vated.
l Dolby Surround Pro Logic II functions in CD mode only.
l 2-channel stereo is recommended for AM/FM radio broadcasts.
l Dolby Surround Pro Logic II is only available on the highest level audio\
system - Premium Sound.
Use the following instructions to select PRO LOGIC II, 3-CHANNEL, or to \
turn these functions off. See
also the menu structure on
page 236.
- Select AUDIO SETTINGS in the menu and press ENTER.
- Select CD SURROUND and press ENTER.
- Select PRO LOGIC II, 3-CHANNEL, or OFF and press ENTER.
pg. 226 Audio
Radio functions
l The symbol PL II is displayed when Pro Logic II is selected.
l 3-CH is displayed when 3-channel stereo is selected.
l OFF indicates normal stereo mode.
Dolby noise reduction is manufactured under license from Dolby Laborator\
ies Licensing Corporation.
"Dolby Surround Pro Logic II", and the double-D symbol
are trademarks of Dolby Laboratories
Licensing Corporation. Dolby Surround Pro Logic II is manufactured under\
licence from Dolby
Laboratories Licensing Corporation.
Bass speaker - SUBWOOFER (option)
The subwoofer helps the system provide fuller sound and deeper bass.
- Select AUDIO SETTINGS in the menu and press ENTER.
Select SUBWOOFER and press ENTER.
See
page 225 for information on setting the subwoofer level.
Equalizer FR
EQ - FRONT (certain audio systems)
This function is used to fine-tune the sound from the front speakers.
file:///K|/ownersdocs/2007/2007_XC90/07xc90_11.htm (9 of 26)12/30/2006\
5:53:54 PM