2007 SUZUKI GRAND VITARA battery
[x] Cancel search: batteryPage 36 of 211

Downloaded from www.Manualslib.com manuals search engine 2-22 BEFORE DRIVING
66J21-03E
Lap-Shoulder BeltEmergency Locking Retractor (ELR)
The lap-shoulder seat belt has an emer-
gency locking retractor (ELR), which is
designed to lock the seat belt only during a
sudden stop or impact. It also may lock if
you pull the belt across your body very
quickly. If this happens, let the belt go back
to unlock it, then pull the belt across your
body more slowly.
Automatic Locking Retractor (ALR)
The front passenger’s seat belt and the
rear seat belts have emergency locking
retractors (ELRs) that can be temporarily
converted to function as automatic locking
retractors (ALRs). The ALR mode should
be used if you need to secure a child
restraint system in the seat. Refer to the
“Child Restraint Systems” section for
details.
WARNING
(Continued)
Do not wear your seat belt over
hard or breakable objects in your
pockets or on your clothing. If an
accident occurs, objects such as
glasses, pens, etc. under the seat
belt can cause injury.
Never use the same seat belt on
more than one occupant and never
attach a seat belt over an infant or
child being held on an occupant’s
lap. Such seat belt use could cause
serious injury in the event of an
accident.
Periodically inspect seat belt
assemblies for excessive wear and
damage. Seat belts should be
replaced if webbing becomes
frayed, contaminated, or damaged
in any way. It is essential to replace
the entire seat belt assembly after it
has been worn in a severe impact,
even if damage to the assembly is
not obvious.
Children age 12 and under should
ride properly restrained in the rear
seat, if equipped.
(Continued)
WARNING
(Continued)
Infants and small children should
never be transported unless they
are properly restrained. Restraint
systems for infants and small chil-
dren can be purchased commer-
cially and should be used. Make
sure that the system you purchase
meets Federal Motor Vehicle Safety
Standards. Read and follow all the
directions provided by the manu-
facturer.
Avoid contamination of seat belt
webbing by polishes, oils, chemi-
cals and particularly battery acid.
Cleaning may safely be carried out
using mild soap and water.
For children, if the shoulder belt
irritates the neck or face, move the
child closer to the center of the
vehicle.
All seatbacks should always be in
an upright position when driving,
or seat belt effectiveness may be
reduced. Seat belts are designed to
offer maximum protection when
seatbacks are in the upright posi-
tion.
Seat Belts and Child Restraint Systems: 14
Page 60 of 211

Downloaded from www.Manualslib.com manuals search engine 2-46 BEFORE DRIVING
66J21-03E
Note that even though your vehicle may be
moderately damaged in a collision, the col-
lision may not have been severe enough to
trigger the front, side, or side curtain air
bags to inflate. If your car sustains ANY
front-end or side damage, have the air bag
system inspected by an authorized
SUZUKI dealer to ensure it is in proper
working order.
Your vehicle is equipped with a diagnostic
module which records information about
the air bag system if the air bags deploy in
a crash. The module records information
about overall system status, which sensors
activated the deployment, and whether the
front seat belts were in use.
Servicing the Air Bag SystemIf the air bags inflate, have the air bags
and related components replaced by an
authorized SUZUKI dealer as soon as pos-
sible.
If your vehicle ever gets in deep water and
the driver’s floor is submerged, the air bag
controller could be damaged. If this hap-
pens, have the air bag system inspected
by the SUZUKI dealer as soon as possible.
Special procedures are required for servic-
ing or replacing an air bag. For that rea-
son, only an authorized SUZUKI dealer
should be allowed to service or replace
your air bags. Please remind anyone who
services your SUZUKI that it has air bags.
Service on or around air bag components
or wiring must be performed only by an
authorized SUZUKI dealer. Improper ser-
vice could result in unintended air bag
deployment or could render the air bags
inoperative. Either of these two conditions
may result in severe injury.
To prevent damage or unintended inflation
of the air bag system, be sure the battery
is disconnected and the ignition switch has
been in the “LOCK” position for at least 90
seconds before performing any electrical
service work on your SUZUKI. Do not
touch air bag system components or wires.
The wires are wrapped with yellow tape or
yellow tubing, and the couplers are yellow
for easy identification.Scrapping a car that has an undeployed air
bag can be hazardous. Ask your dealer,
body repair shop or scrap yard for help
with disposal.
If it is necessary to modify the advanced
front air bag system to accommodate a
person with disabilities, owners in the con-
tinental United States can call American
Suzuki toll-free at 1-800-934-0934, or write
to:
American Suzuki Motor Corporation
Automotive Customer Relations
3251 East Imperial Highway
Brea, CA 92821-6795
If you purchased your SUZUKI in Canada
please contact the Suzuki Canada Cus-
tomer Relations Department by telephone
at 1-905-889-2677 extension 2254 or in
writing at:
Suzuki Canada Inc.
Customer Relations
100 East Beaver Creek Road
Richmond Hill, On
L4B 1J6
WARNING
(Continued)
For vehicles with side air bags, do
not place seat covers on the front
seats, because seat covers could
restrict the air bag’s inflation. Also,
do not place any cup holders or
other objects on the door, as these
objects could be propelled by the
air bag in the event of a crash.
Either of these conditions may
cause severe injury.
Page 68 of 211

Downloaded from www.Manualslib.com manuals search engine 4-6 INSTRUMENT PANEL
66J21-03E
SLIP Indicator Light
66J033
ESP
® is a registered trademark of
DaimlerChrysler AG.
This light blinks 5 times per second when
one of the ESP
® systems other than ABS
is activated. If this light blinks, drive care-
fully.
When the ignition switch is turned to the
“ON” position, the light comes on briefly so
you can check that the light is working. If
the light stays on, or comes on when driv-
ing and remains on, there may be some-
thing wrong with the ESP
® systems (other
than ABS). You should have the system
inspected by an authorized SUZUKI
dealer.
NOTE:
When you disconnect and re-connect the
battery, ESP
® system functions other than
ABS will be deactivated and the slip indica-
tor light will blink 1 time per second. For
details on how to reactive the ESP
® sys-
tems, refer to “SLIP Indicator Light” in the
“OPERATING YOUR VEHICLE” section.For details of the ESP
® systems, refer to
“Electronic Stability Program (ESP
®)” in
the “OPERATING YOUR VEHICLE” sec-
tion.
“ESP” (Electronic Stability
Program) Warning Ligh
66J031
When the ignition switch is turned to the
“ON” position, the light comes on briefly so
you can check that the light is working. If
the light stays on, or comes on when driv-
ing, there may be something wrong with
the ESP
® systems (other than ABS). You
should have the system inspected by an
authorized SUZUKI dealer.
For details of the ESP
® systems, refer to
“Electronic Stability Program (ESP
®)” in
the “OPERATING YOUR VEHICLE” sec-
tion.
“ESP OFF” Indicator Light
66J032
When the ignition switch is turned to the
“ON” position, this light comes on briefly so
you can check that the light is working.
When the “ESP OFF” switch is pushed to
turn off the ESP
® systems (other than
ABS), the “ESP OFF” light comes on and
stays on.
NOTE:
If the vehicle speed is greater than
approximately 30 km/h (19 mph), the
ESP
® systems (other than ABS) will turn
on automatically and the light will go out.
When the transfer switch (if equipped) is
turned to the “4L LOCK” position, the
ESP® systems (other than ABS) will be
canceled automatically. The light will
come on and stay on.
If the ESP
® systems operate continu-
ously such as when driving on slippery
roads, the traction control functions of
the ESP
® systems may be canceled
temporarily to avoid overheating the
brake pads, and the light will come on.
After a short period of time, the ESP
®
WARNING
The ESP
® systems cannot prevent
accidents. Always drive carefully.
Warning and Indicator Lights: 8
Page 69 of 211

Downloaded from www.Manualslib.com manuals search engine 4-7 INSTRUMENT PANEL
66J21-03E
systems (other than ABS) will turn on
automatically and the light will go out.
For details of the ESP
® systems, refer to
“Electronic Stability Program (ESP
®)” in
the “OPERATING YOUR VEHICLE” sec-
tion.
Oil Pressure Light
50G051
This light comes on when the ignition
switch is turned to the “ON” position, and
goes out when the engine is started. The
light will come on and remain on if there is
insufficient oil pressure. If the light comes
on when driving, pull off the road as soon
as you can and stop the engine. Check the
oil level and add oil if necessary. If there is
enough oil, the lubrication system should
be inspected by your SUZUKI dealer
before you drive the vehicle again.
Charging Light
50G052
This light comes on when the ignition
switch is turned to the “ON” position, and
goes out when the engine is started. The
light will come on and remain on if there is
something wrong with the battery charging
system. If the light comes on when the
engine is running, the charging system
should be inspected immediately by your
SUZUKI dealer.
Driver’s Seat Belt Reminder Light
60G049
If the driver’s seat belt is unbuckled when
the ignition switch is turned to the “ON”
position, this light will come on and then
blink. When the light comes on, a buzzer
will also sound intermittently for about 6
seconds. The reminder will repeat several
times under certain conditions until the
driver’s seat belt is buckled. After repeat-
ing several times, the reminder will be can-
celed even if the driver’s seat belt remains
unbuckled.
For details about the seat belt reminder,
refer to “Seat Belts and Child Restraint
Systems” in the “BEFORE DRIVING” sec-
tion.
CAUTION
If you operate the engine with this
light on, severe engine damage can
result.
Do not rely on the Oil Pressure
Light to indicate the need to add
oil. Be sure to periodically check
the engine oil level.
WARNING
It is absolutely essential that the
driver and passengers wear their
seat belts at all times. Persons who
are not wearing seat belts have a
much greater risk of injury if an acci-
dent occurs. Make a regular habit of
buckling your seat belt before putting
the key in the ignition.
Warning and Indicator Lights: 8
Page 81 of 211

Downloaded from www.Manualslib.com manuals search engine 4-19 INSTRUMENT PANEL
66J21-03E
Instantaneous fuel consumption (a)
If you selected instantaneous fuel con-
sumption the last time you drove the vehi-
cle, the display indicates “--.-” when the
ignition switch is turned to the “ACC” or
“ON” position. Unless the vehicle is mov-
ing, the display will indicate “--.-”.
Average fuel consumption (b)
If you selected average fuel consumption
the last time you drove the vehicle, the dis-
play shows the last value of average fuel
consumption when the ignition switch is
turned to the “ACC” or “ON” position.
Unless you reset the value of average fuel
consumption, the display will show the
value of average fuel consumption which
includes average fuel consumption during
previous driving.
To reset the value of average fuel con-
sumption, hold in the “DISP” button (6) for
more than 2 seconds when the display
shows an average fuel consumption value.
The display will indicate “--.-” and then will
show a new average fuel consumption
value after driving for a short time.
Driving range (c)
If you selected driving range the last time
you drove the vehicle, the display shows “-
-.-” for a few seconds and then shows the
current driving range when the ignition
switch is turned to the “ON” position.
The driving range shown in the display is
the approximate distance you can driveuntil the fuel gauge indicates “E” based a
current driving conditions.
When the remaining fuel in fuel tank
reaches a low level, the display “--.-” will
appear.
If the low fuel warning light comes on, fill
the fuel tank immediately regardless of the
value of driving range shown in the dis-
play.
As the driving range after refueling is cal-
culated based on the last driving condition,
the value is different each time you refuel.
NOTE:
When you reconnect the negative (–)
terminal to the battery, the value of driv-
ing range will be shown after driving for a
while.
For new vehicle with low mileage, the
driving range may not be shown
promptly in the display when beginning
to drive. The driving range will be shown
after a while.
NOTE:
The values of fuel consumption and driving
range shown in the display are affected by
conditions such as the following;
road condition
surrounding traffic condition
driving condition
vehicle condition
when the malfunction indicator light
comes on or blinksUnit indication of fuel consumption and
driving range
You can change the unit indication of fuel
consumption when selecting instanta-
neous fuel consumption or average fuel
consumption in the display.
You can also change the unit indication of
driving range when selecting driving range
in the display.
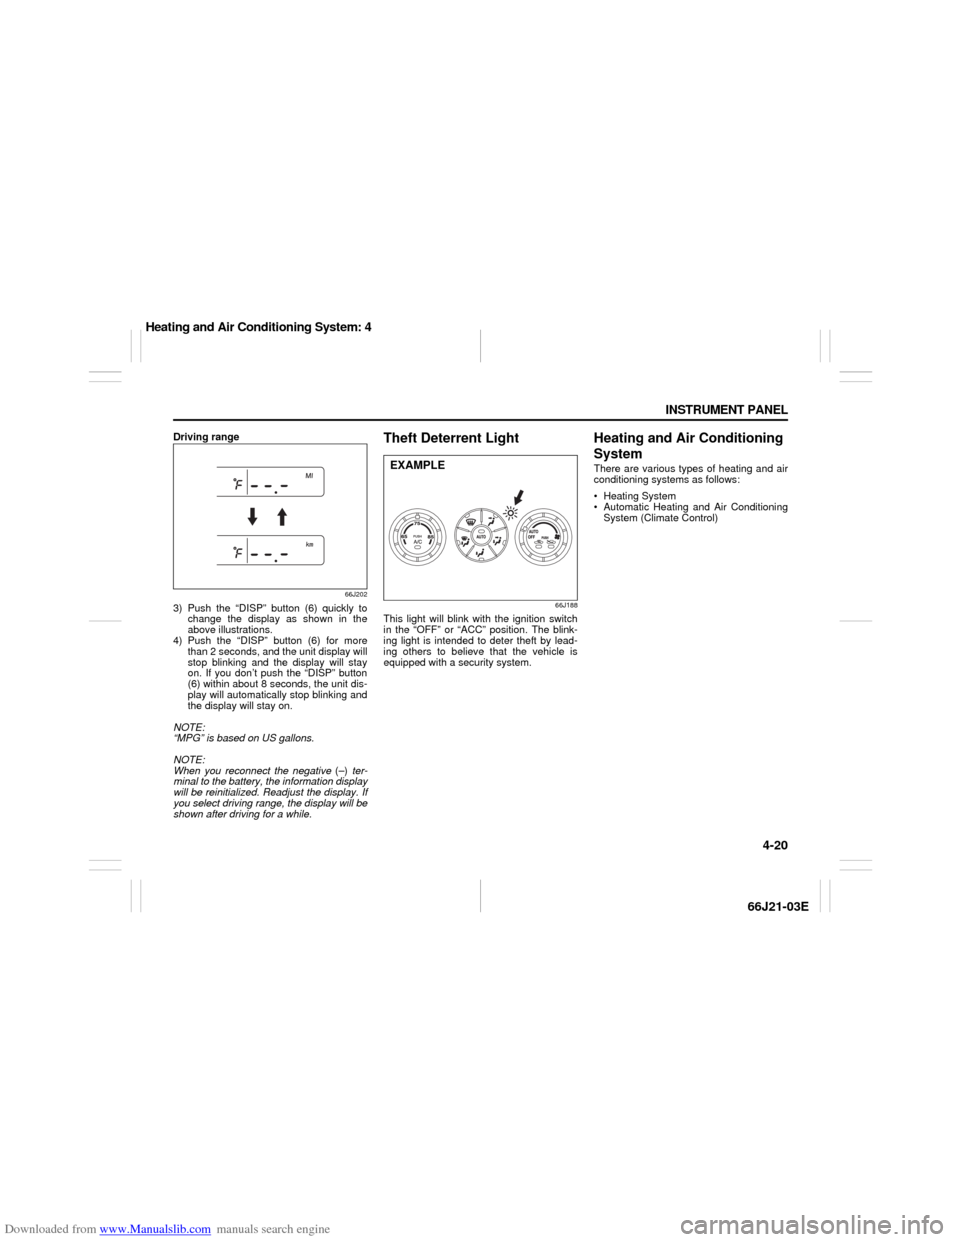
To change the unit indication in the dis-
play, follow the instructions below.
You should operate the display before the
vehicle moves.
1) Turn the ignition switch to the “ACC” or
“ON” position while holding in the
“DISP” button (6). The unit display of
the thermometer will blink.
2) Push the “M” button (5), and the unit
display of fuel consumption or driving
range will blink.
Fuel consumption
66J201
Information Display:
Page 82 of 211

Downloaded from www.Manualslib.com manuals search engine 4-20 INSTRUMENT PANEL
66J21-03E
Driving range
66J202
3) Push the “DISP” button (6) quickly to
change the display as shown in the
above illustrations.
4) Push the “DISP” button (6) for more
than 2 seconds, and the unit display will
stop blinking and the display will stay
on. If you don’t push the “DISP” button
(6) within about 8 seconds, the unit dis-
play will automatically stop blinking and
the display will stay on.
NOTE:
“MPG” is based on US gallons.
NOTE:
When you reconnect the negative (–) ter-
minal to the battery, the information display
will be reinitialized. Readjust the display. If
you select driving range, the display will be
shown after driving for a while.
Theft Deterrent Light
66J188
This light will blink with the ignition switch
in the “OFF” or “ACC” position. The blink-
ing light is intended to deter theft by lead-
ing others to believe that the vehicle is
equipped with a security system.
Heating and Air Conditioning
SystemThere are various types of heating and air
conditioning systems as follows:
Heating System
Automatic Heating and Air Conditioning
System (Climate Control)
EXAMPLE
Heating and Air Conditioning System: 4
Page 113 of 211

Downloaded from www.Manualslib.com manuals search engine 4-51 INSTRUMENT PANEL
66J21-03E
Anti-Theft Feature
66J223
(1)
(2)
(3)
(1)
(2)
(3)
Type 1 AM/FM/XM CD PLAYER WITH CD CHANGER CONTROL
Type 2 AM/FM/XM 6-CD PLAYER WITH CD CHANGER CONTROL
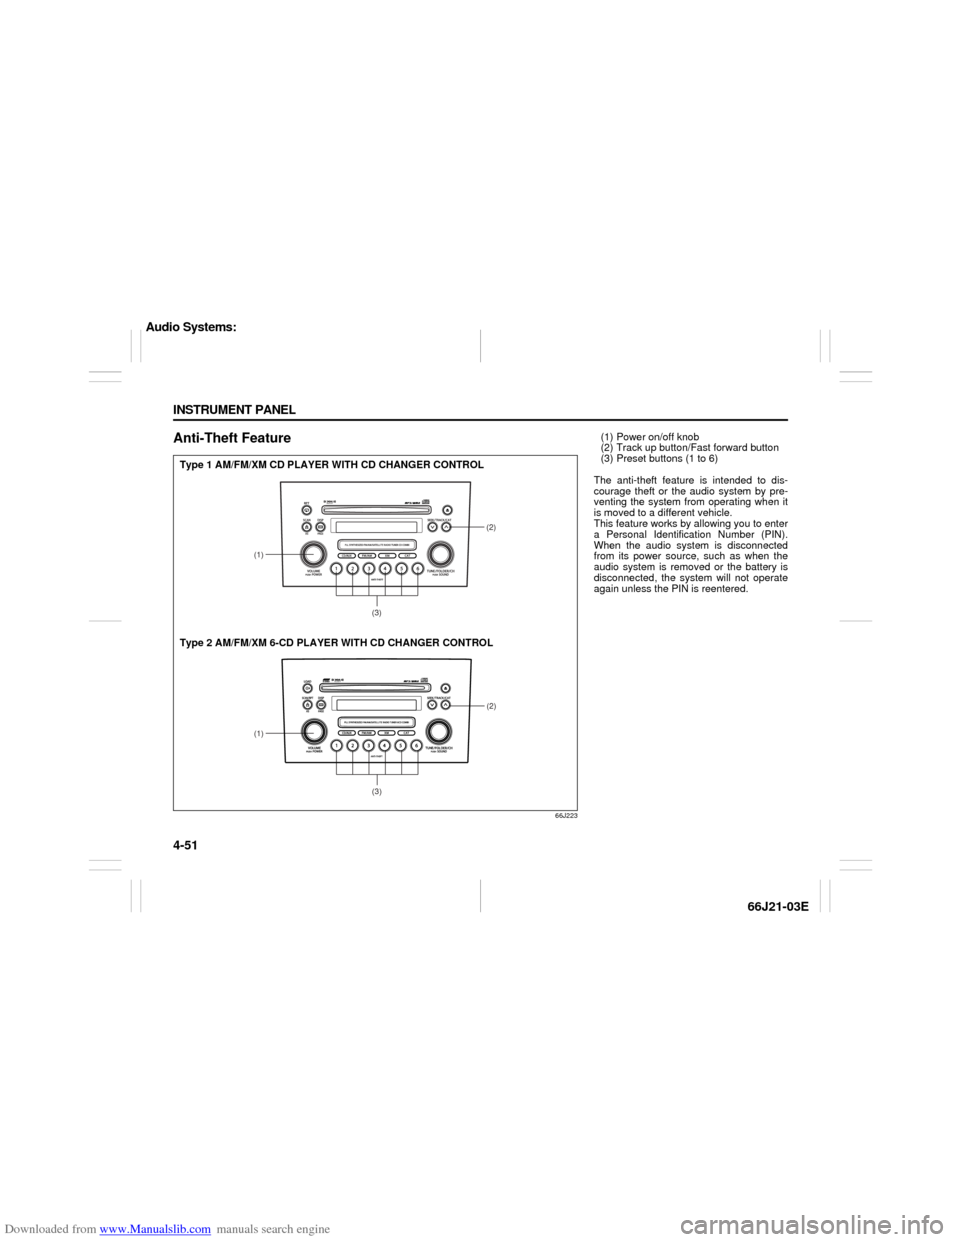
(1) Power on/off knob
(2) Track up button/Fast forward button
(3) Preset buttons (1 to 6)
The anti-theft feature is intended to dis-
courage theft or the audio system by pre-
venting the system from operating when it
is moved to a different vehicle.
This feature works by allowing you to enter
a Personal Identification Number (PIN).
When the audio system is disconnected
from its power source, such as when the
audio system is removed or the battery is
disconnected, the system will not operate
again unless the PIN is reentered.
Audio Systems:
Page 115 of 211

Downloaded from www.Manualslib.com manuals search engine 4-53 INSTRUMENT PANEL
66J21-03E
66J124
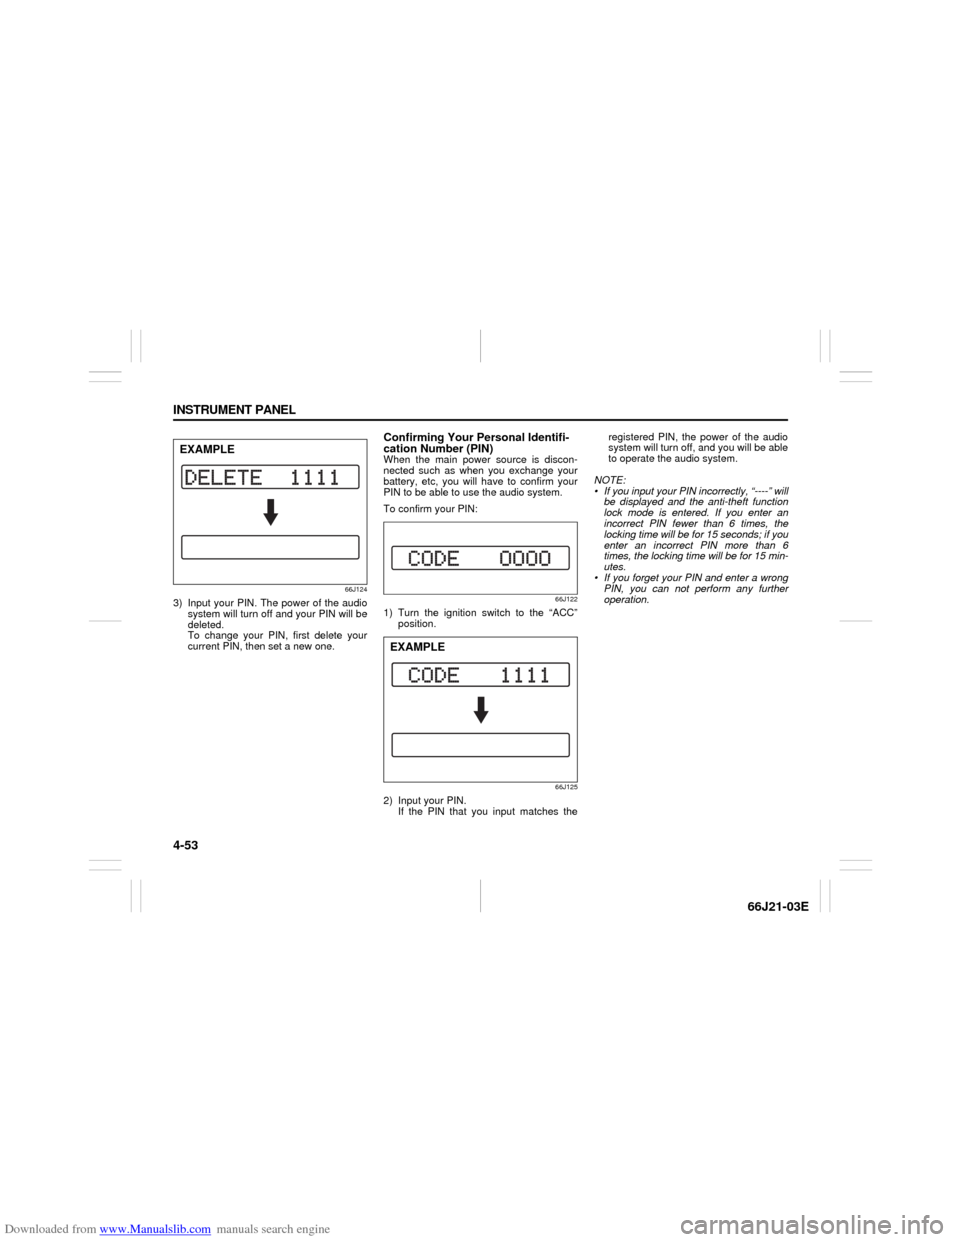
3) Input your PIN. The power of the audio
system will turn off and your PIN will be
deleted.
To change your PIN, first delete your
current PIN, then set a new one.
Confirming Your Personal Identifi-
cation Number (PIN)When the main power source is discon-
nected such as when you exchange your
battery, etc, you will have to confirm your
PIN to be able to use the audio system.
To confirm your PIN:
66J122
1) Turn the ignition switch to the “ACC”
position.
66J125
2) Input your PIN.
If the PIN that you input matches theregistered PIN, the power of the audio
system will turn off, and you will be able
to operate the audio system.
NOTE:
If you input your PIN incorrectly, “----” will
be displayed and the anti-theft function
lock mode is entered. If you enter an
incorrect PIN fewer than 6 times, the
locking time will be for 15 seconds; if you
enter an incorrect PIN more than 6
times, the locking time will be for 15 min-
utes.
If you forget your PIN and enter a wrong
PIN, you can not perform any further
operation.
EXAMPLE
EXAMPLE