2007 SUZUKI FORENZA tow
[x] Cancel search: towPage 139 of 225

4-15 DRIVING YOUR VEHICLE
85Z03-03E
Run your engine only as long as you must.
This saves fuel. When you run the engine,
make it go a little faster than just idle. That
is, push the accelerator slightly. This uses
less fuel for the heat that you get and it
keeps the battery charged. You will need a
well-charged battery to restart the vehicle,
and possibly for signaling later on with your
headlamps. Let the heater run for a while.
Then, shut the engine off and close the
window almost all the way to preserve the
heat. Start the engine again and repeat
this only when you feel really uncomfort-
able from the cold. But do it as little as pos-
sible. Preserve the fuel as long as you can.
To help keep warm, you can get out of the
vehicle and do some fairly vigorous exer-
cises every half hour or so until help
comes.
If You Are Stuck: In Sand, Mud, Ice or
Snow
In order to free your vehicle when it is
stuck, you will need to spin the wheels, but
you don’t want to spin your wheels too fast.
The method known as “rocking” can help
you get out when you’re stuck, but you
must use caution.For information about using tire chains on
your vehicle, see “Tire Chains” in section 5.Rocking Your Vehicle To Get It Out
First, turn your steering wheel left and
right. That will clear the area around your
front wheels. Then shift back and forth
between REVERSE (R) and a forward
gear (or with a manual transmission,
between FIRST (1) or SECOND (2) and
REVERSE (R)), spinning the wheels as lit-
tle as possible. Release the accelerator
pedal while you shift, and press lightly on
the accelerator pedal when the transmis-
sion is in gear. By slowly spinning your
wheels in the forward and reverse direc-
tions, you will cause a rocking motion that
may free your vehicle. If that doesn’t get
you out after a few tries, you may need to
be towed out. If you do need to be towed
out, see “Towing Your Vehicle” in the fol-
lowing section.
WARNING
If you let your tires spin at high
speed, they can explode, and you or
others could be injured. And, the
transmission or other parts of the
vehicle can overheat. That could
cause an engine compartment fire or
other damage. When you’re stuck,
spin the wheels as little as possible.
Don’t spin the wheels above 35 mph
(55 km/h) as shown on the speedom-
eter.
CAUTION
Spinning your wheels can destroy
parts of your vehicle as well as the
tires. If you spin the wheels too fast
while shifting your transmission back
and forth, you can destroy your trans-
mission. See “Rocking Your Vehicle
To Get It Out.”
Your Driving, the Road, and Your Vehicle:
Page 140 of 225
4-16 DRIVING YOUR VEHICLE
85Z03-03E
TowingTowing Your VehicleConsult your SUZUKI dealer or a profes-
sional towing service if you need to have
your disabled vehicle towed.
If you want to tow your vehicle behind
another vehicle for recreational purposes
(such as behind a motorhome), see the fol-
lowing section, “Recreational Vehicle Tow-
ing”.Recreational Vehicle TowingRecreational vehicle towing means towing
your vehicle behind another vehicle – such
as behind a motorhome. The two most
common types of recreational vehicle tow-
ing are known as “dinghy towing” (towing
your vehicle with all four wheels on the
ground) and “dolly towing” (towing your
vehicle with two wheels on the ground and
two wheels up on a device known as a
“dolly”).
With the proper preparation and equip-
ment, many vehicles can be towed in these
ways. See the following sections, “Dinghy
Towing” and “Dolly Towing”.Here are some important things to con-
sider before you do recreational vehicle
towing:
What’s the towing capacity of the towing
vehicle? Be sure you read the tow vehi-
cle manufacturer’s recommendations.
How far will you tow? Some vehicles
have restrictions on how far and how
long they can tow.
Do you have the proper towing equip-
ment? See your SUZUKI dealer or traile-
ring professional for additional advice
and equipment recommendations.
Is your vehicle ready to be towed? Just
as you would prepare your vehicle for a
long trip, you’ll want to make sure your
vehicle is prepared to be towed. See
“Before Leaving on a Long Trip” in this
section.
Dinghy Towing
Your vehicle was not designed to be towed
with all four wheels on the ground. If your
vehicle must be towed, you should use a
dolly. See “Dolly Towing” that follows for
more information.Dolly Towing
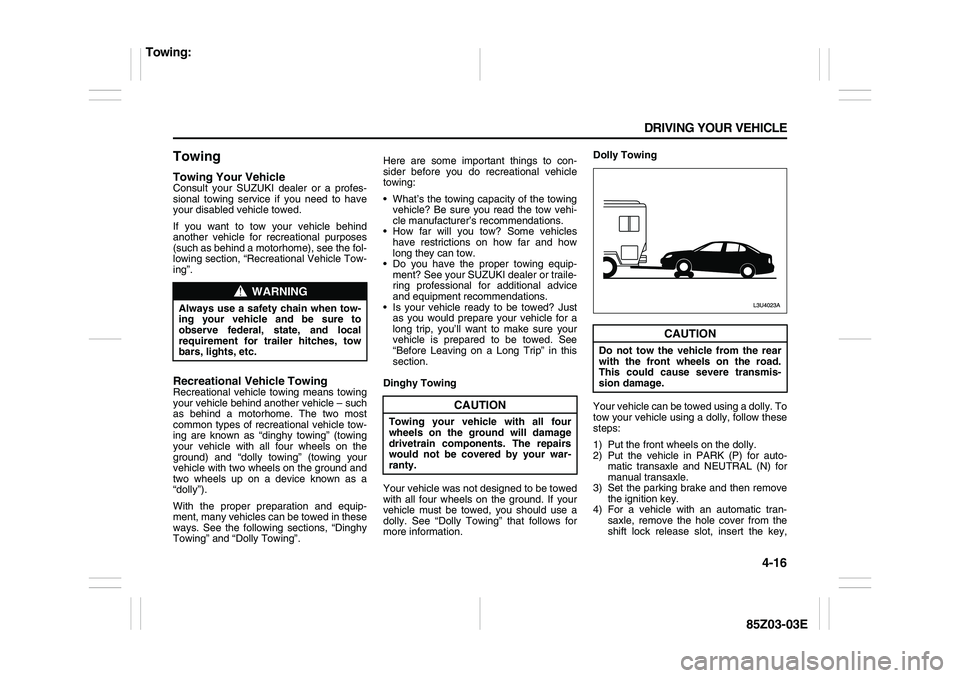
Your vehicle can be towed using a dolly. To
tow your vehicle using a dolly, follow these
steps:
1) Put the front wheels on the dolly.
2) Put the vehicle in PARK (P) for auto-
matic transaxle and NEUTRAL (N) for
manual transaxle.
3) Set the parking brake and then remove
the ignition key.
4) For a vehicle with an automatic tran-
saxle, remove the hole cover from the
shift lock release slot, insert the key,
WARNING
Always use a safety chain when tow-
ing your vehicle and be sure to
observe federal, state, and local
requirement for trailer hitches, tow
bars, lights, etc.
CAUTION
Towing your vehicle with all four
wheels on the ground will damage
drivetrain components. The repairs
would not be covered by your war-
ranty.
CAUTION
Do not tow the vehicle from the rear
with the front wheels on the road.
This could cause severe transmis-
sion damage.
Towing:
Page 141 of 225
4-17 DRIVING YOUR VEHICLE
85Z03-03E
and shift to NEUTRAL (N). See “Shift-
ing Out of Park (P)” in Section 2.
5) Clamp the steering wheel in a straight-
ahead position with a clamping device
designed for towing.
6) Release the parking brake.
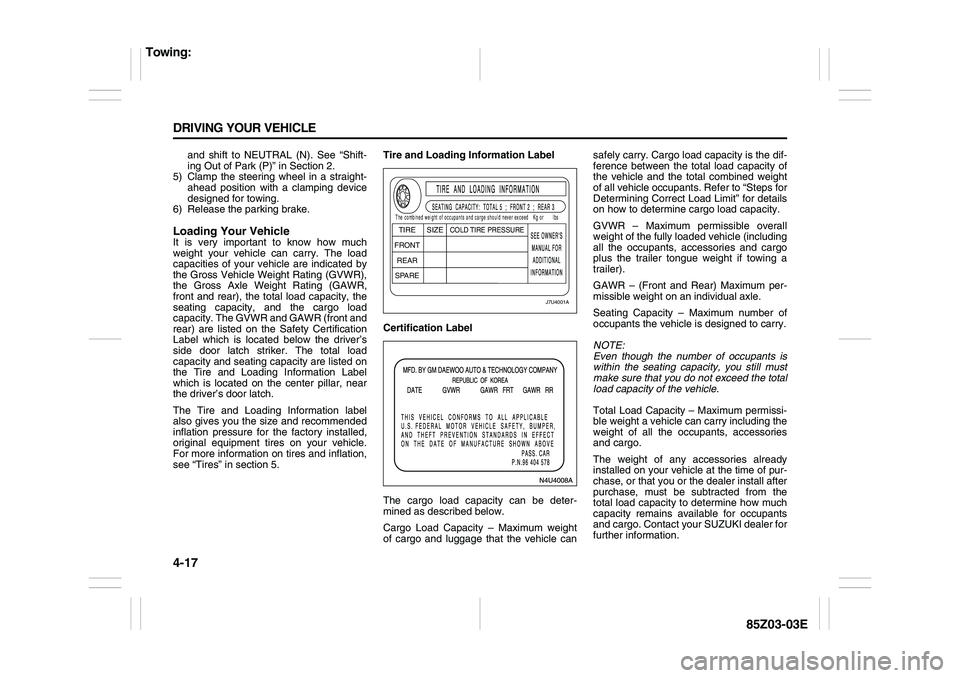
Loading Your VehicleIt is very important to know how much
weight your vehicle can carry. The load
capacities of your vehicle are indicated by
the Gross Vehicle Weight Rating (GVWR),
the Gross Axle Weight Rating (GAWR,
front and rear), the total load capacity, the
seating capacity, and the cargo load
capacity. The GVWR and GAWR (front and
rear) are listed on the Safety Certification
Label which is located below the driver’s
side door latch striker. The total load
capacity and seating capacity are listed on
the Tire and Loading Information Label
which is located on the center pillar, near
the driver’s door latch.
The Tire and Loading Information label
also gives you the size and recommended
inflation pressure for the factory installed,
original equipment tires on your vehicle.
For more information on tires and inflation,
see “Tires” in section 5.Tire and Loading Information Label
Certification Label
The cargo load capacity can be deter-
mined as described below.
Cargo Load Capacity – Maximum weight
of cargo and luggage that the vehicle cansafely carry. Cargo load capacity is the dif-
ference between the total load capacity of
the vehicle and the total combined weight
of all vehicle occupants. Refer to “Steps for
Determining Correct Load Limit” for details
on how to determine cargo load capacity.
GVWR – Maximum permissible overall
weight of the fully loaded vehicle (including
all the occupants, accessories and cargo
plus the trailer tongue weight if towing a
trailer).
GAWR – (Front and Rear) Maximum per-
missible weight on an individual axle.
Seating Capacity – Maximum number of
occupants the vehicle is designed to carry.
NOTE:
Even though the number of occupants is
within the seating capacity, you still must
make sure that you do not exceed the total
load capacity of the vehicle.
Total Load Capacity – Maximum permissi-
ble weight a vehicle can carry including the
weight of all the occupants, accessories
and cargo.
The weight of any accessories already
installed on your vehicle at the time of pur-
chase, or that you or the dealer install after
purchase, must be subtracted from the
total load capacity to determine how much
capacity remains available for occupants
and cargo. Contact your SUZUKI dealer for
further information.
J7U4001A
TIRE
SIZE
COLD TIRE PRESSURE
FRONT
REAR
SPAREThe combined weight of occupants and carge should never exceedKg or lbs
Towing:
Page 142 of 225
4-18 DRIVING YOUR VEHICLE
85Z03-03E
Actual weight of the loaded vehicle and
actual loads at the front and rear axles can
only be determined by weighing the vehicle
using a vehicle scale. To measure the
weight and load, try taking your vehicle to
a highway weighing station, shipping com-
pany or inspection station for trucks, etc.
Compare these weights to the GVWR and
GAWR (front and rear) listed on the Safety
Certification Label. If the gross vehicle
weight or the load on either axle exceeds
these ratings, you must remove enough
weight to bring the load down to the rated
capacity.
Steps for Determining Correct Load
Limit
1) Locate the statement “The combined
weight of occupants and cargo should
never exceed XXX pounds” on your
vehicle placard.
2) Determine the combined weight of the
driver and passengers that will be riding
in your vehicle.
3) Subtract the combined weight of the
driver and passengers from XXX kilo-
grams or XXX pounds.
4) The resulting figure equals the available
amount of cargo and luggage load
capacity. For example, if the “XXX”
amounts equals 1,400 lbs and there will
be five 150 lb passengers in your vehi-
cle, the amount of available cargo and
luggage load capacity is 650 lbs (1,400
– 750 (5 x 150) = 650 lbs).5) Determine the combined weight of lug-
gage and cargo being loaded on the
vehicle. That weight may not safely
exceed the available cargo and luggage
load capacity calculated in Step 4.
Vehicle Loading Example
As an example, suppose that the Tire and
Loading Information label on your vehicle
indicates that your vehicle’s total load
capacity is 950 lbs. If you were to drive
your vehicle with one passenger, and the
total combined weight of you and your pas-
senger was 350 lbs, then the cargo and
luggage capacity of your vehicle would be
600 lbs (950 – 350 = 600 lbs).
If you later added 2 more passengers, hav-
ing a combined weight of 325 lbs, the
cargo and luggage capacity of your vehicle
would be reduced from 600 lbs to 275 lbs
(600 – 325 = 275 lbs). As you can see, as
the number and combined weight of vehi-
cle occupants increase, the vehicle’s cargo
and luggage capacity decreases. Do not
carry more than 123 lbs (56 kg) in your
trunk.If you put things inside your vehicle – like
suitcases, tools, packages, or anything
else – they will go as fast as the vehicle
goes. If you have to stop or turn quickly, or
if there is a crash, they’ll keep going.
WARNING
Never overload your vehicle. Over-
loading your vehicle can cause dam-
age to your tires and lead to poor
steering and braking which can result
in an accident. The gross vehicle
weight (sum of the weights of the
loaded vehicle, driver and passen-
gers) must never exceed the Gross
Vehicle Weight Rating (GVWR) listed
on the Safety Certification Label. In
addition, never distribute a load so
that the weight on either the front or
rear axle exceeds the Gross Axle
Weight Rating (GAWR) listed on the
Safety Certification Label.
Towing:
Page 143 of 225
4-19 DRIVING YOUR VEHICLE
85Z03-03E
Determining Compatibility of Tire and
Vehicle Load Limits
The tires on your vehicle, when they are
inflated to the recommended tire inflation
pressure, have a load-carrying capacity
that is greater than the load that will be onthe tires when the vehicle is at its GVWR
or GAWR limit. Never use replacement
tires that have a load-carrying capacity
less than the original tires on your vehicle.
Tire load-carrying capacity information is
molded into the tire sidewall typically
shown as “Max. Load”. Use of replacement
tires with a lower load-carrying capacity
than the original tires, or failure to keep the
tires inflated to recommended tire pres-
sure, may reduce the GVWR or GAWR
limit of your vehicle.
NOTE:
Use of replacement tires with a higher
load-carrying capacity than the original
tires, or using a tire inflation pressure
higher than the recommended tire inflation
pressure, will not increase the GVWR or
GAWR limit of your vehicle.
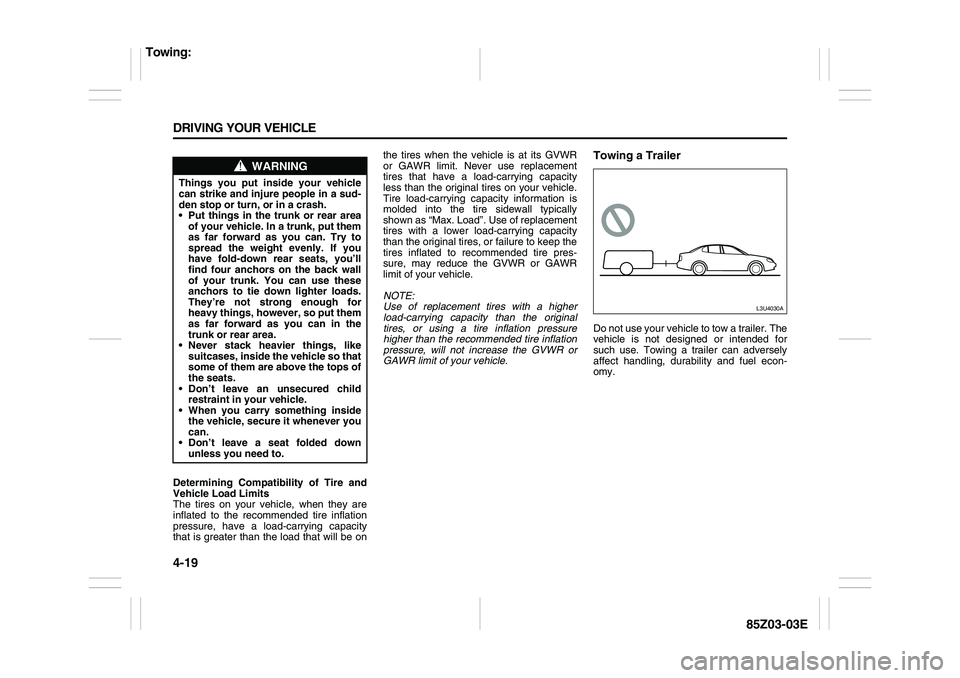
Towing a TrailerDo not use your vehicle to tow a trailer. The
vehicle is not designed or intended for
such use. Towing a trailer can adversely
affect handling, durability and fuel econ-
omy.
WARNING
Things you put inside your vehicle
can strike and injure people in a sud-
den stop or turn, or in a crash.
Put things in the trunk or rear area
of your vehicle. In a trunk, put them
as far forward as you can. Try to
spread the weight evenly. If you
have fold-down rear seats, you’ll
find four anchors on the back wall
of your trunk. You can use these
anchors to tie down lighter loads.
They’re not strong enough for
heavy things, however, so put them
as far forward as you can in the
trunk or rear area.
Never stack heavier things, like
suitcases, inside the vehicle so that
some of them are above the tops of
the seats.
Don’t leave an unsecured child
restraint in your vehicle.
When you carry something inside
the vehicle, secure it whenever you
can.
Don’t leave a seat folded down
unless you need to.
L3U4030A
Towing:
Page 151 of 225
5-7 SERVICE AND APPEARANCE CARE
85Z03-03E
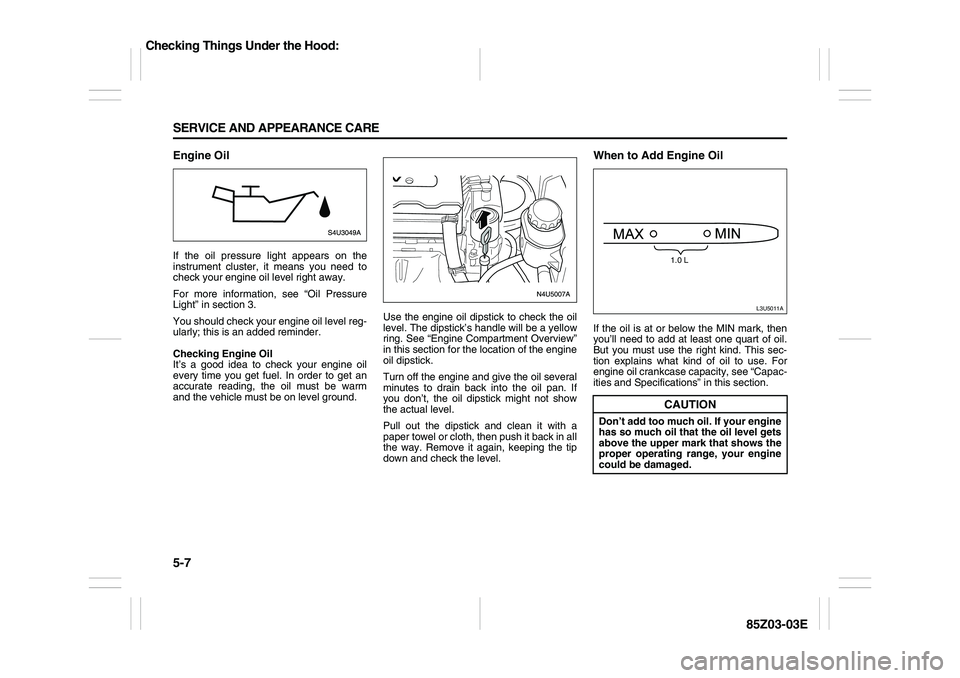
Engine OilIf the oil pressure light appears on the
instrument cluster, it means you need to
check your engine oil level right away.
For more information, see “Oil Pressure
Light” in section 3.
You should check your engine oil level reg-
ularly; this is an added reminder.
Checking Engine Oil
It’s a good idea to check your engine oil
every time you get fuel. In order to get an
accurate reading, the oil must be warm
and the vehicle must be on level ground.Use the engine oil dipstick to check the oil
level. The dipstick’s handle will be a yellow
ring. See “Engine Compartment Overview”
in this section for the location of the engine
oil dipstick.
Turn off the engine and give the oil several
minutes to drain back into the oil pan. If
you don’t, the oil dipstick might not show
the actual level.
Pull out the dipstick and clean it with a
paper towel or cloth, then push it back in all
the way. Remove it again, keeping the tip
down and check the level.
When to Add Engine OilIf the oil is at or below the MIN mark, then
you’ll need to add at least one quart of oil.
But you must use the right kind. This sec-
tion explains what kind of oil to use. For
engine oil crankcase capacity, see “Capac-
ities and Specifications” in this section.
CAUTION
Don’t add too much oil. If your engine
has so much oil that the oil level gets
above the upper mark that shows the
proper operating range, your engine
could be damaged.
L3U5011A
1.0 L
Checking Things Under the Hood:
Page 161 of 225

5-17 SERVICE AND APPEARANCE CARE
85Z03-03E
2) Then keep turning the pressure cap
slowly, and remove it.
3) Fill the coolant surge tank with the
proper mixture to the MAX mark on the
coolant surge tank. Wait about five min-
utes, then check to see if the level is
below the MAX mark. If the level is
below the MAX mark, add additional
coolant to bring the level up to the MAX
mark. Repeat this procedure until the
level remains constant at the MAX mark
for at least five minutes.
4) With the coolant surge tank pressure
cap off, start the engine and let it run
until you can feel the upper radiator
hose getting hot. Watch out for the
engine cooling fan.
By this time, the coolant level inside the
coolant surge tank may be lower. If thelevel is lower than the MAX mark, add
more of the proper mixture to the cool-
ant surge tank until the level reaches
the MAX mark.
5) Then replace the pressure cap. Be sure
the pressure cap is hand-tight and fully
seated. See your SUZUKI dealer, if
necessary.
Power Steering FluidThe power steering fluid reservoir is
located toward the front of the engine com-
partment on the driver’s side of the vehicle.
See “Engine Compartment Overview” in
this section for more information on loca-
tion.
When to Check Power Steering Fluid
It is not necessary to regularly check
power steering fluid unless you suspect
there is a leak in the system or you hear an
unusual noise. A fluid loss in this system
could indicate a problem. Have the system
inspected and repaired.How to Check Power Steering Fluid
Turn the key off and then check the fluid
level. The level should be between the MIN
and MAX marks on the reservoir. If the
level is below the MIN mark, add power
steering fluid.
What to Use
To determine what kind of fluid to use, see
“Recommended Fluids and Lubricants” in
section 6. Always use the proper fluid. Fail-
ure to use the proper fluid can cause leaks
and can damage hoses and seals.
Checking Things Under the Hood:
Page 180 of 225

5-36 SERVICE AND APPEARANCE CARE
85Z03-03E
When rotating your tires, always use the
correct rotation pattern shown here.
Don’t include the compact spare tire in
your tire rotation.
After the tires have been rotated, adjust
the front and rear inflation pressures as
shown on the Tire and Loading Information
label. Make certain that all wheel nuts are
properly tightened. See “Wheel Nut
Torque” under “Capacities and Specifica-
tions” in this section.
Vehicle LoadingThe tires on your vehicle, when they are
inflated to the recommended tire inflation
pressure, have a load-carrying capacity
that is greater than the load that will be on
the tires when the vehicle is at its GVWR
or GAWR limit. Never use replacement
tires that have a load-carrying capacity
less than the original tires on your vehicle.
Tire load-carrying capacity information is
molded into the tire sidewall typically
shown as “Max. Load”. Use of replacement
tires with a lower load-carrying capacity
than the original tires, or failure to keep the
tires inflated to the recommended tire pres-
sure, may reduce the GVWR or GAWR
limit of your vehicle.NOTE:
Use of replacement tires with a higher
load-carrying capacity than the original
tires, or using a tire inflation pressure
higher than the recommended tire inflation
pressure, will not increase the GVWR or
GAWR limit of your vehicle.
When It Is Time for New TiresOne way to tell when it’s time for new tires
is to check the tread wear indicators, which
will appear when your tires have only 1/16
inch (1.6 mm) or less of tread remaining.
You need a new tire if any of the following
statements are true:
You can see the indicators at three or
more places around the tire.
You can see cord or fabric showing
through the tire’s rubber.
WARNING
Rust or dirt on a wheel, or on the
parts to which it is fastened, can
make wheel nuts become loose after
a time. The wheel could come off and
cause an accident. When you change
a wheel, remove any rust or dirt from
places where the wheel attaches to
the vehicle. In an emergency, you can
use a cloth or a paper towel to do
this, but be sure to use a scraper or
wire brush later, if you need to, to get
all the rust or dirt off. See “Changing
a Flat Tire” in this section.
Tires: