2007 SUZUKI FORENZA tow
[x] Cancel search: towPage 71 of 225
2-23 FEATURES AND CONTROLS
85Z03-03E
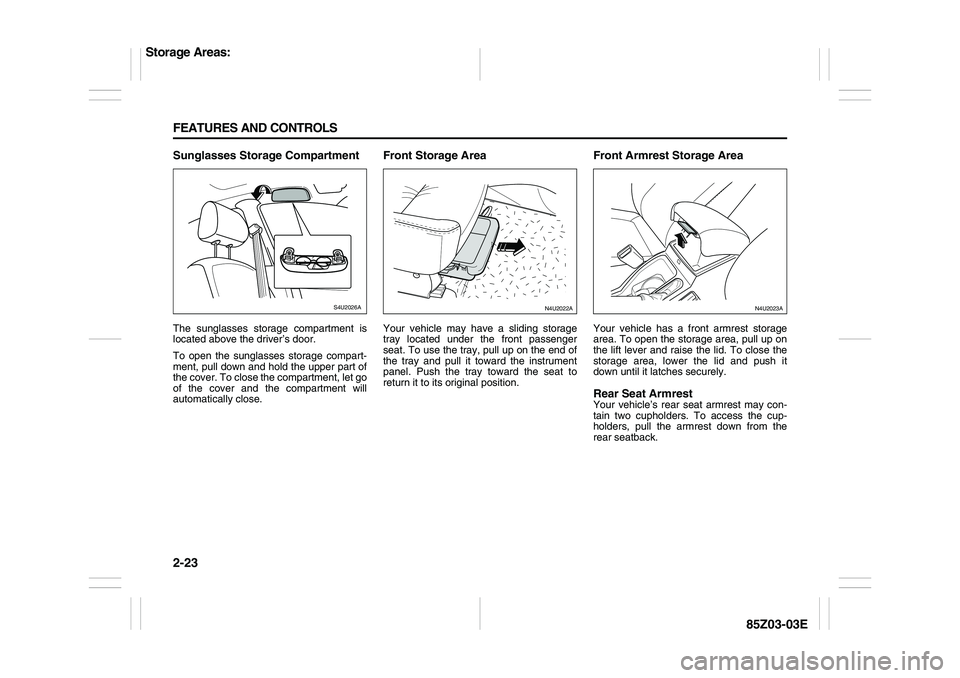
Sunglasses Storage CompartmentThe sunglasses storage compartment is
located above the driver’s door.
To open the sunglasses storage compart-
ment, pull down and hold the upper part of
the cover. To close the compartment, let go
of the cover and the compartment will
automatically close.
Front Storage AreaYour vehicle may have a sliding storage
tray located under the front passenger
seat. To use the tray, pull up on the end of
the tray and pull it toward the instrument
panel. Push the tray toward the seat to
return it to its original position.
Front Armrest Storage AreaYour vehicle has a front armrest storage
area. To open the storage area, pull up on
the lift lever and raise the lid. To close the
storage area, lower the lid and push it
down until it latches securely.Rear Seat ArmrestYour vehicle’s rear seat armrest may con-
tain two cupholders. To access the cup-
holders, pull the armrest down from the
rear seatback.
S4U2026A
N4U2022A
N4U2023A
Storage Areas:
Page 73 of 225

2-25 FEATURES AND CONTROLS
85Z03-03E
Luggage Compartment Cover
(Wagon only)Luggage or other cargo placed in the lug-
gage compartment can be hidden from
view by the luggage compartment cover.
To close the cover, pull the handle of the
cover toward you and then insert the
retainer into the slot located on both sides
of the tailgate opening.To remove the cover, release the handle
after pulling it toward you a little. The cover
retracts automatically.
Roof Rack (Wagon only)The roof rack can be used to conveniently
carry additional cargo, or bulky items, such
as bicycles, which are better carried out-
side than inside.AntennaFor the Sedan models, an antenna is inte-
grated with the rear window defogger,
located in the rear window. For the Wagon
models, an antenna is located in the wind-
shield glass. Be sure that the inside sur-
face of the rear window or windshield glass
is not scratched and that the lines on the
glass are not damaged. If the inside sur-
face is damaged, it could interfere with
radio reception.
Because this antenna is built into your rear
window or windshield glass, there is a
reduced risk of damage caused by car
washes and vandals.If you choose to add a cellular telephone to
your vehicle, and the antenna needs to be
attached to the glass, be sure that you do
not damage the grid lines for the antenna.
There is enough space between the lines
to attach a cellular telephone antenna with-
out interfering with radio reception.
Do not apply aftermarket glass tinting to
the back glass. The metallic film in some
tinting materials will interfere with or distort
the incoming radio reception. Care must
be taken when cleaning the rear window or
CAUTION
Do not carry items on top of the lug-
gage compartment cover, even if they
are small and light. Objects on top of
the cover could be thrown about in an
accident, causing injury, or could
obstruct the driver’s rear view.
N5U2005A
WARNING
A loaded roof rack changes the vehi-
cle’s center of gravity. Do not drive at
high speeds. Take precautions when
driving in crosswinds. Failure to fol-
low this caution can result in vehicle
damage and personal injury.
WARNING
Using a razor blade or sharp object to
clear the inside rear window or wind-
shield glass may damage the antenna
and/or the rear window defogger.
Repairs would not be covered by
your warranty. Do not clear the inside
of the rear window or windshield with
sharp objects.
WARNING
Do not apply aftermarket glass tinting
with metallic film. The metallic film in
some tinting materials will interfere
with or distort the incoming radio
reception. Any damage caused to
your backglass antenna due to metal-
lic tinting materials will not be cov-
ered by your warranty.
Storage Areas:
Sunroof:
Page 80 of 225
3-4 INSTRUMENT PANEL
85Z03-03E
Tilt WheelYour vehicle has a tilt wheel which allows
you to adjust the steering wheel before you
drive. You can raise it to the highest level to
give your legs more room when you exit
and enter the vehicle.
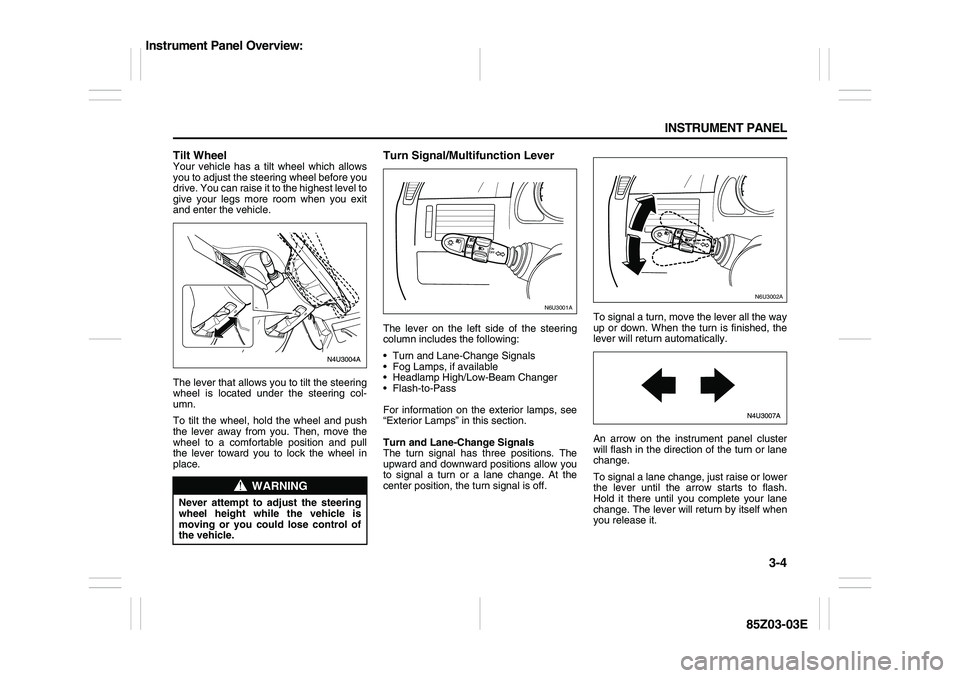
The lever that allows you to tilt the steering
wheel is located under the steering col-
umn.
To tilt the wheel, hold the wheel and push
the lever away from you. Then, move the
wheel to a comfortable position and pull
the lever toward you to lock the wheel in
place.
Turn Signal/Multifunction LeverThe lever on the left side of the steering
column includes the following:
Turn and Lane-Change Signals
Fog Lamps, if available
Headlamp High/Low-Beam Changer
Flash-to-Pass
For information on the exterior lamps, see
“Exterior Lamps” in this section.
Turn and Lane-Change Signals
The turn signal has three positions. The
upward and downward positions allow you
to signal a turn or a lane change. At the
center position, the turn signal is off.To signal a turn, move the lever all the way
up or down. When the turn is finished, the
lever will return automatically.
An arrow on the instrument panel cluster
will flash in the direction of the turn or lane
change.
To signal a lane change, just raise or lower
the lever until the arrow starts to flash.
Hold it there until you complete your lane
change. The lever will return by itself when
you release it.
WARNING
Never attempt to adjust the steering
wheel height while the vehicle is
moving or you could lose control of
the vehicle.
N6U3001A
N6U3002A
Instrument Panel Overview:
Page 81 of 225
3-5 INSTRUMENT PANEL
85Z03-03E
As you signal a turn or a lane change, if
the arrows flash rapidly, a signal bulb may
be burned out and other drivers won’t see
your turn signal.
If a bulb is burned out, replace it to help
avoid an accident. If the arrows don’t go on
at all when you signal a turn, check for
burned-out bulbs and then check the fuse.
See “Fuses and Circuit Breakers” in sec-
tion 5.
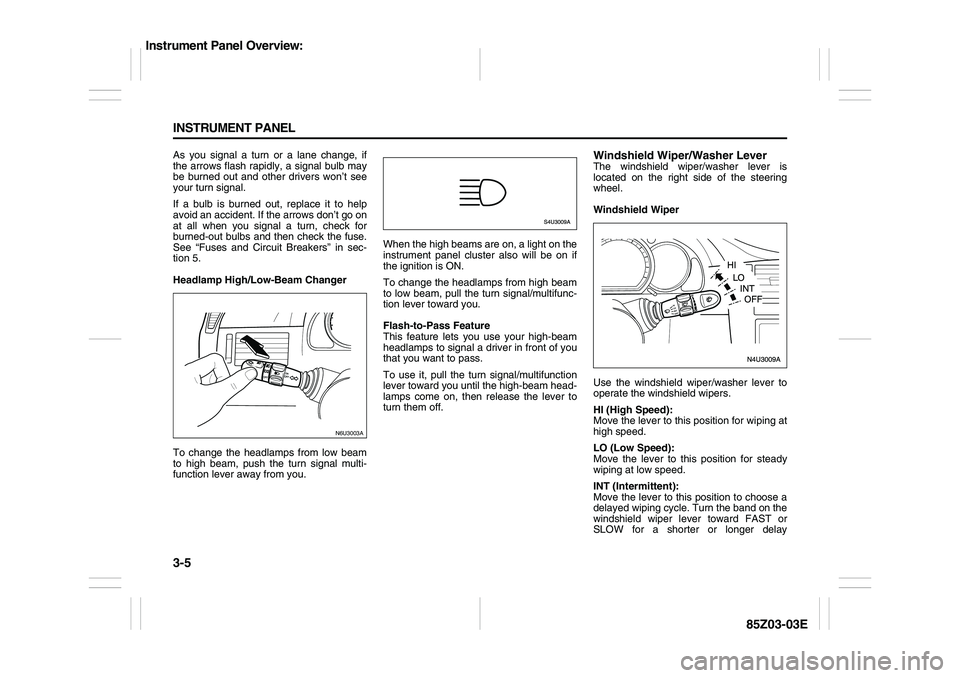
Headlamp High/Low-Beam Changer
To change the headlamps from low beam
to high beam, push the turn signal multi-
function lever away from you.When the high beams are on, a light on the
instrument panel cluster also will be on if
the ignition is ON.
To change the headlamps from high beam
to low beam, pull the turn signal/multifunc-
tion lever toward you.
Flash-to-Pass Feature
This feature lets you use your high-beam
headlamps to signal a driver in front of you
that you want to pass.
To use it, pull the turn signal/multifunction
lever toward you until the high-beam head-
lamps come on, then release the lever to
turn them off.
Windshield Wiper/Washer LeverThe windshield wiper/washer lever is
located on the right side of the steering
wheel.
Windshield Wiper
Use the windshield wiper/washer lever to
operate the windshield wipers.
HI (High Speed):
Move the lever to this position for wiping at
high speed.
LO (Low Speed):
Move the lever to this position for steady
wiping at low speed.
INT (Intermittent):
Move the lever to this position to choose a
delayed wiping cycle. Turn the band on the
windshield wiper lever toward FAST or
SLOW for a shorter or longer delay
N6U3003A
Instrument Panel Overview:
Page 82 of 225
3-6 INSTRUMENT PANEL
85Z03-03E
between wipes. The wiper speed can only
be adjusted when the lever is in the INT
position.
OFF (Off):
Move the lever to this position to turn off
the windshield wipers.
Misting Function
Move the lever toward, but not completely
in, the INT position for a single wiping
cycle. Hold it there until the windshield wip-
ers start; then let go. The windshield wip-
ers will stop after one cycle. If you want
more wipes, hold the lever toward the INT
position longer.
Remember that damaged wiper blades
may prevent you from seeing well enough
to drive safely. To avoid damage, be sure to
clear ice and snow from the wiper blades
before using them.
If they’re frozen to the windshield, carefully
loosen or thaw them. If your blades do
become damaged, get new blades or
blade inserts.
Heavy snow or ice can overload the wiper
motor. A circuit breaker will stop the motor
until it cools. Clear away snow or ice to
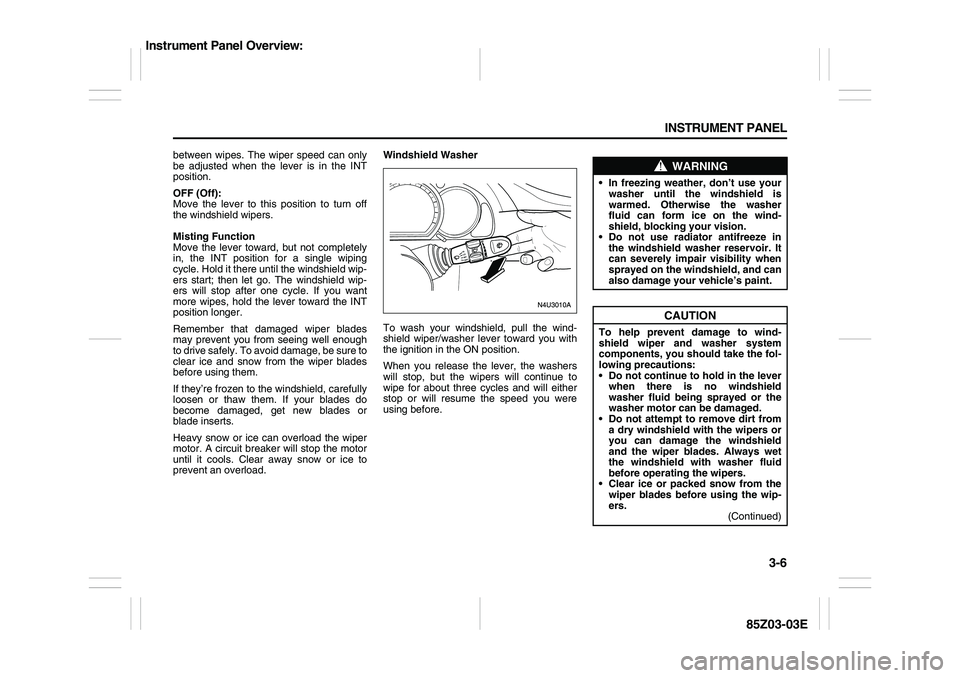
prevent an overload.Windshield Washer
To wash your windshield, pull the wind-
shield wiper/washer lever toward you with
the ignition in the ON position.
When you release the lever, the washers
will stop, but the wipers will continue to
wipe for about three cycles and will either
stop or will resume the speed you were
using before.
WARNING
In freezing weather, don’t use your
washer until the windshield is
warmed. Otherwise the washer
fluid can form ice on the wind-
shield, blocking your vision.
Do not use radiator antifreeze in
the windshield washer reservoir. It
can severely impair visibility when
sprayed on the windshield, and can
also damage your vehicle’s paint.
CAUTION
To help prevent damage to wind-
shield wiper and washer system
components, you should take the fol-
lowing precautions:
Do not continue to hold in the lever
when there is no windshield
washer fluid being sprayed or the
washer motor can be damaged.
Do not attempt to remove dirt from
a dry windshield with the wipers or
you can damage the windshield
and the wiper blades. Always wet
the windshield with washer fluid
before operating the wipers.
Clear ice or packed snow from the
wiper blades before using the wip-
ers.
(Continued)
Instrument Panel Overview:
Page 87 of 225

3-11 INSTRUMENT PANEL
85Z03-03E
Accessory Power OutletWith the accessory power outlet you can
plug in auxiliary electrical equipment such
as a cellular phone or CB radio.
The accessory power outlet is located on
the front side of the center console below
the front ashtray. Another power outlet is
located on the left side of the luggage area
only in the Wagon models.
To use the outlet, remove the cover. When
not in use, always cover the outlet with the
protective cap. The accessory power outlet
is operational when the ignition is in the
ACC or ON positions.Certain electrical accessories may not be
compatible with the accessory power outlet
and could result in blown vehicle or
adapter fuses. If you experience a prob-
lem, see your SUZUKI dealer for additional
information on the accessory power outlet.
When adding electrical equipment, be sure
to follow the proper installation instructions
included with the equipment.
Ashtrays and Cigarette LighterThe front ashtray is located at the lower
part of the center of the instrument panel.
To remove the front ashtray for cleaning,
open the ashtray fully, lift the inner case up
and then pull it out.
The rear ashtray is located at the bottom of
the rear center console. Pull the ashtray
toward the rear of the vehicle to open it. To
remove the rear ashtray, press in the
retaining spring and pull the bin out.
N5U3006A
(Sedan/Wagon) (Wagon only)
CAUTION
When using the accessory power
outlet, the maximum electrical load
must not exceed 12V-10A. Be sure to
turn off any electrical equipment
when not in use. Leaving electrical
equipment on for extended periods
can drain the battery.
CAUTION
Adding some electrical equipment to
your vehicle can damage it or keep
other things from working as they
should. This wouldn’t be covered by
your warranty. Check with your
SUZUKI dealer before adding electri-
cal equipment, and never use any-
thing that exceeds the amperage
rating.
CAUTION
Power outlets are designed for acces-
sory plugs only. Do not hang any
type of accessory or accessory
bracket from the plug. Improper use
of the power outlet can cause dam-
age not covered by your warranty.
Instrument Panel Overview:
Page 97 of 225
3-21 INSTRUMENT PANEL
85Z03-03E
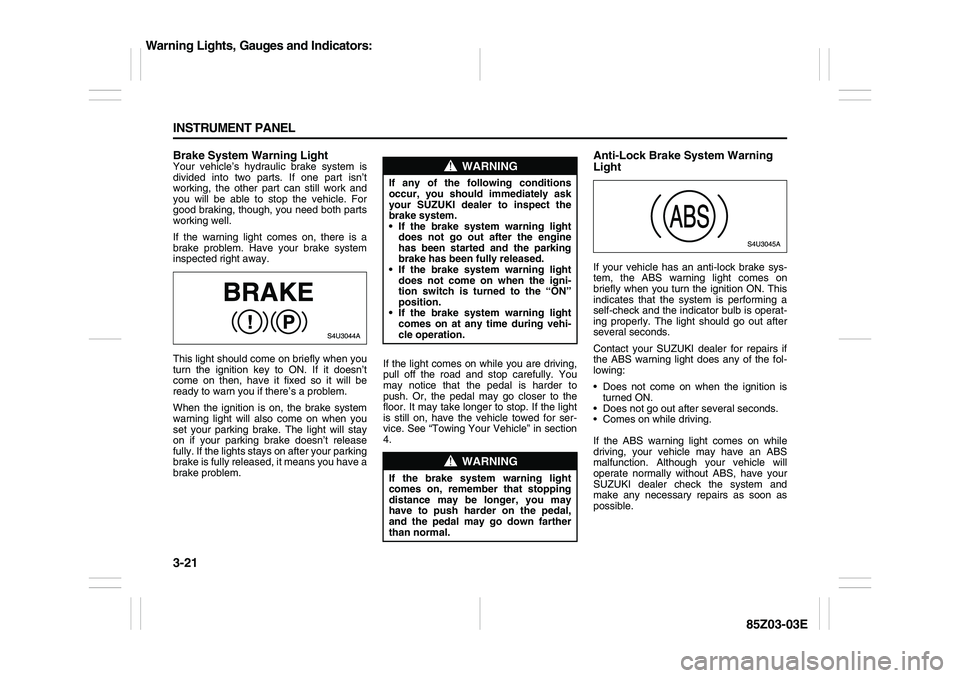
Brake System Warning LightYour vehicle’s hydraulic brake system is
divided into two parts. If one part isn’t
working, the other part can still work and
you will be able to stop the vehicle. For
good braking, though, you need both parts
working well.
If the warning light comes on, there is a
brake problem. Have your brake system
inspected right away.
This light should come on briefly when you
turn the ignition key to ON. If it doesn’t
come on then, have it fixed so it will be
ready to warn you if there’s a problem.
When the ignition is on, the brake system
warning light will also come on when you
set your parking brake. The light will stay
on if your parking brake doesn’t release
fully. If the lights stays on after your parking
brake is fully released, it means you have a
brake problem.If the light comes on while you are driving,
pull off the road and stop carefully. You
may notice that the pedal is harder to
push. Or, the pedal may go closer to the
floor. It may take longer to stop. If the light
is still on, have the vehicle towed for ser-
vice. See “Towing Your Vehicle” in section
4.
Anti-Lock Brake System Warning
LightIf your vehicle has an anti-lock brake sys-
tem, the ABS warning light comes on
briefly when you turn the ignition ON. This
indicates that the system is performing a
self-check and the indicator bulb is operat-
ing properly. The light should go out after
several seconds.
Contact your SUZUKI dealer for repairs if
the ABS warning light does any of the fol-
lowing:
Does not come on when the ignition is
turned ON.
Does not go out after several seconds.
Comes on while driving.
If the ABS warning light comes on while
driving, your vehicle may have an ABS
malfunction. Although your vehicle will
operate normally without ABS, have your
SUZUKI dealer check the system and
make any necessary repairs as soon as
possible.
WARNING
If any of the following conditions
occur, you should immediately ask
your SUZUKI dealer to inspect the
brake system.
If the brake system warning light
does not go out after the engine
has been started and the parking
brake has been fully released.
If the brake system warning light
does not come on when the igni-
tion switch is turned to the “ON”
position.
If the brake system warning light
comes on at any time during vehi-
cle operation.
WARNING
If the brake system warning light
comes on, remember that stopping
distance may be longer, you may
have to push harder on the pedal,
and the pedal may go down farther
than normal.
Warning Lights, Gauges and Indicators:
Page 124 of 225
DRIVING YOUR VEHICLE
4
85Z03-03E
DRIVING YOUR VEHICLEYour Driving, the Road, and Your Vehicle ........................ 4-1
Towing .................................................................................. 4-16