2007 SUZUKI FORENZA trunk
[x] Cancel search: trunkPage 142 of 225
4-18 DRIVING YOUR VEHICLE
85Z03-03E
Actual weight of the loaded vehicle and
actual loads at the front and rear axles can
only be determined by weighing the vehicle
using a vehicle scale. To measure the
weight and load, try taking your vehicle to
a highway weighing station, shipping com-
pany or inspection station for trucks, etc.
Compare these weights to the GVWR and
GAWR (front and rear) listed on the Safety
Certification Label. If the gross vehicle
weight or the load on either axle exceeds
these ratings, you must remove enough
weight to bring the load down to the rated
capacity.
Steps for Determining Correct Load
Limit
1) Locate the statement “The combined
weight of occupants and cargo should
never exceed XXX pounds” on your
vehicle placard.
2) Determine the combined weight of the
driver and passengers that will be riding
in your vehicle.
3) Subtract the combined weight of the
driver and passengers from XXX kilo-
grams or XXX pounds.
4) The resulting figure equals the available
amount of cargo and luggage load
capacity. For example, if the “XXX”
amounts equals 1,400 lbs and there will
be five 150 lb passengers in your vehi-
cle, the amount of available cargo and
luggage load capacity is 650 lbs (1,400
– 750 (5 x 150) = 650 lbs).5) Determine the combined weight of lug-
gage and cargo being loaded on the
vehicle. That weight may not safely
exceed the available cargo and luggage
load capacity calculated in Step 4.
Vehicle Loading Example
As an example, suppose that the Tire and
Loading Information label on your vehicle
indicates that your vehicle’s total load
capacity is 950 lbs. If you were to drive
your vehicle with one passenger, and the
total combined weight of you and your pas-
senger was 350 lbs, then the cargo and
luggage capacity of your vehicle would be
600 lbs (950 – 350 = 600 lbs).
If you later added 2 more passengers, hav-
ing a combined weight of 325 lbs, the
cargo and luggage capacity of your vehicle
would be reduced from 600 lbs to 275 lbs
(600 – 325 = 275 lbs). As you can see, as
the number and combined weight of vehi-
cle occupants increase, the vehicle’s cargo
and luggage capacity decreases. Do not
carry more than 123 lbs (56 kg) in your
trunk.If you put things inside your vehicle – like
suitcases, tools, packages, or anything
else – they will go as fast as the vehicle
goes. If you have to stop or turn quickly, or
if there is a crash, they’ll keep going.
WARNING
Never overload your vehicle. Over-
loading your vehicle can cause dam-
age to your tires and lead to poor
steering and braking which can result
in an accident. The gross vehicle
weight (sum of the weights of the
loaded vehicle, driver and passen-
gers) must never exceed the Gross
Vehicle Weight Rating (GVWR) listed
on the Safety Certification Label. In
addition, never distribute a load so
that the weight on either the front or
rear axle exceeds the Gross Axle
Weight Rating (GAWR) listed on the
Safety Certification Label.
Towing:
Page 143 of 225
4-19 DRIVING YOUR VEHICLE
85Z03-03E
Determining Compatibility of Tire and
Vehicle Load Limits
The tires on your vehicle, when they are
inflated to the recommended tire inflation
pressure, have a load-carrying capacity
that is greater than the load that will be onthe tires when the vehicle is at its GVWR
or GAWR limit. Never use replacement
tires that have a load-carrying capacity
less than the original tires on your vehicle.
Tire load-carrying capacity information is
molded into the tire sidewall typically
shown as “Max. Load”. Use of replacement
tires with a lower load-carrying capacity
than the original tires, or failure to keep the
tires inflated to recommended tire pres-
sure, may reduce the GVWR or GAWR
limit of your vehicle.
NOTE:
Use of replacement tires with a higher
load-carrying capacity than the original
tires, or using a tire inflation pressure
higher than the recommended tire inflation
pressure, will not increase the GVWR or
GAWR limit of your vehicle.
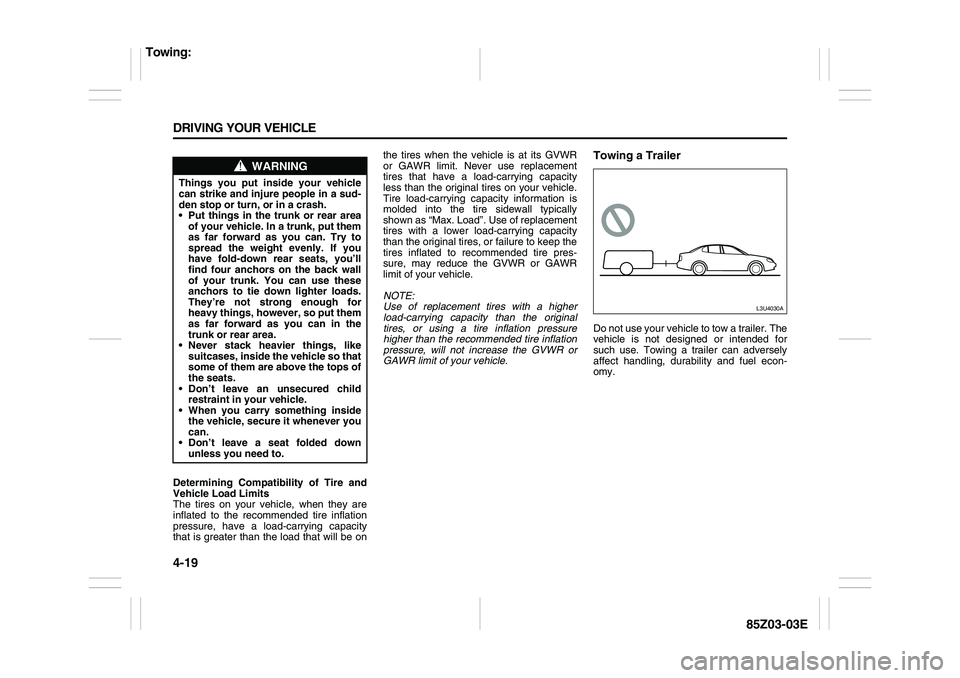
Towing a TrailerDo not use your vehicle to tow a trailer. The
vehicle is not designed or intended for
such use. Towing a trailer can adversely
affect handling, durability and fuel econ-
omy.
WARNING
Things you put inside your vehicle
can strike and injure people in a sud-
den stop or turn, or in a crash.
Put things in the trunk or rear area
of your vehicle. In a trunk, put them
as far forward as you can. Try to
spread the weight evenly. If you
have fold-down rear seats, you’ll
find four anchors on the back wall
of your trunk. You can use these
anchors to tie down lighter loads.
They’re not strong enough for
heavy things, however, so put them
as far forward as you can in the
trunk or rear area.
Never stack heavier things, like
suitcases, inside the vehicle so that
some of them are above the tops of
the seats.
Don’t leave an unsecured child
restraint in your vehicle.
When you carry something inside
the vehicle, secure it whenever you
can.
Don’t leave a seat folded down
unless you need to.
L3U4030A
Towing:
Page 148 of 225
5-4 SERVICE AND APPEARANCE CARE
85Z03-03E
Filling a Portable Fuel Container
Checking Things Under the
Hood
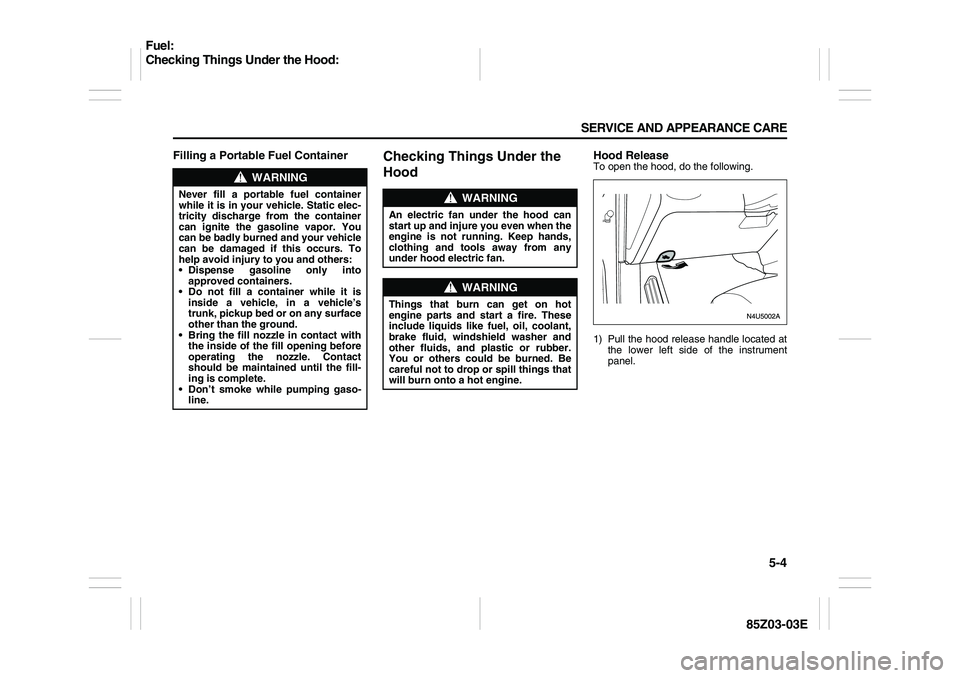
Hood ReleaseTo open the hood, do the following.
1) Pull the hood release handle located at
the lower left side of the instrument
panel.
WARNING
Never fill a portable fuel container
while it is in your vehicle. Static elec-
tricity discharge from the container
can ignite the gasoline vapor. You
can be badly burned and your vehicle
can be damaged if this occurs. To
help avoid injury to you and others:
Dispense gasoline only into
approved containers.
Do not fill a container while it is
inside a vehicle, in a vehicle’s
trunk, pickup bed or on any surface
other than the ground.
Bring the fill nozzle in contact with
the inside of the fill opening before
operating the nozzle. Contact
should be maintained until the fill-
ing is complete.
Don’t smoke while pumping gaso-
line.
WARNING
An electric fan under the hood can
start up and injure you even when the
engine is not running. Keep hands,
clothing and tools away from any
under hood electric fan.
WARNING
Things that burn can get on hot
engine parts and start a fire. These
include liquids like fuel, oil, coolant,
brake fluid, windshield washer and
other fluids, and plastic or rubber.
You or others could be burned. Be
careful not to drop or spill things that
will burn onto a hot engine.
Fuel:
Checking Things Under the Hood:
Page 169 of 225
5-25 SERVICE AND APPEARANCE CARE
85Z03-03E
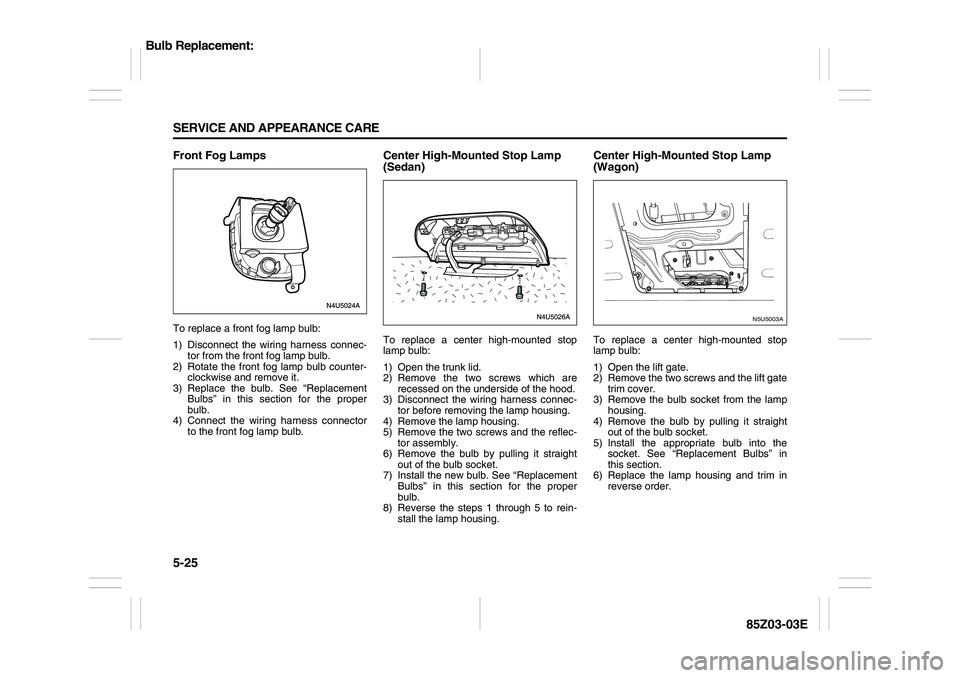
Front Fog LampsTo replace a front fog lamp bulb:
1) Disconnect the wiring harness connec-
tor from the front fog lamp bulb.
2) Rotate the front fog lamp bulb counter-
clockwise and remove it.
3) Replace the bulb. See “Replacement
Bulbs” in this section for the proper
bulb.
4) Connect the wiring harness connector
to the front fog lamp bulb.
Center High-Mounted Stop Lamp
(Sedan)To replace a center high-mounted stop
lamp bulb:
1) Open the trunk lid.
2) Remove the two screws which are
recessed on the underside of the hood.
3) Disconnect the wiring harness connec-
tor before removing the lamp housing.
4) Remove the lamp housing.
5) Remove the two screws and the reflec-
tor assembly.
6) Remove the bulb by pulling it straight
out of the bulb socket.
7) Install the new bulb. See “Replacement
Bulbs” in this section for the proper
bulb.
8) Reverse the steps 1 through 5 to rein-
stall the lamp housing.
Center High-Mounted Stop Lamp
(Wagon)To replace a center high-mounted stop
lamp bulb:
1) Open the lift gate.
2) Remove the two screws and the lift gate
trim cover.
3) Remove the bulb socket from the lamp
housing.
4) Remove the bulb by pulling it straight
out of the bulb socket.
5) Install the appropriate bulb into the
socket. See “Replacement Bulbs” in
this section.
6) Replace the lamp housing and trim in
reverse order.
N5U5003A
Bulb Replacement:
Page 170 of 225
5-26 SERVICE AND APPEARANCE CARE
85Z03-03E
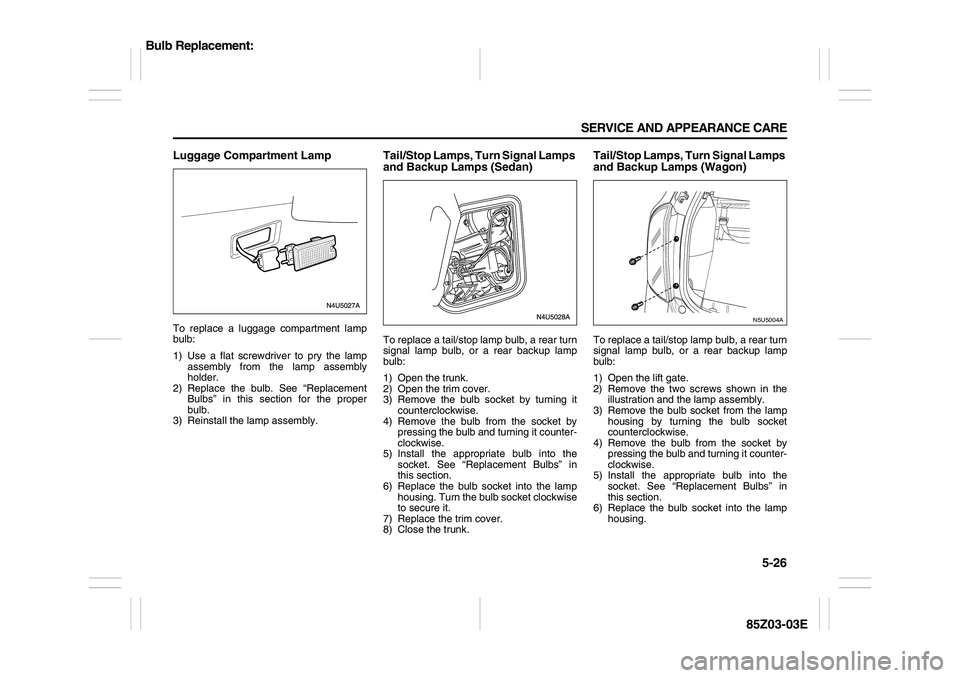
Luggage Compartment LampTo replace a luggage compartment lamp
bulb:
1) Use a flat screwdriver to pry the lamp
assembly from the lamp assembly
holder.
2) Replace the bulb. See “Replacement
Bulbs” in this section for the proper
bulb.
3) Reinstall the lamp assembly.
Tail/Stop Lamps, Turn Signal Lamps
and Backup Lamps (Sedan)To replace a tail/stop lamp bulb, a rear turn
signal lamp bulb, or a rear backup lamp
bulb:
1) Open the trunk.
2) Open the trim cover.
3) Remove the bulb socket by turning it
counterclockwise.
4) Remove the bulb from the socket by
pressing the bulb and turning it counter-
clockwise.
5) Install the appropriate bulb into the
socket. See “Replacement Bulbs” in
this section.
6) Replace the bulb socket into the lamp
housing. Turn the bulb socket clockwise
to secure it.
7) Replace the trim cover.
8) Close the trunk.
Tail/Stop Lamps, Turn Signal Lamps
and Backup Lamps (Wagon)To replace a tail/stop lamp bulb, a rear turn
signal lamp bulb, or a rear backup lamp
bulb:
1) Open the lift gate.
2) Remove the two screws shown in the
illustration and the lamp assembly.
3) Remove the bulb socket from the lamp
housing by turning the bulb socket
counterclockwise.
4) Remove the bulb from the socket by
pressing the bulb and turning it counter-
clockwise.
5) Install the appropriate bulb into the
socket. See “Replacement Bulbs” in
this section.
6) Replace the bulb socket into the lamp
housing.
N5U5004A
Bulb Replacement:
Page 184 of 225
5-40 SERVICE AND APPEARANCE CARE
85Z03-03E
The following steps will tell you how to use
the jack to change a tire.Removing the Spare Tire and Tools
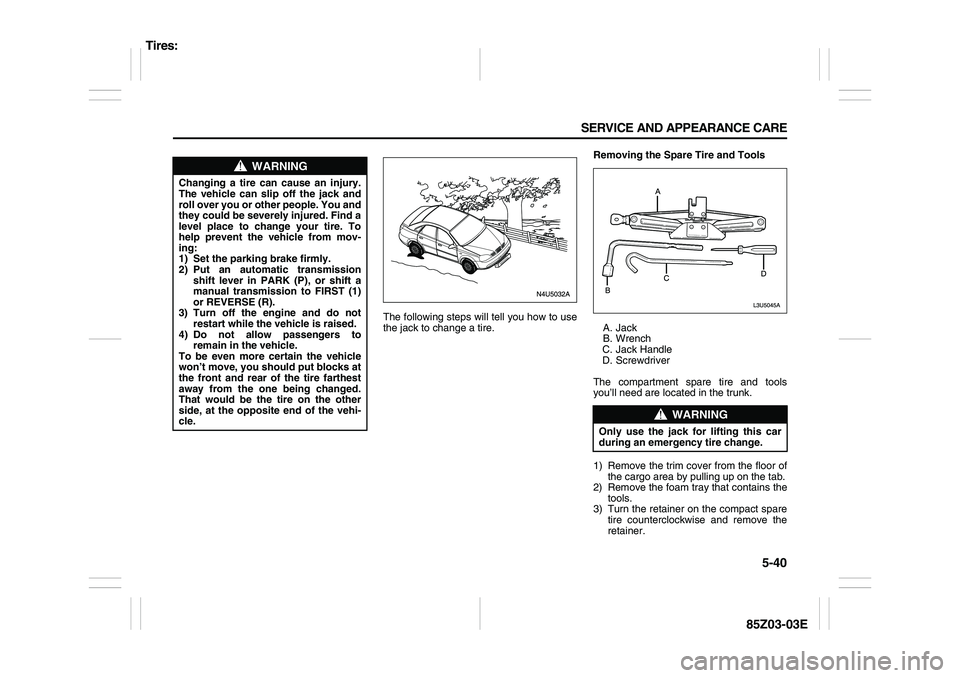
A. Jack
B. Wrench
C. Jack Handle
D. Screwdriver
The compartment spare tire and tools
you’ll need are located in the trunk.
1) Remove the trim cover from the floor of
the cargo area by pulling up on the tab.
2) Remove the foam tray that contains the
tools.
3) Turn the retainer on the compact spare
tire counterclockwise and remove the
retainer.
WARNING
Changing a tire can cause an injury.
The vehicle can slip off the jack and
roll over you or other people. You and
they could be severely injured. Find a
level place to change your tire. To
help prevent the vehicle from mov-
ing:
1) Set the parking brake firmly.
2) Put an automatic transmission
shift lever in PARK (P), or shift a
manual transmission to FIRST (1)
or REVERSE (R).
3) Turn off the engine and do not
restart while the vehicle is raised.
4) Do not allow passengers to
remain in the vehicle.
To be even more certain the vehicle
won’t move, you should put blocks at
the front and rear of the tire farthest
away from the one being changed.
That would be the tire on the other
side, at the opposite end of the vehi-
cle.
WARNING
Only use the jack for lifting this car
during an emergency tire change.
Tires:
Page 187 of 225

5-43 SERVICE AND APPEARANCE CARE
85Z03-03E
Don’t try to put a wheel cover on your com-
pact spare tire. It won’t fit. Store the wheel
cover in the trunk until you have the flat tire
repaired or replaced.Storing the Flat Tire and Tools
Store the flat tire in the compact spare tire
compartment. Place the tire in the com-
partment, then secure the retainer. Store
the jack in its housing in the cargo area.
Secure the jack by turning the retainer
clockwise. Store the tools securely in the
foam tray and place the tray on top of the
tire. Replace the trim cover.
Storing the Spare Tire and Tools
The compact spare tire is for temporary
use only. Replace the compact spare tire
with a full-size tire as soon as you can. See
“Compact Spare Tire” in this section.
WARNING
Incorrect wheel nuts or improperly
tightened wheel nuts can cause the
wheel to come loose and even come
off. This could lead to an accident. Be
sure to use the correct wheel nuts. If
you have to replace them, be sure to
get new SUZUKI original equipment
wheel nuts. Stop somewhere as soon
as you can and have the nuts tight-
ened with a torque wrench to the
proper torque specification. See
“Capacities and Specifications” in
the Index for the wheel nut torque
specification.
CAUTION
Improperly tightened wheel nuts can
lead to brake pulsation and rotor
damage. To avoid expensive brake
repairs, evenly tighten the wheel nuts
in the proper sequence and to the
proper torque specification. See
“Capacities and Specifications” in
the index for the wheel nut torque
specification.
CAUTION
If you install a full-size tire rather than
your compact spare tire, reinstall the
wheel cover as follows:
1) Put the wheel cover on the full-
size tire.
2) Fasten the 4 plastic caps snugly
by hand.
3) Tighten the caps by turning them
an additional 90° with the wheel
wrench.
– The proper tightening torque is a
maximum of 5.9 lb-ft (8 N·m).
– Tightening to the improper
torque can cause damage to the
plastic caps.
CAUTION
Wheel covers will not fit on your com-
pact spare. If you try to put a wheel
cover on the compact spare, you
could damage the cover or the spare.
WARNING
Improperly storing a jack, a tire, or
other equipment in the passenger
compartment of the vehicle could
cause injury. In a sudden stop or col-
lision, loose equipment could strike
someone. Store all these items in the
proper place.
WARNING
Storing a jack, a tire, or other equip-
ment in the passenger compartment
of the vehicle could cause injury. In a
sudden stop or collision, loose
equipment could strike someone.
Store all these in the proper place.
Appearance Care:
Page 224 of 225
8-5 INDEX
85Z03-03E
Steering
................................................................................4-5
STEERING WHEEL REMOTE OPERATION
............. 3-36
, 3-44
Storage Areas
......................................................................2-22
Sun Visors
............................................................................2-9
Sunglasses Storage Compartment
....................................2-23
Sunroof
.................................................................................2-26
Supplemental Restraint System (air bags)
.......................1-27
TTachometer
..........................................................................3-19
Tail/Stop Lamps, Turn Signal Lamps and Backup Lamps
(Sedan)
.................................................................................5-26
Tail/Stop Lamps, Turn Signal Lamps and Backup Lamps
(Wagon) ................................................................................5-26
Theft-Deterrent Systems
.....................................................2-10
Tilt Wheel
..............................................................................3-4
Tire Chains ...........................................................................5-39
Tire Inflation Pressure
.........................................................5-35
Tire Inspection and Rotation
..............................................5-35
Tire Pressure Monitoring System
......................................5-33
Tire Pressure Monitoring System Warning Light
.............3-26
Tire Sidewall Labeling
.........................................................5-28
Tire Size
................................................................................5-30
Tires
......................................................................................5-28
Top Strap
..............................................................................1-21
Top Strap Anchor Location
................................................1-22
Towing
..................................................................................4-16
Towing a Trailer
...................................................................4-19
Towing Your Vehicle
...........................................................4-16
Trip Odometer
......................................................................3-19
Trunk (Sedan) ......................................................................2-6
Trunk Ajar Light ...................................................................3-26Turn Signal/Multifunction Lever
........................................ 3-4
UUnder Floor Bins (Wagon only)
......................................... 2-24
Underbody Maintenance
.................................................... 5-48
Uniform Tire Quality Grading
............................................. 5-37
VVehicle Care/Appearance Materials
.................................. 5-48
Vehicle Identification
.......................................................... 5-49
Vehicle Identification Number
........................................... 7-1
Vehicle Identification Number (VIN)
.................................. 5-49
Vehicle Loading
.................................................................. 5-36
WWarning Lights, Gauges and Indicators
........................... 3-18
Warranties
........................................................................... 7-2
Weatherstrips ...................................................................... 5-46
What Makes an Air Bag Inflate?
........................................ 1-33
What Will You See After an Air Bag Inflates?
.................. 1-33
Wheel Alignment and Tire Balance
................................... 5-38
Wheel Replacement
............................................................ 5-38
When It Is Time for New Tires
............................................ 5-36
When Should an Air Bag Inflate?
...................................... 1-32
When to Add Engine Oil
..................................................... 5-7
Where Are the Air Bags? .................................................... 1-30
Where to Put the Restraint ................................................. 1-20
Windows
.............................................................................. 2-8
Windshield Washer Fluid
................................................... 5-18
Windshield Wiper Blade Replacement
.............................. 5-28
Windshield Wiper Fuses
.................................................... 5-49
Windshield Wiper/Washer Lever
....................................... 3-5
Winter Driving
..................................................................... 4-13