2007 SUZUKI FORENZA wiring
[x] Cancel search: wiringPage 27 of 225

1-15 SEATS AND RESTRAINT SYSTEMS
85Z03-03E
impacts, side impacts, rollovers or minor
frontal collisions. The pretensioners can be
activated only once. If the pretensioners
are activated, have the pretensioner sys-
tem serviced by an authorized SUZUKI
dealer as soon as possible.
If the air bag readiness light on the instru-
ment cluster does not blink or come on
briefly when the ignition switch is turned to
the “ON” position, stays on for more than
10 seconds, or comes on while driving, the
pretensioner system or the air bag system
may not work properly. Have both systems
inspected by an authorized SUZUKI dealer
as soon as possible.
Service on or around the pretensioner sys-
tem components or wiring must be per-
formed only by an authorized SUZUKI
dealer who is specially trained. Improper
service could result in unintended activa-
tion of pretensioners or could render the
pretensioners inoperative. Either of these
two conditions may result in personal
injury.
To prevent damage or unintended activa-
tion of the pretensioners, be sure the bat-
tery is disconnected and the ignition switch
has been in the “LOCK” position for at least
60 seconds before performing any electri-
cal service work on your SUZUKI. Do not
touch pretensioner system components or
wiring. The wires are wrapped with yellow
tape or yellow tubing, and the couplers are
yellow. When scrapping your SUZUKI, askyour SUZUKI dealer, body repair shop or
scrap yard for assistance.
Safety Belt Extender
65D613
(1) Center of body
(2) Less than 152 mm (6 inches)
(3) Open end of extender buckle
If a safety belt cannot be fastened securely
because it is not long enough, see your
authorized SUZUKI dealer for a safety belt
extender. Safety belt extenders are avail-
able for each seating position except for
the rear center position. After inspecting
the relationship between the safety belt
length, the occupant’s body size, and the
seat adjustment (the driver’s seat should
always be adjusted as far back as possible
while still maintaining control of the vehicle,
and other adjustable seats should be
adjusted as far back as possible), yourSUZUKI dealer can select the appropriate
safety belt extender.
A safety belt extender should only be
used for the person, vehicle and seating
location it was provided for.
When using the extender, ensure that
both ends are latched securely. Do not
use the extender if the open end of the
extender’s buckle is within 152 mm (6
inches) of the center of the occupant’s
body (See diagram). Use of the extender
when the buckle is too close to the cen-
ter of the body could increase the risk of
abdominal injury in the event of an acci-
dent, and could cause the shoulder belt
to be positioned incorrectly.
Make sure to use the correct buckle cor-
responding to your seating position.
Safety belt extenders are not intended
for use by pregnant women, and should
only be used upon approval by their
medical advisors.
Remove and stow the extender when it
is not being used.
Safety Belts:
Page 55 of 225
2-7 FEATURES AND CONTROLS
85Z03-03E
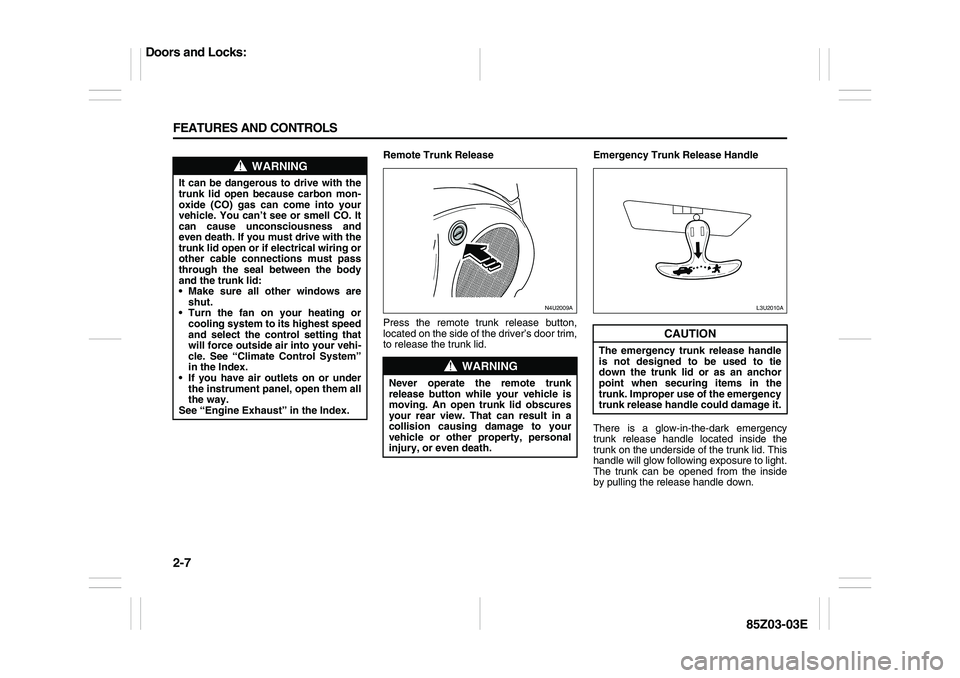
Remote Trunk Release
Press the remote trunk release button,
located on the side of the driver’s door trim,
to release the trunk lid.Emergency Trunk Release Handle
There is a glow-in-the-dark emergency
trunk release handle located inside the
trunk on the underside of the trunk lid. This
handle will glow following exposure to light.
The trunk can be opened from the inside
by pulling the release handle down.
WARNING
It can be dangerous to drive with the
trunk lid open because carbon mon-
oxide (CO) gas can come into your
vehicle. You can’t see or smell CO. It
can cause unconsciousness and
even death. If you must drive with the
trunk lid open or if electrical wiring or
other cable connections must pass
through the seal between the body
and the trunk lid:
Make sure all other windows are
shut.
Turn the fan on your heating or
cooling system to its highest speed
and select the control setting that
will force outside air into your vehi-
cle. See “Climate Control System”
in the Index.
If you have air outlets on or under
the instrument panel, open them all
the way.
See “Engine Exhaust” in the Index.
WARNING
Never operate the remote trunk
release button while your vehicle is
moving. An open trunk lid obscures
your rear view. That can result in a
collision causing damage to your
vehicle or other property, personal
injury, or even death.
N4U2009A
CAUTION
The emergency trunk release handle
is not designed to be used to tie
down the trunk lid or as an anchor
point when securing items in the
trunk. Improper use of the emergency
trunk release handle could damage it.
L3U2010A
Doors and Locks:
Page 56 of 225
2-8 FEATURES AND CONTROLS
85Z03-03E
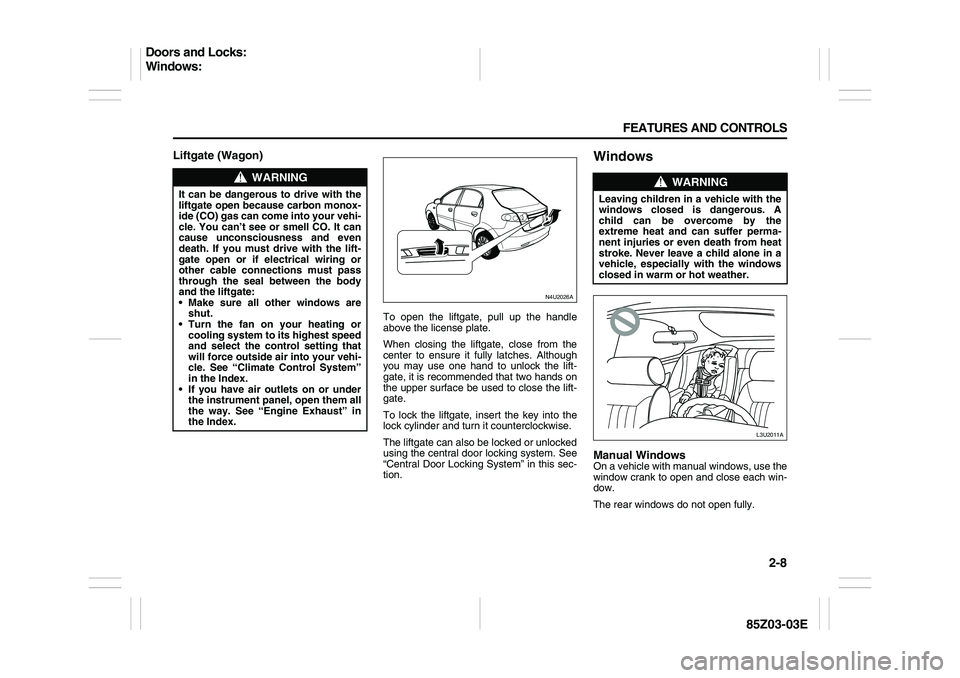
Liftgate (Wagon)
To open the liftgate, pull up the handle
above the license plate.
When closing the liftgate, close from the
center to ensure it fully latches. Although
you may use one hand to unlock the lift-
gate, it is recommended that two hands on
the upper surface be used to close the lift-
gate.
To lock the liftgate, insert the key into the
lock cylinder and turn it counterclockwise.
The liftgate can also be locked or unlocked
using the central door locking system. See
“Central Door Locking System” in this sec-
tion.
WindowsManual WindowsOn a vehicle with manual windows, use the
window crank to open and close each win-
dow.
The rear windows do not open fully.
WARNING
It can be dangerous to drive with the
liftgate open because carbon monox-
ide (CO) gas can come into your vehi-
cle. You can’t see or smell CO. It can
cause unconsciousness and even
death. If you must drive with the lift-
gate open or if electrical wiring or
other cable connections must pass
through the seal between the body
and the liftgate:
Make sure all other windows are
shut.
Turn the fan on your heating or
cooling system to its highest speed
and select the control setting that
will force outside air into your vehi-
cle. See “Climate Control System”
in the Index.
If you have air outlets on or under
the instrument panel, open them all
the way. See “Engine Exhaust” in
the Index.
N4U2026A
WARNING
Leaving children in a vehicle with the
windows closed is dangerous. A
child can be overcome by the
extreme heat and can suffer perma-
nent injuries or even death from heat
stroke. Never leave a child alone in a
vehicle, especially with the windows
closed in warm or hot weather.
L3U2011A
Doors and Locks:
Windows:
Page 96 of 225

3-20 INSTRUMENT PANEL
85Z03-03E
Air Bag Readiness LightThere is an air bag readiness light on the
instrument panel. The air bag readiness
system checks the air bag’s electrical sys-
tem for malfunctions. The light tells you if
there is an electrical problem. The system
check includes the air bag sensor, the air
bag modules, the wiring and the crash
sensing and diagnostic module. For more
information on the air bag system, see “Air
Bag Systems” in section 1.
This light will come on when you start your
vehicle, and it will flash for a few seconds.
Then the light should go out. This means
the system is ready.If the air bag readiness light stays on after
you start the vehicle or comes on or
flashes when you are driving, the air bag
system may not work properly. Have your
vehicle serviced right away.
The air bag readiness light should be illu-
minated for a few seconds when you turn
the ignition key to ON. If the light doesn’t
come on then, have it fixed so it will be
ready to warn you if there is a problem.
Charging System LightThe charging system light will come on
when you turn on the ignition, and the
engine is not running, as a check to show
you it is working.
When the engine is running, the light
should go out.
If it stays on, or comes on while you are
driving, you may have a problem with the
electrical charging system. It could indicate
that you have a loose generator drive belt,
or another electrical problem. Have it
checked right away. Driving while this light
is on could drain your battery.
If you must drive a short distance with the
light on, be certain to turn off all your
accessories, such as the radio and air con-
ditioner.
WARNING
It is absolutely essential that the
driver and passengers wear their
safety belts at all times. Persons who
are not wearing safety belts have a
much greater risk of injury if an acci-
dent occurs. Make a regular habit of
buckling your safety belt before put-
ting the key in the ignition.
S4U3042A
WARNING
If the air bag readiness light stays on
after you start your vehicle, it means
the air bag system may not be work-
ing properly. The air bags in your
vehicle may not inflate in a crash, or
they could even inflate without a
crash. To help avoid injury to yourself
or others, have your vehicle serviced
right away if the air bag readiness
light stays on after you start your
vehicle.
Warning Lights, Gauges and Indicators:
Page 168 of 225
5-24 SERVICE AND APPEARANCE CARE
85Z03-03E
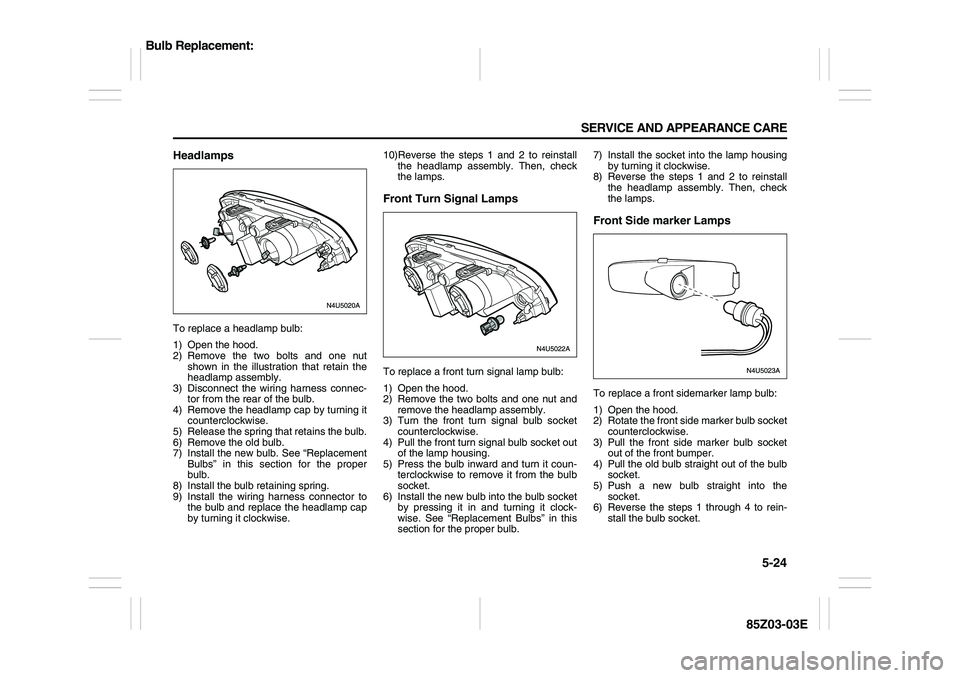
HeadlampsTo replace a headlamp bulb:
1) Open the hood.
2) Remove the two bolts and one nut
shown in the illustration that retain the
headlamp assembly.
3) Disconnect the wiring harness connec-
tor from the rear of the bulb.
4) Remove the headlamp cap by turning it
counterclockwise.
5) Release the spring that retains the bulb.
6) Remove the old bulb.
7) Install the new bulb. See “Replacement
Bulbs” in this section for the proper
bulb.
8) Install the bulb retaining spring.
9) Install the wiring harness connector to
the bulb and replace the headlamp cap
by turning it clockwise.10)Reverse the steps 1 and 2 to reinstall
the headlamp assembly. Then, check
the lamps.
Front Turn Signal LampsTo replace a front turn signal lamp bulb:
1) Open the hood.
2) Remove the two bolts and one nut and
remove the headlamp assembly.
3) Turn the front turn signal bulb socket
counterclockwise.
4) Pull the front turn signal bulb socket out
of the lamp housing.
5) Press the bulb inward and turn it coun-
terclockwise to remove it from the bulb
socket.
6) Install the new bulb into the bulb socket
by pressing it in and turning it clock-
wise. See “Replacement Bulbs” in this
section for the proper bulb.7) Install the socket into the lamp housing
by turning it clockwise.
8) Reverse the steps 1 and 2 to reinstall
the headlamp assembly. Then, check
the lamps.
Front Side marker LampsTo replace a front sidemarker lamp bulb:
1) Open the hood.
2) Rotate the front side marker bulb socket
counterclockwise.
3) Pull the front side marker bulb socket
out of the front bumper.
4) Pull the old bulb straight out of the bulb
socket.
5) Push a new bulb straight into the
socket.
6) Reverse the steps 1 through 4 to rein-
stall the bulb socket.
Bulb Replacement:
Page 169 of 225
5-25 SERVICE AND APPEARANCE CARE
85Z03-03E
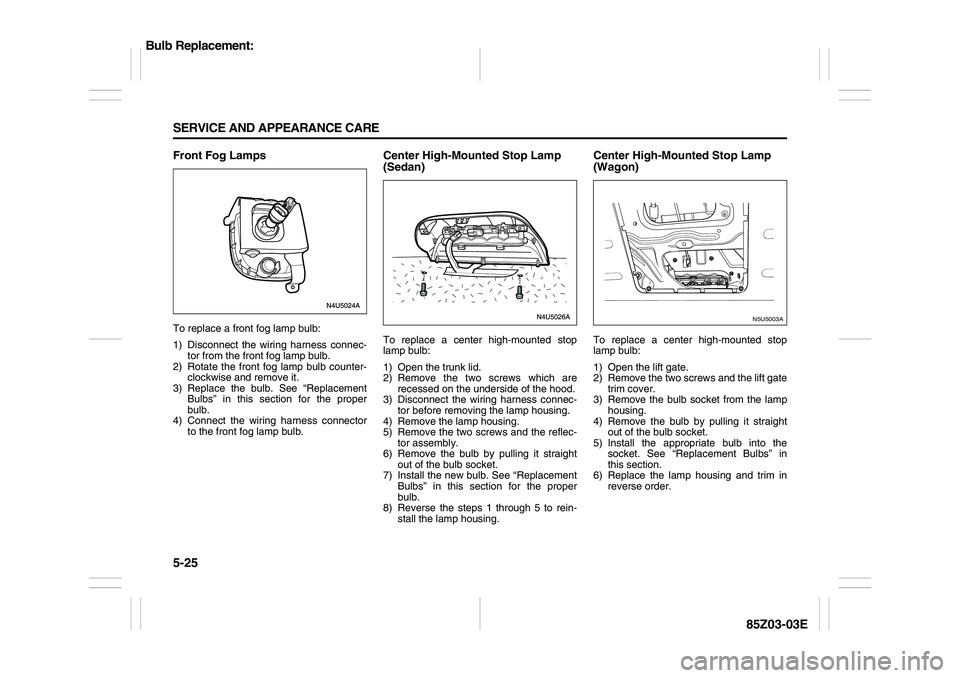
Front Fog LampsTo replace a front fog lamp bulb:
1) Disconnect the wiring harness connec-
tor from the front fog lamp bulb.
2) Rotate the front fog lamp bulb counter-
clockwise and remove it.
3) Replace the bulb. See “Replacement
Bulbs” in this section for the proper
bulb.
4) Connect the wiring harness connector
to the front fog lamp bulb.
Center High-Mounted Stop Lamp
(Sedan)To replace a center high-mounted stop
lamp bulb:
1) Open the trunk lid.
2) Remove the two screws which are
recessed on the underside of the hood.
3) Disconnect the wiring harness connec-
tor before removing the lamp housing.
4) Remove the lamp housing.
5) Remove the two screws and the reflec-
tor assembly.
6) Remove the bulb by pulling it straight
out of the bulb socket.
7) Install the new bulb. See “Replacement
Bulbs” in this section for the proper
bulb.
8) Reverse the steps 1 through 5 to rein-
stall the lamp housing.
Center High-Mounted Stop Lamp
(Wagon)To replace a center high-mounted stop
lamp bulb:
1) Open the lift gate.
2) Remove the two screws and the lift gate
trim cover.
3) Remove the bulb socket from the lamp
housing.
4) Remove the bulb by pulling it straight
out of the bulb socket.
5) Install the appropriate bulb into the
socket. See “Replacement Bulbs” in
this section.
6) Replace the lamp housing and trim in
reverse order.
N5U5003A
Bulb Replacement:
Page 193 of 225
5-49 SERVICE AND APPEARANCE CARE
85Z03-03E
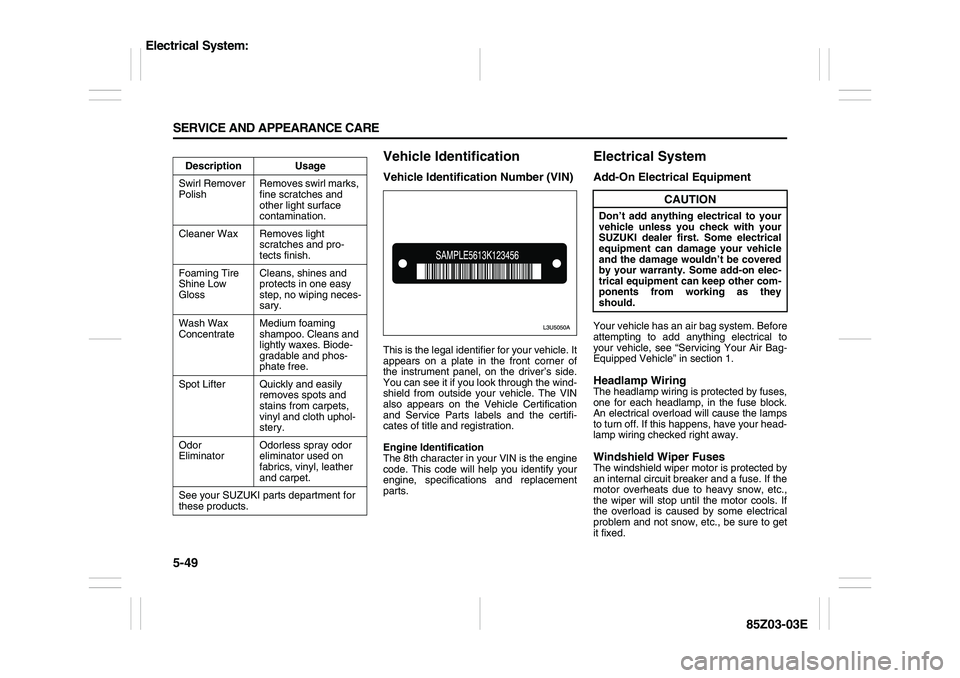
Vehicle IdentificationVehicle Identification Number (VIN)This is the legal identifier for your vehicle. It
appears on a plate in the front corner of
the instrument panel, on the driver’s side.
You can see it if you look through the wind-
shield from outside your vehicle. The VIN
also appears on the Vehicle Certification
and Service Parts labels and the certifi-
cates of title and registration.
Engine Identification
The 8th character in your VIN is the engine
code. This code will help you identify your
engine, specifications and replacement
parts.
Electrical SystemAdd-On Electrical EquipmentYour vehicle has an air bag system. Before
attempting to add anything electrical to
your vehicle, see “Servicing Your Air Bag-
Equipped Vehicle” in section 1.Headlamp WiringThe headlamp wiring is protected by fuses,
one for each headlamp, in the fuse block.
An electrical overload will cause the lamps
to turn off. If this happens, have your head-
lamp wiring checked right away.Windshield Wiper FusesThe windshield wiper motor is protected by
an internal circuit breaker and a fuse. If the
motor overheats due to heavy snow, etc.,
the wiper will stop until the motor cools. If
the overload is caused by some electrical
problem and not snow, etc., be sure to get
it fixed. Description Usage
Swirl Remover
PolishRemoves swirl marks,
fine scratches and
other light surface
contamination.
Cleaner Wax Removes light
scratches and pro-
tects finish.
Foaming Tire
Shine Low
GlossCleans, shines and
protects in one easy
step, no wiping neces-
sary.
Wash Wax
ConcentrateMedium foaming
shampoo. Cleans and
lightly waxes. Biode-
gradable and phos-
phate free.
Spot Lifter Quickly and easily
removes spots and
stains from carpets,
vinyl and cloth uphol-
stery.
Odor
EliminatorOdorless spray odor
eliminator used on
fabrics, vinyl, leather
and carpet.
See your SUZUKI parts department for
these products.
CAUTION
Don’t add anything electrical to your
vehicle unless you check with your
SUZUKI dealer first. Some electrical
equipment can damage your vehicle
and the damage wouldn’t be covered
by your warranty. Some add-on elec-
trical equipment can keep other com-
ponents from working as they
should.
Electrical System:
Page 194 of 225

5-50 SERVICE AND APPEARANCE CARE
85Z03-03E
Power Windows and Other Power
OptionsCircuit breakers in the fuse block protect
the power windows and other power
accessories. When the current load is too
heavy, the circuit breaker opens, protecting
the circuit until the problem is fixed or goes
away.Fuses and Circuit BreakersThe wiring circuits in your vehicle are pro-
tected from short circuits by a combination
of fuses, circuit breakers and fusible ther-
mal links in the wiring itself.
Look at the silver-colored band inside the
fuse. If the band is broken or melted,
replace the fuse. Be sure you replace a
bad fuse with a new one of the identical
size and rating.
There are spare fuses provided in the
engine compartment fuse block. If you ever
have a problem on the road and don’t have
a spare fuse, you can borrow one that has
the same amperage. Just pick a feature of
your vehicle that you can get along without
– like the radio or cigarette lighter – and
use its fuse, if it is the correct amperage.
Replace it as soon as you can.
There are two fuse blocks in your vehicle:
the instrument panel fuse block and the
engine compartment fuse block.
There is a fuse puller located on the
engine compartment fuse block. It can beused to easily remove fuses from the fuse
block.
Instrument Panel Fuse Block
The instrument panel fuse block is located
on the end of the instrument panel on the
driver’s side of the vehicle. To access the
fuses, open the fuse panel door by pulling
the door out.
To reinstall the door, first insert the rear
edge of the fuse panel door, then push the
front of the door into the end of the instru-
ment panel to secure it.
N5U5001B
10A
AIRBAG25A
WPR10A
RADIO/CLK
10A
ECM10A
AIRBAG15A
AUX LTR
15ATRN SIG LAMPS
10A
ABS15A
LT R
10A
CLSTR
BTSI10A
BCK/UP
15A
A/C
CLK 10A
TCM10A
RKE
10A
ENG FUSE BOX
DRL
15A
HAZRD
LAMPS
20A
HVAC15A
RKE15A
RADIO
15A
S/ROOF10A
DLC10A
SPARE
Electrical System: