Page 297 of 442

Black plate (302,1)
北米Model "A2420BE-B" EDITED: 2006/ 7/ 26
8-10
Driving tips
! Wiper operation when snowing
Before driving in cold weather, make sure
the wiper blades are not frozen to the
windshield or rear window. If the wiper
blades are frozen to the windshield or rear
window, use the defroster with the airflow
control button/dial in the “
”position and
the temperature control dial set for max-
imum warmth until the wiper blades are
completely thawed out. If your vehicle is
equipped with a wiper deicer, it is helpful
to thaw the windshield wiper blades. To
thaw out the rear wiper blade, use the rear
window defogger.
When driving in snow, if frozen snow starts
to stick on the surface of the windshield
despite wiper operation, use the defroster
with the airflow control button/dial in “
”
and the temperature control dial set for
maximum warmth. After the windshield
gets warmed enough to melt the frozen
snow on it, wash it away using the
windshield washer.
Snow stuck on the wiper arm prevents the
wiper from working effectively. If snow is
stuck on the wiper arm, pull off the road to
a safe place, then remove it. If you stop
the vehicle at road side, use the hazard
warning flasher to alert other drivers.
We recommend use of non-freezing type
wiper blades (winter blades) during the seasons you could have snow and sub-
zero temperatures. Blades of this type
give superior wiping performance in
snowy conditions. Be sure to use blades
that are suitable for your vehicle.
CAUTION
During high-speed driving, non-
freezing type wiper blades may not
perform as well as standard wiper
blades. If this happens, reduce the
vehicle speed.NOTEWhen the season requiring non-freez-
ing type wiper blades is over, replace
them with standard wiper blades.&
Corrosion protectionRefer to the “Corrosion protection ”section
(chapter 10).& Snow tires! All models except OUTBACK or
2.5GT spec.B
WARNING
.When replacing original tires with winter (snow) tires, make sure
you use only the same size,
construction and load range as
the original tires listed on the tire
placard. Using other sizes and
construction may affect speed-
ometer/odometer calibration and
clearance between the body and
tires. It also may be dangerous
and lead to loss of vehicle con-
trol.
. You must install four winter tires
that are of the same size, circum-
ferences, construction, brand,
andloadrange.Mixingother
sizes, circumferences or con-
structions may result in severe
mechanical damage to the drive
train of your vehicle and may
affect ride, handling, braking and
speedometer/odometer calibra-
tion. It also may be dangerous
and lead to loss of vehicle con-
trol.
. Do not use a combination of
radial, belted bias or bias tires
since it may cause dangerous
handling characteristics and lead
to an accident.
Your vehicle is equipped with “all season
tires ”which are designed to provide an
ProCarManuals.com
Page 298 of 442

Black plate (303,1)
北米Model "A2420BE-B" EDITED: 2006/ 7/ 26
adequate measure of traction, handling
and braking performance in year-round
driving. In winter, it may be possible to
enhance performance through use of tires
designed specifically for winter driving
conditions.
If you choose to install winter tires on your
vehicle, be sure to use the correct tire size
and type. You must install four winter tires
that are of the same size, construction,
brand and load range and you should
never mix radial, belted bias or bias tires
since this may result in dangerous hand-
ling characteristics. When you choose a
tire, make sure that there is enough
clearance between the tire and vehicle
body.
Remember to drive with care at all times
regardless of the type of tires on your
vehicle.
! OUTBACK models
WARNING
.When replacing original tires with
winter (snow) tires, make sure
you use only the same size and
construction as recommended.
Using other sizes or construction
may affect speedometer/od-
ometer calibration and clearance between the body and tires. It
also may be dangerous and lead
to loss of vehicle control.
. You must install four winter tires
that are of the same size, circum-
ferences, construction, brand,
andloadrange.Mixingother
sizes, circumferences or con-
structions may result in severe
mechanical damage to the drive
train of your vehicle and may
affect ride, handling, braking and
speedometer/odometer calibra-
tion. It also may be dangerous
and lead to loss of vehicle con-
trol.
. Do not use a combination of
radial, belted bias or bias tires
since it may cause dangerous
handling characteristics and lead
to an accident.
Your vehicle is equipped with “all season
tires ”which are designed to provide an
adequate measure of traction, handling
and braking performance in year-round
driving. In winter, it may be possible to
enhance performance through use of tires
designed specifically for winter driving
conditions.
If you choose to install winter tires on your
vehicle, be sure to use the correct tire size and type. You must install four winter tires
that are of the same size, construction,
brand and load range and you should
never mix radial, belted bias or bias tires
since this may result in dangerous hand-
ling characteristics. When you choose a
tire, make sure that there is enough
clearance between the tire and vehicle
body.
Remember to drive with care at all times
regardless of the type of tires on your
vehicle.
Your OUTBACK comes with P225/
60R16 or P225/55R17
“all season tires ”
as original equipment. You should be
aware that some winter tires with that
same size designation may actually be
too large for the vehicle and may cause
rubbing on sharp turns. Listed below is
the winter tire size that we recommend.
Recommended winter (snow) tire size
2.5-liter non-turbo models: P225/60R16
or P215/60R16 Studless
All models other than 2.5-liter non-turbo
models: P215/55R17, P225/60R16 or
P215/60R16 Studless Driving tips
8-11
–
CONTINUED –
8
ProCarManuals.com
Page 299 of 442

Black plate (304,1)
北米Model "A2420BE-B" EDITED: 2006/ 7/ 26
8-12
Driving tips
! 2.5GT spec.B
WARNING
.When replacing original tires with
winter (snow) tires, make sure
you use only the same size,
construction and load range as
the original tires listed on the tire
placard. Using other sizes and
construction may affect speed-
ometer/odometer calibration and
clearance between the body and
tires. It also may be dangerous
and lead to loss of vehicle con-
trol.
. You must install four winter tires
that are of the same size, con-
struction, brand, and load range.
Mixing other sizes or construc-
tions may result in severe me-
chanical damage to the drive
train of your vehicle and may
affect ride, handling, braking and
speedometer/odom eter calibra-
tion. It also may be dangerous
and lead to loss of vehicle con-
trol.
. Do not use a combination of
radial, belted bias or bias tires
since it may cause dangerous
handling characteristics and lead to an accident.
Your vehicle is equipped with “summer
tires ”as original equipment, which are
inadequate for driving on slippery roads
such as on snow-covered or icy roads.
Compared with winter and all-season
tires, summer tires give significantly less
grip on snowy and icy road surfaces.
Therefore, use of winter tires is strongly
recommended when driving with such
road conditions.
When you choose to install winter tires on
your vehicle, be sure to use the correct tire
size and type. You must install four winter
tires that are of the same size, construc-
tion, brand and load range and you should
never mix radial, belted bias or bias tires
since this may result in dangerous hand-
ling characteristics. When you choose a
tire, make sure that there is enough
clearance between the tire and vehicle
body.
Remember to drive with care at all times
regardless of the type of tires on your
vehicle.
& Tire chains
CAUTION
Tire chains cannot be used on tires
listed in the following because of
lack of clearance between the tires
and vehicle body.
. 2.5-liter non-turbo models (ex-
cept OUTBACK): P205/50R17
tires
. 2.5-liter turbo models (except
OUTBACK and 2.5GT spec.B):
215/45ZR17 tires
. OUTBACK models: P225/55R17
tires
. OUTBACK models: P225/60R16
tires
. 2.5GT spec.B model: 215/45R18
tires
. 2.5-liter non-turbo and 3.0-liter
models (OUTBACK): P225/60R16
winter (snow) tires
. 2.5-liter non-turbo and 3.0-liter
models (OUTBACK): P215/60R16
winter (snow) tires
. 2.5-liter turbo and 3.0-liter models
(OUTBACK): P215/55R17 winter
(snow) tires
ProCarManuals.com
Page 300 of 442

Black plate (305,1)
北米Model "A2420BE-B" EDITED: 2006/ 7/ 26
Driving on snowy grades or icy roads may
require the use of tire chains, in which
case put the chains on the front wheels
only. Use only SAE class S type chains
that are of the correct size for your tires so
as not to damage the vehicle body or
suspension.
When driving with tire chains, drive at
speeds below 19 mph (30 km/h). When a
temporary spare tire is on a front wheel,
replace the temporary spare tire with the
rear tire on the same side of the vehicle,
and then fit chains on the front tires.
Always use the utmost care when driving
with tire chains –overconfidence because
you are driving with tire chains could
easily lead to a serious accident.& Rocking the vehicleIf you must rock the vehicle to free it from
snow, sand, or mud, depress the accel-
erator pedal slightly and move the selector
lever back and forth between “D”and “R”
repeatedly. Do not race the engine. For
the best possible traction, avoid spinning
the wheels when trying to free the vehicle.
When the road surface is extremely
slippery, you can obtain better traction by
starting the vehicle with the transmission
in 2nd than 1st (both for MT and AT).
Refer to the “Automatic transmission –4- speed
”and “Automatic transmission –5-
speed ”section in chapter 7 for information
on holding the transmission in 2nd posi-
tion.
Loading your vehicle
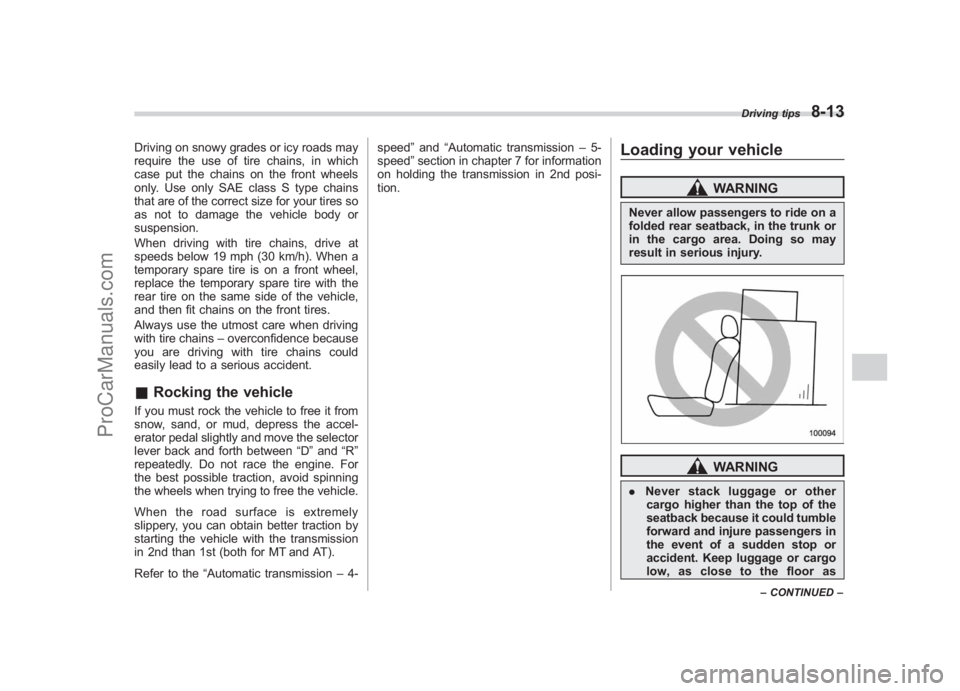
WARNING
Never allow passengers to ride on a
folded rear seatback, in the trunk or
in the cargo area. Doing so may
result in serious injury.
WARNING
. Never stack luggage or other
cargo higher than the top of the
seatback because it could tumble
forward and injure passengers in
the event of a sudden stop or
accident. Keep luggage or cargo
low, as close to the floor as
Driving tips
8-13
– CONTINUED –
8
ProCarManuals.com
Page 301 of 442

Black plate (306,1)
北米Model "A2420BE-B" EDITED: 2006/ 7/ 26
8-14
Driving tips
possible.
. When you carry something inside
the vehicle, secure it whenever
you can to prevent it from being
thrown around inside the vehicle
during sudden stops, sharp turns
or in an accident.
. Do not pile heavy loads on the
roof. These loads raise the vehi-
cle ’s center of gravity and make it
more prone to tip over.
. Secure lengthy items properly to
prevent them from shooting for-
ward and causing serious injury
during a sudden stop.
. Never exceed the maximum load
limit. If you do, some parts on
your vehicle can break, or it can
change the way your vehicle
handles. This could result in loss
of control and cause personal
injury. Also, overloading can
shorten the life of your vehicle. .
Do not place anything on the rear
shelf behind the rear seatback
(for Sedan) or the extended lug-
gage cover (for Station wagon).
Such items could tumble forward
in the event of a sudden stop or a
collision. This could cause ser-
ious injury.
CAUTION
Do not carry spray cans, containers
with flammable or corrosive liquids
or any other dangerous items inside
the vehicle.NOTEFor better fuel economy, do not carry
unneeded cargo.
& Vehicle capacity weightThe load capacity of your vehicle is
determined by weight, not by available
cargo space. The maximum load you can
carry in your vehicle is shown on the
vehicle placard attached to the driver ’s
ProCarManuals.com
Page 302 of 442

Black plate (307,1)
北米Model "A2420BE-B" EDITED: 2006/ 7/ 26
side door pillar. It includes the total weight
of the driver and all passengers and their
belongings, any optional equipment such
as a trailer hitch, roof rack or bike carrier,
etc., and the tongue load of a trailer.& GVWR and GAWR (Gross
Vehicle Weight Rating and
Gross Axle Weight Rating)Certification labelThe certification label attached to the
driver ’s side door shows GVWR (Gross
Vehicle Weight Rating) and GAWR (Gross
Axle Weight Rating).
The GVW (Gross Vehicle Weight) must
never exceed the GVWR. GVW is the
combined total of weight of the vehicle,
fuel, driver, all passengers, luggage, any optional equipment and trailer tongue
load. Therefore, the GVW changes de-
pending on the situation.
In addition, the total weight applied to
each axle (GAW) must never exceed the
GAWR. The front and rear GAWs can be
adjusted by relocating luggage inside the
vehicle.
Even if the total weight of your luggage is
lower than the vehicle capacity weight,
either front or rear GAW may exceed the
GAWR, depending on the distribution of
the luggage.
When possible, the load should be evenly
distributed throughout the vehicle.
If you carry heavy loads in the vehicle, you
should confirm that GVW and front and
rear GAWs are within the GVWR and
GAWR by putting your vehicle on a
vehicle scale, found at a commercial
weighing station.
Do not use replacement tires with a lower
load range than the originals because they
may lower the GVWR and GAWR limita-
tions. Replacement tires with a higher load
range than the originals do not increase
the GVWR and GAWR limitations.
&
Roof rail and crossbar (if
equipped)1) Crossbar kit
CAUTION
. For cargo carrying purposes, the
roof rail must be used together
with a roof crossbar kit and the
appropriate carrying attachment.
The roof rail must never be used
alone to carry cargo. Otherwise,
damage to the roof or paint or a
dangerous road hazard due to
loss of cargo could result.
. When using the roof crossbar kit,
make sure that the total weight of
the crossbars, carrying attach-
Driving tips
8-15
– CONTINUED –
8
ProCarManuals.com
Page 303 of 442

Black plate (308,1)
北米Model "A2420BE-B" EDITED: 2006/ 7/ 26
8-16
Driving tips
ment and cargo does not exceed
the maximum load limit. Over-
loading may cause damage to
the vehicle and create a safety
hazard.
The roof rail is not designed to carry cargo
by itself. Cargo can be carried after
securing the roof crossbar kit to the roof
rail and installing the appropriate carrying
attachment. When installing the roof
crossbar kit, follow the manufacturer ’s
instructions.
When you carry cargo on the roof using
the roof crossbar kit and a carrying
attachment, never exceed the maximum
load limit explained in the following. You
should also be careful that your vehicle
does not exceed the Gross Vehicle Weight
Rating (GVWR) and front and rear Gross
Axle Weight Rating (GAWR). See the
“ Loading your vehicle ”section in this
chapter for information on loading cargo
into or onto your vehicle. The maximum
load limit of the cargo, crossbars and
carrying attachment must not exceed 100
lbs (45 kg) . Place the heaviest load at the
bottom, nearest the roof, and evenly
distribute the cargo. Always properly
secure all cargo. !
Installing carrying attachments on
the crossbars
When installing any carrying attachment
such as a bike carrier, ski carrier, kayak
carrier, cargo basket, etc. on the cross-
bars, follow the manufacturer ’s instruc-
tions and make sure that the attachment is
securely fixed to the crossbars. Use only
attachments designed specifically for the
crossbars. A set of the crossbars is
designed to carry loads (cargo and attach-
ment) of not more than 100 lbs (45 kg).
Before operating the vehicle, make sure
that the cargo is properly secured on the
attachment.
NOTERemember that the vehicle ’s center of
gravity is altered with the weight of the
load on the roof, thus affecting the
driving characteristics.
Drive carefully. Avoid rapid starts, hard
cornering and abrupt stops. Crosswind
effects will be increased.
! Removal and installation of the
crossbars
The crossbars can be removed when you
do not use the roof to carry cargo. !
To remove the crossbar
1. Loosen and remove the T-30 torx®
head screw from the top of each crossbar
end support.
Loosen the lower clamps.
ProCarManuals.com
Page 304 of 442

Black plate (309,1)
北米Model "A2420BE-B" EDITED: 2006/ 7/ 26
2. Carefully raise the crossbar from roof
rails.
! To install the front crossbar
Front crossbar:
Front crossbar has 100 LBS Load Label
on left-hand side.1) T-25 torx® head screw1. Make sure that the T-25 torx® head
screw on the back of each crossbar end
support is tightened correctly.
2. Before placing the crossbar on the roof
rails, make sure that the T-30 torx® head
screw is removed from the top of each
crossbar end support.
3. The crossbar with the 100 LBS Load
Label attached onto it is the front crossbar.
An arrow is marked on the back of the
front crossbar for correct installation.
Install the front crossbar so that the arrow
faces the front of the vehicle.
1) 10 in (250 mm)4. Install the front crossbar so that the
crossbar end supports are located ap-
proximately 10 in (250 mm) rearward from
the joints between the roof rails and the
front roof rail supports.
Driving tips
8-17
– CONTINUED –
8
ProCarManuals.com