2007 SATURN VUE light
[x] Cancel search: lightPage 179 of 470

Change Engine Oil Light
If this light comes on, it
means that service is
required for your vehicle.
SeeScheduled Maintenance on page 420and
Engine Oil on page 318for more information.
After having the oil changed you will need to
reset the light. SeeEngine Oil Life System
on page 323for more information.
Security Light
Your vehicle has
a Passlock®
theft-deterrent
system.
With this system, the security light will �ash as
you open the door if your ignition is off.This light will come on brie�y when the vehicle is
turned on.
For more information, seePasslock
®on page 108.
Reduced Engine Power Light
This light will come on
brie�y when you start
the engine.
This light, along with the service engine soon light
will be displayed when a noticeable reduction in
the vehicle’s performance may occur. Stop
the vehicle and turn off the ignition. Wait for
10 seconds and restart your vehicle. This may
correct the condition.
The vehicle may be driven at a reduced speed
when the reduced engine power light is on
but acceleration and speed may be reduced.
The performance may be reduced until the next
time you drive your vehicle. If this light stays
on, see your retailer as soon as possible
for diagnosis and repair.
179
ProCarManuals.com
Page 180 of 470

Highbeam On Light
This light comes on
when the high-beam
headlamps are in use.
SeeHeadlamp High/Low-Beam Changer on
page 144for more information.
Daytime Running Lamps (DRL)
Indicator Light
This light is located on
the instrument panel
cluster. It comes
on whenever the
Daytime Running
Lamps are on.
SeeDaytime Running Lamps (DRL) on page 150
for further information.
Gate Ajar Light
If this light comes on,
your liftgate is not
completely closed.
Driving with the liftgate
open can cause
carbon monoxide (CO)
to enter the vehicle.
SeeEngine Exhaust on page 123for more
information.
Service Vehicle Soon Light
This light will come on if
a condition exists that
may require the
vehicle to be taken
in for service.
If the light comes on, take your vehicle to your
dealer/retailer for service as soon as possible.
180
ProCarManuals.com
Page 181 of 470

Fuel Gage
When the ignition is on,
the fuel gage tells you
about how much
fuel you have left in
your tank.
When the indicator nears empty, the low fuel light
will come on. You still have a little fuel left, but
you should get more soon. SeeLow Fuel Warning
Light on page 181for more information.
Here are four things that some owners ask about.
None of these mean a condition exists with
your fuel gage:
At the service station, the fuel pump shuts off
before the gage reads full.
It takes a little more or less fuel to �ll up than
the gage indicated. For example, the gage
may have indicated the tank was half full,
but it actually took a little more or less than
half the tank’s capacity to �ll the tank.
The gage moves a little when you turn a
corner or speed up.
The gage takes a few seconds to stabilize
after the ignition is turned on, and will go
back to empty when you turn the ignition off.
For your fuel tank capacity, seeCapacities and
Speci�cations on page 414.
Low Fuel Warning Light
The light next to the fuel
gage will come on
brie�y when you are
starting the engine.
This light also comes on when the fuel tank is low
on fuel. When you add fuel the light should go
off. If it doesn’t, have your vehicle serviced.
181
ProCarManuals.com
Page 193 of 470

Playing the Radio
O
(Power/Volume):Press this knob to turn the
system on and off.
Turn this knob clockwise to increase or
counterclockwise to decrease the volume.
Finding a Station
BAND:Press this button to switch between AM,
FM, or XM™ (if equipped). The display shows
the selection.
f(Tune):Turn this knob to select radio stations.
©SEEK¨:Press the right or left SEEK
arrow to go to the next or to the previous station
and stay there.
To scan stations, press and hold either SEEK
arrow for a few seconds until a beep sounds. The
radio goes to a station, plays for a few seconds,
then goes to the next station. Press either
SEEK arrow again to stop scanning.
The radio only seeks and scans stations with a
strong signal that are in the selected band.
4(Information) (XM™ Satellite Radio Service,
MP3, and RDS Features):Press the information
button to display additional text information related
to the current FM-RDS or XM™ station, or MP3
song. A choice of additional information such as:
Channel, Song, Artist, CAT can display. Continue
pressing the information button to highlight the
desired label, or press the pushbutton positioned
under any one of the labels and the information
about that label displays.
When information is not available, No Info displays.
Storing a Radio Station as a Favorite
Drivers are encouraged to set up their radio station
favorites while the vehicle is parked. Tune to
your favorite stations using the presets, favorites
button, and steering wheel controls, if your vehicle
has them. SeeDefensive Driving on page 230.
FAV (Favorites):A maximum of 36 stations
can be programmed as favorites using the
six pushbuttons positioned below the radio station
frequency labels and by using the radio favorites
page button (FAV button). Press the FAV button to
go through up to six pages of favorites, each
having six favorite stations available per page.
193
ProCarManuals.com
Page 194 of 470

Each page of favorites can contain any
combination of AM, FM, or XM™ (if equipped)
stations. To store a station as a favorite, perform
the following steps:
1. Tune to the desired radio station.
2. Press the FAV button to display the page
where you want the station stored.
3. Press and hold one of the six pushbuttons
until a beep sounds. When that pushbutton
is pressed and released, the station that was
set, returns.
4. Repeat the steps for each pushbutton radio
station you want stored as a favorite.
The number of favorites pages can be setup using
the MENU button. To setup the number of
favorites pages, perform the following steps:
1. Press the MENU button to display the radio
setup menu.
2. Press the pushbutton located below the
FAV 1-6 label.3. Select the desired number of favorites pages
by pressing the pushbutton located below the
displayed page numbers.
4. Press the FAV button, or let the menu time out,
to return to the original main radio screen
showing the radio station frequency labels and
to begin the process of programming your
favorites for the chosen amount of numbered
pages.
Setting the Tone
(Bass/Midrange/Treble)
BASS/MID/TREB (Bass, Midrange, or Treble):
To adjust bass, midrange, or treble, press the tune
knob until the tone control labels display. Continue
pressing to highlight the desired label, or press the
pushbutton positioned under the desired label.
Turn the tune knob clockwise or counterclockwise
to adjust the highlighted setting. The highlighted
setting can also be adjusted by pressing either the
SEEK, FWD (forward), or REV (reverse) button
until the desired levels are obtained. If a station’s
frequency is weak, or has static, decrease the
treble.
194
ProCarManuals.com
Page 195 of 470

To quickly adjust bass, midrange, or treble to the
middle position, press the pushbutton positioned
under the BASS, MID, or TREB label for more
than two seconds. A beep sounds and the level
adjusts to the middle position.
To quickly adjust all tone and speaker controls
to the middle position, press the tune knob for more
than two seconds until a beep sounds.
EQ (Equalization):Press this button to select
preset equalization settings.
To return to the manual mode, press the EQ
button until Manual displays or start to manually
adjust the bass, midrange, or treble by pressing
the tune knob.Adjusting the Speakers (Balance/Fade)
BAL/FADE (Balance/Fade):To adjust balance or
fade, press the tune knob until the speaker control
labels display. Continue pressing to highlight the
desired label, or press the pushbutton positioned
under the desired label. Turn the tune knob
clockwise or counterclockwise to adjust the
highlighted setting. The highlighted setting can also
be adjusted by pressing either the SEEK, FWD, or
REV button until the desired levels are obtained.
To quickly adjust balance or fade to the middle
position, press the pushbutton positioned under the
BAL or FADE label for more than two seconds.
A beep sounds and the level adjusts to the
middle position.
To quickly adjust all speaker and tone controls to
the middle position, press the tune knob for more
than two seconds until a beep sounds.
195
ProCarManuals.com
Page 211 of 470

Rear Seat Entertainment System
Your vehicle may have a DVD Rear Seat
Entertainment (RSE) system. The RSE system
works with the vehicle’s audio system and includes
a radio that accepts CD audio or DVD video, a
video display screen, two sets of wireless
headphones, and a remote control.
Before You Drive
The RSE is designed for rear seat passengers
only. The driver cannot safely view the video
screen while driving and should not try to do so.
In severe or extreme weather conditions the
RSE system might not work until the temperature
is within the operating range. The operating
range for the RSE system is above−4°F (−20°C)
or below 140°F (60°C). If the temperature of
your vehicle is outside of this range, heat or cool
the vehicle until the temperature is within the
operating range of the RSE system.
Headphones
The RSE includes two sets of wireless
headphones that are only dedicated to this
system. These headphones are used to listen
to the radio with CD and DVD or an auxiliary
device connected to the RCA jacks. The wireless
headphones have an ON/OFF switch and a
volume control.
To use the headphones, turn the switch to ON.
An indicator light on the headphones comes on.
If the light does not come on, the batteries
might need to be replaced. See “Battery
Replacement” later in this section for more
information. Switch the headphones to OFF
when not in use.
The infrared transmitters are located in the display
below the video screen. The headphones shut
off automatically to save the battery power if the
DVD system is shut off or if the headphones
are out of range of the transmitters for more than
three minutes. If you move too far forward or
step out of the vehicle, the headphones lose the
audio signal.
211
ProCarManuals.com
Page 212 of 470

To adjust the volume on the headphones, use the
volume control located on the right side.
Notice:Do not store the headphones in heat
or direct sunlight. This could damage the
headphones and repairs will not be covered by
your warranty. Keep the headphones stored
in a cool, dry place.
Battery Replacement
To change the batteries, do the following:
1. Slide open the battery door located on the left
side of the headphones.
2. Replace the two AAA batteries in the
compartment. Make sure that they are
installed correctly, using the diagram on the
inside of the battery compartment.
3. Slide the battery door shut.
If the headphones are to be stored for a long
period of time, remove the batteries and keep them
in a cool, dry place.
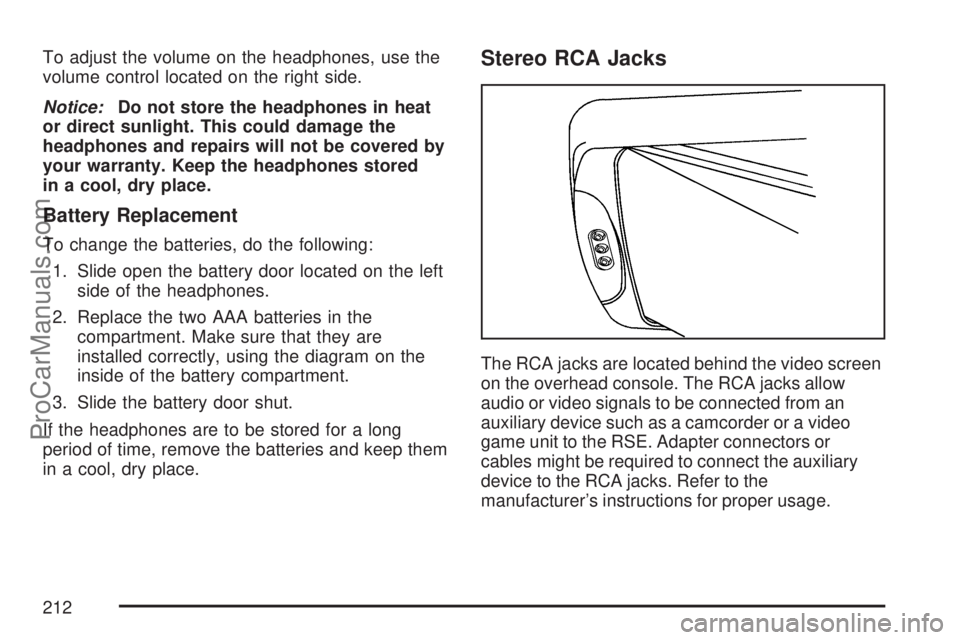
Stereo RCA Jacks
The RCA jacks are located behind the video screen
on the overhead console. The RCA jacks allow
audio or video signals to be connected from an
auxiliary device such as a camcorder or a video
game unit to the RSE. Adapter connectors or
cables might be required to connect the auxiliary
device to the RCA jacks. Refer to the
manufacturer’s instructions for proper usage.
212
ProCarManuals.com