MT-20
TRANSMISSION ASSEMBLY
Revision: 2006 November2007 350Z
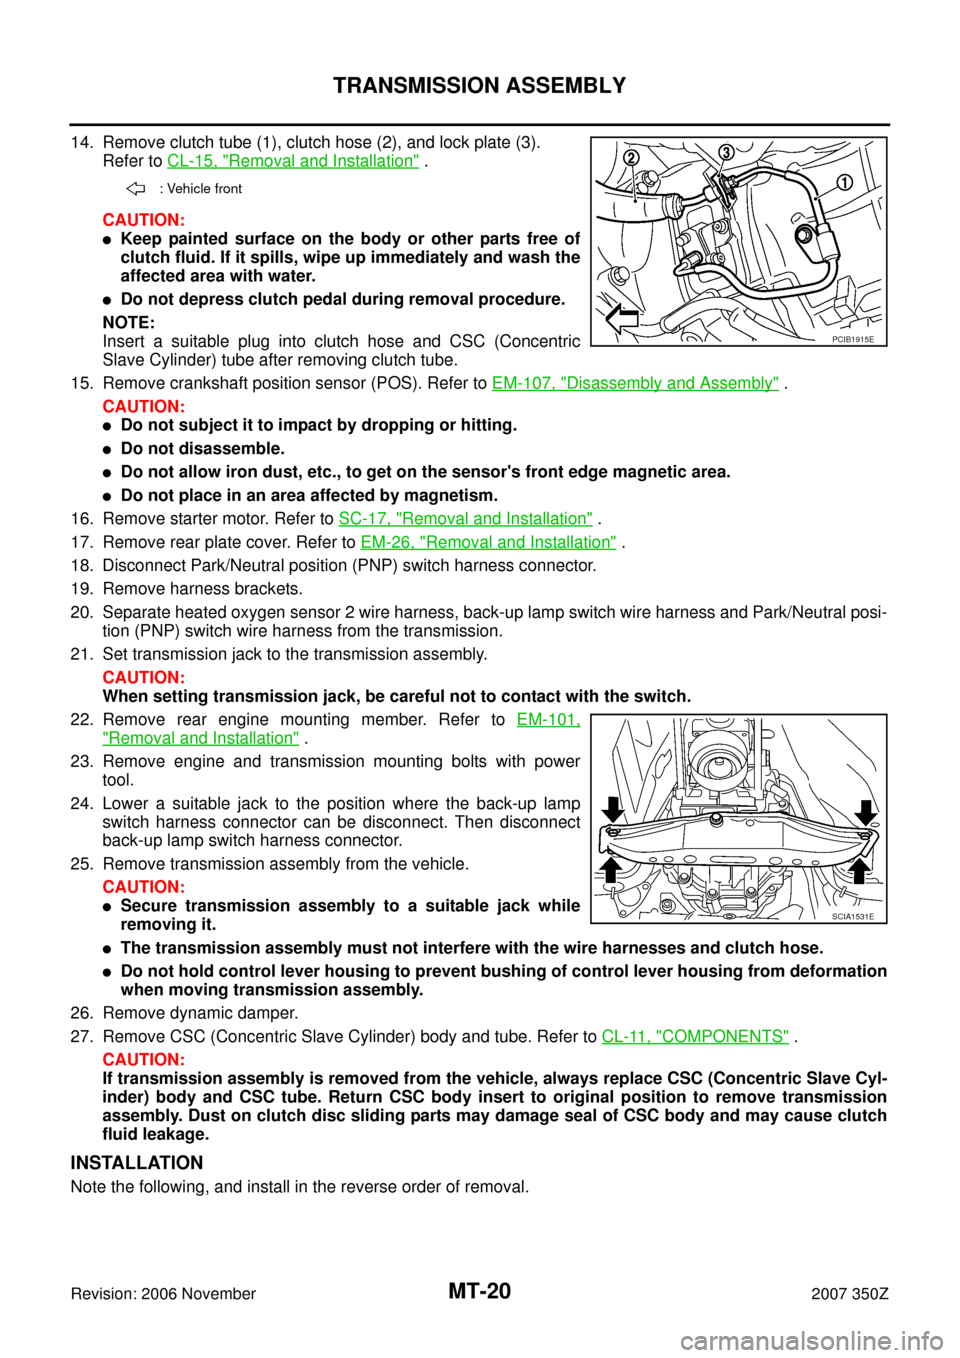
14. Remove clutch tube (1), clutch hose (2), and lock plate (3).
Refer to CL-15, "
Removal and Installation" .
CAUTION:
�Keep painted surface on the body or other parts free of
clutch fluid. If it spills, wipe up immediately and wash the
affected area with water.
�Do not depress clutch pedal during removal procedure.
NOTE:
Insert a suitable plug into clutch hose and CSC (Concentric
Slave Cylinder) tube after removing clutch tube.
15. Remove crankshaft position sensor (POS). Refer to EM-107, "
Disassembly and Assembly" .
CAUTION:
�Do not subject it to impact by dropping or hitting.
�Do not disassemble.
�Do not allow iron dust, etc., to get on the sensor's front edge magnetic area.
�Do not place in an area affected by magnetism.
16. Remove starter motor. Refer to SC-17, "
Removal and Installation" .
17. Remove rear plate cover. Refer to EM-26, "
Removal and Installation" .
18. Disconnect Park/Neutral position (PNP) switch harness connector.
19. Remove harness brackets.
20. Separate heated oxygen sensor 2 wire harness, back-up lamp switch wire harness and Park/Neutral posi-
tion (PNP) switch wire harness from the transmission.
21. Set transmission jack to the transmission assembly.
CAUTION:
When setting transmission jack, be careful not to contact with the switch.
22. Remove rear engine mounting member. Refer to EM-101,
"Removal and Installation" .
23. Remove engine and transmission mounting bolts with power
tool.
24. Lower a suitable jack to the position where the back-up lamp
switch harness connector can be disconnect. Then disconnect
back-up lamp switch harness connector.
25. Remove transmission assembly from the vehicle.
CAUTION:
�Secure transmission assembly to a suitable jack while
removing it.
�The transmission assembly must not interfere with the wire harnesses and clutch hose.
�Do not hold control lever housing to prevent bushing of control lever housing from deformation
when moving transmission assembly.
26. Remove dynamic damper.
27. Remove CSC (Concentric Slave Cylinder) body and tube. Refer to CL-11, "
COMPONENTS" .
CAUTION:
If transmission assembly is removed from the vehicle, always replace CSC (Concentric Slave Cyl-
inder) body and CSC tube. Return CSC body insert to original position to remove transmission
assembly. Dust on clutch disc sliding parts may damage seal of CSC body and may cause clutch
fluid leakage.
INSTALLATION
Note the following, and install in the reverse order of removal.
: Vehicle front
PCIB1915E
SCIA1531E
TRANSMISSION ASSEMBLY
MT-31
D
E
F
G
H
I
J
K
L
MA
B
MT
Revision: 2006 November2007 350Z
Shift Control Components
1. Install adapter setting plate to the adapter plate and then fixing
in adapter setting plate using a vise.
CAUTION:
Do not directly secure the surface in a vise.
2. Remove baffle plate mounting bolts, and remove baffle plate
from the adapter plate.
3. Remove retaining pin using a pin punch, and remove striking
lever and striking rod.
4. Remove check ball plugs and then remove check ball springs
and check balls from the adapter plate.Tool number : ST22490000 ( — )
PCIB0254E
PCIB0154E
PCIB0414E
PCIB0143E
TRANSMISSION ASSEMBLY
MT-49
D
E
F
G
H
I
J
K
L
MA
B
MT
Revision: 2006 November2007 350Z
30. Install the adapter setting plate to adapter plate and then fixing
in adapter setting plate using a vise.
CAUTION:
Do not directly secure the surface in a vise.
31. Install magnet to adapter plate.
32. Install snap ring to mainshaft bearing.
CAUTION:
Do not reuse snap ring.
33. Install counter rear bearing onto the adapter plate using the drift.
CAUTION:
Replace counter rear bearing inner race, counter rear bear-
ing and counter rear bearing spacer as a set.
34. Apply recommended thread locking sealant to the end of the
bolts (first 3 to 4 threads), screw the bolts into the main shaft
bearing retainer, and tighten it to the specified torque. Refer to
MT-22, "
Case Components" .
�Use Genuine Medium Strength Thread Locking Sealant or
an equivalent. Refer to GI-45, "
RECOMMENDED CHEMI-
CAL PRODUCTS AND SEALANTS" .
CAUTION:
Remove old sealant and oil adhering to threads.
35. Install reverse coupling sleeve and reverse shifting inserts into the reverse synchronizer hub.
CAUTION:
�Do not reuse reverse coupling sleeve and reverse synchronizer hub.
�Replace reverse coupling sleeve and reverse synchronizer hub as a set.Tool number : ST22490000 ( — )
PCIB0254E
SCIA1691E
PCIB1375E
PCIB1238E