Page 30 of 62
MT-30
TRANSMISSION ASSEMBLY
Revision: 2006 November2007 350Z
18. Remove baffle plate mounting nut from the transmission case.
19. Remove snap ring from the main drive gear bearing, using snap
ring pliers.
20. Using a soft hammer to carefully tap main shaft and counter
shaft from the transmission case side, and then separate
adapter plate and transmission case.
21. Remove counter front bearing from the transmission case.
22. Remove oil gutter and breather tube from the transmission case.
23. Remove filler plug, drain plug, and gaskets from transmission
case.
24. Remove bracket mounting bolt and then remove bracket from
transmission case.
SCIA1443E
SCIA1532E
SCIA1687E
PCIB0436E
Page 31 of 62
TRANSMISSION ASSEMBLY
MT-31
D
E
F
G
H
I
J
K
L
MA
B
MT
Revision: 2006 November2007 350Z
Shift Control Components
1. Install adapter setting plate to the adapter plate and then fixing
in adapter setting plate using a vise.
CAUTION:
Do not directly secure the surface in a vise.
2. Remove baffle plate mounting bolts, and remove baffle plate
from the adapter plate.
3. Remove retaining pin using a pin punch, and remove striking
lever and striking rod.
4. Remove check ball plugs and then remove check ball springs
and check balls from the adapter plate.Tool number : ST22490000 ( — )
PCIB0254E
PCIB0154E
PCIB0414E
PCIB0143E
Page 32 of 62
MT-32
TRANSMISSION ASSEMBLY
Revision: 2006 November2007 350Z
5. Remove 3rd-4th control lever mounting bolts and then remove
3rd-4th control lever and shifter cap.
CAUTION:
Be careful not to lose shifter cap.
6. Remove check ball plug and then remove check ball spring and
check ball from the adapter plate.
7. Using a pin punch to knock out retaining pin, and then remove
3rd-4th fork rod bracket and 3rd-4th fork rod.
8. Using a pin punch to knock out retaining pin, and then remove
3rd-4th shift fork and 3rd-4th fork rod (reversal side).
9. Remove check balls and interlock pin from the adapter plate.
PCIB0235E
PCIB0144E
PCIB0145E
PCIB0601E
PCIB0146E
Page 33 of 62
TRANSMISSION ASSEMBLY
MT-33
D
E
F
G
H
I
J
K
L
MA
B
MT
Revision: 2006 November2007 350Z
10. Using a pin punch to knock out retaining pin, and then remove
1st-2nd shift fork and 1st-2nd fork rod.
11. Remove interlock plunger and interlock pin from the adapter
plate.
12. Using a pin punch to knock out retaining pin, and then remove
reverse shift fork and reverse fork rod.
13. Remove check balls from the adapter plate.
14. Remove 5th-6th control lever mounting bolts and then remove
5th-6th control lever from the adapter plate.
PCIB0602E
PCIB0147E
SCIA1447E
PCIB0148E
PCIB0238E
Page 34 of 62
MT-34
TRANSMISSION ASSEMBLY
Revision: 2006 November2007 350Z
15. Using a pin punch to knock out retaining pin, and then remove
5th-6th fork rod bracket and 5th-6th fork rod.
16. Using a pin punch to knock out retaining pin, and then remove
5th-6th fork rod (reversal side) and 5th-6th shift fork.
Gear Components
�Before disassembly, measure end play for each position. If the end play is outside the standards, disas-
semble and inspect.
–Main drive gear
–Main shaft
PCIB0239E
PCIB0412E
End play : 0 - 0.10 mm (0 - 0.004 in)
PCIB0484E
End play : 0 - 0.10 mm (0 - 0.004 in)
PCIB0225E
Page 35 of 62
TRANSMISSION ASSEMBLY
MT-35
D
E
F
G
H
I
J
K
L
MA
B
MT
Revision: 2006 November2007 350Z
–Counter shaft
1. After removing snap ring and reverse coupling snap ring, using
a puller to remove reverse main gear and reverse synchronizer
assembly.
2. Remove reverse main needle bearing.
3. After removing snap ring, using the puller to remove reverse
counter gear and counter rear bearing spacer.
4. Remove main shaft bearing retainer mounting bolts and then
remove main shaft bearing retainer.
5. Remove snap ring from the main shaft bearing.End play : 0 - 0.10 mm (0 - 0.004 in)
PCIB0226E
SCIA1683E
SCIA1682E
PCIB1238E
SCIA1691E
Page 36 of 62
MT-36
TRANSMISSION ASSEMBLY
Revision: 2006 November2007 350Z
6. Carefully tap main shaft with a plastic hammer and then remove
main shaft, main drive gear, and counter shaft from adapter
plate.
7. Remove main pilot bearing, pilot bearing spacer and 5th baulk
ring.
8. Remove counter rear bearing from the adapter plate.
9. Remove magnet from adapter plate.
10. Remove snap ring from the main drive gear using snap ring pli-
ers.
11. Set the suitable puller on the main drive gear and then using a
press to remove main drive gear bearing from the main drive
gear.
12. Using a press to remove the reverse main gear bushing, main
shaft bearing and 4th main gear.
13. Remove 3rd-4th main spacer.
SCIA1456E
PCIB0244E
SCIA1461E
SCIA1533E
SCIA1386E
Page 37 of 62

TRANSMISSION ASSEMBLY
MT-37
D
E
F
G
H
I
J
K
L
MA
B
MT
Revision: 2006 November2007 350Z
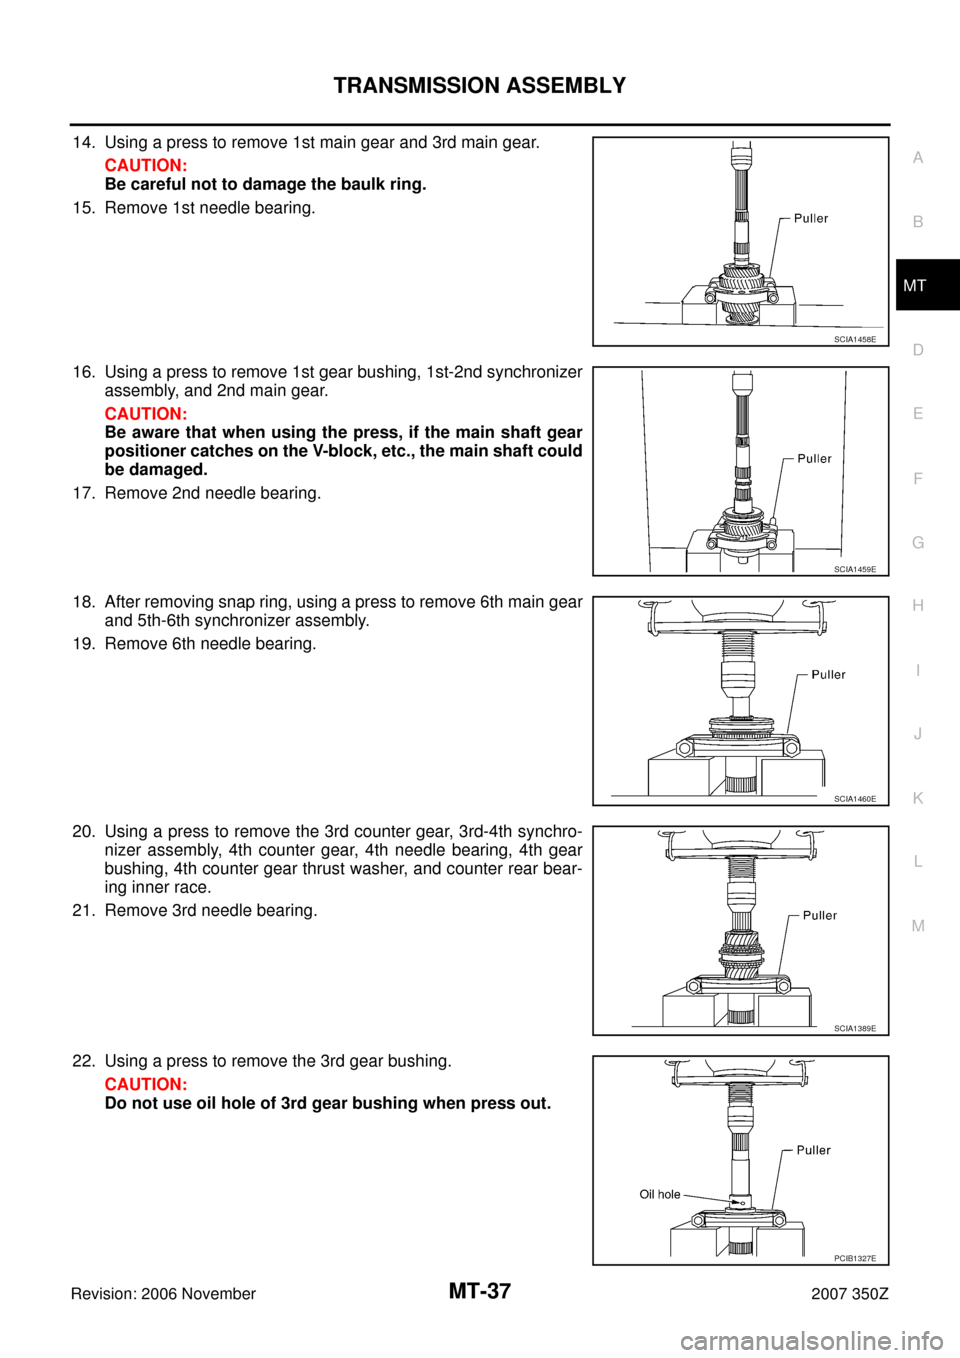
14. Using a press to remove 1st main gear and 3rd main gear.
CAUTION:
Be careful not to damage the baulk ring.
15. Remove 1st needle bearing.
16. Using a press to remove 1st gear bushing, 1st-2nd synchronizer
assembly, and 2nd main gear.
CAUTION:
Be aware that when using the press, if the main shaft gear
positioner catches on the V-block, etc., the main shaft could
be damaged.
17. Remove 2nd needle bearing.
18. After removing snap ring, using a press to remove 6th main gear
and 5th-6th synchronizer assembly.
19. Remove 6th needle bearing.
20. Using a press to remove the 3rd counter gear, 3rd-4th synchro-
nizer assembly, 4th counter gear, 4th needle bearing, 4th gear
bushing, 4th counter gear thrust washer, and counter rear bear-
ing inner race.
21. Remove 3rd needle bearing.
22. Using a press to remove the 3rd gear bushing.
CAUTION:
Do not use oil hole of 3rd gear bushing when press out.
SCIA1458E
SCIA1459E
SCIA1460E
SCIA1389E
PCIB1327E