Page 100 of 473
99 Safety and Security
Anti-theft systems
�
Press button1.
The indicator lamp2 in the switch
comes on briefly.
�
Exit and lock your vehicle with the
SmartKey or (vehicles with
KEYLESS-GO*) with the lock button on
each door handle or trunk lid.
The tow-away alarm remains disarmed un-
til you lock the vehicle again.
Canceling the alarm
To cancel the alarm:
With the SmartKey
�
Insert the SmartKey in the starter
switch.
or
�
Press theŒor‹button on the
SmartKey.With KEYLESS-GO*
�
Grasp an outside door handle.
The SmartKey with KEYLESS-GO must
be within 3 ft. (1 m) of the vehicle.
or
�
Press the KEYLESS-GO start/stop
button (
�page 40).
The SmartKey with KEYLESS-GO must
be inside the vehicle.
Page 112 of 473

111 Controls in detail
Locking and unlocking
Opening the doors from the inside
You can open a locked door from the in-
side. Open door only when conditions are
safe to do so.
1Locking knob
2Inside door handle�
Pull on inside door handle2 in direc-
tion of arrow.
If the door was locked, locking knob1
will move up.
Opening the trunk
You can open the trunk if the vehicle is sta-
tionary and the retractable hardtop is fully
opened or closed.
A minimum height clearance of
6.2 ft (1.88 m) is required to open the
trunk lid.
i
If you open a door, the side windows on that
side of the vehicle will lower slightly. The win-
dows close again when you close the door.
i
If the vehicle has previously been locked
with the SmartKey or KEYLESS-GO*, opening a
door from the inside will trigger the anti-theft
alarm system.
To cancel the alarm, do one of the following:
�
Press buttonŒ or‹on the
SmartKey.
�
Insert the SmartKey in the starter switch.
Vehicles with KEYLESS-GO*:
�
Grasp an outside door handle.
The SmartKey with KEYLESS-GO must be
within 3 ft. (1 m) of the vehicle.
�
Press the KEYLESS-GO* start/stop button
(�page 40).
The SmartKey with KEYLESS-GO must be in-
side the vehicle.
Warning!
G
Only drive with the trunk closed as, among
other dangers such as blocked visibility, ex-
haust fumes may enter the vehicle interior.i
If the trunk lid does not open, the trunk lid is
still locked separately (
�page 117).
i
To facilitate trunk loading and unloading
when the hardtop is retracted, you can raise the
hardtop from its storage position in the trunk us-
ing the load assist feature (
�page 241). You
may also unhook the luggage cover.
Remember to re-secure the luggage cover after
loading/unloading the trunk. Otherwise you will
not be able to lower the retractable hardtop.
Page 131 of 473

130 Controls in detailLightingDaytime running lamp mode�
Turn the exterior lamp switch to
positionM orU.
When the engine is running, the low
beam headlamps are switched on auto-
matically.
In low ambient light conditions, the fol-
lowing lamps will switch on additional-
ly:�
Tail lamps
�
Side marker lamps
�
Parking lamps
�
License plate lampsCanada only:
The daytime running lamp mode is manda-
tory and therefore in a constant mode.
When the engine is running and you shift
from a driving position to positionN orP,
the low beam headlamps will switch off
with a three-minute delay.
When the engine is running and you
�
turn the exterior lamp switch to posi-
tion C, the parking lamps switch on
additionally
�
turn the exterior lamp switch to posi-
tion B, the manual headlamp mode
has priority over the daytime running
lamp mode
The corresponding exterior lamps
switch on (
�page 128).USA only:
By default, the daytime running lamp mode
is deactivated. Activate the daytime run-
ning lamp mode using the control system,
see “Setting daytime running lamp mode
(USA only)” (
�page 159).
When the engine is running and you turn
the exterior lamp switch to positionC
or B, the manual headlamp mode has
priority over the daytime running lamp
mode.
The corresponding exterior lamps switch
on (
�page 128).
Locator lighting and night security
illumination
Locator lighting and night security illumi-
nation are described in the control system
section, see “Setting locator lighting”
(
�page 160) and “Setting night security il-
lumination” (
�page 160).
Page 156 of 473
155 Controls in detail
Control system
The table below shows what settings can
be changed within the various menus. De-
tailed instructions on making individual
settings can be found on the following pag-
es.Instrument cluster
(�page 156)
Time
(�page 157)
Lighting
(�page 159)
Vehicle
(�page 162)
Convenience
(�page 162)
Selecting standard
display
Synchronizing time with
head unit
Setting daytime running
lamp mode (USA only)
Setting automatic locking
Activating
easy-entry/exit feature
Selecting speedometer
display mode
Setting the time (hours)
Setting locator lighting
Selecting language
Setting the time
(minutes)
Setting night security
illuminationSetting interior lighting
delayed switch-off
Page 160 of 473

159 Controls in detail
Control system
Lighting submenu
Access the
Lighting
submenu via the
Settings
menu. Use the
Lighting
sub-
menu to change the lamp and lighting set-
tings on your vehicle. The following
functions are available:Setting daytime running lamp mode
(USA only)
�
Move the selection marker with button
æ or ç to the
Lighting
sub-
menu.
�
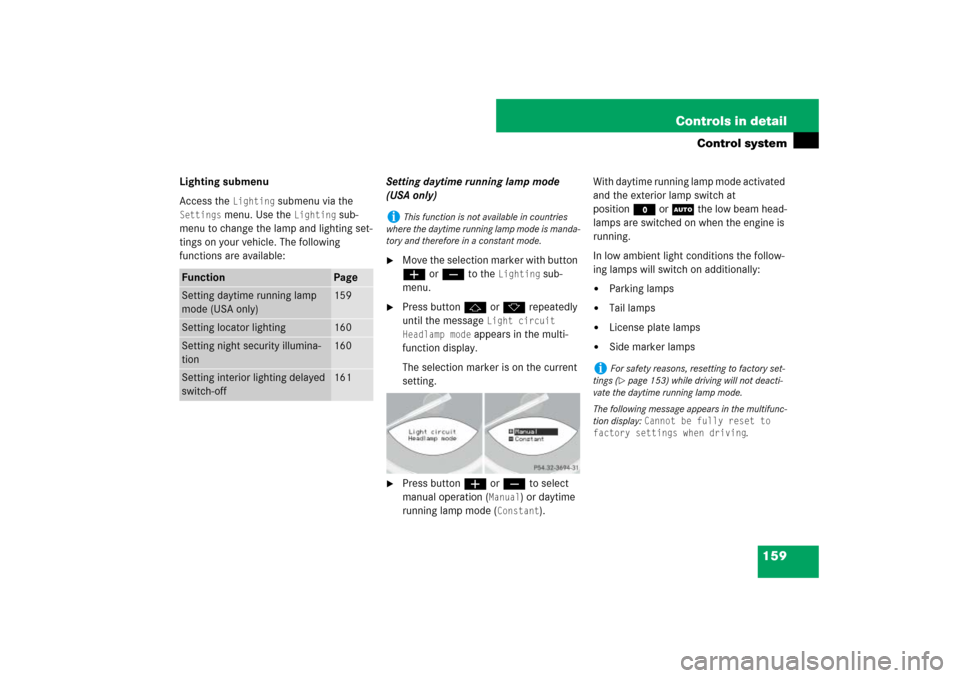
Press button j or k repeatedly
until the message
Light circuit
Headlamp mode
appears in the multi-
function display.
The selection marker is on the current
setting.
�
Press button æ or ç to select
manual operation (
Manual
) or daytime
running lamp mode (
Constant
).With daytime running lamp mode activated
and the exterior lamp switch at
positionM or U the low beam head-
lamps are switched on when the engine is
running.
In low ambient light conditions the follow-
ing lamps will switch on additionally:
�
Parking lamps
�
Tail lamps
�
License plate lamps
�
Side marker lamps
Function
Page
Setting daytime running lamp
mode (USA only)
159
Setting locator lighting
160
Setting night security illumina-
tion
160
Setting interior lighting delayed
switch-off
161
i
This function is not available in countries
where the daytime running lamp mode is manda-
tory and therefore in a constant mode.
i
For safety reasons, resetting to factory set-
tings (�page 153) while driving will not deacti-
vate the daytime running lamp mode.
The following message appears in the multifunc-
tion display:
Cannot be fully reset to
factory settings when driving
.
Page 161 of 473

160 Controls in detailControl systemSetting locator lighting
With the locator lighting feature activated
and the exterior lamp switch in position
U, the following lamps will switch on
during darkness when the vehicle is un-
locked with the SmartKey: �
Parking lamps
�
Tail lamps
�
License plate lamps
�
Front fog lamps
�
Side marker lamps
The locator lighting switches off when the
driver’s door is opened.
If you do not open a door after unlocking
the vehicle with the SmartKey, the lamps
will switch off automatically after approxi-
mately 40 seconds.
�
Move the selection marker with button
æ or ç to the
Lighting
sub-
menu.
�
Press button j or k repeatedly
until the message
Locator lighting
appears in the multifunction display.
The selection marker is on the current
setting.
�
Press button æ or ç to switch
the locator lighting feature to
On.
�
Turn the exterior lamp switch to posi-
tion U when exiting the vehicle.
The locator lighting feature is
activated.Setting night security illumination
(Exterior lamps delayed switch-off fea-
ture)
Use this function to set whether you would
like the exterior lamps to remain on for 15
seconds during darkness after exiting the
vehicle and closing the doors.
With the delayed switch-off feature activat-
ed and the exterior lamp switch in position
U before the engine is turned off, the
following lamps will switch on when the en-
gine is turned off:
�
Parking lamps
�
Tail lamps
�
License plate lamps
�
Side marker lamps
�
Front fog lamps
Page 171 of 473

170 Controls in detailAutomatic transmissionGear selector lever position
Effect
ì
Park position
Gear selector lever position
when the vehicle is parked. Place
gear selector lever in positionP
only when vehicle is stopped.
The park position is not intended
to serve as a brake when the
vehicle is parked. Rather, the
driver should always set the
parking brake in addition to
placing the gear selector lever in
positionP to secure the vehicle.
EffectThe SmartKey can only be
removed from the starter switch
with the gear selector lever in
positionP. With the SmartKey
removed, the gear selector lever
is locked in positionP.
í
Reverse gear
Place gear selector lever in
positionR only when vehicle is
stopped.
Effect
ë
Neutral
No power is transmitted from the
engine to the drive axle. When
the brakes are released, the
vehicle can be moved freely
(pushed or towed).
To avoid damage to the trans-
mission, never engageN while
driving.
If the ESP
® is deactivated or
malfunctioning:
Move gear selector lever toN
only if the vehicle is in danger of
skidding, e.g. on icy roads.
ê
Drive
The transmission shifts
automatically. All forward gears
are available.
!
Coasting the vehicle, or driving for any other
reason with gear selector lever inN can result in
transmission damage that is not covered by the
Mercedes-Benz Limited Warranty.
Page 205 of 473

204 Controls in detailRetractable hardtop�
The hardtop drive system has shut it-
self down. For safety reasons, no more
than five consecutive attempts may be
made to raise or lower the hardtop.�
After about 10 minutes you may
again attempt to open or close the
retractable hardtop.
�
If the retractable hardtop still does
open, close, or lock properly, have
the retractable hardtop system
checked at an authorized
Mercedes-Benz Center.
�
There is a malfunction in the retract-
able hardtop system.�
Notify an authorized
Mercedes-Benz Center.Wind screen
The wind screen deflects drafts away from
the driver and passenger when the retract-
able hardtop is lowered. It is stored in the
trunk.
Installing
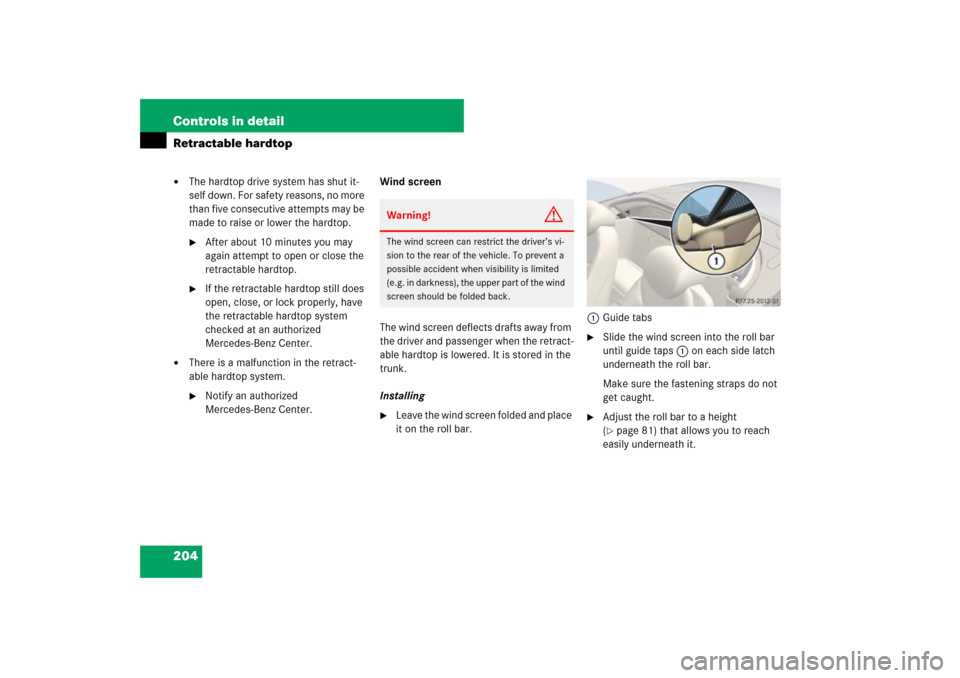
�
Leave the wind screen folded and place
it on the roll bar.1Guide tabs
�
Slide the wind screen into the roll bar
until guide taps 1 on each side latch
underneath the roll bar.
Make sure the fastening straps do not
get caught.
�
Adjust the roll bar to a height
(�page 81) that allows you to reach
easily underneath it.
Warning!
G
The wind screen can restrict the driver’s vi-
sion to the rear of the vehicle. To prevent a
possible accident when visibility is limited
(e.g. in darkness), the upper part of the wind
screen should be folded back.