Page 218 of 473
217 Controls in detail
Driving systems
Distronic menu in the control system
Use the
Distronic
menu to display the
current settings for your Distronic system.
The information shown in the multifunction
display depends on whether the Distronic
system is activated (�page 218) or deac-
tivated (
�page 220).
�
Press button è or ÿ repeatedly
until you see one of the following dis-
plays in the multifunction display.Distronic deactivated
When Distronic is deactivated, you will see
the standard display in the left multifunc-
tion display.
1Preceding vehicle, if detected
2Actual distance to preceding vehicle
3Preset distance threshold to preceding
vehicle
4Your vehicle
5Symbol for activated distance warning
functionDistronic activated
When Distronic is activated, the
DTR
sym-
bol and the set speed appear in the left
multifunction display.
1Symbol for activated Distronic
2Set speed
i
For information on the distance warning
function*, see “Distance warning function*”
(
�page 224).
Page 220 of 473

219 Controls in detail
Driving systems
Setting the current speed�
Accelerate or decelerate to the desired
speed.
�
Briefly lift the cruise control lever in
direction of arrow1 or depress in
direction of arrow2 (
�page 218).
Distronic is activated and the current
speed is set.
�
Remove your foot from the accelerator
pedal.Setting a higher speed
�
Briefly tip the cruise control lever in
direction of arrow1 (
�page 218) to
increase the vehicle speed in incre-
ments of 5 mph (Canada: 10 km/h).
The new speed is set.Setting a lower speed
�
Briefly tip the cruise control lever in di-
rection of arrow2 (
�page 218) to de-
crease the vehicle speed in increments
of 5 mph (Canada: 10 km/h).
The new speed is set.
Fine adjustment in 1 mph
(Canada: 1 km/h) increments
Faster
�
Briefly pull the cruise control lever in
direction of arrow4 (
�page 218).
i
If you do not take your foot off of the accel-
erator but continue to accelerate past the set
speed, the following message will appear in the
multifunction display:
DTR override
.
The distance to slower moving vehicles in front
of you will not be set. Your vehicle speed will
then be determined only by the accelerator
pedal position.
i
Depressing the accelerator pedal does not
deactivate Distronic. After brief acceleration
(e.g. for passing), the cruise control will resume
the last speed set.
i
When you use the cruise control lever to de-
celerate, the brakes will be applied to support
deceleration.
In addition, the transmission will automatically
downshift on long downhill grades.
Page 221 of 473
�
Briefly pull the cruise control lever in
direction of arrow4 (
�page 218).
Distronic resumes the last store")
220 Controls in detailDriving systemsSetting to last stored speed
(“Resume” function)�
Briefly pull the cruise control lever in
direction of arrow4 (
�page 218).
Distronic resumes the last stored
speed or, if no speed is stored, it will
set and store the current speed.
�
Remove your foot from the accelerator
pedal.Deactivating Distronic
There are several ways to deactivate the
Distronic system:
�
Step on the brake pedal.
or
�
Briefly push the cruise control lever in
direction of arrow3 (
�page 218).
Distronic will be deactivated. The last set
speed will be stored into memory.
The following message appears in the mul-
tifunction display for approximately
5 seconds:
DTR off
Warning!
G
The set speed stored in memory should only
be set again if prevailing road conditions
permit. Possible acceleration or decelera-
tion differences arising from returning to the
preset speed could caused an accident
and/or serious injury to you and others.
i
The last stored set speed is deleted when
the engine is turned off.
i
Distronic deactivates automatically when
�
you depress the parking brake pedal
�
the vehicle speed is below
20 mph (30 km/h) (
�page 218)
�
the ESP
® is in operation or switched off with
the ESP® switch (
�page 91)
�
you move the gear selector lever into
positionN
An acoustic warning sounds and the mes-
sage
DTR off
appears in the multifunction
display for approximately 5 seconds.
Warning!
G
Distronic switches off and releases the
brakes when the vehicle decelerates below
the minimum speed of 20 mph (30 km/h)
by operation of the system. At that time the
driver must apply the brakes in order to
reduce vehicle speed further or bring it to a
stop.
Page 222 of 473

221 Controls in detail
Driving systems
Setting the following distance in
Distronic
You can set the specified following dis-
tance for Distronic by varying the time set-
ting between 1.0 and 2.0 seconds. Using
this time setting and the current speed of
your vehicle, Distronic calculates and sets
the required following distance to the pre-
ceding vehicle. The set distance will ap-
pear in the right multifunction display
(�page 217).
The distance setting thumbwheel for the
time setting is located on the lower section
of the center console.1Thumbwheel for setting following
distanceIncreasing distance
Increasing the distance setting tells
Distronic to maintain a greater following
distance to the preceding vehicle.
�
Turn thumbwheel1 towards ¯.
Decreasing distance
Decreasing the distance setting tells
Distronic to maintain a shorter following
distance to the preceding ahead.
�
Turn thumbwheel1 towards ®.
!
Moving the gear selector lever to positionN
while driving cancels the Distronic. However, the
gear selector lever should not be moved to
positionN while driving except to coast when
the vehicle is in danger of skidding (e.g. on icy
roads).
i
Depressing the accelerator pedal does not
deactivate the Distronic. After brief acceleration
(e.g. for passing), the Distronic will resume the
last speed set.
Warning!
G
It is up to the driver to exercise discretion to
select the appropriate setting given road
conditions, traffic, driver’s preferred driving
style and applicable laws and driving recom-
mendations for safe following distance.
Page 223 of 473

222 Controls in detailDriving systemsDriving with Distronic
This section describes a number of driving
situations where special precaution is re-
quired on the part of the driver. Be pre-
pared to brake in such situations. This will
deactivate the Distronic system.The most likely cause for a malfunctioning
system is a dirty sensor (located behind
the hood grille), especially at times of snow
and ice or heavy rain. In such a case,
Distronic will switch off, and the message
Distronic Currently unavailable. See
Oper. Manual
appears in the multifunction
display.
For cleaning and care of the Distronic sen-
sor, see “Cleaning the Distronic* system
sensor cover” (�page 325).
Warning!
G
Distronic works to maintain the speed se-
lected by the driver unless a moving obsta-
cle proceeding directly ahead of it in the
same travel direction is detected (e.g. fol-
lowing another vehicle ahead of you at your
set distance. This means that:�
Your vehicle can pass another vehicle
after you have changed lanes.
�
While in a sharp turn or if the preceding
vehicle is in a sharp turn, Distronic could
lose sight of the preceding vehicle. Your
vehicle could then accelerate to the pre-
viously set speed.
Distronic regulates only the distance be-
tween your vehicle and those directly ahead
of it, but does not register stationary objects
in the road, e.g.: �
a stopped vehicle in a traffic jam
�
a disabled vehicle
�
an oncoming vehicle
The driver must always be alert, observe all
traffic and intercede as required by means
of steering or braking the vehicle.
Warning!
G
Distronic should not be used in snowy or icy
road conditions.
i
If the message
Distronic available
again
appears in the multifunction display dur-
ing driving, the dirt (e.g. slush) has dissolved.
Distronic is available again if you reactivate it
(
�page 218).
Page 226 of 473
225 Controls in detail
Driving systems
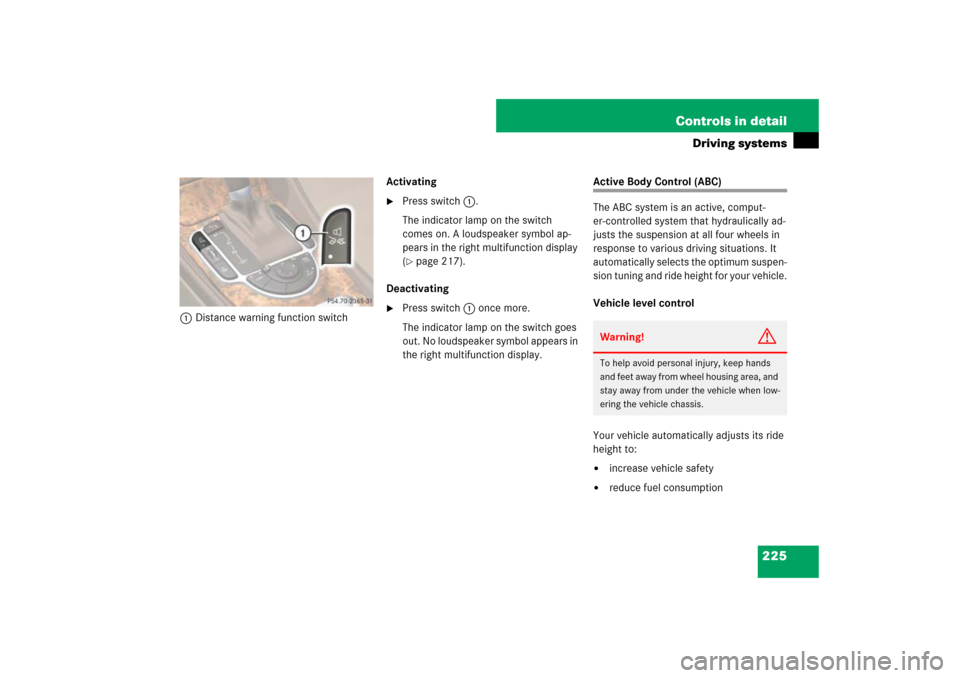
1Distance warning function switchActivating
�
Press switch1.
The indicator lamp on the switch
comes on. A loudspeaker symbol ap-
pears in the right multifunction display
(�page 217).
Deactivating
�
Press switch1 once more.
The indicator lamp on the switch goes
out. No loudspeaker symbol appears in
the right multifunction display.
Active Body Control (ABC)
The ABC system is an active, comput-
er-controlled system that hydraulically ad-
justs the suspension at all four wheels in
response to various driving situations. It
automatically selects the optimum suspen-
sion tuning and ride height for your vehicle.
Vehicle level control
Your vehicle automatically adjusts its ride
height to:�
increase vehicle safety
�
reduce fuel consumptionWarning!
G
To help avoid personal injury, keep hands
and feet away from wheel housing area, and
stay away from under the vehicle when low-
ering the vehicle chassis.
Page 227 of 473

226 Controls in detailDriving systemsThe vehicle chassis ride height is raised or
lowered according to the selected level
setting and to the vehicle speed:�
With increasing speed, ride height is re-
duced by up to approximately 0.5 inch
(12 mm).
�
With decreasing speed, the ride height
is again raised to the selected vehicle
level.The following vehicle level settings can be
selected when the vehicle is stationary:
Select the level 1 and level 2 settings only
when required by current driving condi-
tions. Otherwise:
�
Fuel consumption may increase.
�
Handling may be impaired.The ABC vehicle level control button with
the indicator lamps is located in the lower
section of the center console.
1Indicator lamp 1
2Indicator lamp 2
3ABC vehicle level control button
i
These height adjustments are so small that
you may not notice any change.
Vehicle
level
Use for
Indicator
lamps
Normal
For driving on nor-
mal roads.
Both
lamps off
Level 1
For driving on
rough roads or with
snow chains
(�page 318).
One
lamp on
Level 2
For driving on very
rough road surface
conditions.
Both
lamps on
i
The selected vehicle level setting remains
stored in memory, even if the engine is turned off
and restarted.
Page 228 of 473
.
�
Briefly press button3 to change from
one level setting to the next.�
The normal level is selected if both
indicator lamps are")
227 Controls in detail
Driving systems
�
Start the engine (
�page 52).
�
Briefly press button3 to change from
one level setting to the next.�
The normal level is selected if both
indicator lamps are off.
�
At level 1, indicator lamp1 is on.
�
At level 2, both indicator lamps are
on.
When the vehicle is at level 2, pressing
the button will return the vehicle to nor-
mal level.Suspension tuning
The suspension tuning is set according to:
�
Your driving style
�
Road surface conditions
�
The vehicle loading
�
Your choice of suspension style
You can set the following suspension
styles:
�
Regular (Comfort)
�
SportyThe ABC suspension tuning button with the
indicator lamp is located in the lower sec-
tion of the center console.
1ABC suspension tuning button
2Indicator lamp
�
Start the engine (
�page 52).
i
Pressing the button twice in quick succes-
sion will cause the vehicle to immediately raise
or lower to the new vehicle level as selected.
i
The selected setting is stored, even if the en-
gine is turned off.