Page 78 of 242
76 Audio
MP3 CD operation
If the MP3 tracks are organized into folders
on the CD, you can select a folder from the
COMAND control unit.
The following options are available:
�Selecting via the MP3 main menu
�Selecting via the folder listSelecting via the MP3 main menu
Only one folder can be viewed at a time.
1Current folder
�Activate the MP3-CD main menu.
(
�page 75).
�Push the joystick to H or h to
select a folder.
�Wait approx. 3 seconds.
The COMAND changes the folder and
loads the data from the new folder. It
may take a while to load the data, de-
pending on the number of folders and
tracks.
Playback of the first track of the
selected folder will begin.
The track list displays the tracks of the
selected folder.
Selecting a folder
i
The folder list only contains folders in
which MP3 or audio CD tracks are
stored.
After inserting a MP3 CD, the COMAND
loads the data. After loading, you can
use this function.
Page 79 of 242
77 Audio
MP3 CD operation
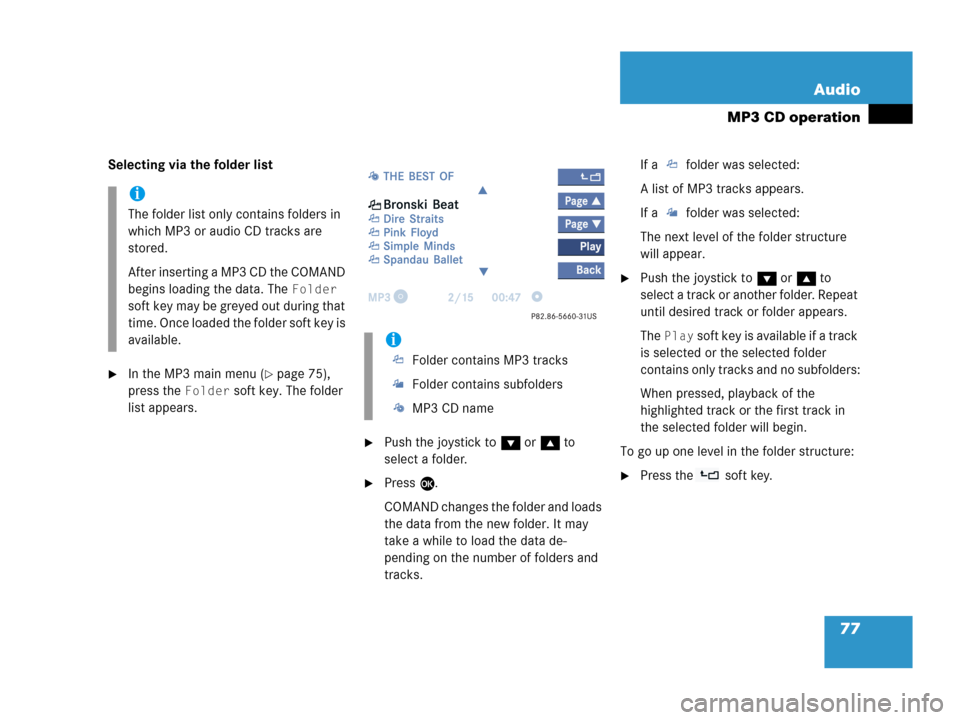
Selecting via the folder list
�In the MP3 main menu (�page 75),
press the
Folder soft key. The folder
list appears.
�Push the joystick to G or g to
select a folder.
�Press E.
COMAND changes the folder and loads
the data from the new folder. It may
take a while to load the data de-
pending on the number of folders and
tracks.If a folder was selected:
A list of MP3 tracks appears.
If a folder was selected:
The next level of the folder structure
will appear.
�Push the joystick to G or g to
select a track or another folder. Repeat
until desired track or folder appears.
The
Play soft key is available if a track
is selected or the selected folder
contains only tracks and no subfolders:
When pressed, playback of the
highlighted track or the first track in
the selected folder will begin.
To go up one level in the folder structure:
�Press the soft key.
i
The folder list only contains folders in
which MP3 or audio CD tracks are
stored.
After inserting a MP3 CD the COMAND
begins loading the data. The
Folder
soft key may be greyed out during that
time. Once loaded the folder soft key is
available.
i
Folder contains MP3 tracks
Folder contains subfolders
MP3 CD name
Page 101 of 242
99 Rear Audio/Video*
Rear Seat Entertainment (RSE) operation*
An MP3 CD is loaded in the RSE CD/DVD
player and it is switched on.
Loading a CD (
�page 93).
Switching on (
�page 92).
�Set the L/R monitor switch on the
remote to the side you wish to control.
�Press on the remote.
The MP3 CD menu will appear on the
display. Playback begins with track 1.
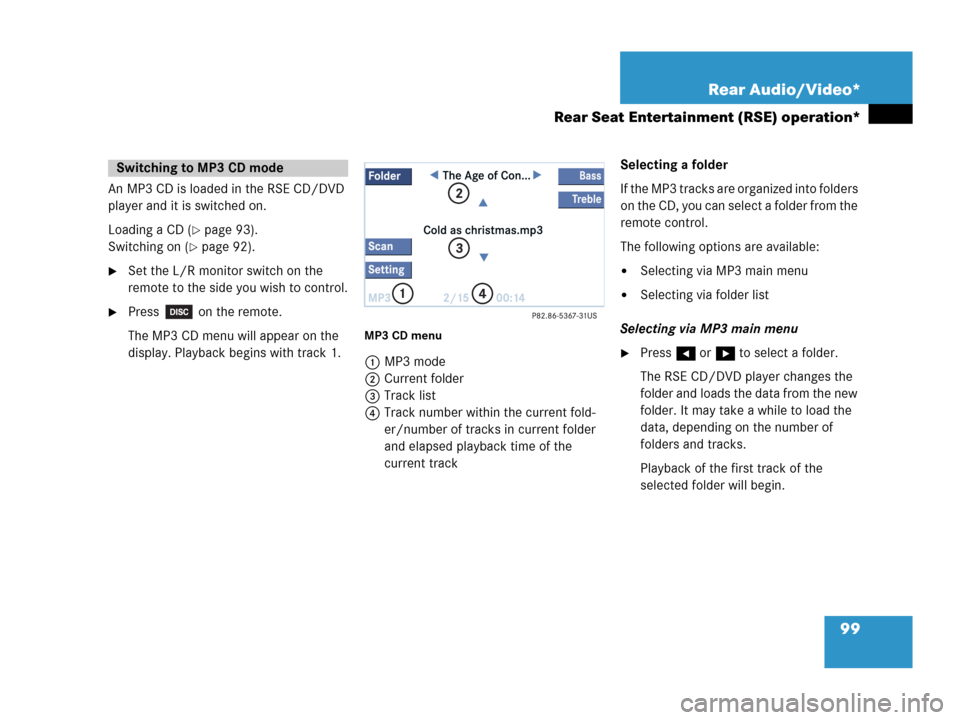
MP3 CD menu
1MP3 mode
2Current folder
3Track list
4Track number within the current fold-
er/number of tracks in current folder
and elapsed playback time of the
current trackSelecting a folder
If the MP3 tracks are organized into folders
on the CD, you can select a folder from the
remote control.
The following options are available:
�Selecting via MP3 main menu
�Selecting via folder list
Selecting via MP3 main menu
�Press H or h to select a folder.
The RSE CD/DVD player changes the
folder and loads the data from the new
folder. It may take a while to load the
data, depending on the number of
folders and tracks.
Playback of the first track of the
selected folder will begin.
Switching to MP3 CD mode
Page 111 of 242
109 Rear Audio/Video*
Rear Seat Entertainment (RSE) operation*
Soft key functions
�4:3, 16:9 or Zoom soft key:
You can change the aspect ratio.
�Full scn. soft key:
The soft key display disappears.
�Tone soft key:
Brings you to the tone menu, where you
can set Bass and Treble (
�page 107).
�Bright., Contr. and Color soft
key
s:
Allow you to adjust brightness, cont-
rast and color (
�page 107).
Changing the aspect ratio
You can manually change the aspect ratio
during playback. To do this, use the top left
soft key. The soft key changes each time
you press the thumb wheel. Possible aspect ratios are:
4:3, 16:9 and
Zoom.
The soft key indicates the aspect ratio to
which you will change when you press the
thumb wheel.
�Turn the thumb wheel to highlight the
top left soft key and press the thumb
wheel in succession until the desired
aspect ratio is set.
Displaying full screen
�Turn the thumb wheel to highlight the
Full scn. soft key and press to se-
lect.
The soft keys disappear. The full screen
will appear.You can set the settings for both monitors
separately. To switch between monitors
(
�page 90).
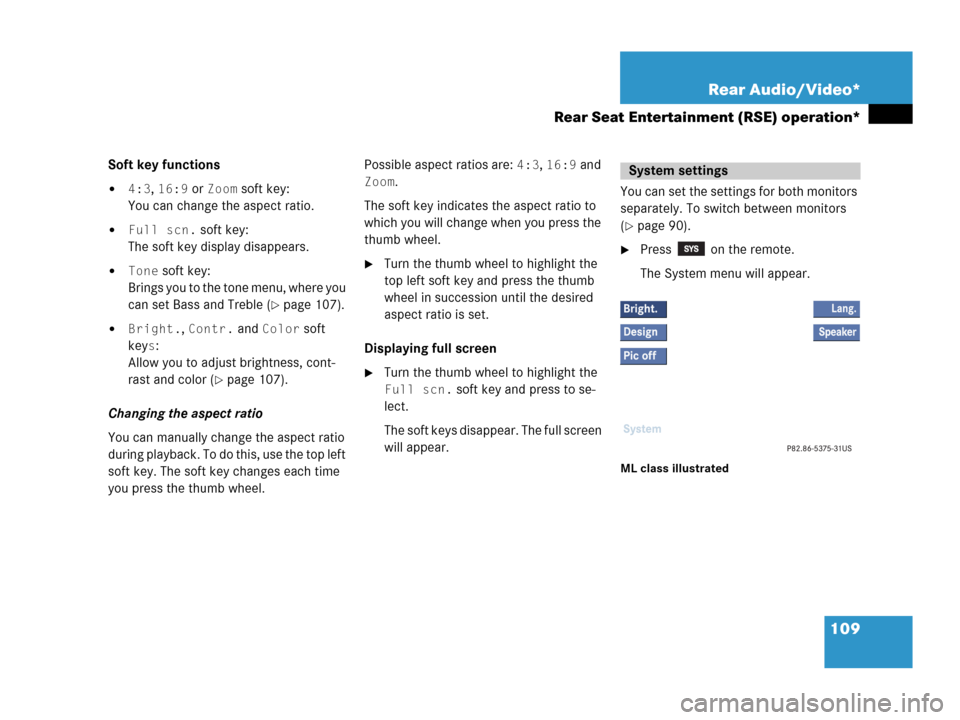
�Press on the remote.
The System menu will appear.
ML class illustrated
System settings
Page 112 of 242
110 Rear Audio/Video*
Rear Seat Entertainment (RSE) operation*
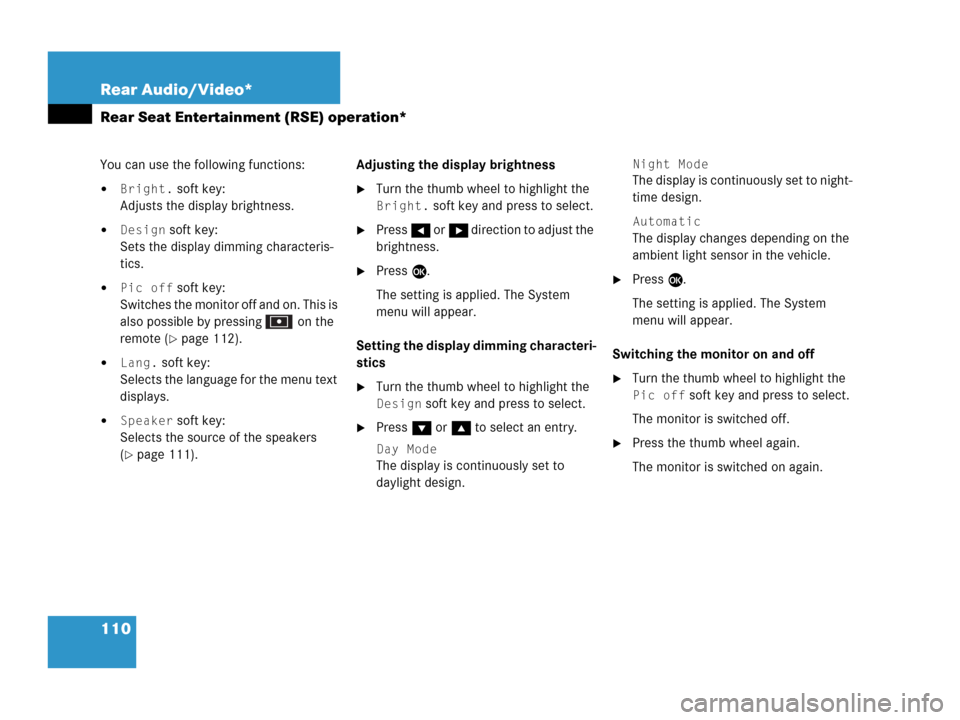
You can use the following functions:
�Bright. soft key:
Adjusts the display brightness.
�Design soft key:
Sets the display dimming characteris-
tics.
�Pic off soft key:
Switches the monitor off and on. This is
also possible by pressing on the
remote (
�page 112).
�Lang. soft key:
Selects the language for the menu text
displays.
�Speaker soft key:
Selects the source of the speakers
(
�page 111).Adjusting the display brightness
�Turn the thumb wheel to highlight the
Bright. soft key and press to select.
�Press H or h direction to adjust the
brightness.
�Press E.
The setting is applied. The System
menu will appear.
Setting the display dimming characteri-
stics
�Turn the thumb wheel to highlight the
Design soft key and press to select.
�Press G or g to select an entry.
Day Mode
The display is continuously set to
daylight design.
Night Mode
The display is continuously set to night-
time design.
Automatic
The display changes depending on the
ambient light sensor in the vehicle.
�Press E.
The setting is applied. The System
menu will appear.
Switching the monitor on and off
�Turn the thumb wheel to highlight the
Pic off soft key and press to select.
The monitor is switched off.
�Press the thumb wheel again.
The monitor is switched on again.
Page 118 of 242
116 Satellite radio*
Important notes
� Important notes
In chapter “Satellite radio”, you will find
detailed information regarding
�selecting a station and a program cate-
gory
�memory functions
�sound adjustments
If you have not done so already, please fa-
miliarize yourself with these functions by
reading chapter “At a glance”.
i
Optional satellite radio equipment and a
subscription to satellite radio service
provider are required for the satellite ra-
dio operation described here.
i
Note that categories and channels
shown in illustrations are dependent on
programming content delivered by the
service provider. Programming content
is subject to change. Therefore, channel
and categories shown in illustrations
and descriptions contained in this ma-
nual may differ from the channels and
categories delivered by the service pro-
vider.
Satellite radio service may be unavai-
lable or interrupted from time to time
for a variety of reasons, such as envi-
ronmental or topographic conditions
and other things we can’t control. Ser-
vice might also not be available in cer-
tain places (e.g., in tunnels, parking
garages, or within or next to buildings)
or near other technologies.
i
Sirius Satellite Radio provides approxi-
mately 100 channels, so called
streams, of digital-quality radio, among
others music, sports, news, and enter-
tainment commercial-free.
Sirius Satellite Radio uses a fleet of
high-power satellites to broadcast 24
hours per day, coast-to-coast, in the
contiguous U.S.
This diverse, satellite-delivered pro-
gramming is available for a monthly
subscription fee. For more information,
call the Sirius Service Center
(
�page 117) or contact
www.siriusradio.com.
Page 147 of 242
145 Telephone*
Telephone operation
You can select the following functions:
�Changing the phone book display at
the COMAND
�Selecting a phone book entry and
dialing the number (
�page 145)
Changing the phone book display
�Open the phone book (�page 144).
�Press the 123 soft key.
The display changes to numbers. The
status bar displays the name of the
marked entry.
or
�Press the ABC soft key.
The display changes to names. The
status bar displays the number of the
marked entry.Selecting a phone book entry and dia-
ling the number
�Open the phone book (�page 144).
The list of phone book entries with
names starting with a certain letter is
displayed.
Changing the initial letters
�Push the joystick to H or h one or
several times.
With every push of the button the
display changes to the next possible
letter. At the end of the letter list
follows the category
Others.Category
Others:
Here, all entries without names or with
names starting with a special character
(e.g. * or #) are put together.
Selecting an entry
�Change the initial letter if required.
�Push the joystick to G or g to
select a list entry.
�Press the Detail soft key to see all
information about the entry.
i
If you hold one of the buttons, scrolling
is accelerated.
Page 151 of 242
149 Navigation*
Important notes
COMAND calculates the route with the
help of data that is stored on the navigati-
on DVD.
Only use Mercedes-Benz navigation DVDs.
Using other navigation DVDs or CDs will
cause malfunctions and/or damage.
Because of changes in local traffic patterns
(e.g. road works) and/or incomplete data,
errors in calculation may occur.
As a result, the recommended route may
deviate from the ideal route. The data
stored on the DVD only reflects local con-
ditions at the time of DVD production. DVD
maps do not cover all areas nor all routes
within an area. Loading/ejecting a DVD
DVDs are loaded and ejected at the DVD
Navigation slot. The DVD Navigation slot is
located behind the display unit.
�Open the display unit to get access to
the DVD Navigation slot as described in
“Starting an update” (
�page 211).
Navigation DVD!
GPS (Global Positioning System) sig-
nals received make it possible to deter-
mine the current vehicle position.
Deviations from the actual position
may occur
�if the reception of GPS signals is
disturbed e.g. in parking garages
and tunnels
�if road conditions are bad
�depending on the vehicle’s conditi-
on
i
There are two l buttons. One is on
the display unit. The other is located
left of the DVD NAVIGATION slot
behind the display (
�page 210).