Page 251 of 350

541
Driving tips
1
2
3
4
5
6
7
8
9
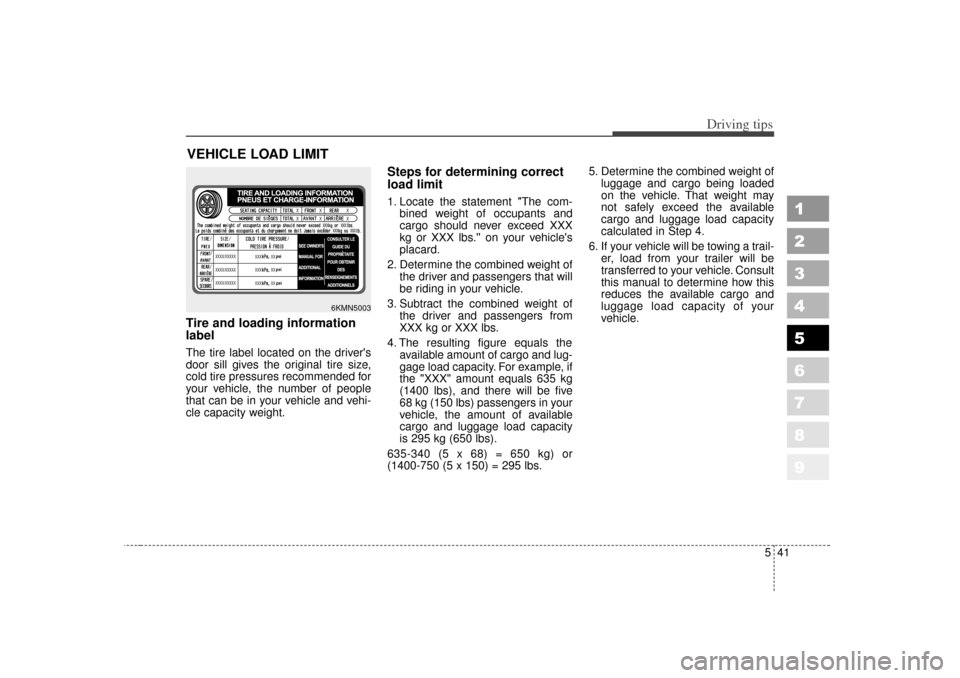
VEHICLE LOAD LIMITTire and loading information
labelThe tire label located on the driver's
door sill gives the original tire size,
cold tire pressures recommended for
your vehicle, the number of people
that can be in your vehicle and vehi-
cle capacity weight.
Steps for determining correct
load limit1. Locate the statement "The com-bined weight of occupants and
cargo should never exceed XXX
kg or XXX lbs.'' on your vehicle's
placard.
2. Determine the combined weight of the driver and passengers that will
be riding in your vehicle.
3. Subtract the combined weight of the driver and passengers from
XXX kg or XXX lbs.
4. The resulting figure equals the available amount of cargo and lug-
gage load capacity. For example, if
the "XXX" amount equals 635 kg
(1400 lbs), and there will be five
68 kg (150 lbs) passengers in your
vehicle, the amount of available
cargo and luggage load capacity
is 295 kg (650 lbs).
635-340 (5 x 68) = 650 kg) or
(1400-750 (5 x 150) = 295 lbs. 5. Determine the combined weight of
luggage and cargo being loaded
on the vehicle. That weight may
not safely exceed the available
cargo and luggage load capacity
calculated in Step 4.
6. If your vehicle will be towing a trail- er, load from your trailer will be
transferred to your vehicle. Consult
this manual to determine how this
reduces the available cargo and
luggage load capacity of your
vehicle.
/
/
/ / /
/
psi
psi
psi
XXXX/XXXXX XXX XX
XXXX/XXXXX XXX XX
XXXX/XXXXX XXX XX
XX X
XX X
6KMN5003
Page 253 of 350

543
Driving tips
1
2
3
4
5
6
7
8
9
Refer to your vehicle's tire and load-
ing information label for specific
information about your vehicle's
capacity weight and seating posi-
tions. The combined weight of the
driver, passengers and cargo should
never exceed your vehicle's capacity
weight.
Compliance labelThe compliance label is located on
the driver's door sill.
The label shows the size of your orig-
inal tires and the inflation pressures
needed to obtain the gross weight
capacity of your vehicle. This is
called the GVWR (Gross Vehicle
Weight Rating). The GVWR includes
the weight of the vehicle, all occu-
pants, fuel and cargo.
This label also tells you the maxi-
mum weights that can be supported
by the front and rear axles, called
Gross Axle Weight Rating (GAWR).
To find out the actual loads on your
front and rear axles, you need to go
to a weigh station and weigh your
vehicle. Your dealer can help you with
this. Be sure to spread out your load
equally on both sides of the center-
line.
WARNING -
Over loading
Never exceed the GVWR for your vehicle, or the GAWR for
either the front or rear axle.
Do not load your vehicle any heavier than the GVWR, or
either the maximum front or
rear GAWR. If you do, parts on
your vehicle can break, and it
can change the way your vehi-
cle handles. This could cause
you to lose control and crash.
Also, overloading can shorten
the life of your vehicle.
Page 288 of 350
1
2
3
4
5
6
7
8
9
Maintenance services / 7-3
Maintenance schedule / 7-4
Owner maintenance / 7-8
Engine compartment / 7-11
Engine oil and oil filter / 7-13
Engine cooling system / 7-15
Brakes and clutch / 7-18
Parking brake / 7-19
Drive belts / 7-20
Power steering / 7-21
Steering wheel / 7-22
Automatic transaxle / 7-23
Manual transaxle / 7-25
Rear differential (4WD) / 7-25
Transfer case (4WD) / 7-25
Lubricants and fluids / 7-26
Air cleaner / 7-27
Climate control air filter / 7-28
Wiper blades / 7-29
Maintenance
Page 291 of 350
Maintenance47
1
2
3
4
5
6
7
8
9
MAINTENANCE SCHEDULE
MAINTENANCEINTERVALS
MAINTENANCE
ITEM
Engine control system
Kilometers or time in months, whichever comes first
× 1,000 km 8 16 24 32 40 48 56 64 72 80 88 96 104 112 120 128
# Months 4 8 12 16 20 24 28 32 36 40 44 48 52 56 60 64
Engine oil & engine oil filter (1) R R R R R R RRRRRRR RRR
Drive belts (tension) I I I I
Cooling system hoses & connections I I I I I
Engine coolant (1) I I I I I R IIIIIRI III
Fuel filter RR
Fuel tank cap, lines, EVAP canister and hoses
II
Fuel tank air filter I R I R I
Air cleaner element (2) I I I I I R IIIIIRI III
Ignition wires I I
Spark plugs 2.0L (Platinum)
R
2.7L (lridium)
PCV valve (if equipped) I I I I
Idle speed I I I I I
Valve clearance 2.0L I
Engine timing belt RReplace every 160,000 km
Page 293 of 350
Maintenance67
1
2
3
4
5
6
7
8
9
MAINTENANCE SCHEDULE (CONTINUED)
Kilometers or time in months, whichever comes first
× 1,000 km 8 16 24 32 40 48 56 64 72 80 88 96 104 112 120 128
# Months 4 8 12 16 20 24 28 32 36 40 44 48 52 56 60 64
Automatic transaxle fluid (1) I I I R I I I R I I I R I I I R
Chassis & underbody bolts & nuts I I I I I I IIIIIII III
Tire condition & inflation pressure I I I I I I IIIIIII III
Wheel alignment (4)
Tire rotation
Steering operation & linkage I I I I I I IIIIIII III
Power steering fluid & lines I I I IIIII
Driveshaft u-joints L L L L L L LLLLLLL LLL
Driveshaft dust boots I I I I I
Safety belts, buckles & anchors I I I I I I IIIIIII III
Lock, hinges & hood latch L L L L L L LLLLLLL LLL
MAINTENANCE
INTERVALS
MAINTENANCE
ITEM
Inspect when abnormal condition noted
Rotate the tires every 12,000 km
Chassis and body (Continued)
Page 296 of 350

79
Maintenance
1
2
3
4
5
6
7
8
9
At least monthly: Check coolant level in the coolantrecovery reservoir.
Check the operation of all exterior lights, including the stoplights, turn
signals and hazard warning flash-
ers.
Check the inflation pressures of all tires including the spare.
At least twice a year
(i.e., every Spring and Fall) : Check radiator, heater and air con- ditioning hoses for leaks or da-
mage.
Check windshield washer spray and wiper operation. Clean wiper
blades with clean cloth dampened
with washer fluid.
Check headlight alignment.
Check muffler, exhaust pipes, shields and clamps.
Check the lap/shoulder belts for wear and function.
Check for worn tires and loose wheel lug nuts.
At least once a year : Clean body and door drain holes.
Lubricate door hinges and checks,and hood hinges.
Lubricate door and hood locks and latches.
Lubricate door rubber weather- strips.
Check the air conditioning system before the warm weather season.
Check the power steering fluid level.
Inspect and lubricate automatic transaxle linkage and controls.
Clean battery and terminals.
Check the brake fluid level.
Page 307 of 350
Maintenance20
7
1
2
3
4
5
6
7
8
9
DRIVE BELTS
Checking the compressor
drive beltHave the drive belts checked in
accordance with the maintenance
schedule.
2LDA7002/1KMA7025
➀
P/S pump pulley
➁ Water pump pulley ➂
A/C compressor pulley
➃ Generator pulley \b
Crankshaft pulley
2.0L Gasoline Engine
2.7L Gasoline Engine
➀➀
➃ ➃
➁
\b \b
➂
➂
Drive belts should be checked periodically for proper tension and adjusted
(2.0L only) if necessary. At the same time, belts should be examined for
cracks, wear, fraying or other evidence of deterioration and replaced if nec-
essary.
Belt routing should also be checked to be sure there is no interference
between the belts and other parts of the engine. After a belt is replaced, the
new belt should be adjusted again after two or three weeks to eliminate slack
resulting from initial stretching after use.
Page 328 of 350

741
Maintenance
1
2
3
4
5
6
7
8
9
3. Checking tire life (TIN : TireIdentification Number) Any tires that are over 6 years, based
on the manufacturing date, tire
strength and performance, decline
with age naturally (even unused
spare tires). Therefore, the tires
(including the spare tire) should be
replaced by new ones. You can find
the manufacturing date on the tire
sidewall (possibly on the inside of the
wheel), displaying the DOT Code.
The DOT Code is a series of num-
bers on a tire consisting of numbers
and English letters. The manufactur-
ing date is designated by the last four
digits (characters) of the DOT code.
DOT : XXXX XXXX OOOO
The front part of the DOT means a
plant code number, tire size and
tread pattern and the last four num-
bers indicate week and year manu-
factured.
For example:
DOT XXXX XXXX 1602 represents
that the tire was produced in the 16th
week of 2002.
4. Tire ply composition and mate-rialThe number of layers or plies of rub-
bercoated fabric in the tire. Tire man-
ufacturers also must indicate the
materials in the tire, which include
steel, nylon, polyester, and others.
The letter "R" means radial ply con-
struction; the letter "D" means diago-
nal or bias ply construction; and the
letter "B" means belted-bias ply con-
struction.
WARNING -
Tire age
Tires degrade over time, even
when they are not being used.
Regardless of the remaining
tread, it is recommended that
tires generally be replaced after
six (6) years of normal service.
Heat caused by hot climates or
frequent high loading condi-
tions can accelerate the aging
process. Failure to follow this
warning can result in sudden
tire failure, which could lead to a
loss of control and an accident
involving serious injury or
death.