2007 ISUZU KB P190 check engine
[x] Cancel search: check enginePage 2268 of 6020
6E–98 ENGINE DRIVEABILITY AND EMISSIONS
FUEL METERING SYSTEM CHECK
Some failures of the fuel metering system will result in
an “Engine Cranks But Will Not Run” symptom. If this
condition exists, refer to the Cranks But Will Not Run
chart. This chart will determine if the problem is caused
by the ignition system, the ECM, or the fuel pump
electrical circuit.
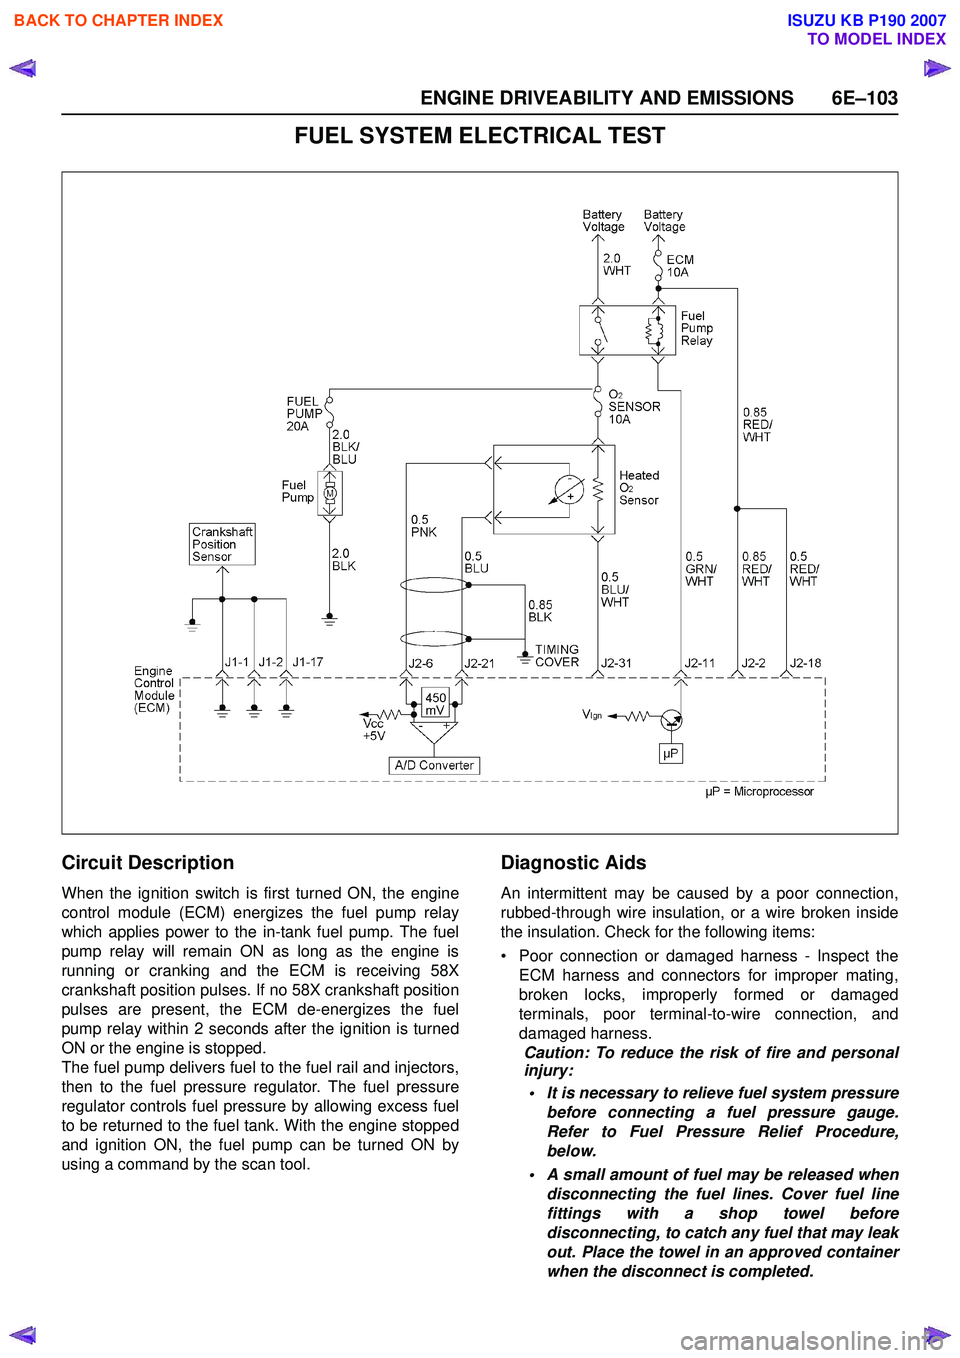
Refer to Fuel System Electrical Test for the fuel system
wiring schematic.
If there is a fuel delivery problem, refer to Fuel System
Diagnosis , which diagnoses the fuel injectors, the fuel
pressure regulator, and the fuel pump.
Followings are applicable to the vehicles with
closed Loop System:
If a malfunction occurs in the fuel metering system, it
usually results in either a rich HO2S signal or a lean
HO2S signal. This condition is indicated by the HO2S
voltage, which causes the ECM to change the fuel
calculation (fuel injector pulse width) based on the
HO2S reading. Changes made to the fuel calculation
will be indicated by a change in the long term fuel trim
values which can be monitored with a Scan Tool. Ideal
long term fuel trim values are around 0%; for a lean
HO2S signal, the ECM will add fuel, resulting in a fuel
trim value above 0%. Some variations in fuel trim values
are normal because all engines are not exactly the
same. If the evaporative emission canister purge is 02
status may be rich condition. 02 status indicates the
lean condition, refer to DTC P1171 for items which can
cause a lean HO2S signal.
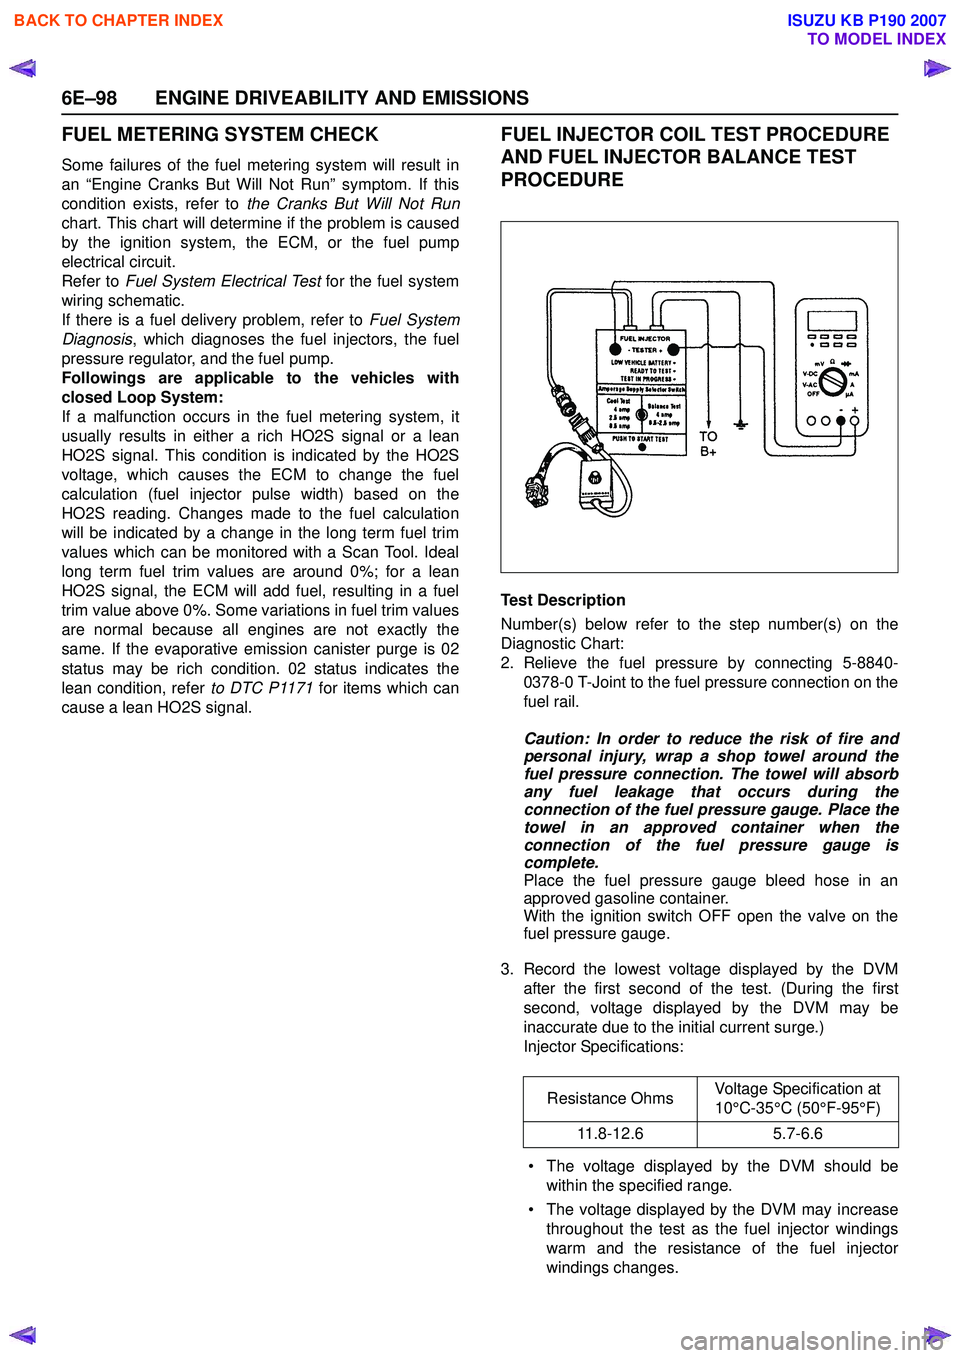
FUEL INJECTOR COIL TEST PROCEDURE
AND FUEL INJECTOR BALANCE TEST
PROCEDURE
Test Description
Number(s) below refer to the step number(s) on the
Diagnostic Chart:
2. Relieve the fuel pressure by connecting 5-8840- 0378-0 T-Joint to the fuel pressure connection on the
fuel rail.
Caution: In order to reduce the risk of fire and
personal injury, wrap a shop towel around the
fuel pressure connection. The towel will absorb
any fuel leakage that occurs during the
connection of the fuel pressure gauge. Place the
towel in an approved container when the
connection of the fuel pressure gauge is
complete.
Place the fuel pressure gauge bleed hose in an
approved gasoline container.
With the ignition switch OFF open the valve on the
fuel pressure gauge.
3. Record the lowest voltage displayed by the DVM after the first second of the test. (During the first
second, voltage displayed by the DVM may be
inaccurate due to the initial current surge.)
Injector Specifications:
• The voltage displayed by the DVM should be within the specified range.
• The voltage displayed by the DVM may increase throughout the test as the fuel injector windings
warm and the resistance of the fuel injector
windings changes. Resistance Ohms
Voltage Specification at
10°C-35°C (50°F-95°F)
11.8-12.6 5.7-6.6
BACK TO CHAPTER INDEX
TO MODEL INDEX
ISUZU KB P190 2007
Page 2269 of 6020
ENGINE DRIVEABILITY AND EMISSIONS 6E–99
• An erratic voltage reading (large fluctuations involtage that do not stabilize) indicates an
intermittent connection within the fuel injector.
5. Injector Specifications: 7. The Fuel Injector Balance Test portion of this chart
(Step 7 through Step 11) checks the mechanical (fuel
delivery) portion of the fuel injector. An engine
cooldown period of 10 minutes is necessary in order
to avoid irregular fuel pressure readings due to “Hot
Soak” fuel boiling.
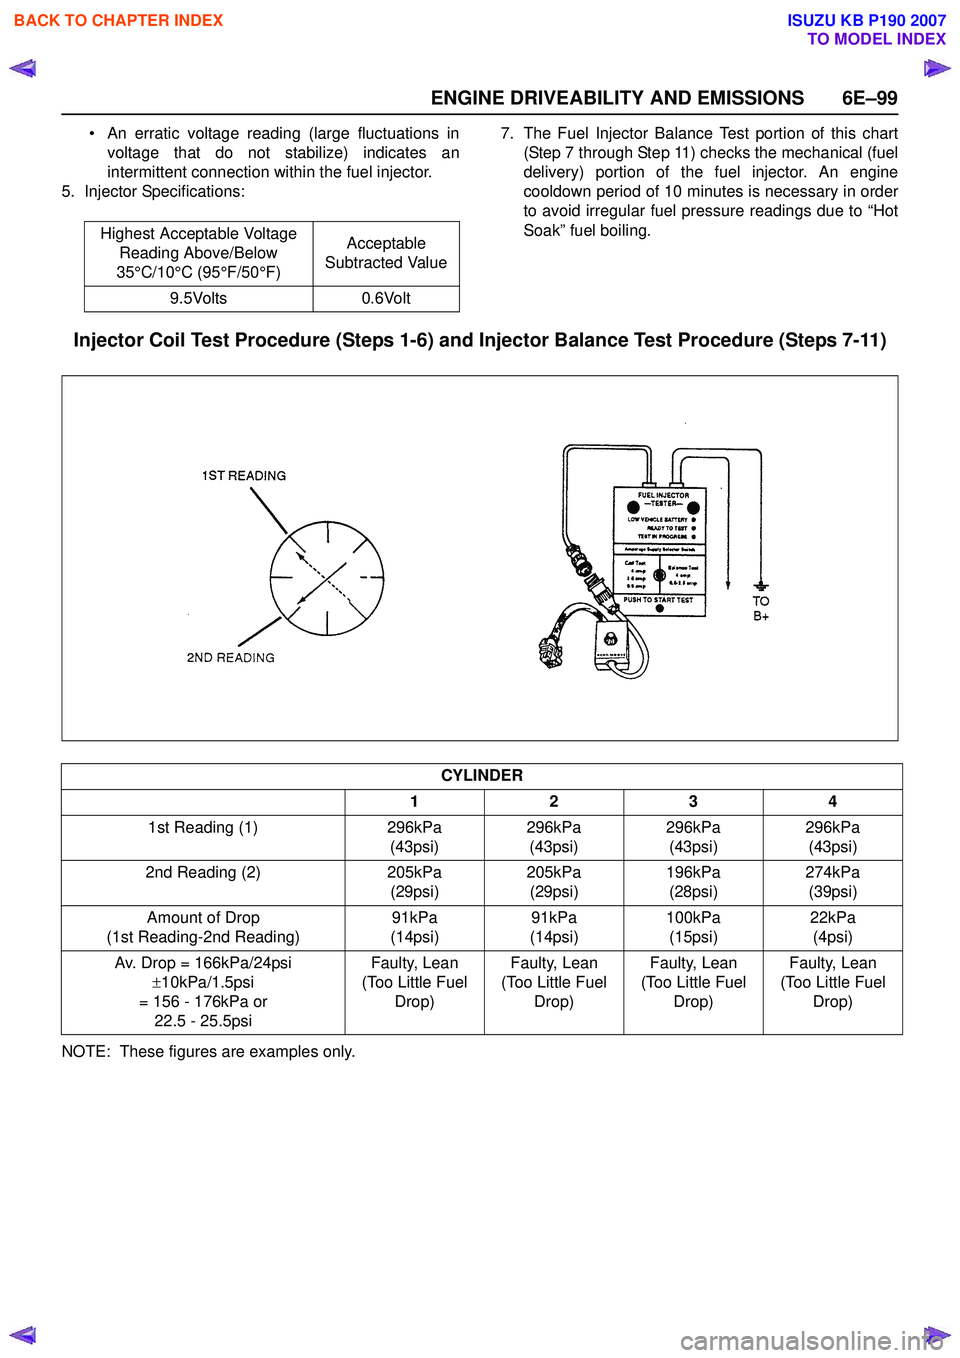
Injector Coil Test Procedure (Steps 1-6) and Injector Balance Test Procedure (Steps 7-11)
NOTE: These figures are examples only. Highest Acceptable Voltage
Reading Above/Below
35°C/10°C (95°F/50°F) Acceptable
Subtracted Value
9.5Volts 0.6Volt
CYLINDER
1234
1st Reading (1) 296kPa (43psi)296kPa
(43psi) 296kPa
(43psi) 296kPa
(43psi)
2nd Reading (2) 205kPa (29psi)205kPa
(29psi) 196kPa
(28psi) 274kPa
(39psi)
Amount of Drop
(1st Reading-2nd Reading) 91kPa
(14psi) 91kPa
(14psi) 100kPa
(15psi) 22kPa
(4psi)
Av. Drop = 166kPa/24psi ±10kPa/1.5psi
= 156 - 176kPa or 22.5 - 25.5psi Faulty, Lean
(Too Little Fuel Drop) Faulty, Lean
(Too Little Fuel Drop) Faulty, Lean
(Too Little Fuel Drop) Faulty, Lean
(Too Little Fuel Drop)
BACK TO CHAPTER INDEX
TO MODEL INDEX
ISUZU KB P190 2007
Page 2270 of 6020
6E–100 ENGINE DRIVEABILITY AND EMISSIONS
Injector Coil Test Procedure (Steps 1-6) and Injector Balance Test Procedure (Steps 7-11)
StepAction Value(s) Yes No
1 Was the “On-Board Diagnostic (OBD) System Check” performed? — Go to Step 2Go to
OBD
System Check
2 1. Turn the engine OFF. NOTE: In order to prevent flooding of a single cylinder
and possible engine damage, relieve the fuel pressure
before performing the fuel injector coil test procedure.
2. Relieve the fuel pressure. Refer to Test Description Number 2.
3. Connect the 5-8840-2618-0 Fuel Injector Tester to B+ and ground, and to the 5-8840-2589-0 Injector
Adapter Cable.
4. Remove the harness connector of the Fuel Injector and connect the 5-8840-2589-0 Injector
Adapter Cable for F/I check.
5. Set the amperage supply selector switch on the fuel injector tester to the “Coil Test” 0.5 amp
position.
6. Connect the leads from the 5-8840-2392-0 Digital Voltmeter (DVM) to the fuel injector tester. Refer
to the illustrations associated with the test
description.
7. Set the DVM to the tenths scale (0.0).
8. Observe the engine coolant temperature.
Is the engine coolant temperature within the specified
values? 10°C (50°F)
to
35°C (95°F) Go to Step 3Go to Step 5
3 1. Set the injector adapter cable to injector #1. 2. Press the “Push to Start Test” button on the fuelinjector tester.
3. Observe the voltage reading on the DVM.
Important: The voltage reading may rise during the
test.
4. Record the lowest voltage observed after the first second of the test.
5. Set the injector adapter cable to the next injector and repeat steps 2, 3, and 4.
Did any fuel injector have an erratic voltage reading
(large fluctuations in voltage that did not stabilize) or a
voltage reading outside of the specified values? 5.7-6.6V Go to Step 4Go to Step 7
4 Replace the faulty fuel injector(S). Refer to Fuel
Injector .
Is the action complete? — Go to Step 7—
BACK TO CHAPTER INDEX
TO MODEL INDEX
ISUZU KB P190 2007
Page 2272 of 6020
6E–102 ENGINE DRIVEABILITY AND EMISSIONS
9 1. Connect the 5-8840-0378-0 Fuel Injector Testerand 5-8840-2589-0 Injector Adapter Cable to the
fuel injector harness connector.
2. Set the amperage supply selector switch on the fuel injector tester to the “Balance Test” 0.5-2.5
amp position.
3. Using the Scan Tool turn the fuel pump ON then OFF in order to pressurize the fuel system.
4. Record the fuel pressure indicated by the fuel pressure gauge after the fuel pressure stabilizes.
This is the first pressure reading.
5. Energize the fuel injector by depressing the “Push to Start Test” button on the fuel injector tester.
6. Record the fuel pressure indicated by the fuel pressure gauge after the fuel pressure gauge
needle has stopped moving. This is the second
pressure reading.
7. Repeat steps 1 through 6 for each fuel injector.
8. Subtract the second pressure reading from the first pressure reading for one fuel injector. The
result is the pressure drop value.
9. Obtain a pressure drop value for each fuel injector.
10. Add all of the individual pressure drop values. This is the total pressure drop.
11. Divide the total pressure drop by the number of fuel injectors. This is the average pressure drop.
Does any fuel injector have a pressure drop value that
is either higher than the average pressure drop or
lower than the average pressure drop by the specified
value? 10kPa
(1.5psi) Go to Step 10Go to
OBD
System Check
10 Re-test any fuel injector that does not meet the specification. Refer to the procedure in Step 11.
NOTE: Do not repeat any portion of this test before
running the engine in order to prevent the engine from
flooding.
Does any fuel injector still have a pressure drop value
that is either higher than the average pressure drop or
lower than the average pressure drop by the specified
value? 10kPa
(1.5psi) Go to Step 11Go to
Symptoms
11 1. Replace the faulty fuel injector(s). Refer to Fuel
Injector .
2. Disconnect the 5-8840-2589-0 Injector Adapter Cable for F/I check and re-connect the original F/I
check connector.
Is the action complete? — Verify repair —
Step
Action Value(s) Yes No
BACK TO CHAPTER INDEX
TO MODEL INDEX
ISUZU KB P190 2007
Page 2273 of 6020
ENGINE DRIVEABILITY AND EMISSIONS 6E–103
FUEL SYSTEM ELECTRICAL TEST
Circuit Description
When the ignition switch is first turned ON, the engine
control module (ECM) energizes the fuel pump relay
which applies power to the in-tank fuel pump. The fuel
pump relay will remain ON as long as the engine is
running or cranking and the ECM is receiving 58X
crankshaft position pulses. If no 58X crankshaft position
pulses are present, the ECM de-energizes the fuel
pump relay within 2 seconds after the ignition is turned
ON or the engine is stopped.
The fuel pump delivers fuel to the fuel rail and injectors,
then to the fuel pressure regulator. The fuel pressure
regulator controls fuel pressure by allowing excess fuel
to be returned to the fuel tank. With the engine stopped
and ignition ON, the fuel pump can be turned ON by
using a command by the scan tool.
Diagnostic Aids
An intermittent may be caused by a poor connection,
rubbed-through wire insulation, or a wire broken inside
the insulation. Check for the following items:
• Poor connection or damaged harness - Inspect the ECM harness and connectors for improper mating,
broken locks, improperly formed or damaged
terminals, poor terminal-to-wire connection, and
damaged harness. Caution: To reduce the risk of fire and personal
injury:
• It is necessary to relieve fuel system pressure before connecting a fuel pressure gauge.
Refer to Fuel Pressure Relief Procedure,
below.
• A small amount of fuel may be released when disconnecting the fuel lines. Cover fuel line
fittings with a shop towel before
disconnecting, to catch any fuel that may leak
out. Place the towel in an approved container
when the disconnect is completed.
BACK TO CHAPTER INDEX
TO MODEL INDEX
ISUZU KB P190 2007
Page 2274 of 6020
6E–104 ENGINE DRIVEABILITY AND EMISSIONS
Fuel Pressure Relief Procedure
1. Remove the fuel cap.
2. Remove the fuel pump relay from the underhood relay center.
3. Start the engine and alow it to stall.
4. Crank the engine for an additional 3 seconds.
Fuel Pressure Gauge Installation
1. Remove the fuel pressure fitting cap.
2. Install fuel pressure gauge 5-8840-0378-0 to the fuel feed line located in front of and above the right
side valve cover.
3. Reinstall the fuel pump relay.
Fuel System Electrical Test
Step Action Value(s) Yes No
1 Was the “On-Board Diagnostic (OBD) System Check” performed?
—Go to Step 2Go to
On Board
Diagnostic
(OBD) System Check
2 1. Using the Tech 2, ignition “On” and engine “On”. 2. Select the “Miscellaneous Test” and perform the“Fuel Pump Relay” in the “Relays”.
3. Operate the Tech 2 in accordance with procedure.
Was the fuel pump operated, when the Tech 2 is
operated? —Go to
Fuel
System
Diagnosis Go to Step 3
3 Check the “Fuel Pump” fuse (20A). If the fuse is burnt out, repair as necessary.
Was the problem found? — Verify repair Go to Step 4
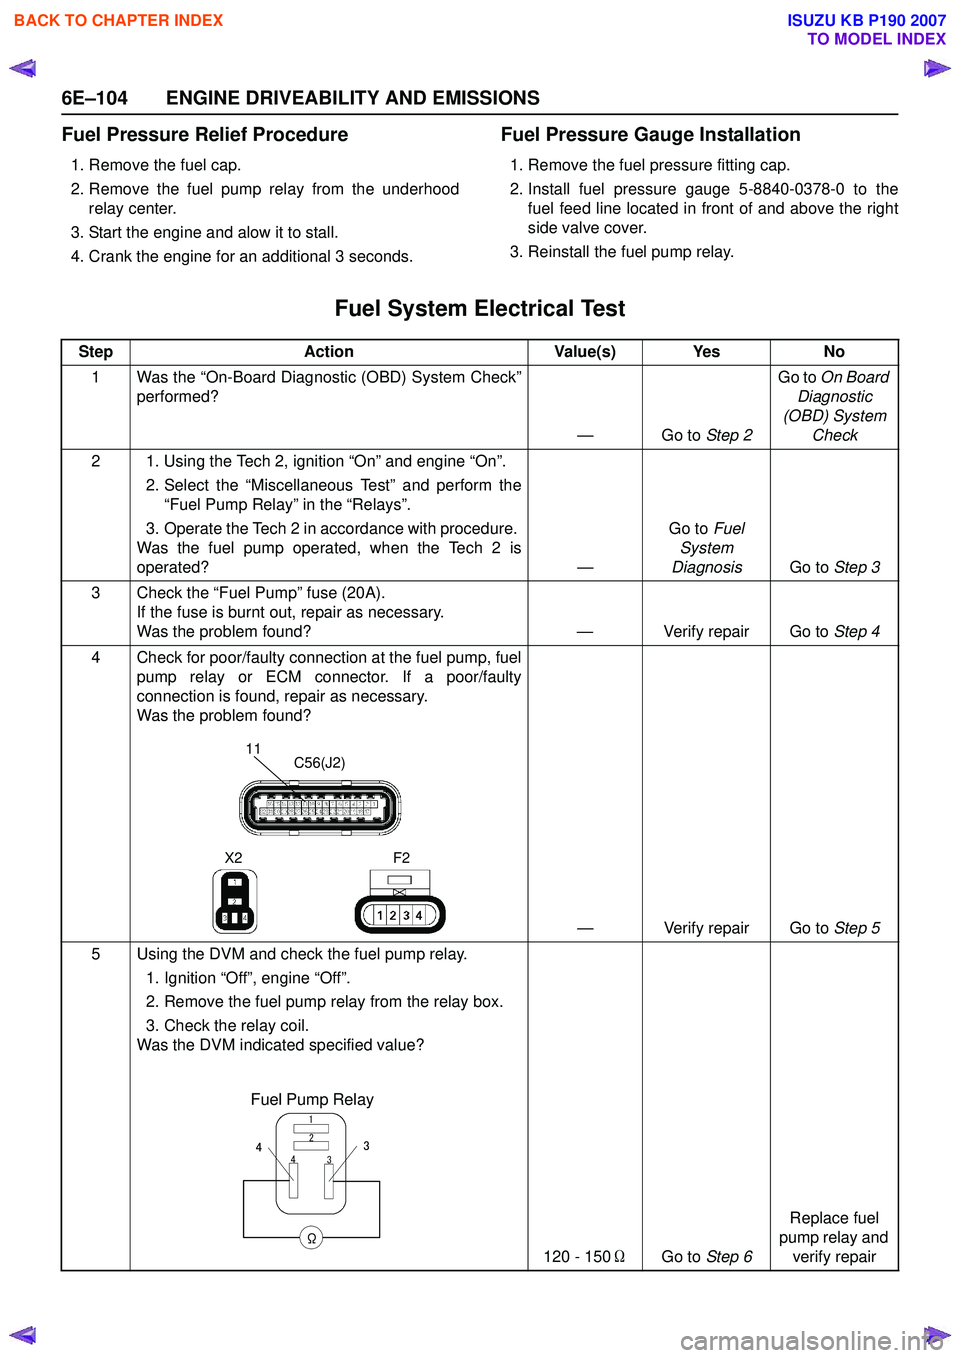
4 Check for poor/faulty connection at the fuel pump, fuel pump relay or ECM connector. If a poor/faulty
connection is found, repair as necessary.
Was the problem found?
— Verify repair Go to Step 5
5 Using the DVM and check the fuel pump relay. 1. Ignition “Off”, engine “Off”.
2. Remove the fuel pump relay from the relay box.
3. Check the relay coil.
Was the DVM indicated specified value?
120 - 150ΩGo to Step 6 Replace fuel
pump relay and verify repair
11C56(J2)
F2
X2
Fuel Pump Relay
3
4 2
1
Ω
34
BACK TO CHAPTER INDEX
TO MODEL INDEX
ISUZU KB P190 2007
Page 2275 of 6020
ENGINE DRIVEABILITY AND EMISSIONS 6E–105
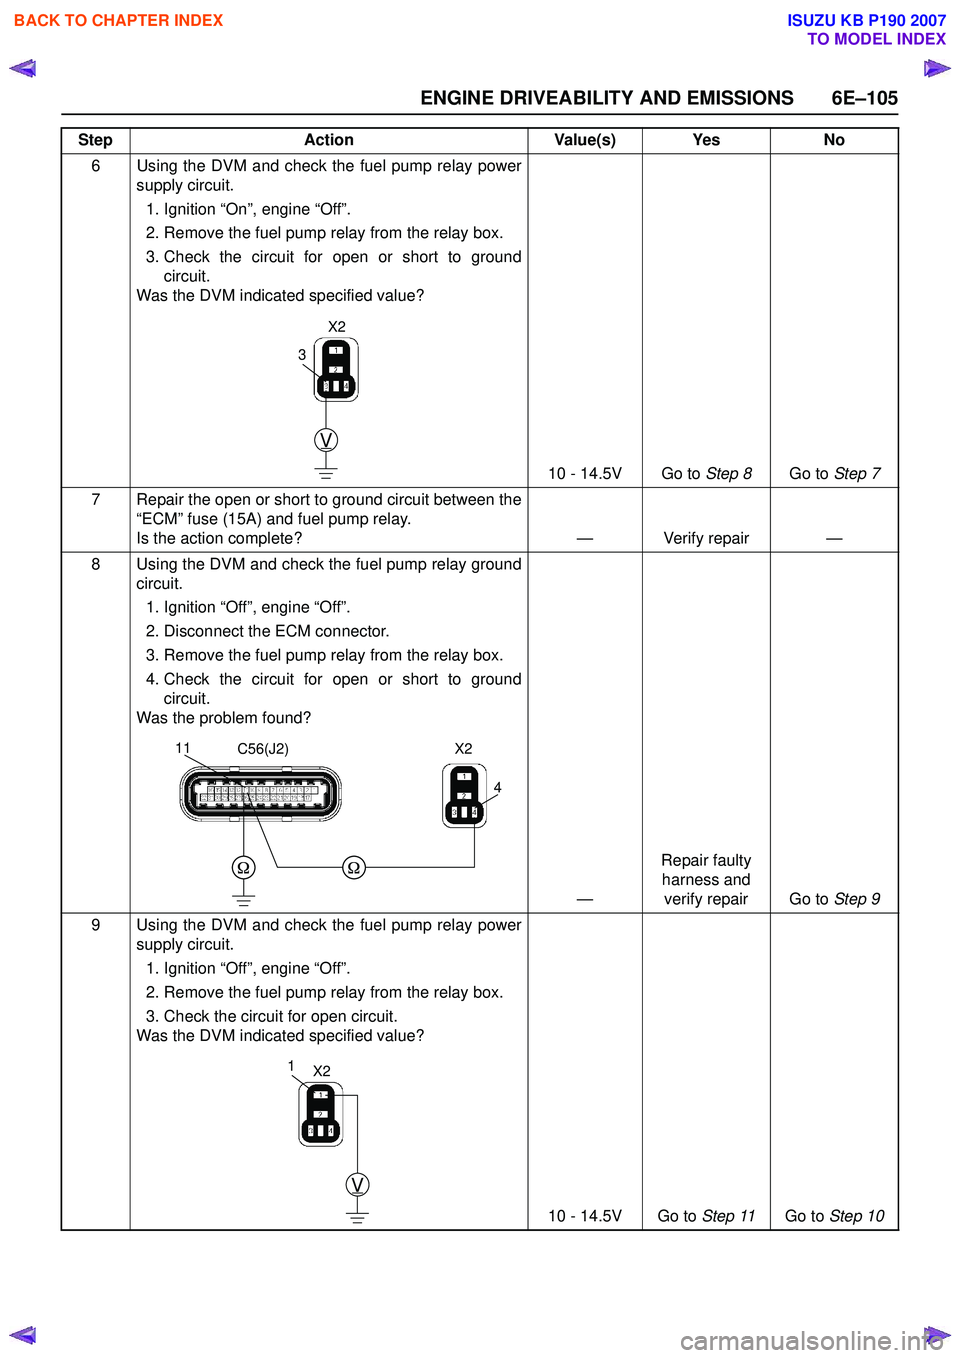
6 Using the DVM and check the fuel pump relay powersupply circuit.
1. Ignition “On”, engine “Off”.
2. Remove the fuel pump relay from the relay box.
3. Check the circuit for open or short to ground circuit.
Was the DVM indicated specified value?
10 - 14.5V Go to Step 8Go to Step 7
7 Repair the open or short to ground circuit between the “ECM” fuse (15A) and fuel pump relay.
Is the action complete? — Verify repair —
8 Using the DVM and check the fuel pump relay ground circuit.
1. Ignition “Off”, engine “Off”.
2. Disconnect the ECM connector.
3. Remove the fuel pump relay from the relay box.
4. Check the circuit for open or short to ground circuit.
Was the problem found?
—Repair faulty
harness and verify repair Go to Step 9
9 Using the DVM and check the fuel pump relay power supply circuit.
1. Ignition “Off”, engine “Off”.
2. Remove the fuel pump relay from the relay box.
3. Check the circuit for open circuit.
Was the DVM indicated specified value?
10 - 14.5V Go to Step 11Go to Step 10
Step
Action Value(s) Yes No
V
3
X2
4
11C56(J2)X2
V
1X2
BACK TO CHAPTER INDEX
TO MODEL INDEX
ISUZU KB P190 2007
Page 2276 of 6020
6E–106 ENGINE DRIVEABILITY AND EMISSIONS
10 Repair the open circuit between the fuel pump relayand battery.
Is the action complete? — Verify repair —
11 Using the DVM and check the fuel pump power supply circuit.
1. Ignition “On”, engine “Off”.
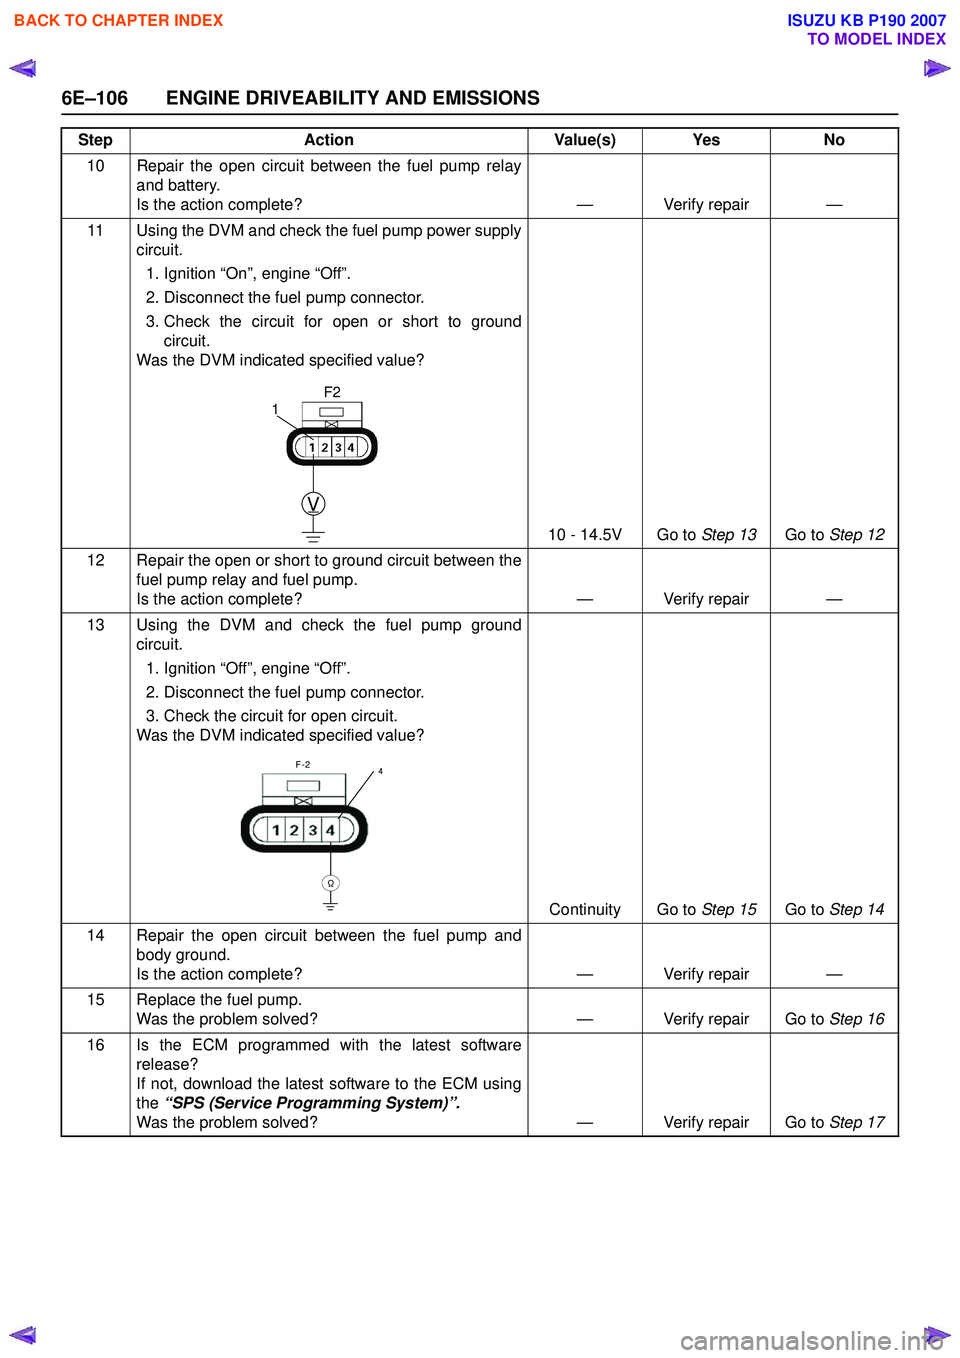
2. Disconnect the fuel pump connector.
3. Check the circuit for open or short to ground circuit.
Was the DVM indicated specified value?
10 - 14.5V Go to Step 13Go to Step 12
12 Repair the open or short to ground circuit between the fuel pump relay and fuel pump.
Is the action complete? — Verify repair —
13 Using the DVM and check the fuel pump ground circuit.
1. Ignition “Off”, engine “Off”.
2. Disconnect the fuel pump connector.
3. Check the circuit for open circuit.
Was the DVM indicated specified value?
Continuity Go to Step 15Go to Step 14
14 Repair the open circuit between the fuel pump and body ground.
Is the action complete? — Verify repair —
15 Replace the fuel pump. Was the problem solved? — Verify repair Go to Step 16
16 Is the ECM programmed with the latest software release?
If not, download the latest software to the ECM using
the “SPS (Service Programming System)”.
Was the problem solved? — Verify repair Go to Step 17
Step
Action Value(s) Yes No
V
1
F2
F-2
Ω
4
BACK TO CHAPTER INDEX
TO MODEL INDEX
ISUZU KB P190 2007