2007 ISUZU KB P190 turn signal
[x] Cancel search: turn signalPage 5585 of 6020
Cruise Control – HFV6 Page 8C–7
Activated and Deactivated
When the cruise control is enabled, the vehicle speed must be above 40 km/h and the cruise control switch assembly
pressed to SET–COAST, the cruise control will be activated and the vehicle will maintain the set speed. When
deactivated by the methods described within this section, the vehicle will no longer maintain the set speed, but the cruise
control will still be engaged.
Cruise Active
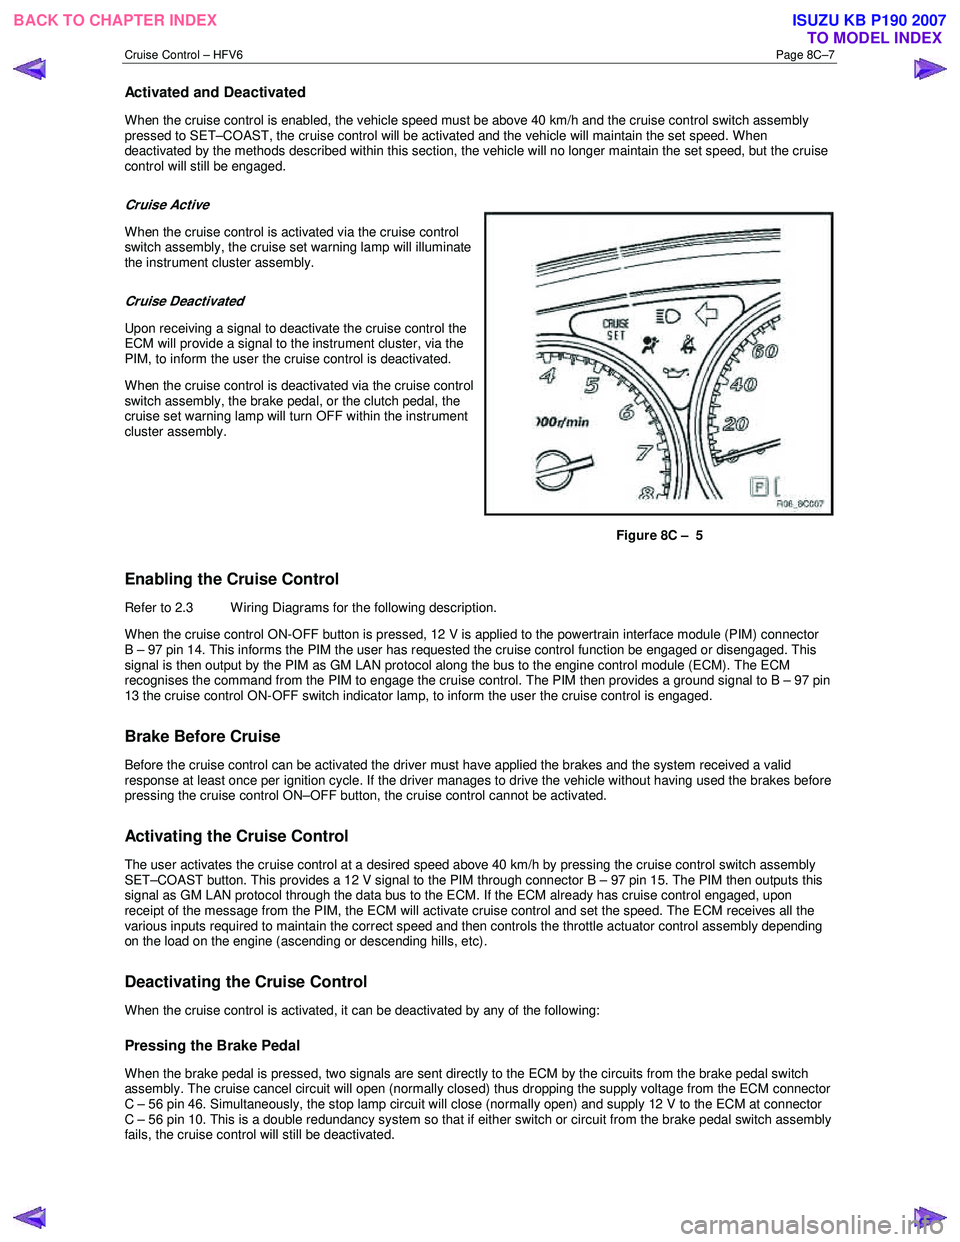
When the cruise control is activated via the cruise control
switch assembly, the cruise set warning lamp will illuminate
the instrument cluster assembly.
Cruise Deactivated
Upon receiving a signal to deactivate the cruise control the
ECM will provide a signal to the instrument cluster, via the
PIM, to inform the user the cruise control is deactivated.
When the cruise control is deactivated via the cruise control
switch assembly, the brake pedal, or the clutch pedal, the
cruise set warning lamp will turn OFF within the instrument
cluster assembly.
Figure 8C – 5
Enabling the Cruise Control
Refer to 2.3 Wiring Diagrams for the following description.
W hen the cruise control ON-OFF button is pressed, 12 V is applied to the powertrain interface module (PIM) connector
B – 97 pin 14. This informs the PIM the user has requested the cruise control function be engaged or disengaged. This
signal is then output by the PIM as GM LAN protocol along the bus to the engine control module (ECM). The ECM
recognises the command from the PIM to engage the cruise control. The PIM then provides a ground signal to B – 97 pin
13 the cruise control ON-OFF switch indicator lamp, to inform the user the cruise control is engaged.
Brake Before Cruise
Before the cruise control can be activated the driver must have applied the brakes and the system received a valid
response at least once per ignition cycle. If the driver manages to drive the vehicle without having used the brakes before
pressing the cruise control ON–OFF button, the cruise control cannot be activated.
Activating the Cruise Control
The user activates the cruise control at a desired speed above 40 km/h by pressing the cruise control switch assembly
SET–COAST button. This provides a 12 V signal to the PIM through connector B – 97 pin 15. The PIM then outputs this
signal as GM LAN protocol through the data bus to the ECM. If the ECM already has cruise control engaged, upon
receipt of the message from the PIM, the ECM will activate cruise control and set the speed. The ECM receives all the
various inputs required to maintain the correct speed and then controls the throttle actuator control assembly depending
on the load on the engine (ascending or descending hills, etc).
Deactivating the Cruise Control
When the cruise control is activated, it can be deactivated by any of the following:
Pressing the Brake Pedal
When the brake pedal is pressed, two signals are sent directly to the ECM by the circuits from the brake pedal switch
assembly. The cruise cancel circuit will open (normally closed) thus dropping the supply voltage from the ECM connector
C – 56 pin 46. Simultaneously, the stop lamp circuit will close (normally open) and supply 12 V to the ECM at connector
C – 56 pin 10. This is a double redundancy system so that if either switch or circuit from the brake pedal switch assembly
fails, the cruise control will still be deactivated.
BACK TO CHAPTER INDEX TO MODEL INDEXISUZU KB P190 2007
Page 5586 of 6020
Cruise Control – HFV6 Page 8C–8
Pressing the Cruise ON–OFF Button
Pressing the cruise control switch assembly ON–OFF button will send a signal via the PIM to the ECM to deactivate the
cruise control.
Rotating the Cruise Control Switch Assembly
Rotating the cruise control switch assembly to the CANCEL position will send a signal via the PIM to the ECM to
deactivate the cruise control.
Pressing the Clutch Pedal (Manual Vehicles Only)
When the clutch pedal is pressed, the cruise control cancel circuit will open (normally closed) thus removing the supply
voltage from the ECM connector C – 56 pin 53. The ECM then deactivates the cruise control.
Decelerating While Cruise Control is Activated
When the cruise control is activated, the speed can be reduced by pressing and holding the cruise control switch
assembly to SET–COAST. When this is done, 12 V is applied to PIM connector B – 97 pin 15. The PIM will then translate
the command to GM LAN protocol and sends the request to the ECM to reduce the speed. The ECM will then
temporarily disable the cruise control and close the throttle plate. The vehicle should then start to decelerate. Once the
operator releases the cruise control switch assembly, the ECM will receive this signal through the PIM and will then set
the speed according to the current VSS and maintain that speed.
Resuming a Speed After Cruise Control Has Been Deactivated
If the cruise control system is engaged but deactivated, the last speed at which it was activated can be resumed. Turning
the cruise control switch assembly to RES–ACC will apply 12 V to the PIM at connector B – 97 pin 16. The PIM will then
translate the command to GM LAN protocol and transmit the request to the ECM. The ECM will then recall the last stored
speed at which the cruise control was activated and increase or reduce engine RPM to maintain that speed.
Accelerating While Cruise Control is Activated
Using the Cruise Control Switch Assembly
When the cruise control is active, rotating the cruise control switch assembly to RES–ACC will accelerate the vehicle.
The cruise control switch assembly will supply a 12 V signal to the PIM connector B – 97 pin 16, which is continuous as
long as the switch is held. While the PIM is receiving the 12 V signal, it will continuously transmit to the ECM to
accelerate the vehicle. The ECM will open the throttle plate to accelerate the vehicle. When the desired speed is
achieved and the cruise control switch assembly is released, the ECM will maintain the vehicle at that speed.
Pressing the Accelerator Pedal
When the cruise control is active, pressing the accelerator pedal will accelerate the vehicle.
Once pressure is removed from the accelerator pedal, the vehicle will return to the last stored speed at which the cruise
control was activated and control the throttle plate to maintain that speed.
BACK TO CHAPTER INDEX TO MODEL INDEXISUZU KB P190 2007
Page 5592 of 6020
Cruise Control – HFV6 Page 8C–14
2.4 Cruise Control Inoperative /
Malfunctioning
Circuit Description
When the ON-OFF button is pressed, 12 V is applied to the Powertrain Interface Module (PIM) connector B – 97 pin 14.
This enables and disables cruise control operation.
Pressing the cruise control switch assembly to SET–COAST button activates the cruise control at a desired speed above
40 km/h. This provides a 12 V signal to the PIM through connector B – 97 pin 15.
Pressing and holding the cruise control switch to SET–COAST provides a 12 V signal to the PIM at connector B – 97
pin 15. Turning the cruise control switch to RES–ACC will apply a 12 V signal to the PIM at connector B – 97 pin 16.
Turning the cruise control switch to CANCEL will apply a 12 V signal to the PIM at connector B – 97 pin 17.
Pressing the brake pedal opens the cruise Initial Brake Apply Signal circuit thus removing the supply voltage from the
ECM connector C – 56 pin 46. Simultaneously, the stop lamp circuit will close (normally open) and supply 12 V to the
ECM at connector C – 56 pin 10. Both these signals must be present so as to ensure the safe operation of the vehicle’s
cruise cancel function.
Manual Vehicles Only
Pressing the clutch pedal opens the cruise cancel circuit thus removing the supply voltage from the ECM at connector C
– 56 pin 53.
For detailed information refer to 3.4 Clutch Pedal Switch (Manual Only) in this Section.
Test Description
The following numbers refer to the step numbers in the diagnostic table:
4–7 Checks the cruise control switch and associated circuits are functioning correctly.
8–9 Checks the brake pedal switch assembly and associated circuit are functioning correctly.
10 Checks the clutch pedal switch assembly and associated circuits are functioning correctly.
11–21 Covers the testing and replacement of system components.
22–28 Checks for intermittent faults in associated circuits and connectors.
Diagnostic Table Notes
1 For all wiring harness fault diagnoses and repairs, refer to 2.3 W iring Diagrams in this Section.
2 Tech 2 can display a stored history of which system parameter or input caused the cruise control to disengage. This can aid diagnosis of intermittent faults.
Diagnostic Table
Step Action Yes No
1 Did you review the System Operation?
Go to Step 2 Go to 1.3
System Operation
2 Did you read Diagnostic Systems Check ?
Go to Step 3 Go to Diagnostic
Systems Check
BACK TO CHAPTER INDEX TO MODEL INDEXISUZU KB P190 2007
Page 5599 of 6020
Cruise Control – HFV6 Page 8C–21
3.2 Cruise Control Switch Assembly
Remove
To remove the cruise control switch assembly, refer to 8 B Cruise Control System.
Test
To test the cruise control switch assembly, use a multimeter to check the continuity.
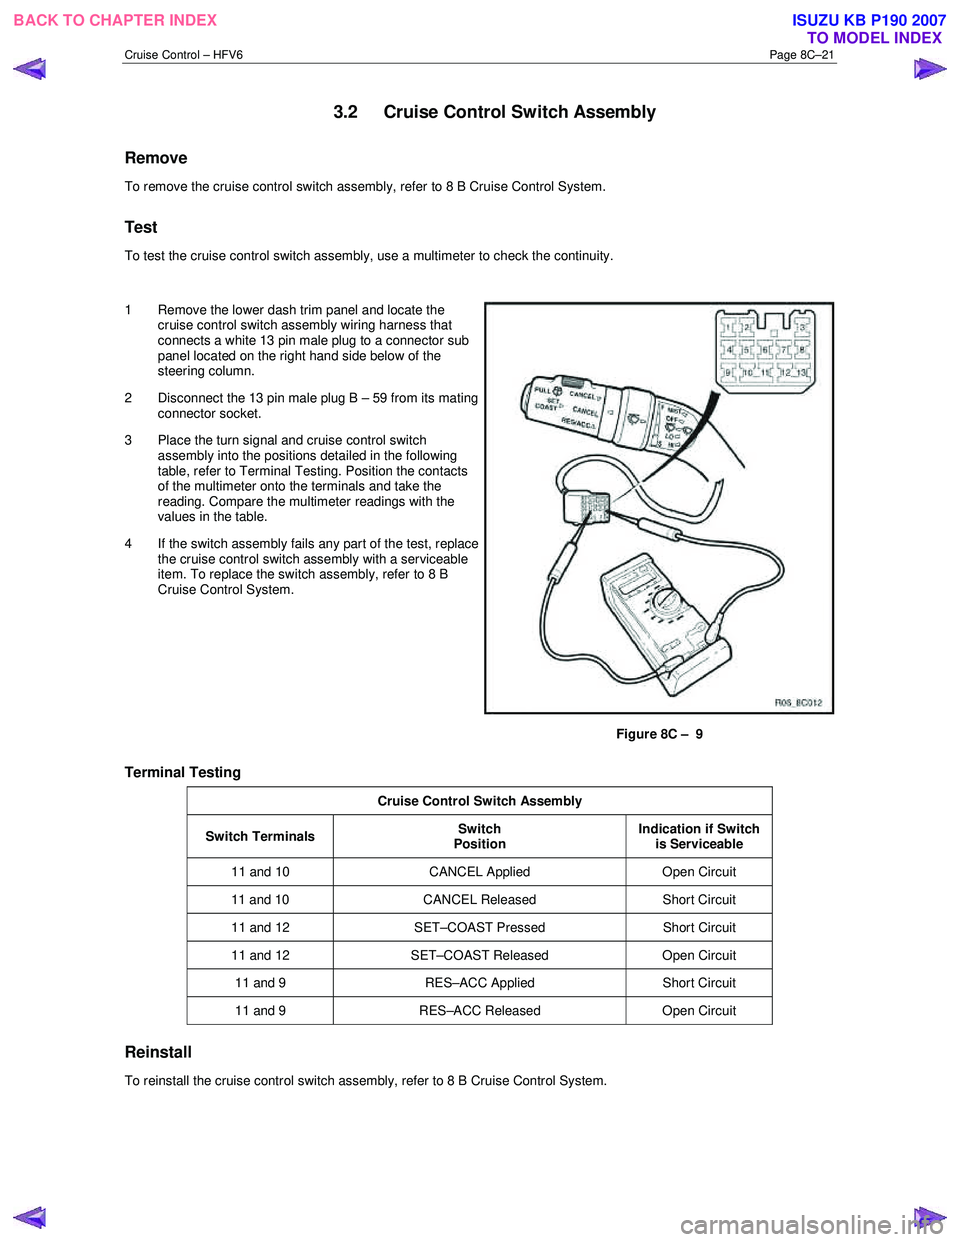
1 Remove the lower dash trim panel and locate the cruise control switch assembly wiring harness that
connects a white 13 pin male plug to a connector sub
panel located on the right hand side below of the
steering column.
2 Disconnect the 13 pin male plug B – 59 from its mating connector socket.
3 Place the turn signal and cruise control switch assembly into the positions detailed in the following
table, refer to Terminal Testing. Position the contacts
of the multimeter onto the terminals and take the
reading. Compare the multimeter readings with the
values in the table.
4 If the switch assembly fails any part of the test, replace the cruise control switch assembly with a serviceable
item. To replace the switch assembly, refer to 8 B
Cruise Control System.
Figure 8C – 9
Terminal Testing
Cruise Control Switch Assembly
Switch Terminals Switch
Position Indication if Switch
is Serviceable
11 and 10 CANCEL Applied Open Circuit
11 and 10 CANCEL Released Short Circuit
11 and 12 SET–COAST Pressed Short Circuit
11 and 12 SET–COAST Released Open Circuit
11 and 9 RES–ACC Applied Short Circuit
11 and 9 RES–ACC Released Open Circuit
Reinstall
To reinstall the cruise control switch assembly, refer to 8 B Cruise Control System.
BACK TO CHAPTER INDEX
TO MODEL INDEXISUZU KB P190 2007
Page 5744 of 6020
9A1-62 RESTRAINT CONTROL SYSTEM
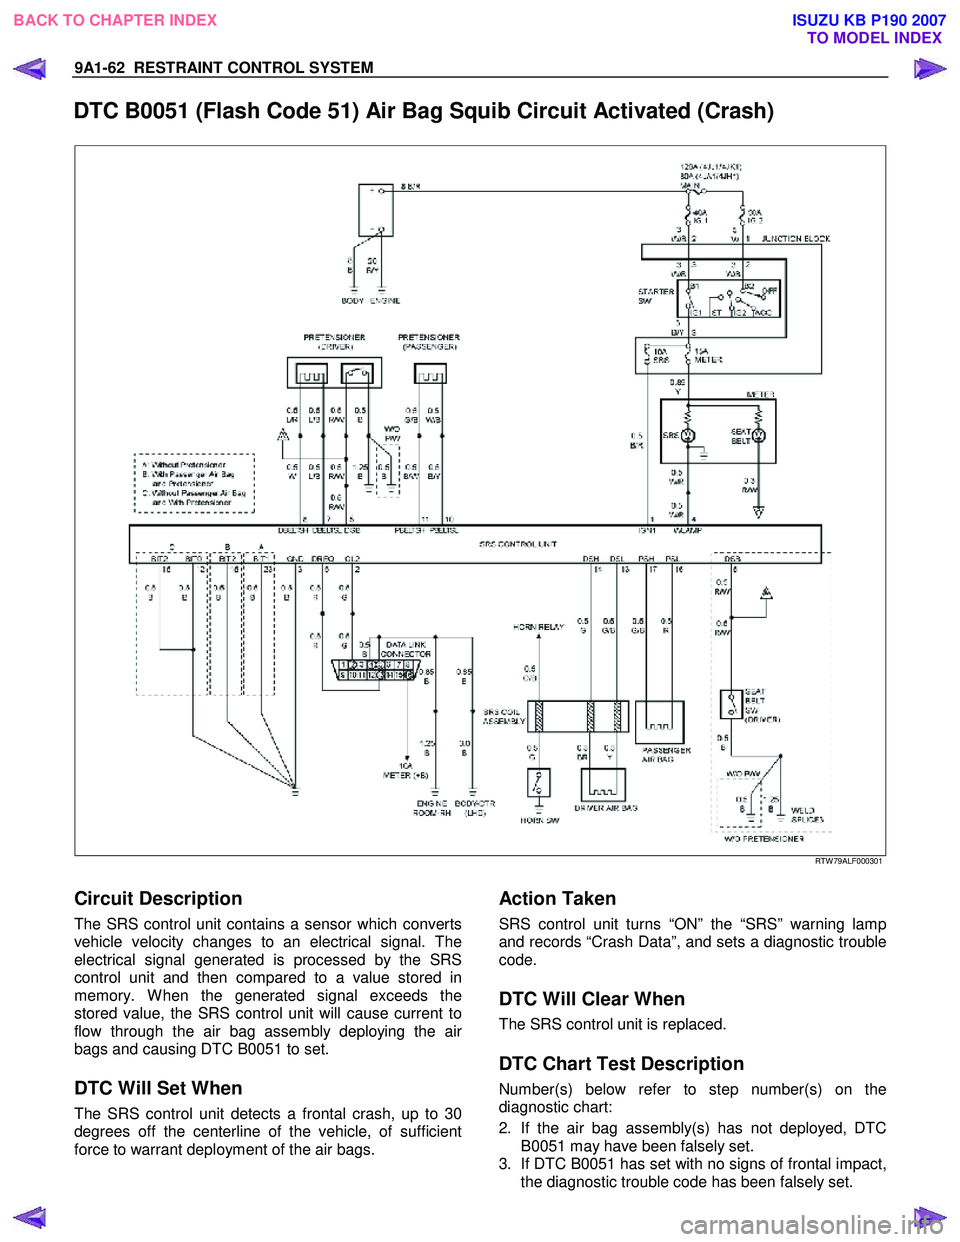
DTC B0051 (Flash Code 51) Air Bag Squib Circuit Activated (Crash)
RTW 79ALF000301
Circuit Description
The SRS control unit contains a sensor which converts
vehicle velocity changes to an electrical signal. The
electrical signal generated is processed by the SRS
control unit and then compared to a value stored in
memory. W hen the generated signal exceeds the
stored value, the SRS control unit will cause current to
flow through the air bag assembly deploying the ai
r
bags and causing DTC B0051 to set.
DTC Will Set When
The SRS control unit detects a frontal crash, up to 30
degrees off the centerline of the vehicle, of sufficient
force to warrant deployment of the air bags.
Action Taken
SRS control unit turns “ON” the “SRS” warning lamp
and records “Crash Data”, and sets a diagnostic trouble
code.
DTC Will Clear When
The SRS control unit is replaced.
DTC Chart Test Description
Number(s) below refer to step number(s) on the
diagnostic chart:
2. If the air bag assembly(s) has not deployed, DTC
B0051 may have been falsely set.
3. If DTC B0051 has set with no signs of frontal impact,
the diagnostic trouble code has been falsely set.
BACK TO CHAPTER INDEX
TO MODEL INDEX
ISUZU KB P190 2007
Page 5746 of 6020
9A1-64 RESTRAINT CONTROL SYSTEM
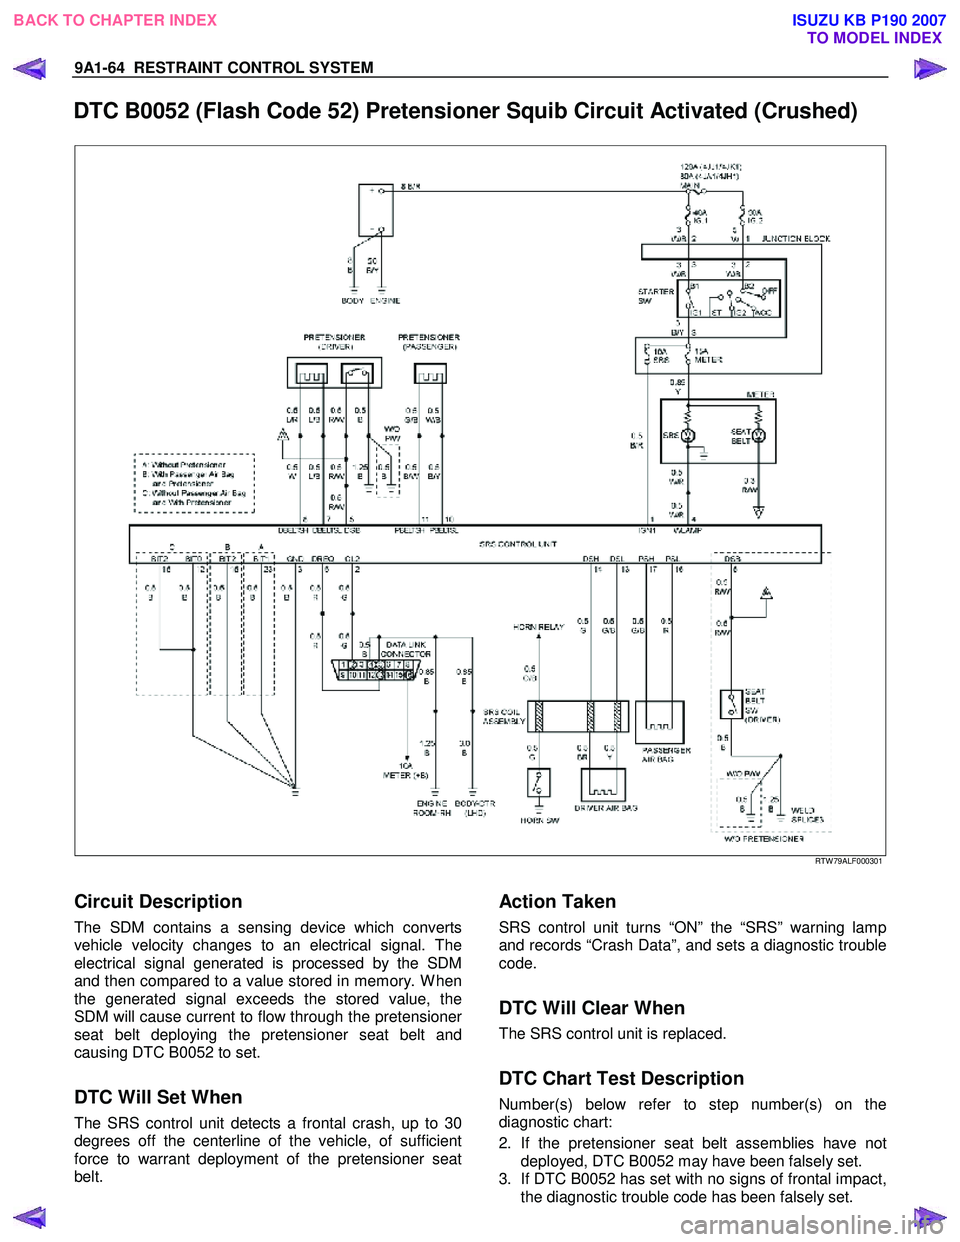
DTC B0052 (Flash Code 52) Pretensioner Squib Circuit Activated (Crushed)
RTW 79ALF000301
Circuit Description
The SDM contains a sensing device which converts
vehicle velocity changes to an electrical signal. The
electrical signal generated is processed by the SDM
and then compared to a value stored in memory. W hen
the generated signal exceeds the stored value, the
SDM will cause current to flow through the pretensione
r
seat belt deploying the pretensioner seat belt and
causing DTC B0052 to set.
DTC Will Set When
The SRS control unit detects a frontal crash, up to 30
degrees off the centerline of the vehicle, of sufficient
force to warrant deployment of the pretensioner seat
belt.
Action Taken
SRS control unit turns “ON” the “SRS” warning lamp
and records “Crash Data”, and sets a diagnostic trouble
code.
DTC Will Clear When
The SRS control unit is replaced.
DTC Chart Test Description
Number(s) below refer to step number(s) on the
diagnostic chart:
2. If the pretensioner seat belt assemblies have not deployed, DTC B0052 may have been falsely set.
3. If DTC B0052 has set with no signs of frontal impact, the diagnostic trouble code has been falsely set.
BACK TO CHAPTER INDEX TO MODEL INDEX
ISUZU KB P190 2007
Page 5757 of 6020
RESTRAINT CONTROL SYSTEM 9A1-75
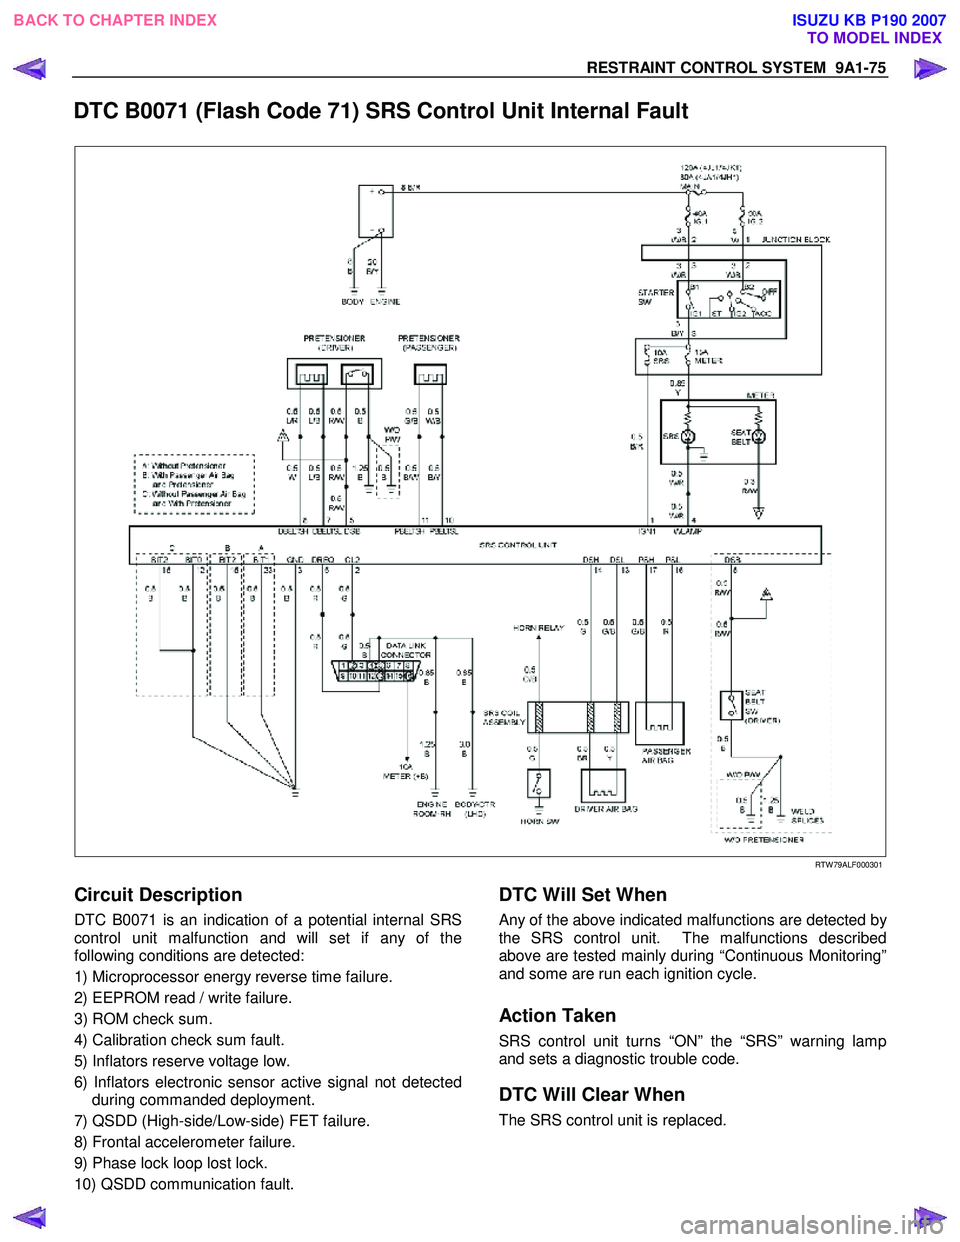
DTC B0071 (Flash Code 71) SRS Control Unit Internal Fault
RTW 79ALF000301
Circuit Description
DTC B0071 is an indication of a potential internal SRS
control unit malfunction and will set if any of the
following conditions are detected:
1) Microprocessor energy reverse time failure.
2) EEPROM read / write failure.
3) ROM check sum.
4) Calibration check sum fault.
5) Inflators reserve voltage low.
6) Inflators electronic sensor active signal not detected during commanded deployment.
7) QSDD (High-side/Low-side) FET failure.
8) Frontal accelerometer failure.
9) Phase lock loop lost lock.
10) QSDD communication fault.
DTC Will Set When
Any of the above indicated malfunctions are detected by
the SRS control unit. The malfunctions described
above are tested mainly during “Continuous Monitoring”
and some are run each ignition cycle.
Action Taken
SRS control unit turns “ON” the “SRS” warning lamp
and sets a diagnostic trouble code.
DTC Will Clear When
The SRS control unit is replaced.
BACK TO CHAPTER INDEX TO MODEL INDEXISUZU KB P190 2007
Page 5863 of 6020
11A-12 IMMOBILIZER CONTROL SYSTEM (4JK1/4JJ1/HFV6)
Scan Tool Does Not Power Up
Circuit Description
The data link connector (DLC) is a standardized 16-
cavity connector. Connector design and location is
dictated by an industry wide standard, and is required
to provide the following:
• Scan tool power battery positive voltage at terminal 16.
• Scan tool power ground at terminal 4. • Common signal ground at terminal 5.
The scan tool will power up with the ignition OFF. Some
modules however, will not communicate unless the
ignition is ON.
Schematic Reference: Immobilizer Controls
Schematics
Connector End View Reference: ICU Connector End
View
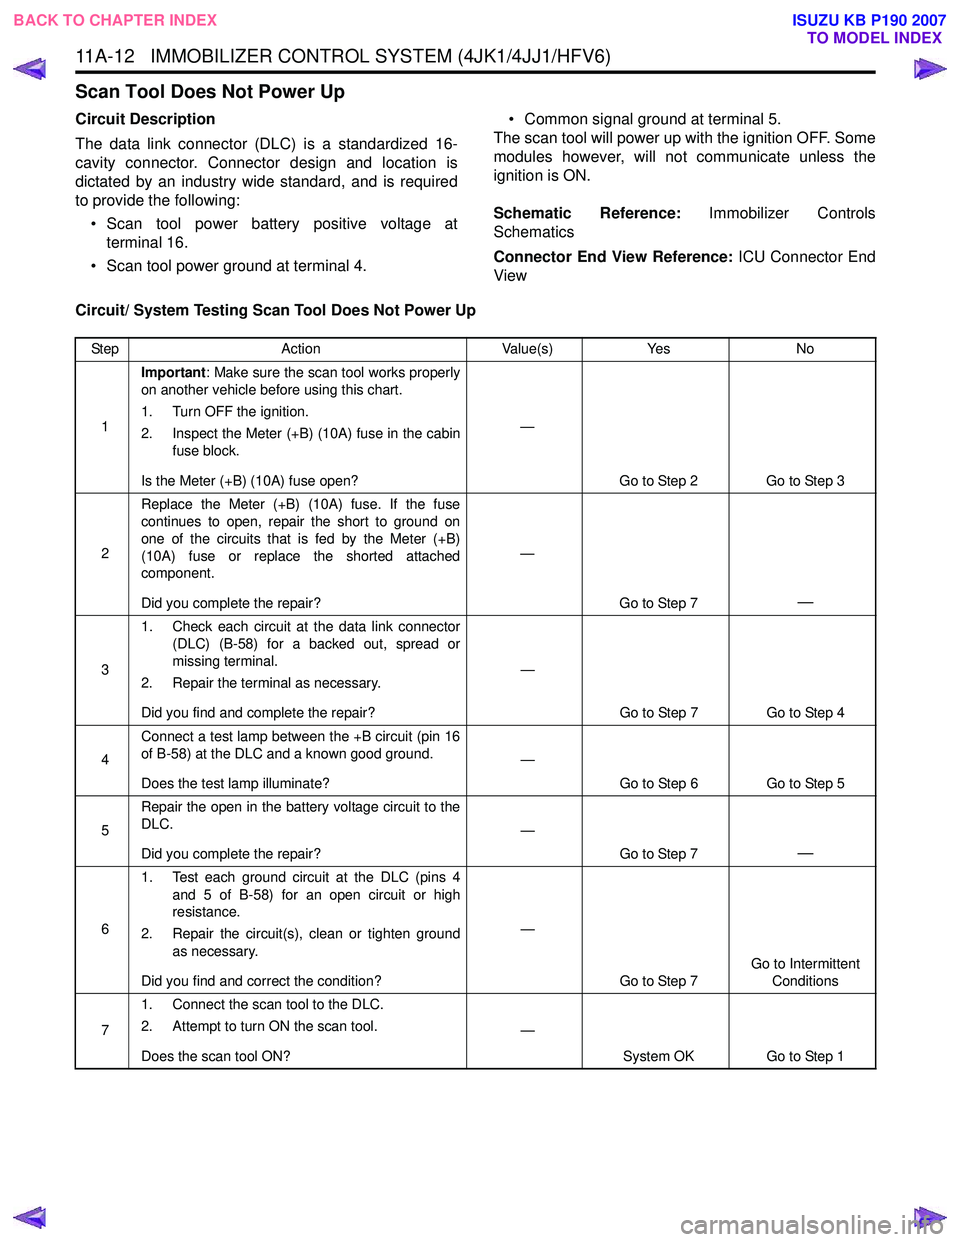
Circuit/ System Testing Scan Tool Does Not Power Up
Step Action Value(s)Yes No
1 Important
: Make sure the scan tool works properly
on another vehicle before using this chart.
1. Turn OFF the ignition.
2. Inspect the Meter (+B) (10A) fuse in the cabin fuse block.
Is the Meter (+B) (10A) fuse open? —
Go to Step 2 Go to Step 3
2 Replace the Meter (+B) (10A) fuse. If the fuse
continues to open, repair the short to ground on
one of the circuits that is fed by the Meter (+B)
(10A) fuse or replace the shorted attached
component.
Did you complete the repair? —
Go to Step 7
—
31. Check each circuit at the data link connector
(DLC) (B-58) for a backed out, spread or
missing terminal.
2. Repair the terminal as necessary.
Did you find and complete the repair? —
Go to Step 7 Go to Step 4
4 Connect a test lamp between the +B circuit (pin 16
of B-58) at the DLC and a known good ground.
Does the test lamp illuminate? —
Go to Step 6 Go to Step 5
5 Repair the open in the battery voltage circuit to the
DLC.
Did you complete the repair? —
Go to Step 7
—
61. Test each ground circuit at the DLC (pins 4
and 5 of B-58) for an open circuit or high
resistance.
2. Repair the circuit(s), clean or tighten ground as necessary.
Did you find and correct the condition? —
Go to Step 7 Go to Intermittent
Conditions
7 1. Connect the scan tool to the DLC.
2. Attempt to turn ON the scan tool.
Does the scan tool ON? —
System OK Go to Step 1
BACK TO CHAPTER INDEX
TO MODEL INDEX
ISUZU KB P190 2007