Page 4403 of 4647

SRS-22
TROUBLE DIAGNOSIS
Revision: 2007 April2007 M35/M45
Trouble Diagnosis with CONSULT-IINHS00097
DIAGNOSTIC PROCEDURE 2
Refer to GI-38, "CONSULT-II Start Procedure" .
CAUTION:
If CONSULT-II is used with no connection of CONSULT-II CONVERTER, malfunctions might be
detected in self-diagnosis depending on control unit which carry out CAN communication.
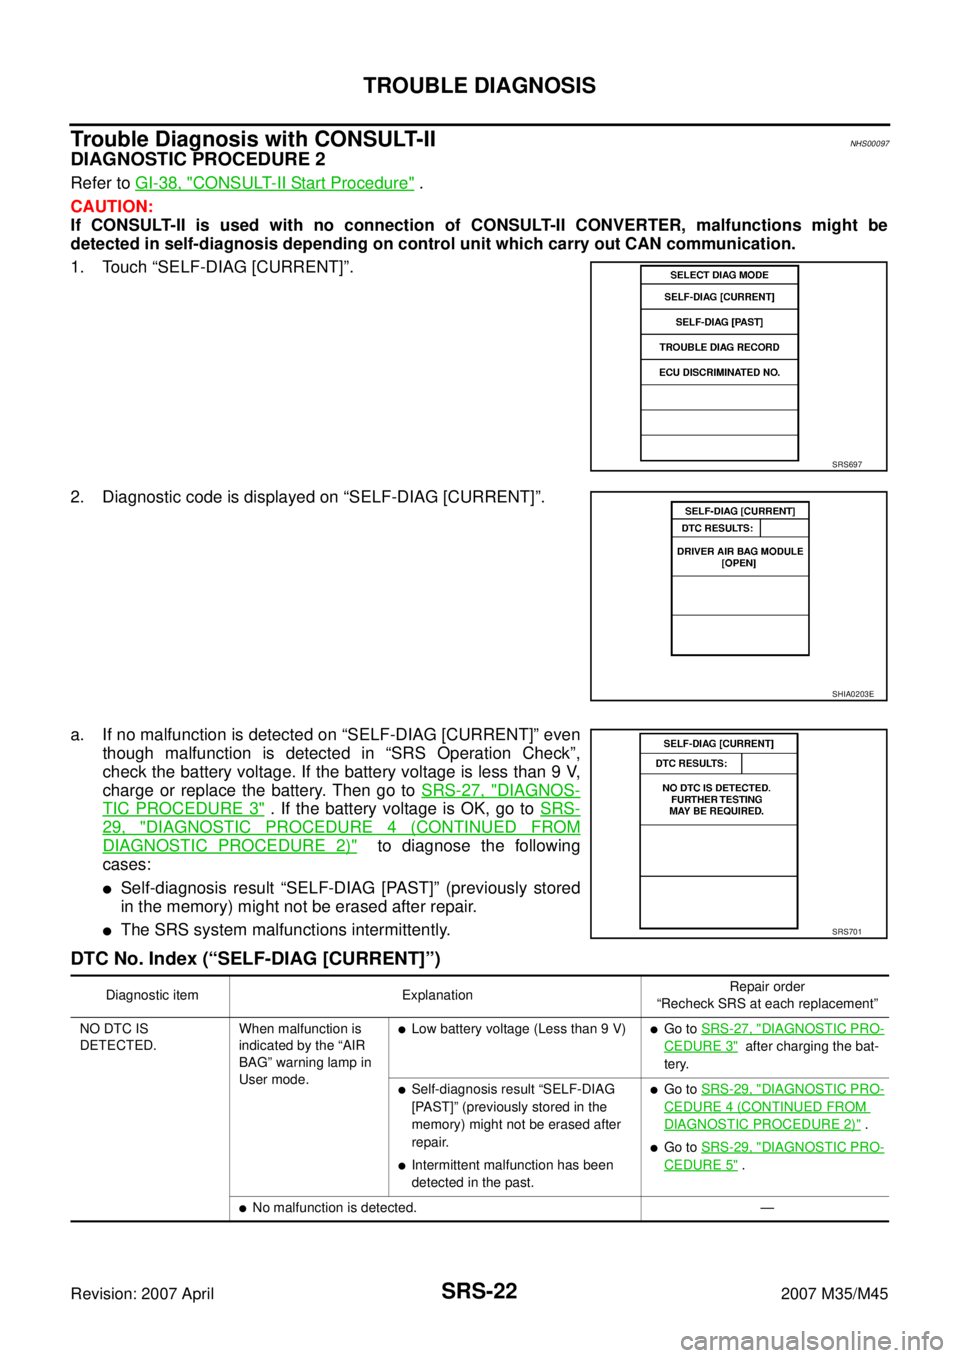
1. Touch “SELF-DIAG [CURRENT]”.
2. Diagnostic code is displayed on “SELF-DIAG [CURRENT]”.
a. If no malfunction is detected on “SELF-DIAG [CURRENT]” even
though malfunction is detected in “SRS Operation Check”,
check the battery voltage. If the battery voltage is less than 9 V,
charge or replace the battery. Then go to SRS-27, "
DIAGNOS-
TIC PROCEDURE 3" . If the battery voltage is OK, go to SRS-
29, "DIAGNOSTIC PROCEDURE 4 (CONTINUED FROM
DIAGNOSTIC PROCEDURE 2)" to diagnose the following
cases:
�Self-diagnosis result “SELF-DIAG [PAST]” (previously stored
in the memory) might not be erased after repair.
�The SRS system malfunctions intermittently.
DTC No. Index (“SELF-DIAG [CURRENT]”)
SRS697
SHIA0203E
SRS701
Diagnostic item ExplanationRepair order
“Recheck SRS at each replacement”
NO DTC IS
DETECTED.When malfunction is
indicated by the “AIR
BAG” warning lamp in
User mode.
�Low battery voltage (Less than 9 V)�Go to SRS-27, "DIAGNOSTIC PRO-
CEDURE 3" after charging the bat-
tery.
�Self-diagnosis result “SELF-DIAG
[PAST]” (previously stored in the
memory) might not be erased after
repair.
�Intermittent malfunction has been
detected in the past.
�Go to SRS-29, "DIAGNOSTIC PRO-
CEDURE 4 (CONTINUED FROM
DIAGNOSTIC PROCEDURE 2)" .
�Go to SRS-29, "DIAGNOSTIC PRO-
CEDURE 5" .
�No malfunction is detected. —
Page 4407 of 4647

SRS-26
TROUBLE DIAGNOSIS
Revision: 2007 April2007 M35/M45
NOTE:
Follow the procedures in numerical order when repairing malfunctioning parts. Confirm whether malfunction is
eliminated using air bag warning lamp or CONSULT-II each time repair is finished. If malfunction is still
observed, proceed to the next step. When malfunction is eliminated, further repair work is not required.
BELT TENSION SENS
[UNIT FAIL]
[B1019]�Belt tension sensor circuit between belt tension sensor and
occupant classification system control unit, or diagnosis sensor
unit is malfunctioning.1. Visually check the wiring harness
connection.
2. Replace the harness if it has visible
damage.
3. Replace front seat belt (passenger
side) assembly.
4. Replace front passenger seat cush-
ion/occupant classification system
control unit assembly.
PASS A/B INDCTR
CKT
[B1023]
�Front passenger air bag off indicator or related circuit is mal-
functioning.1. Visually check the wiring harness
connection.
2. Replace the harness if it has visible
damage.
3. Replace front passenger air bag off
indicator (The installation position is
an overhead consoul).
4. Replace the diagnosis sensor unit.
5. Replace the related harness.
FRONTAL COLLISION
DETECTION
[B1209]
�Seat belt pre-tensioner and front air bag are deployed.�Go to SRS-54, "For Frontal Colli-
sion" .
SIDE COLLISION
DETECTION
[B1210]
�Side and curtain air bag is deployed.�Go to SRS-56, "For Side Collision" . Diagnostic item ExplanationRepair order
“Recheck SRS at each replacement”
Page 4408 of 4647

TROUBLE DIAGNOSIS
SRS-27
C
D
E
F
G
I
J
K
L
MA
B
SRS
Revision: 2007 April2007 M35/M45
DIAGNOSTIC PROCEDURE 3
Final inspection after repairing SRS by using CONSULT-II — Diagnosis mode
Refer to GI-38, "
CONSULT-II Start Procedure" .
CAUTION:
If CONSULT-II is used with no connection of CONSULT-II CONVERTER, malfunctions might be
detected in self-diagnosis depending on control unit which carry out CAN communication.
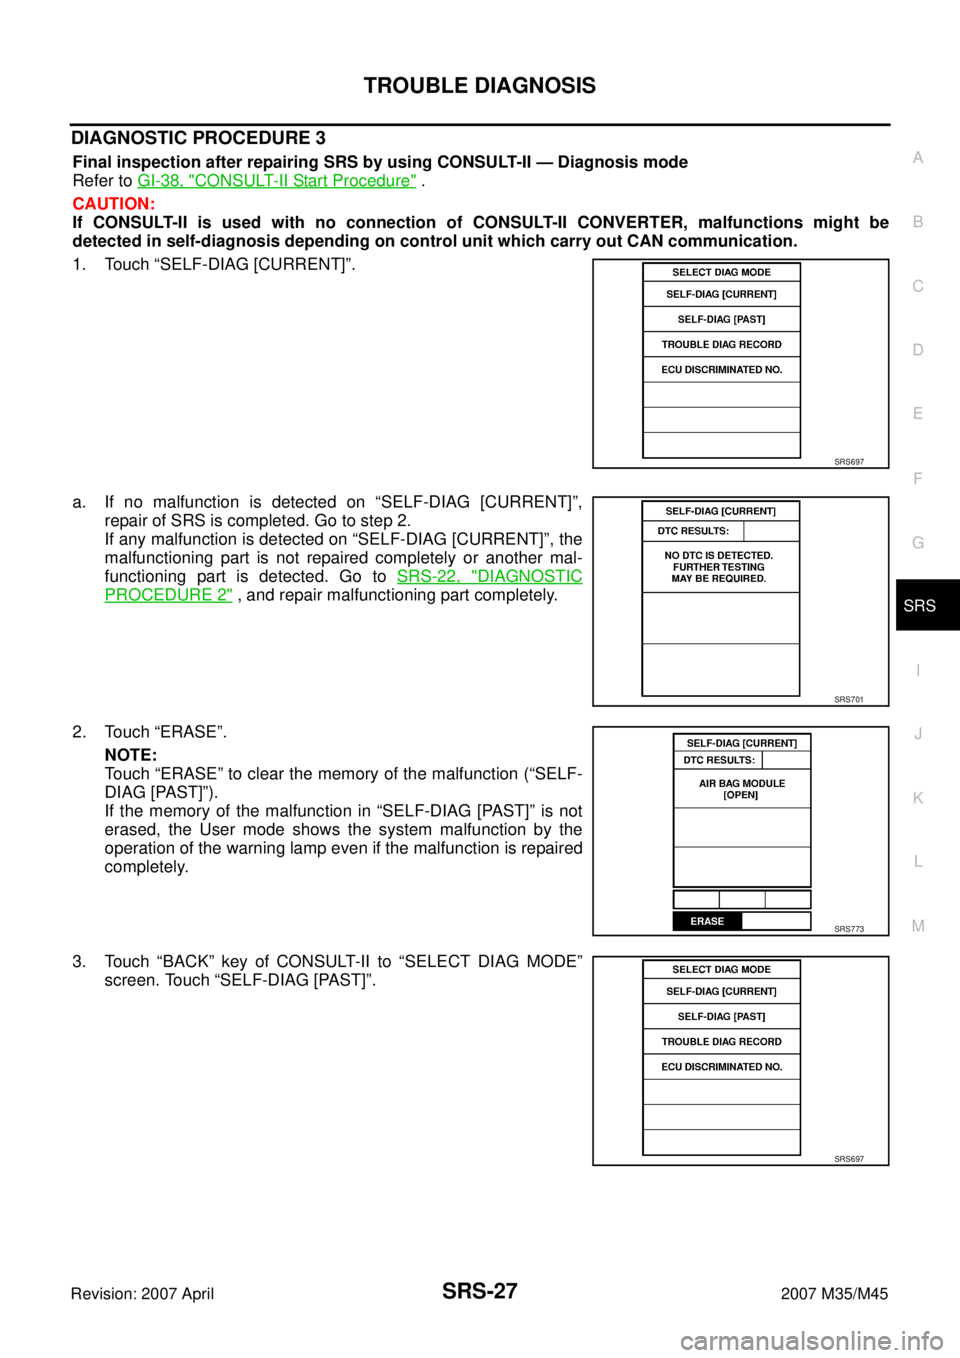
1. Touch “SELF-DIAG [CURRENT]”.
a. If no malfunction is detected on “SELF-DIAG [CURRENT]”,
repair of SRS is completed. Go to step 2.
If any malfunction is detected on “SELF-DIAG [CURRENT]”, the
malfunctioning part is not repaired completely or another mal-
functioning part is detected. Go to SRS-22, "
DIAGNOSTIC
PROCEDURE 2" , and repair malfunctioning part completely.
2. Touch “ERASE”.
NOTE:
Touch “ERASE” to clear the memory of the malfunction (“SELF-
DIAG [PAST]”).
If the memory of the malfunction in “SELF-DIAG [PAST]” is not
erased, the User mode shows the system malfunction by the
operation of the warning lamp even if the malfunction is repaired
completely.
3. Touch “BACK” key of CONSULT-II to “SELECT DIAG MODE”
screen. Touch “SELF-DIAG [PAST]”.
SRS697
SRS701
SRS773
SRS697
Page 4409 of 4647
SRS-28
TROUBLE DIAGNOSIS
Revision: 2007 April2007 M35/M45
4. Make sure no malfunction is detected on “SELF-DIAG [PAST]”.
5. Touch “BACK” key of CONSULT-II until “SELECT SYSTEM”
appears in order to return to User mode from Diagnosis mode.
6. Turn ignition switch OFF then turn off and disconnect CON-
SULT-II.
Refer to SRS-20, "
Checking Air Bag Operation by Using “AIR
BAG” Warning Lamp — User Mode" .
SRS702
Page 4411 of 4647

SRS-30
TROUBLE DIAGNOSIS
Revision: 2007 April2007 M35/M45
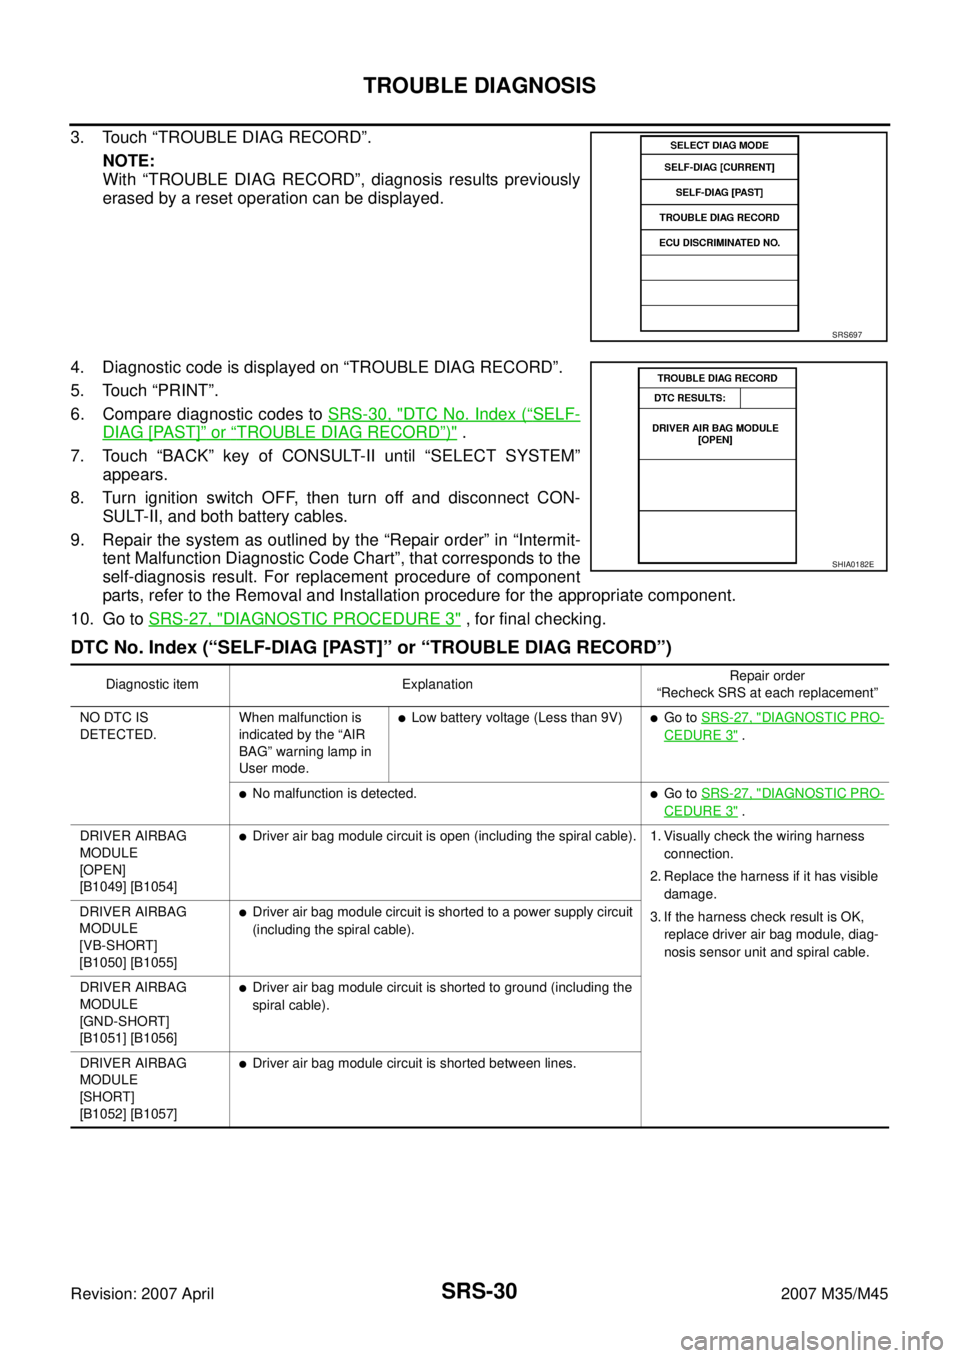
3. Touch “TROUBLE DIAG RECORD”.
NOTE:
With “TROUBLE DIAG RECORD”, diagnosis results previously
erased by a reset operation can be displayed.
4. Diagnostic code is displayed on “TROUBLE DIAG RECORD”.
5. Touch “PRINT”.
6. Compare diagnostic codes to SRS-30, "
DTC No. Index (“SELF-
DIAG [PAST]” or “TROUBLE DIAG RECORD”)" .
7. Touch “BACK” key of CONSULT-II until “SELECT SYSTEM”
appears.
8. Turn ignition switch OFF, then turn off and disconnect CON-
SULT-II, and both battery cables.
9. Repair the system as outlined by the “Repair order” in “Intermit-
tent Malfunction Diagnostic Code Chart”, that corresponds to the
self-diagnosis result. For replacement procedure of component
parts, refer to the Removal and Installation procedure for the appropriate component.
10. Go to SRS-27, "
DIAGNOSTIC PROCEDURE 3" , for final checking.
DTC No. Index (“SELF-DIAG [PAST]” or “TROUBLE DIAG RECORD”)
SRS697
SHIA0182E
Diagnostic item ExplanationRepair order
“Recheck SRS at each replacement”
NO DTC IS
DETECTED.When malfunction is
indicated by the “AIR
BAG” warning lamp in
User mode.
�Low battery voltage (Less than 9V)�Go to SRS-27, "DIAGNOSTIC PRO-
CEDURE 3" .
�No malfunction is detected.�Go to SRS-27, "DIAGNOSTIC PRO-
CEDURE 3" .
DRIVER AIRBAG
MODULE
[OPEN]
[B1049] [B1054]
�Driver air bag module circuit is open (including the spiral cable). 1. Visually check the wiring harness
connection.
2. Replace the harness if it has visible
damage.
3. If the harness check result is OK,
replace driver air bag module, diag-
nosis sensor unit and spiral cable. DRIVER AIRBAG
MODULE
[VB-SHORT]
[B1050] [B1055]
�Driver air bag module circuit is shorted to a power supply circuit
(including the spiral cable).
DRIVER AIRBAG
MODULE
[GND-SHORT]
[B1051] [B1056]
�Driver air bag module circuit is shorted to ground (including the
spiral cable).
DRIVER AIRBAG
MODULE
[SHORT]
[B1052] [B1057]
�Driver air bag module circuit is shorted between lines.
Page 4416 of 4647
TROUBLE DIAGNOSIS
SRS-35
C
D
E
F
G
I
J
K
L
MA
B
SRS
Revision: 2007 April2007 M35/M45
Trouble Diagnosis without CONSULT-IINHS00098
DIAGNOSTIC PROCEDURE 6
Inspecting SRS Malfunctioning Parts by Using “AIR BAG” Warning Lamp — Diagnosis Mode
NOTE:
SRS will not enter Diagnosis mode if no malfunction is detected in User mode.
1. Turn ignition switch ON.
2. After “AIR BAG” warning lamp lights for 7 seconds, turn ignition switch OFF within 1 second.
3. Wait more than 3 seconds.
4. Repeat the steps 1 to 3 twice. (Perform three times in all.)
5. Turn ignition switch ON.
SRS is now in Diagnosis mode.
“AIR BAG” warning lamp operates in Diagnosis mode as follows:
WARNING LAMP FLASH CODE CHART
PHIA0532E
PHIA1233E
SHIA0028E
Page 4420 of 4647

TROUBLE DIAGNOSIS
SRS-39
C
D
E
F
G
I
J
K
L
MA
B
SRS
Revision: 2007 April2007 M35/M45
Trouble Diagnosis: “AIR BAG” Warning Lamp Does Not Turn OFFNHS00099
DIAGNOSTIC PROCEDURE 7
1. CHECK THE DEPLOYMENT OF AIR BAG MODULE
Is air bag module deployed?
YES or NO
YES >> Refer to SRS-54, "COLLISION DIAGNOSIS" .
NO >> GO TO 2.
2. CHECK THE AIR BAG FUSE
Check 10A fuse [No.13, located in fuse block (J/B)].
Refer to PG-3, "
POWER SUPPLY ROUTING CIRCUIT" .
OK or NG
OK >> GO TO 4.
NG >> GO TO 3.
3. CHECK AIR BAG FUSE AGAIN
Replace “AIR BAG” fuse and turn ignition switch ON.
Does the
“AIR BAG” fuse blow again?
YES >> Repair or replace main harness.
NO >>INSPECTION END
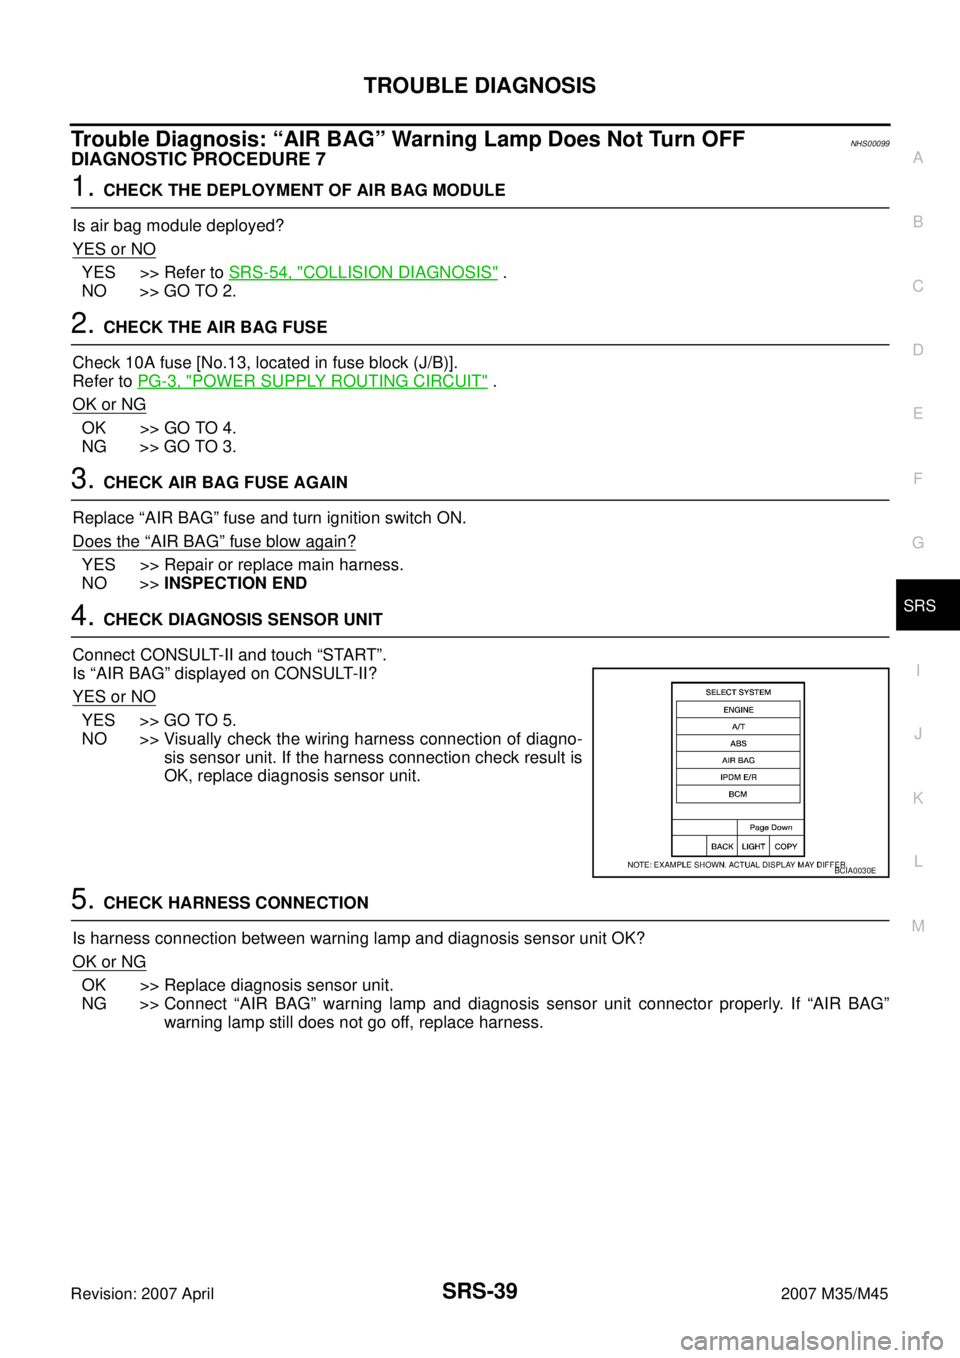
4. CHECK DIAGNOSIS SENSOR UNIT
Connect CONSULT-II and touch “START”.
Is “AIR BAG” displayed on CONSULT-II?
YES or NO
YES >> GO TO 5.
NO >> Visually check the wiring harness connection of diagno-
sis sensor unit. If the harness connection check result is
OK, replace diagnosis sensor unit.
5. CHECK HARNESS CONNECTION
Is harness connection between warning lamp and diagnosis sensor unit OK?
OK or NG
OK >> Replace diagnosis sensor unit.
NG >> Connect “AIR BAG” warning lamp and diagnosis sensor unit connector properly. If “AIR BAG”
warning lamp still does not go off, replace harness.
BCIA0030E
Page 4421 of 4647
SRS-40
TROUBLE DIAGNOSIS
Revision: 2007 April2007 M35/M45
Trouble Diagnosis: “AIR BAG” Warning Lamp Does Not Turn ONNHS0009A
DIAGNOSTIC PROCEDURE 8
1. CHECK METER FUSE
Check 10A fuse [No.14, located in fuse block (J/B)].
Refer to PG-3, "
POWER SUPPLY ROUTING CIRCUIT" .
OK or NG
OK >> GO TO 3.
NG >> GO TO 2.
2. CHECK METER FUSE AGAIN
Replace 10A fuse [No.14, located in fuse block (J/B)] and turn ignition switch ON.
Does the meter fuse blow again?
YES >> Repair or replace the related harness.
NO >>INSPECTION END
3. CHECK HARNESS CONNECTION BETWEEN DIAGNOSIS SENSOR UNIT AND COMBINATION
METER
Disconnect diagnosis sensor unit connector and turn ignition switch ON.
Does “AIR BAG” warning lamp turn ON?
YES or NO
YES >> Replace diagnosis sensor unit.
NO >> Replace combination meter assembly.