2007 Hyundai H-1 (Grand Starex) warning light
[x] Cancel search: warning lightPage 9 of 284

F9
1. Multi-function light switch
2. Seat warmer switch (If installed)
3. Horn/Driver's side airbag (If installed)
4. Rear heater switch (If installed)
5. Windshield wiper/Washer switch
6. Hazard warning switch
7. Front fog light switch (If installed)
8. 4WD Switch (If installed)
9. Rear fog light switch (If installed)
10. Front/Rear window defroster switch
11. Passenger's side airbag (If installed)
12. Glove box
13. Headlight leveling device switch (If installed)
14. ECT switch (Automatic transmission only)
15. Fuel-filler lid release lever
16. Hood release lever
17. Panel brightness control knob (Rheostat) (If installed)
18. Engine RPM adjustment knob (If installed)
19. Heater/Air conditioner control panel
20. Cigarette lighter
21. Ashtray
22. Drink holder
23. Audio system (If installed)
24. Digital clock (If installed)
CAUTION:
When installing the container of liquid air refresher inside a vehicle, do not place it near theinstrument cluster nor on the crash pad surface. If there is any leakage from the air refresher onto these areas (Instrument cluster, crash pad or air ventilator), it may damage these parts. If the liquid from air refresher does leak onto these areas, wash them with water immediately.
!
Page 11 of 284

F11
1. Multi-function light switch
2. Horn/Driver's side airbag (If installed)
3. Windshield wiper/Washer switch
4. Hazard warning switch
5. Front fog light switch (If installed)
6. Rear fog light switch (If installed)
7. Outside rearview mirror heater switch (If installed)
8. Glove box
9. Hood release lever
10. Headlight leveling device switch (If installed)
11. Engine RPM Adjustment Knob
12. Heater/Air conditioner control panel
13. Cigarette lighter
14. Ashtray
15. Drink holder
16. Audio system (If installed)
17. Digital clock (If installed)
CAUTION:
When installing the container of liquid air refresher inside a vehicle, do not place it near theinstrument cluster nor on the crash pad surface. If there is any leakage from the air refresheronto these areas (Instrument cluster, crash pad or air ventilator), it may damage these parts. If the liquid from air refresher does leak onto these areas, wash them with water immediately.
!
Page 12 of 284

YOUR VEHICLE AT A GLANCE
F12
B255A01P-GAT INDICATOR SYMBOLS ON THE INSTRUMENT CLUSTER * More detailed explanations of these items will be found beginning on page 2-8.
O/D OFF Indicator Light (Automatic Transmission Only)
Fuel Filter Warning Light (Diesel only)
Diesel Pre-heat Indicator Light (Diesel only)
Immobilizer Warning Light (If installed)
SRS (Airbag) Service Reminder Indicator Light (SRI) (If installed)
ABS Service Reminder Indicator Light(If installed)
Turn Signal Indicator Lights High Beam Indicator LightLow Oil Pressure Warning Light Parking Brake/Low Brake Fluid Level Warning Light Charging System Warning Light Seat Belt Warning Light (If installed) Door Ajar Warning Light Low Fuel Level Warning Light
POWER/HOLD Indicator Light (If installed) Malfunction Indicator Light (If installed)
4WD HIGH/LOW Indicator Light (If installed)
Page 15 of 284

1
BEFORE DRIVING YOUR VEHICLE
3BEFORE DRIVING YOUR VEHICLE SAFETY CHECKS
!
B010A01P-GAT Be sure you know your vehicle and its equipment and how to use it safely. B010B01P-GAT Before entering the vehicle
o Check that windows, mirrors and
lights are clean.
o Check if any tire is low or flat.
o Look for fluid leaks.
o Check that area is clear if you're about to back up.
B010C03P-GAT After entering the vehicle
o Lock all doors.
o The driver and passengers are wear- ing properly adjusted seat belts.
o The head restraints are properly adjusted, if so equipped.
o Adjust inside and outside mirrors.
o Check warning lights for correct
operation, with the ignition key in the position "ON".
o Check all gauges, for normal opera- tion. WARNING: (Diesel only)
To ensure that sufficient vacuum exists within the brake system dur-ing cold weather start-up condi- tions, it is necessary to run the engine at idle after starting the en-gine. NOTE: Fluid levels, such as engine oil, engine coolant, brake fluid, and windshield washer fluid, should be checked daily and/or weekly, orwhenever you refuel. Further details are described in the "CONSUMER INFORMATION" sec-tion.
Biodiesel Commercially supplied biodiesel blends of no more than 5% biodiesel, com- monly known as "B5 biodiesel" may beused in your vehicle if it meets EN 14214 or equivalent specifications. (EN stands for "European Norm"). The useof biofuels made from rapeseed methyl ester (RME), fatty acid methyl ester (FAME), vegetable oil methyl ester(VME) etc. or mixing diesel with biodiesel will cause increased wear or damage to the engine and fuel system.Repair or replacement of worn or dam- aged components due to the use of non approved fuels will not be covered bythe manufactures warranty.
CAUTION:
o Never use any fuel, whether diesel or B5 biodiesel that fails to meetthe latest petroleum industry speci-fication.
o Never use any fuel additives or
treatments that are not recom-mended or approved by the ve- hicle manufacturer.
!
Page 39 of 284

1
BEFORE DRIVING YOUR VEHICLE
27
!WARNING:
o Fuel vapors are dangerous. Be- fore refueling, always stop the en- gine and never allow sparks oropen flames near the filler area. If you need to replace the filler cap, use a genuine Hyundai replace-ment part. If you open the fuel filler cap dur- ing high ambient temperatures, aslight "pressure sound" may be heard. This is normal and not a cause for concern.Whenever you open the fuel filler cap, turn it slowly. o Automotive fuels are flammable/
explosive materials. When refuel-ing, please note the following guidelines carefully. Failure tofollow these guidelines may re- sult in severe personal injury, se- vere burns or death by fire orexplosion.
- Before refueling always note thelocation of the Emergency Gaso- line Shut-Off, if available, at the gas station facility.
- Before touching the fuel nozzle or fuel filler cap, you shouldeliminate potentially dangerous static electricity discharge bytouching another metal part of the front of the vehicle, a safe distance away from the fuel fillerneck, nozzle, or other gas source.
- Do not get back into a vehicle once you have begun refueling.Do not touch, rub or slide against any item or fabric (polyester,satin, nylon, etc.) capable of pro- ducing static electricity. Static electricity discharge can ignitefuel vapors resulting in explo- sion. If you must re-enter the vehicle,you should once again elimi- nate potentially dangerous staticelectricity discharge by touch- ing a metal part of the vehicle, away from the fuel filler neck,nozzle or other gasoline source.
- When using a portable fuel con-
tainer be sure to place the con-tainer on the ground prior to refueling. Static electricity dis- charge from the container canignite fuel vapors causing a fire. Once refueling has begun, con- tact with the vehicle should bemaintained until the filling is complete. Use only portable fuel containers designed to carry andstore gasoline.
- Do not use cellular phones
around a gas station or whilerefueling any vehicle. Electric current and/or electronic inter- ference from cellular phones canpotentially ignite fuel vapors causing a fire. If you must use your cellular phone use it in aplace away from the gas station.
NOTE: If the fuel-filler lid will not open be- cause ice has formed around it, tap lightly or push on the lid to break theice and release the lid. Do not pry on the lid. If necessary, spray around the lid with an approved de-icer fluid(do not use radiator anti-freeze) or move the vehicle to a warm place and allow the ice to melt.
Page 40 of 284

1BEFORE DRIVING YOUR VEHICLE
28
B250A01P-GAT POWER WINDOW (If installed) Power window operates when the igni- tion key is in the "ON" position.The main switches are located on the driver's armrest and control the front windows on the respective sides of thevehicle. The windows may be opened by de- pressing the appropriate windowswitch. To stop at the desired opening, re- lease the switch. The window may beclosed by pulling the front portion of the switch. Close
HSRFL250
Open
WINDOW
!
B230A01P-GAT FRONT DOOR WINDOW GLASS Manual type
Turn the window regulator handle to raise or lower the window. WARNING:
When opening or closing the win- dows, make sure your passenger's arms and hands are safely out of the way. CLOSE
GT10260A
OPEN
- When refueling always shut the
engine off. Sparks produced byelectrical components related to the engine can ignite fuel va- pors causing a fire. Always in-sure that the engine is OFF be- fore and during refueling. Once refueling is complete, check tomake sure the fuel filler cap and door are securely closed, before starting the engine.
- Do not light any fire around a gas station. DO NOT use matchesor a lighter and DO NOT SMOKE or leave a lit cigarette in your vehicle while at a gas stationespecially during refueling. Automotive fuel is highly flam- mable and can, when ignited,result in explosion by flames.
- If a fire breaks out during refuel-
ing, leave the vicinity of the ve-hicle, and immediately contact the manager of the gas station or contact the police and localfire department. Follow any safety instructions they provide.
Page 68 of 284

2
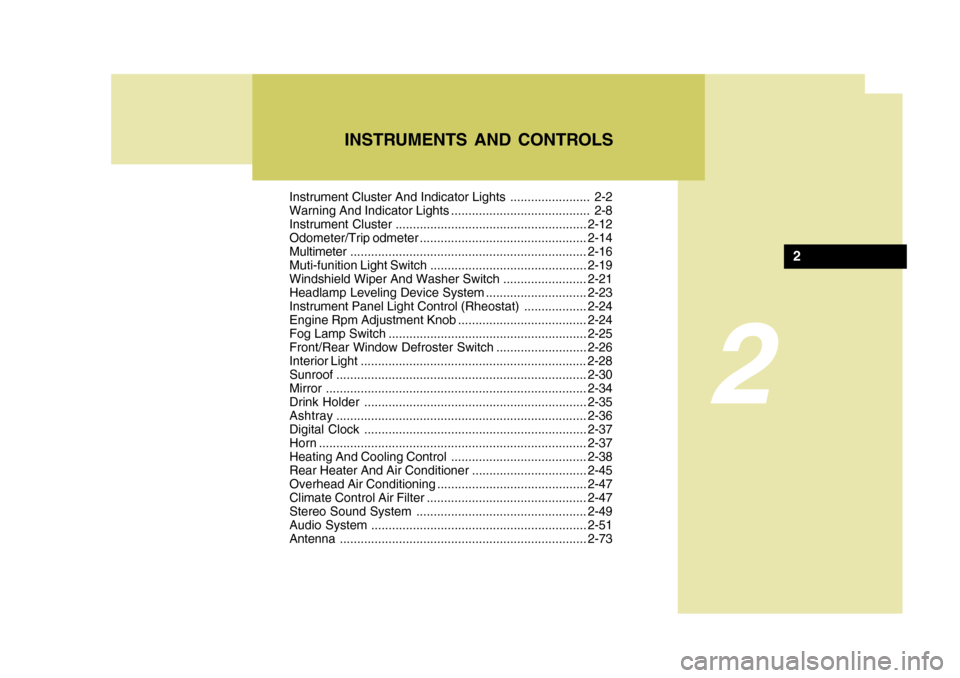
Instrument Cluster And Indicator Lights ....................... 2-2
Warning And Indicator Lights ........................................ 2-8
Instrument Cluster....................................................... 2-12
Odometer/Trip odmeter ................................................ 2-14
Multimeter .................................................................... 2-16
Muti-funition Light Switch ............................................. 2-19
Windshield Wiper And Washer Switch ........................2-21
Headlamp Leveling Device System .............................2-23
Instrument Panel Light Control (Rheostat) ..................2-24
Engine Rpm Adjustment Knob ..................................... 2-24
Fog Lamp Switch ......................................................... 2-25
Front/Rear Window Defroster Switch ..........................2-26
Interior Light ....................... .......................................... 2-28
Sunroof ........................................................................ 2-30
Mirror ........................................................................... 2-34
Drink H older ................................................................ 2-35
Ashtray ........................................................................ 2-36
Digital Clock ................................................................ 2-37
Horn ............................................................................. 2-37
Heating And Cooling Control .......................................2-38
Rear Heater And Air Conditioner ................................. 2-45
Overhead Air C onditioning ........................................... 2-47
Climate Control Air Filter .............................................. 2-47
Stereo Sound System ................................................. 2-49
Audio System .............................................................. 2-51
Antenna ....................................................................... 2-73
INSTRUMENTS AND CONTROLS
2
Page 70 of 284

2
INSTRUMENTS AND CONTROLS
3
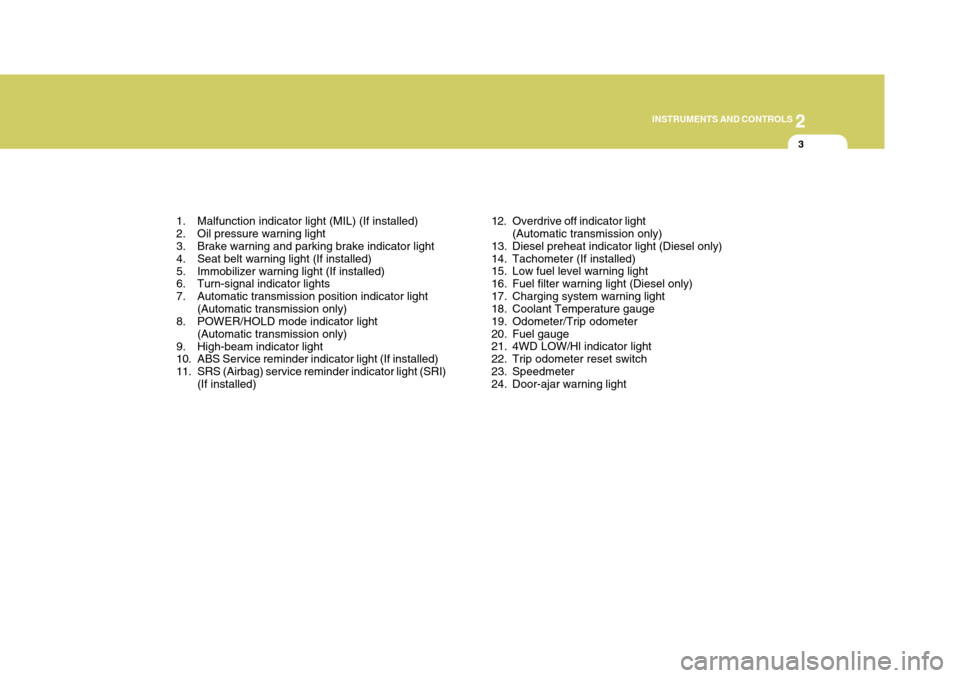
1. Malfunction indicator light (MIL) (If installed)
2. Oil pressure warning light
3. Brake warning and parking brake indicator light
4. Seat belt warning light (If installed)
5. Immobilizer warning light (If installed)
6. Turn-signal indicator lights
7. Automatic transmission position indicator light (Automatic transmission only)
8. POWER/HOLD mode indicator light
(Automatic transmission only)
9. High-beam indicator light
10. ABS Service reminder indicator light (If installed)
11. SRS (Airbag) service reminder indicator light (SRI) (If installed) 12. Overdrive off indicator light
(Automatic transmission only)
13. Diesel preheat indicator light (Diesel only)
14. Tachometer (If installed)
15. Low fuel level warning light
16. Fuel filter warning light (Diesel only)
17. Charging system warning light
18. Coolant Temperature gauge
19. Odometer/Trip odometer
20. Fuel gauge
21. 4WD LOW/Hl indicator light
22. Trip odometer reset switch
23. Speedmeter
24. Door-ajar warning light