2007 Hyundai H-1 (Grand Starex) turn signal
[x] Cancel search: turn signalPage 75 of 284

2 INSTRUMENTS AND CONTROLS
8WARNING AND INDICATOR LIGHTS
B260B01S-GAT SRS (Airbag) Service Reminder Indicator (SRI)(If installed)
The SRS service reminder indicator (SRI) comes on and flashes for about 6 seconds after the ignition key isturned to the "ON" position or after the engine is started, after which it will go out. This light also comes on when the SRS is not working properly. If the SRI doesnot come on, or continuously remains on after flashing for about 6 seconds when you turned the ignition key to the"ON" position or started the engine, or if it comes on while driving, have the SRS inspected by an authorizedHyundai Dealer.
C130N02Y-GAT Anti-lock Brake Warning
Light (If installed)
When the key is turned to the "ON" position, the ABS light will come onand then go off in a few seconds. If the ABS light remains on, comes on while driving, or does not come onwhen the key is turned to the "ON" position, this indicates that there may be a problem with the ABS.If this occurs, have your vehicle checked by your Hyundai dealer as soon as possible. The normal brakingsystem will still be operational, but without the assistance of the anti-lock brake system.C130I01P-GAT Overdrive/Off Indicator (If installed)
When the overdrive switch is turned on and 4th gear is engaged, the overdriveoff indicator will go out. This amber indicator will be illuminated when the overdrive switch is turned off.(Automatic tranmission only)
C130F01P-GAT Turn-signal Indication Lamps
These indication lamps blink on and off when a turn-signal lamp is blinking. Ifthe blinking is too short, the cause may be a faulty turn-signal lamp connection or a blown lamp bulb.
C130G01P-GAT High-beam Indication Lamp
This indication lamp illuminates when the high beams are on.
!WARNING:
If both the ABS SRI and Parking Brake/Brake fluid level warning lights remain "ON" or come on whiledriv ing, there may be a problem with
E.B.D (Electronic brake force distri-
bution). If this occurs, avoid suddenstops and have your vehicle checked by your Hyundai dealer as soon as possible.
Page 86 of 284

2
INSTRUMENTS AND CONTROLS
19MUTI-FUNITION LIGHT SWITCH
B340C03P-AAT Headlight Switch
To operate the headlights, turn the bar- rel on the end of the multi-function switch. The first position turns on theposition, licence-plate, tail lights and instrument panel lights. The second position turns on the headlights. NOTE: The ignition must be in the "ON" position to turn on the headlights.
B340B01A-AAT Lane Change Signal To indicate a lane change, move the lever up or down to a point where it begins flashing.The lever will automatically return to the center position when released.
HSRFL2113
HSRFL2114
C150A01P-GAT Turn signal switch Pulling down on the lever causes the turn signals on the left side of the car toblink. Pushing upward on the lever causes the turn signals on the right side of the car to blink. As the turn iscompleted, the lever will automatically return to the center position and turn off the turn signals at the same time. Ifeither turn signal indicator light blinks more rapidly than usual, goes on but does not blink, or does not go on at all,there is a malfunction in the system. Check for a burned-out fuse or bulb or see your Hyundai dealer.
Page 93 of 284

2 INSTRUMENTS AND CONTROLS
26FRONT/REAR WINDOW DEFROSTER SWITCHHAZARD WARNING SYS- TEM
B370A01A-AAT The hazard warning system should be used whenever you find it necessary to stop the car in a hazardous location.When you must make such an emer- gency stop, always pull off the road as far as possible.The hazard warning lights are turned on by pushing in the hazard switch. This causes all turn signal lights toblink. The hazard warning lights will operate even though the key is not in the ignition.To turn the hazard warning lights off, push the switch a second time. B380A02P-AAT (Minibus/Van)(If installed)
C260A01P B380A01P
The front/rear window defroster is actu- ated in connection with the front window defroster. The window defroster is turned on by pushing in the switch. To turn thedefroster off, pushing in the switch a second time. The front/rear window defroster automatically turns itself offafter about 20 minutes. To restart the defroster cycle, push in the switch again after it has turned itself off. CAUTION:
Do not clean the inner side of thefront/rear window glass with an abra- sive type of glass cleaner or use a scraper to remove the foreign depos-its from the inner surface of the glass as this may cause damage to the defroster elements.
!
NOTE: The engine must be running for the front/rear window defroster to oper- ate.
Page 140 of 284

2
INSTRUMENTS AND CONTROLS
73ANTENNA
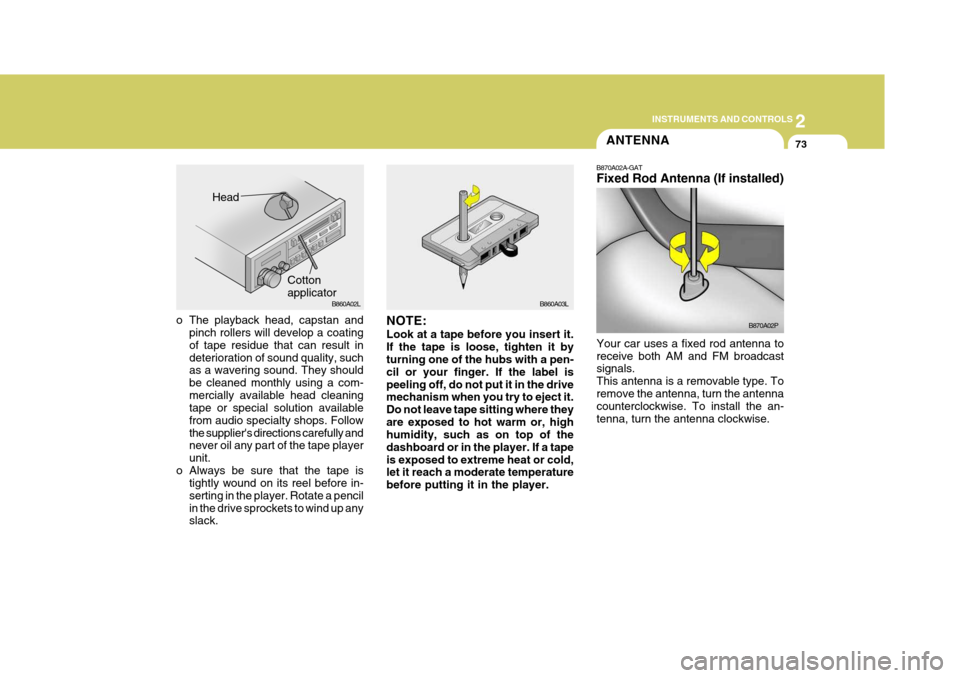
o The playback head, capstan and pinch rollers will develop a coating of tape residue that can result indeterioration of sound quality, such as a wavering sound. They should be cleaned monthly using a com-mercially available head cleaning tape or special solution available from audio specialty shops. Followthe supplier's directions carefully and never oil any part of the tape player unit.
o Always be sure that the tape is tightly wound on its reel before in-serting in the player. Rotate a pencilin the drive sprockets to wind up any slack. NOTE: Look at a tape before you insert it. If the tape is loose, tighten it by turning one of the hubs with a pen- cil or your finger. If the label ispeeling off, do not put it in the drive mechanism when you try to eject it. Do not leave tape sitting where theyare exposed to hot warm or, high humidity, such as on top of the dashboard or in the player. If a tapeis exposed to extreme heat or cold, let it reach a moderate temperature before putting it in the player. B870A02A-GAT Fixed Rod Antenna (If installed)
Your car uses a fixed rod antenna to receive both AM and FM broadcast signals. This antenna is a removable type. Toremove the antenna, turn the antenna counterclockwise. To install the an- tenna, turn the antenna clockwise. B870A02P
Head
CottonapplicatorB860A02L
B860A03L
Page 141 of 284

2 INSTRUMENTS AND CONTROLS
74
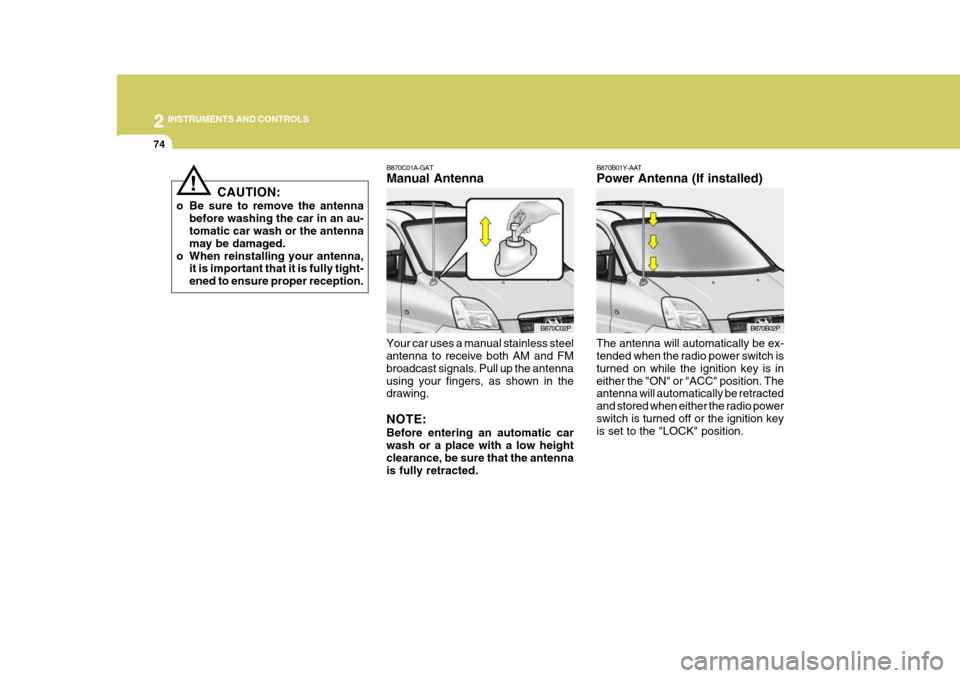
B870C01A-GAT Manual Antenna
Your car uses a manual stainless steel antenna to receive both AM and FM broadcast signals. Pull up the antennausing your fingers, as shown in the drawing. NOTE: Before entering an automatic car wash or a place with a low height clearance, be sure that the antenna is fully retracted. B870B01Y-AAT Power Antenna (If installed) The antenna will automatically be ex- tended when the radio power switch is turned on while the ignition key is ineither the "ON" or "ACC" position. The antenna will automatically be retracted and stored when either the radio powerswitch is turned off or the ignition key is set to the "LOCK" position.
CAUTION:
o Be sure to remove the antenna before washing the car in an au-tomatic car wash or the antenna may be damaged.
o When reinstalling your antenna, it is important that it is fully tight-ened to ensure proper reception.
!
B870C02PB870B02P
Page 167 of 284

3
STARTING AND OPERATING
25REAR PARKING ASSIST SYSTEM
NOTE:
o Rear parking assist system shouldonly be considered as a supple- mentary function. The driver mustcheck the rear view.
o The audible signal can be differ-
ent depending on the objects.
o The audible signal might not acti- vate in case the sensor is frozen orstained with dirt or mud.
o There is a chance of malfunction of the rear parking assist systemwhen driving in uneven surfacessuch as woods, gravel road, jagged road, or gradient.
o Do not push, or scratch the sur- face of the sensor. This will likelydamage the covering.
o The sensor system might not rec- ognize sharp objects, thick win-ter clothes or sponges which absorb the frequency.
o Clean dirty sensors with a soft sponge and clean water.
o When more than two objects are sensed at the same time, the clos- est one will be recognized first.
C400A02P-GAT (If installed)
The rear parking assist system assists the driver during backward movementof the vehicle by chiming if any object is sensed within the distance of 1200 mm (47 in.) behind the vehicle. Thissystem is only a supplemental system. Sensor
HSRFL160
o Use caution when parking on a hill.
Engage the parking brake and place the gear selector lever in "P"(automatic transmission) or in first or reverse gear (manual trans-mission). If your vehicle is facing downhill, turn the front wheels away from the curb to help keep thevehicle from rolling. If there is no curb or if it is required by other conditions to keep the vehicle fromrolling, block the wheels.
o Under some conditions your park-
ing brake can freeze in the engagedposition. This is most likely to hap- pen when there is an accumulation of snow or ice around or near therear brakes or if the brakes are wet. if there is a risk that the parking brake may freeze, apply it only tem-porarily while you put the gear se- lector lever in "P" (automatic trans- mission) or in first or reverse gear(manual transmission) and block the rear wheels so the vehicle cannot roll. Then release the parking brake.
Page 192 of 284

44IN CASE OF EMERGENCY
16
Tow at the illustrated point. Using any part other than the designated towing hooks could result in damage to ve- hicle body. The regulations concern-ing towing may differ from country to country. It is recommended that you may obeythe regulations in your area. If your vehicle is to be towed, pay careful attention to the following points.
1. Move the gearshift lever to neutral.
2. Be sure the towing speed is within
the legal limit. 3. On vehicles with steering lock sys-
tem, turn the ignition switch to "ACC"to unlock the steering wheel. If you will be using the turn signals while being towed, turn the ignition switchto "ON" position.
4. To prevent the exhaust gas from
entering the towing vehicle, set theair selection lever on the heater control to the recirculation position.
5. Turn on the hazard warning lamps.
6. During towing, make sure that close contact is maintained between thedrivers of both vehicles, and thatthe vehicles travel at low speed. Avoid abrupt starting or stopping which might subject the vehicles toshock.
7. If the transmission is malfunction-
ing or damaged, tow the vehiclewith the rear wheels raised off the ground.
8. If the vehicle is equipped with a brake booster system, the brakeboosting power will be lost and greater force will be required todepress the brake pedal.
JFS920-1
Rear (Minbus/Van)
Towing hook
9. If the vehicle is equipped with apower steering system, greater force will be required to operate the steering wheel.
NOTE:
o Your vehicle should only be used to tow another vehicle if the weight of the other vehicle is less than that of your vehicle.
o Before towing, check the level of the automatic transaxle fluid. If itis below the "HOT" range on thedipstick, add fluid. If you cannot add fluid, a towing dolly must be used.
Page 196 of 284

44IN CASE OF EMERGENCY
20
!WARNING:
o Improperly loading your car and trailer can serious affect its steer- ing and braking performance causing a crash in which youmay be seriously injured.
o For automatic transmission ve-
hicles, the trailer should be towedwith the towing vehicle unloaded, with the exception of the driver. Otherwise, the automatic trans-mission oil temperature may rise to a temperature that may result in serious damage of the auto- matic transmission. C190F02A-GAT Trailer or Vehicle Towing Tips
1. Before towing, check hitch and
safety chain connections as well as proper operation of the trailer run- ning lights, brake lights, and turn signals.
2. Always drive your vehicle at a mod- erate speed (Less than 100 km/h).
3. Trailer towing requires more fuel than normal conditions.
4. To maintain engine braking effi-
ciency and electrical charging per-formance, do not use fifth gear (manual transmission) or overdrive (automatic transmission).
5. Always secure items in the trailer to prevent load shift while driving.
6. Check the condition and air pres- sure of all tires on the trailer and your car. Low tire pressure can se- riously affect the handling. Alsocheck the spare tire.
7. The vehicle/trailer combination is
more affected by crosswind andbuffeting. When being passed by a large vehicle, keep a constant speed and steer straight ahead. If there is too much wind buffeting,slow down to get out of the othervehicle’s air turbulence.
8. When parking your car and trailer,
especially on a hill, be sure to followall the normal precautions. Turn your front wheel into the curb, set the parking brake firmly, and put thetransmission in 1st or "R" (manual transmission) or "P" (automatic transmission). In addition, placewheel chocks at each of the trailer’s tires.
9. If the trailer has electric brakes, start your vehicle and trailer mov-ing, and then apply the trailer brake controller by hand to be sure thebrakes are working. This lets you check your electrical connection at the same time.
10.During your trip, check occasion- ally to be sure that the load issecure, and that the lights and anytrailer brakes are still working.
11.Avoid jerky starts, sudden accel-
eration or sudden stops.
12.Avoid sharp turns and rapid lane changes.