2007 Hyundai H-1 (Grand Starex) low oil pressure
[x] Cancel search: low oil pressurePage 12 of 284

YOUR VEHICLE AT A GLANCE
F12
B255A01P-GAT INDICATOR SYMBOLS ON THE INSTRUMENT CLUSTER * More detailed explanations of these items will be found beginning on page 2-8.
O/D OFF Indicator Light (Automatic Transmission Only)
Fuel Filter Warning Light (Diesel only)
Diesel Pre-heat Indicator Light (Diesel only)
Immobilizer Warning Light (If installed)
SRS (Airbag) Service Reminder Indicator Light (SRI) (If installed)
ABS Service Reminder Indicator Light(If installed)
Turn Signal Indicator Lights High Beam Indicator LightLow Oil Pressure Warning Light Parking Brake/Low Brake Fluid Level Warning Light Charging System Warning Light Seat Belt Warning Light (If installed) Door Ajar Warning Light Low Fuel Level Warning Light
POWER/HOLD Indicator Light (If installed) Malfunction Indicator Light (If installed)
4WD HIGH/LOW Indicator Light (If installed)
Page 70 of 284
2
INSTRUMENTS AND CONTROLS
3
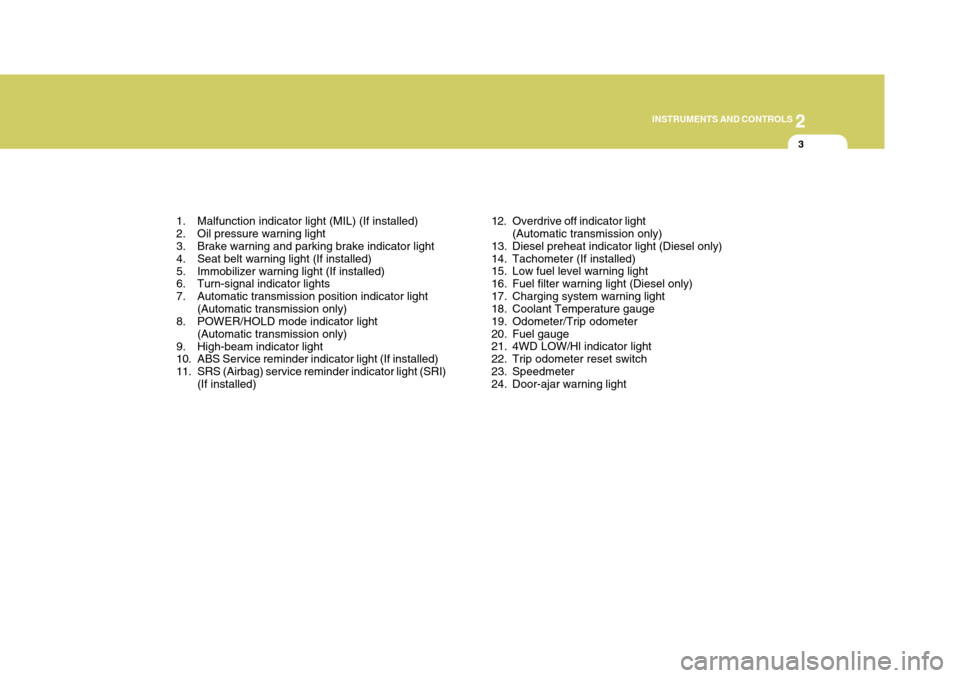
1. Malfunction indicator light (MIL) (If installed)
2. Oil pressure warning light
3. Brake warning and parking brake indicator light
4. Seat belt warning light (If installed)
5. Immobilizer warning light (If installed)
6. Turn-signal indicator lights
7. Automatic transmission position indicator light (Automatic transmission only)
8. POWER/HOLD mode indicator light
(Automatic transmission only)
9. High-beam indicator light
10. ABS Service reminder indicator light (If installed)
11. SRS (Airbag) service reminder indicator light (SRI) (If installed) 12. Overdrive off indicator light
(Automatic transmission only)
13. Diesel preheat indicator light (Diesel only)
14. Tachometer (If installed)
15. Low fuel level warning light
16. Fuel filter warning light (Diesel only)
17. Charging system warning light
18. Coolant Temperature gauge
19. Odometer/Trip odometer
20. Fuel gauge
21. 4WD LOW/Hl indicator light
22. Trip odometer reset switch
23. Speedmeter
24. Door-ajar warning light
Page 72 of 284
2
INSTRUMENTS AND CONTROLS
5
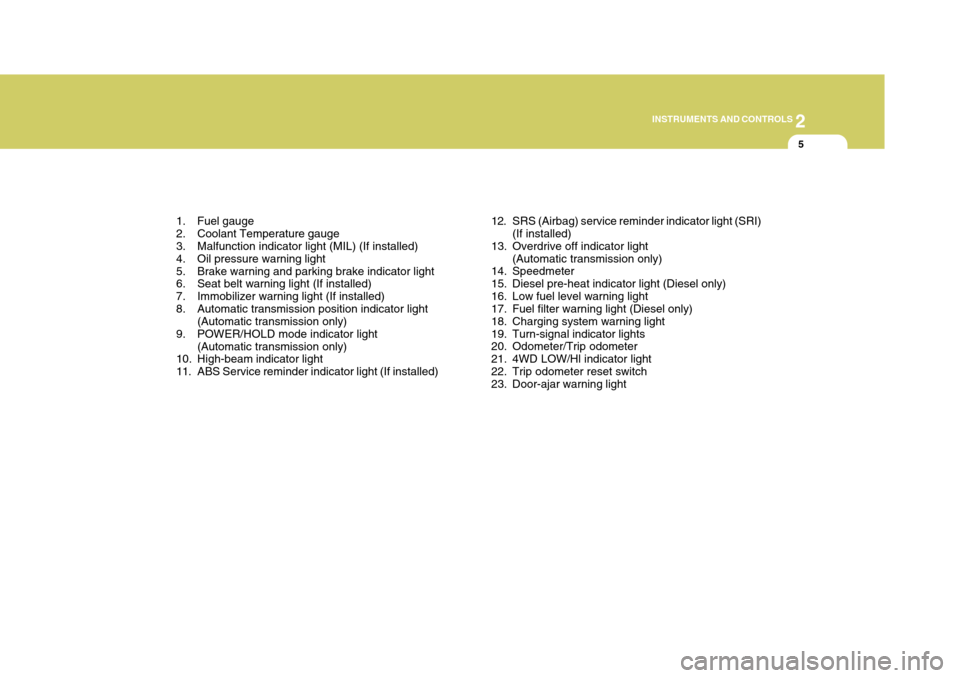
1. Fuel gauge
2. Coolant Temperature gauge
3. Malfunction indicator light (MIL) (If installed)
4. Oil pressure warning light
5. Brake warning and parking brake indicator light
6. Seat belt warning light (If installed)
7. Immobilizer warning light (If installed)
8. Automatic transmission position indicator light (Automatic transmission only)
9. POWER/HOLD mode indicator light
(Automatic transmission only)
10. High-beam indicator light
11. ABS Service reminder indicator light (If installed) 12. SRS (Airbag) service reminder indicator light (SRI)
(If installed)
13. Overdrive off indicator light (Automatic transmission only)
14. Speedmeter
15. Diesel pre-heat indicator light (Diesel only)
16. Low fuel level warning light
17. Fuel filter warning light (Diesel only)
18. Charging system warning light
19. Turn-signal indicator lights
20. Odometer/Trip odometer
21. 4WD LOW/Hl indicator light
22. Trip odometer reset switch
23. Door-ajar warning light
Page 74 of 284
2
INSTRUMENTS AND CONTROLS
7
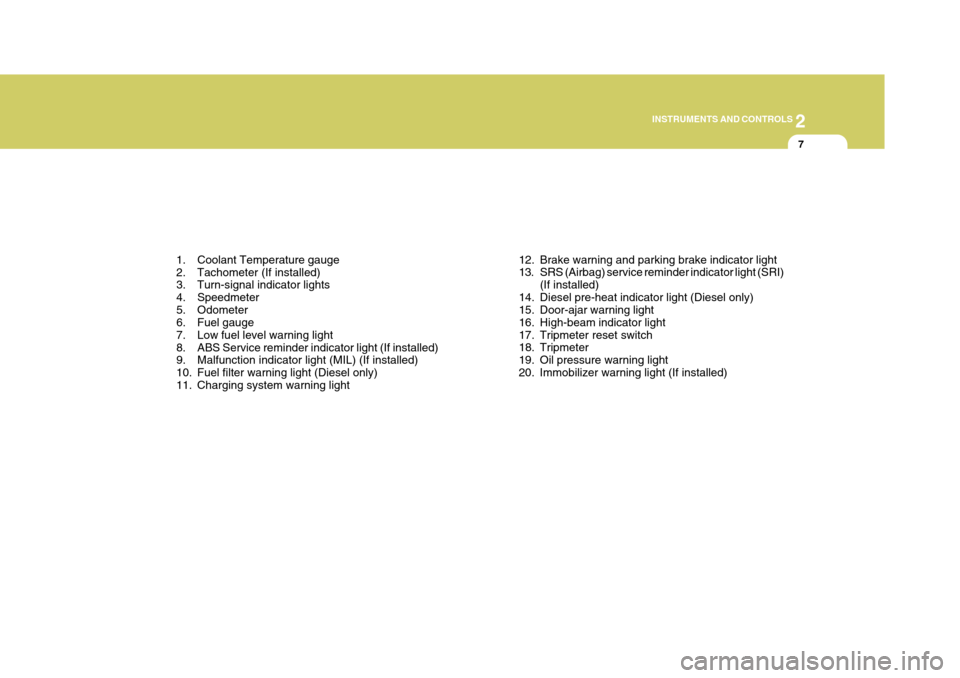
1. Coolant Temperature gauge
2. Tachometer (If installed)
3. Turn-signal indicator lights
4. Speedmeter
5. Odometer
6. Fuel gauge
7. Low fuel level warning light
8. ABS Service reminder indicator light (If installed)
9. Malfunction indicator light (MIL) (If installed)
10. Fuel filter warning light (Diesel only)
11. Charging system warning light 12. Brake warning and parking brake indicator light
13. SRS (Airbag) service reminder indicator light (SRI)
(If installed)
14. Diesel pre-heat indicator light (Diesel only)
15. Door-ajar warning light
16. High-beam indicator light
17. Tripmeter reset switch
18. Tripmeter
19. Oil pressure warning light
20. Immobilizer warning light (If installed)
Page 76 of 284

2
INSTRUMENTS AND CONTROLS
9
B260G01A-AAT
Low Oil Pressure Warning Light CAUTION:
If the oil pressure warning light stays on while the engine is running, seri-ous engine damage may result. The oil pressure warning light comes on whenever there is insufficient oilpressure. In normal operation, it should come on when the ignition switch is turned on, then go outwhen the engine is started. If the oil pressure warning light stays on while the engine is running, there may bea serious malfunction. If this happens, stop the car as soon as it is safe to do so, turn off theengine and check the oil level. If the oil level is low, fill the engine oil to the proper level and start the engineagain. If the light stays on with the engine running, turn the engine off immediately. In any instance wherethe oil light stays on when the en- gine is running, the engine should be checked by an authorizedHyundai dealer before the car is driven again.
!
!
B260H03A-AAT Parking Brake/Low Brake Fluid Level Warning Light If the parking brake is not applied, the warning light should come on when theignition switch is turned to "ON" or "START", then go out when the engine starts. If the light comes on at anyother time, you should slow the vehicle and bring it to a complete stop in a safe location off the roadway.The brake warning light indicates that the brake fluid level in the brake mas- ter cylinder is low and hydraulic brakefluid conforming to DOT 3 or DOT 4 specifications should be added. After adding fluid, if no other trouble is found,the car should be immediately and carefully driven to a Hyundai dealer for inspection. If further trouble is experi-enced, the vehicle should not be driven at all but taken to a dealer by a professional towing service or someother safe method.
WARNING:
If you suspect brake trouble, have your brakes checked by a Hyundaidealer as soon as possible. Driving your car with a problem in either the brake electrical system or brake hy-draulic system is dangerous, and could result in a serious injury or death. Warning Light Operation The parking brake/brake fluid level warning light should come on when the parking brake is applied and the igni- tion switch is turned to "ON" or"START". After the engine is started, the light should go out when the park- ing brake is released.
Page 196 of 284
44IN CASE OF EMERGENCY
20
!WARNING:
o Improperly loading your car and trailer can serious affect its steer- ing and braking performance causing a crash in which youmay be seriously injured.
o For automatic transmission ve-
hicles, the trailer should be towedwith the towing vehicle unloaded, with the exception of the driver. Otherwise, the automatic trans-mission oil temperature may rise to a temperature that may result in serious damage of the auto- matic transmission. C190F02A-GAT Trailer or Vehicle Towing Tips
1. Before towing, check hitch and
safety chain connections as well as proper operation of the trailer run- ning lights, brake lights, and turn signals.
2. Always drive your vehicle at a mod- erate speed (Less than 100 km/h).
3. Trailer towing requires more fuel than normal conditions.
4. To maintain engine braking effi-
ciency and electrical charging per-formance, do not use fifth gear (manual transmission) or overdrive (automatic transmission).
5. Always secure items in the trailer to prevent load shift while driving.
6. Check the condition and air pres- sure of all tires on the trailer and your car. Low tire pressure can se- riously affect the handling. Alsocheck the spare tire.
7. The vehicle/trailer combination is
more affected by crosswind andbuffeting. When being passed by a large vehicle, keep a constant speed and steer straight ahead. If there is too much wind buffeting,slow down to get out of the othervehicle’s air turbulence.
8. When parking your car and trailer,
especially on a hill, be sure to followall the normal precautions. Turn your front wheel into the curb, set the parking brake firmly, and put thetransmission in 1st or "R" (manual transmission) or "P" (automatic transmission). In addition, placewheel chocks at each of the trailer’s tires.
9. If the trailer has electric brakes, start your vehicle and trailer mov-ing, and then apply the trailer brake controller by hand to be sure thebrakes are working. This lets you check your electrical connection at the same time.
10.During your trip, check occasion- ally to be sure that the load issecure, and that the lights and anytrailer brakes are still working.
11.Avoid jerky starts, sudden accel-
eration or sudden stops.
12.Avoid sharp turns and rapid lane changes.
Page 205 of 284
4
CORROSION PREVENTION AND APPEARANCE CARE
29
4
IN CASE OF EMERGENCY
29
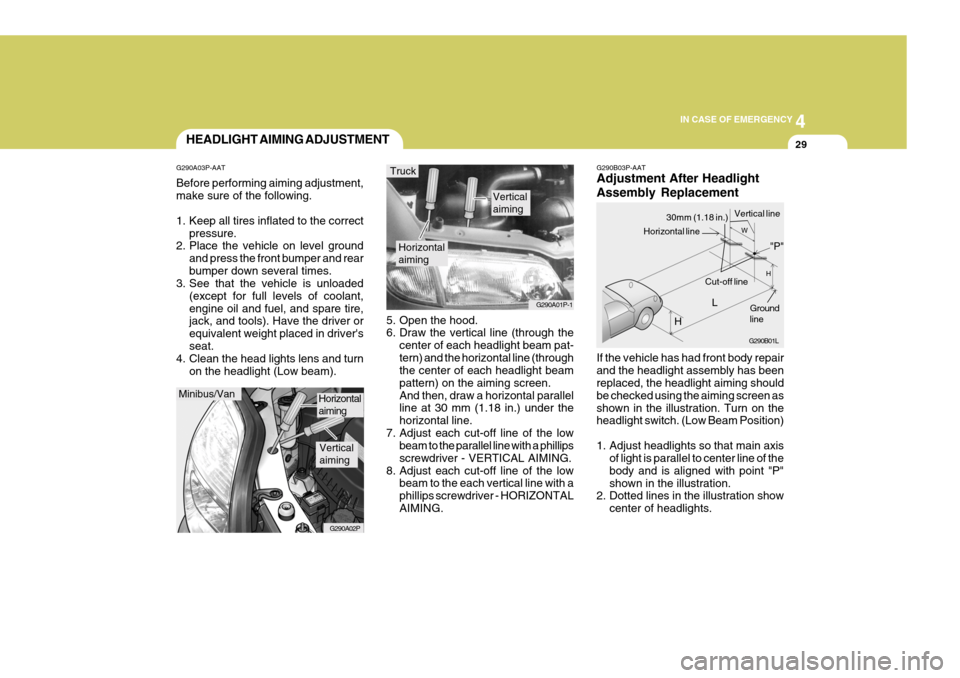
G290B03P-AAT Adjustment After Headlight Assembly Replacement If the vehicle has had front body repair and the headlight assembly has been replaced, the headlight aiming should be checked using the aiming screen asshown in the illustration. Turn on the headlight switch. (Low Beam Position)
1. Adjust headlights so that main axis
of light is parallel to center line of the body and is aligned with point "P"shown in the illustration.
2. Dotted lines in the illustration show
center of headlights.
5. Open the hood.
6. Draw the vertical line (through the
center of each headlight beam pat- tern) and the horizontal line (through the center of each headlight beam pattern) on the aiming screen.And then, draw a horizontal parallel line at 30 mm (1.18 in.) under the horizontal line.
7. Adjust each cut-off line of the low beam to the parallel line with a phillipsscrewdriver - VERTICAL AIMING.
8. Adjust each cut-off line of the low beam to the each vertical line with aphillips screwdriver - HORIZONTALAIMING.
Horizontal aiming
Verticalaiming
G290A01P-1
Truck
G290B01L
LW
H
H Cut-off line
Ground line
"P"
Horizontal line
30mm (1.18 in.) Vertical line
HEADLIGHT AIMING ADJUSTMENT
G290A03P-AAT Before performing aiming adjustment, make sure of the following.
1. Keep all tires inflated to the correct pressure.
2. Place the vehicle on level ground
and press the front bumper and rear bumper down several times.
3. See that the vehicle is unloaded
(except for full levels of coolant,engine oil and fuel, and spare tire, jack, and tools). Have the driver or equivalent weight placed in driver'sseat.
4. Clean the head lights lens and turn
on the headlight (Low beam).
Minibus/Van
G290A02P
Horizontal aiming
Verticalaiming
Page 225 of 284
5APPEARANCE CARE
4
F010L01P-GAT
Damaged paint
Small cracks and scratches in the
paint coat should be touched up as soon as possible with HYUNDAI paint pencil or spray paint to prevent corro-sion. Check body areas facing the road or the tires especially carefully for damage to the paint coat caused byflying stones, etc. The paint code num- ber for your vehicle can be found on the vehicle information code plate. F010M01P-GAT
Tar
If tar becomes adhered to the vehicle, use special tar remover to remove it as soon as possible. If the tar leavesa stain, polish the affected area. F010N01P-GAT
Plastic and rubber parts
Use a soft cloth and wash with water.
If necessary, a cleaning agent spe- cially designed for plastics can beused. If engine oil, brake fluid, battery fluid, etc., comes in contact with these parts, wash promptly with water andthen use alcohol to remove the stain completely.
! CAUTION:
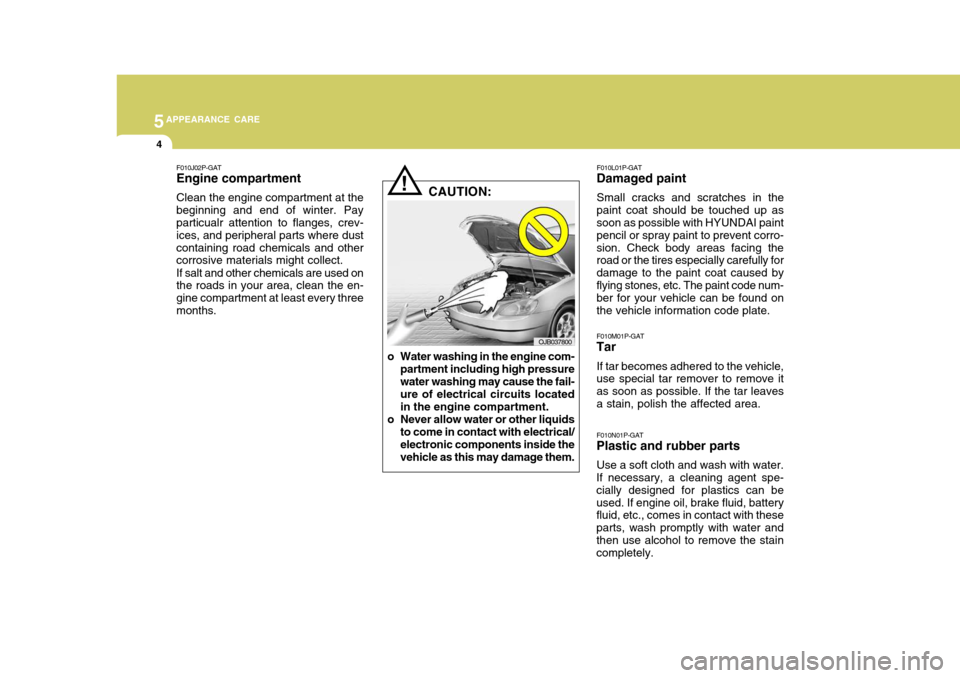
o Water washing in the engine com- partment including high pressure water washing may cause the fail- ure of electrical circuits located in the engine compartment.
o Never allow water or other liquids to come in contact with electrical/electronic components inside thevehicle as this may damage them.
OJB037800
F010J02P-GAT Engine compartment Clean the engine compartment at the beginning and end of winter. Pay particualr attention to flanges, crev- ices, and peripheral parts where dustcontaining road chemicals and other corrosive materials might collect. If salt and other chemicals are used on the roads in your area, clean the en- gine compartment at least every threemonths.