2007 Hyundai H-1 (Grand Starex) light
[x] Cancel search: lightPage 29 of 284

1
BEFORE DRIVING YOUR VEHICLE
17
B070C01FC-GAT Alarm Stage The alarm will be activated if any of the following occurs while the car is parkedand the system is armed.
(1) A front or rear door is opened with-
out using the transmitter.
(2) The tail gate is opened without us-
ing the transmitter.
(3) The engine hood is opened. B070B03P
NOTE:
o If any door, tail gate or engine
hood remains open, the system will not be armed.
o If this happens, rearm the system as described above.
CAUTION:
Do not arm the system until all passengers have left the car. If the system is armed while apassenger(s) remains in the car, the alarm may be activated when the remaining passenger(s) leaves the car.
!
B070B01O-AAT Armed Stage Park the car and stop the engine. Arm the system as described below.
(1) Remove the ignition key from the
ignition switch.
(2) Make sure that the engine hood and tail gate are locked.
(3) Lock the doors using the transmit-
ter of the keyless entry system.
After completion of the steps above, the turn signal light will blink once to indicate that the system is armed. B070B02P
Page 30 of 284

1BEFORE DRIVING YOUR VEHICLE
18
B070D03P-AAT Disarmed Stage The system will be disarmed when the driver's or passenger's door is un-locked by depressing the button on the transmitter after the system was armed. After completion of the step above, the turn signal lights will blink twice to indicate that the system is disarmed. NOTE:
o Once the system has been dis-armed, it can not be rearmed ex- cept by repeating the arming pro- cedures.
o When the system is disarmed
with the interior light switched to"DR", the interior light will illumi- nate for 30 seconds.
The alarming horn will sound and theturn signal light will blink continuouslyfor 27 seconds (E.C only/ Except E.C 3 times). To turn off the system, unlock the door or tail gate with the transmit-ter.
CAUTION:
Avoid trying to start the engine whilethe system is armed.
! CAUTION:
Only the transmitter can disarm the armed stage. If the transmitter doesnot disarm the system, it is neces- sary to take the following steps;
1. Unlock the door with the key, which will cause, the alarm to be activated.
2. Insert the key in the ignition key cylinder and turn the ignition keyto "ON" position.
3. Wait for 30 seconds. After completing the steps above, the system will be disarmed.
!
Page 31 of 284

1
BEFORE DRIVING YOUR VEHICLE
19
B070F03A-GAT Keyless Entry System (If installed) Locking doors
1. Close all doors.
2. Push the button on the transmitter.
3. At the same time all doors lock, the turn signal lights will blink once toindicate that the system is armed.
Unlocking doors 1. Push the button on the transmitter once more after all doors were locked.
2. At the same time all doors unlock,
the turn signal lights will blink twiceto indicate that the system is dis- armed. NOTE:
o The transmitter will not work if any
of following occur:
- The ignition key is in ignition
switch.
- You exceed the operating dis-
tance limit (10 m).
- The battery in the transmitter is weak.
- Other vehicles or objects may be blocking the signal.
- The weather is extremely cold.
- The transmitter is close to a
radio transmitter such as a radio station or an airport which can interfere with normal operationof the transmitter.
When the transmitter does not workcorrectly, open and close the doorwith the ignition key. If you have a problem with the transmitter, con- tact an authorized Hyundai Dealer.
o Keep the transmitter away from water or any liquid. If the keylessentry system is inoperative due toexposure to water or liquids, it will not be covered by your manufac- turer vehicle warranty.
B070E02P-AAT Replacing the battery When the transmitter's battery be- comes weak, it may take several pushes on the button to lock or unlockthe doors, and the LED will not light. Replace the battery as soon as pos- sible. Battery type : CR1220 (Minibus/Van) CR2032 (Truck)
Replacement instructions: (Minibus/Van)
1. Remove the screw with a phillips screwdriver.
2. Carefully separate the case with a flat-head screwdriver as shown in the illustration. HTB053
Page 39 of 284

1
BEFORE DRIVING YOUR VEHICLE
27
!WARNING:
o Fuel vapors are dangerous. Be- fore refueling, always stop the en- gine and never allow sparks oropen flames near the filler area. If you need to replace the filler cap, use a genuine Hyundai replace-ment part. If you open the fuel filler cap dur- ing high ambient temperatures, aslight "pressure sound" may be heard. This is normal and not a cause for concern.Whenever you open the fuel filler cap, turn it slowly. o Automotive fuels are flammable/
explosive materials. When refuel-ing, please note the following guidelines carefully. Failure tofollow these guidelines may re- sult in severe personal injury, se- vere burns or death by fire orexplosion.
- Before refueling always note thelocation of the Emergency Gaso- line Shut-Off, if available, at the gas station facility.
- Before touching the fuel nozzle or fuel filler cap, you shouldeliminate potentially dangerous static electricity discharge bytouching another metal part of the front of the vehicle, a safe distance away from the fuel fillerneck, nozzle, or other gas source.
- Do not get back into a vehicle once you have begun refueling.Do not touch, rub or slide against any item or fabric (polyester,satin, nylon, etc.) capable of pro- ducing static electricity. Static electricity discharge can ignitefuel vapors resulting in explo- sion. If you must re-enter the vehicle,you should once again elimi- nate potentially dangerous staticelectricity discharge by touch- ing a metal part of the vehicle, away from the fuel filler neck,nozzle or other gasoline source.
- When using a portable fuel con-
tainer be sure to place the con-tainer on the ground prior to refueling. Static electricity dis- charge from the container canignite fuel vapors causing a fire. Once refueling has begun, con- tact with the vehicle should bemaintained until the filling is complete. Use only portable fuel containers designed to carry andstore gasoline.
- Do not use cellular phones
around a gas station or whilerefueling any vehicle. Electric current and/or electronic inter- ference from cellular phones canpotentially ignite fuel vapors causing a fire. If you must use your cellular phone use it in aplace away from the gas station.
NOTE: If the fuel-filler lid will not open be- cause ice has formed around it, tap lightly or push on the lid to break theice and release the lid. Do not pry on the lid. If necessary, spray around the lid with an approved de-icer fluid(do not use radiator anti-freeze) or move the vehicle to a warm place and allow the ice to melt.
Page 40 of 284

1BEFORE DRIVING YOUR VEHICLE
28
B250A01P-GAT POWER WINDOW (If installed) Power window operates when the igni- tion key is in the "ON" position.The main switches are located on the driver's armrest and control the front windows on the respective sides of thevehicle. The windows may be opened by de- pressing the appropriate windowswitch. To stop at the desired opening, re- lease the switch. The window may beclosed by pulling the front portion of the switch. Close
HSRFL250
Open
WINDOW
!
B230A01P-GAT FRONT DOOR WINDOW GLASS Manual type
Turn the window regulator handle to raise or lower the window. WARNING:
When opening or closing the win- dows, make sure your passenger's arms and hands are safely out of the way. CLOSE
GT10260A
OPEN
- When refueling always shut the
engine off. Sparks produced byelectrical components related to the engine can ignite fuel va- pors causing a fire. Always in-sure that the engine is OFF be- fore and during refueling. Once refueling is complete, check tomake sure the fuel filler cap and door are securely closed, before starting the engine.
- Do not light any fire around a gas station. DO NOT use matchesor a lighter and DO NOT SMOKE or leave a lit cigarette in your vehicle while at a gas stationespecially during refueling. Automotive fuel is highly flam- mable and can, when ignited,result in explosion by flames.
- If a fire breaks out during refuel-
ing, leave the vicinity of the ve-hicle, and immediately contact the manager of the gas station or contact the police and localfire department. Follow any safety instructions they provide.
Page 57 of 284

1
BEFORE DRIVING YOUR VEHICLE
45
B210A01A-AAT To Release the Seat Belt
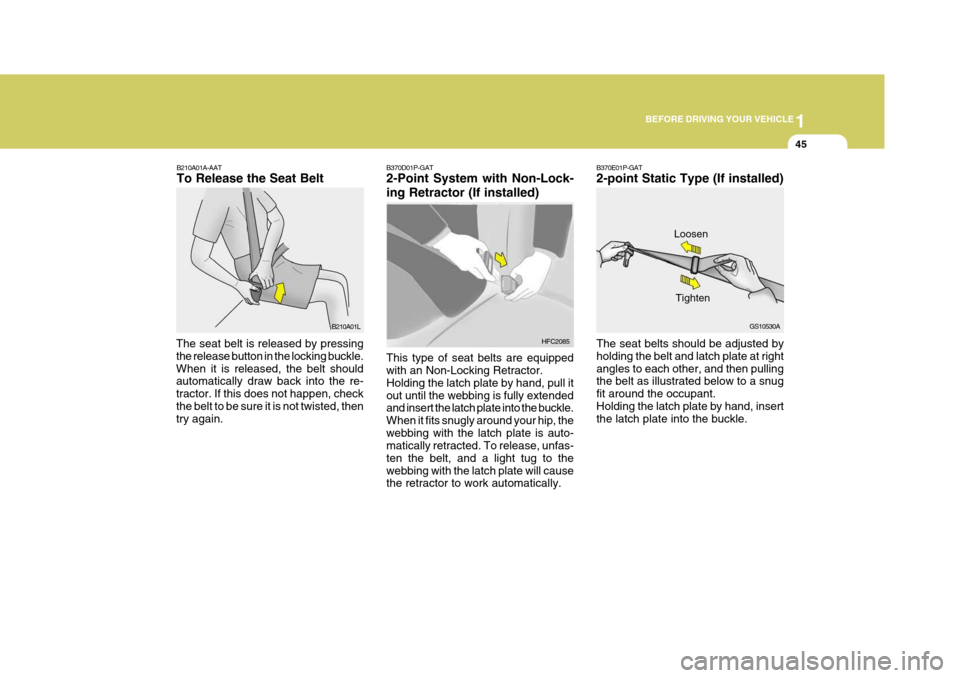
The seat belt is released by pressing the release button in the locking buckle.When it is released, the belt should automatically draw back into the re- tractor. If this does not happen, checkthe belt to be sure it is not twisted, then try again. B210A01LB370D01P-GAT 2-Point System with Non-Lock- ing Retractor (If installed) This type of seat belts are equipped with an Non-Locking Retractor. Holding the latch plate by hand, pull itout until the webbing is fully extended and insert the latch plate into the buckle. When it fits snugly around your hip, thewebbing with the latch plate is auto- matically retracted. To release, unfas- ten the belt, and a light tug to thewebbing with the latch plate will cause the retractor to work automatically.HFC2085B370E01P-GAT 2-point Static Type (If installed) The seat belts should be adjusted by holding the belt and latch plate at rightangles to each other, and then pulling the belt as illustrated below to a snug fit around the occupant.Holding the latch plate by hand, insert the latch plate into the buckle. Loosen
GS10530A
Tighten
Page 68 of 284

2
Instrument Cluster And Indicator Lights ....................... 2-2
Warning And Indicator Lights ........................................ 2-8
Instrument Cluster....................................................... 2-12
Odometer/Trip odmeter ................................................ 2-14
Multimeter .................................................................... 2-16
Muti-funition Light Switch ............................................. 2-19
Windshield Wiper And Washer Switch ........................2-21
Headlamp Leveling Device System .............................2-23
Instrument Panel Light Control (Rheostat) ..................2-24
Engine Rpm Adjustment Knob ..................................... 2-24
Fog Lamp Switch ......................................................... 2-25
Front/Rear Window Defroster Switch ..........................2-26
Interior Light ....................... .......................................... 2-28
Sunroof ........................................................................ 2-30
Mirror ........................................................................... 2-34
Drink H older ................................................................ 2-35
Ashtray ........................................................................ 2-36
Digital Clock ................................................................ 2-37
Horn ............................................................................. 2-37
Heating And Cooling Control .......................................2-38
Rear Heater And Air Conditioner ................................. 2-45
Overhead Air C onditioning ........................................... 2-47
Climate Control Air Filter .............................................. 2-47
Stereo Sound System ................................................. 2-49
Audio System .............................................................. 2-51
Antenna ....................................................................... 2-73
INSTRUMENTS AND CONTROLS
2
Page 70 of 284

2
INSTRUMENTS AND CONTROLS
3
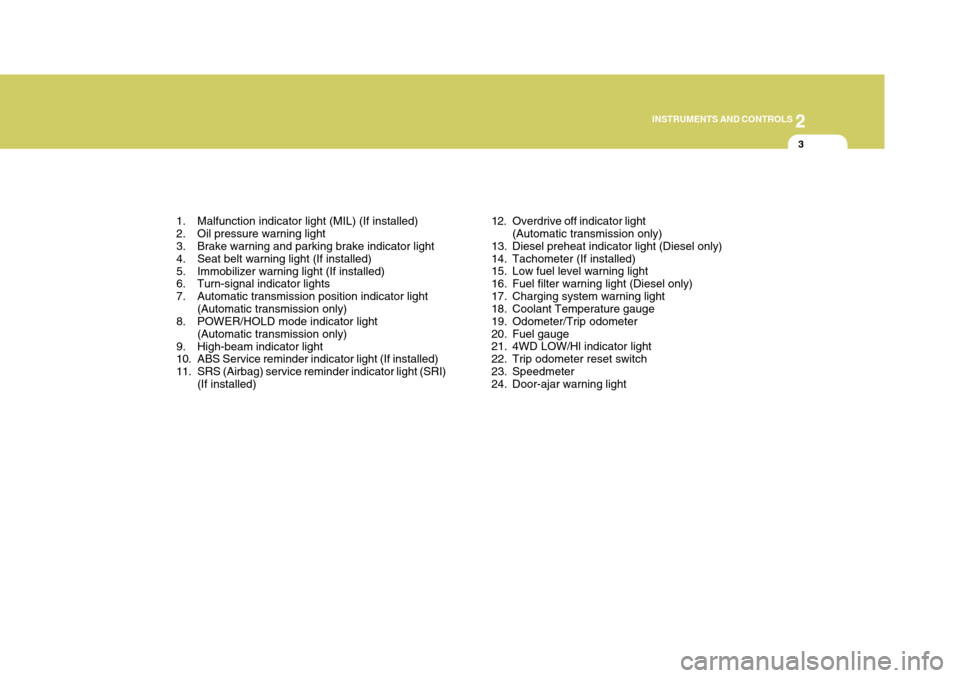
1. Malfunction indicator light (MIL) (If installed)
2. Oil pressure warning light
3. Brake warning and parking brake indicator light
4. Seat belt warning light (If installed)
5. Immobilizer warning light (If installed)
6. Turn-signal indicator lights
7. Automatic transmission position indicator light (Automatic transmission only)
8. POWER/HOLD mode indicator light
(Automatic transmission only)
9. High-beam indicator light
10. ABS Service reminder indicator light (If installed)
11. SRS (Airbag) service reminder indicator light (SRI) (If installed) 12. Overdrive off indicator light
(Automatic transmission only)
13. Diesel preheat indicator light (Diesel only)
14. Tachometer (If installed)
15. Low fuel level warning light
16. Fuel filter warning light (Diesel only)
17. Charging system warning light
18. Coolant Temperature gauge
19. Odometer/Trip odometer
20. Fuel gauge
21. 4WD LOW/Hl indicator light
22. Trip odometer reset switch
23. Speedmeter
24. Door-ajar warning light