Page 131 of 268

To take the system out of disc mode,
press the AM/FM button or CD/ XM
button (if the XM radio is connected).
You can also touch the FM1, FM2,
AM, or CARD icon on the screen. To
return to disc mode, press the CD/
XM button or touch the CD icon.
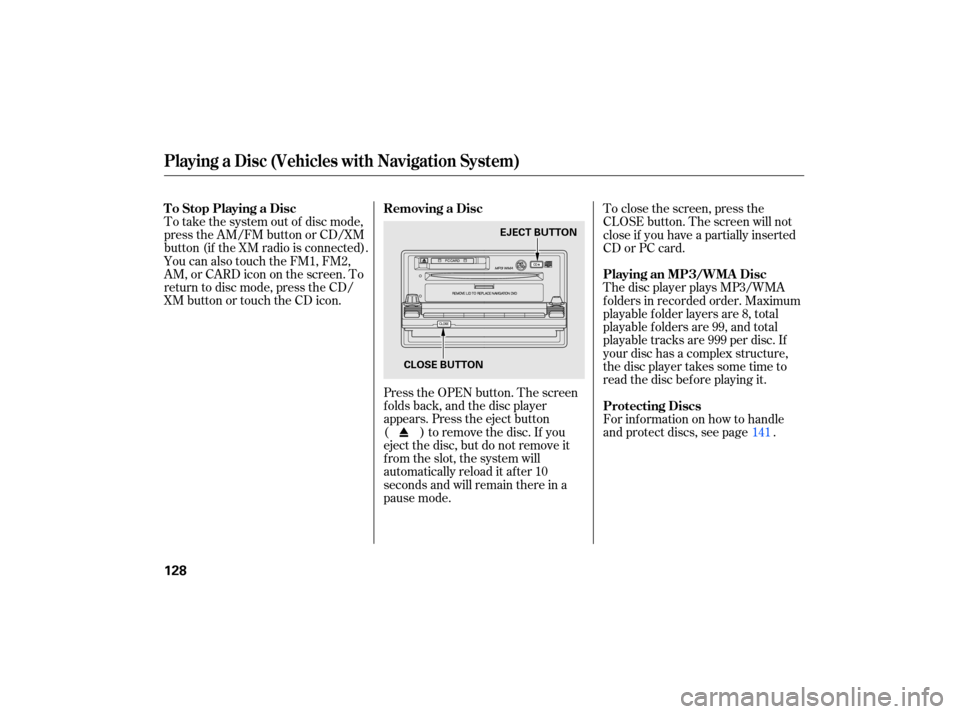
Press the OPEN button. The screen
folds back, and the disc player
appears. Press the eject button
( ) to remove the disc. If you
eject the disc, but do not remove it
from the slot, the system will
au tomatically reload it after 10
seconds and will remain there in a
pause mode. To
close the screen, press the
CLOSE button. The screen will not
close if you have a partially inserted
CD or PC card.
The disc player plays MP3/WMA
folders in recorded order. Maximum
playable folder layers are 8, total
playable folders are 99, and total
playable tracks are 999 per disc. If
your disc has a complex structure,
the disc player takes some time to
read the disc bef ore playing it.
For inf ormation on how to handle
and protect discs, see page . 141
To Stop Playing a Disc
Removing a Disc
Playing an MP3/WMA Disc
Protecting Discs
Playing a Disc (Vehicles with Navigation System)
128
EJECT BUTTON
CLOSE BUTTON
Page 144 of 268

When a disc is not being played,
store it in its case to protect it f rom
dust and other contamination. To
prevent warpage, keep discs out of
direct sunlight and extreme heat.
To clean a disc, use a clean sof t cloth.
Wipe across the disc f rom the center
to the outside edge.
A new disc may be rough on the
inner and outer edges. The small
plastic pieces causing this roughness
can f lake of f and f all on the
recording surf ace of the disc,
causing skipping or other problems.
Remove these pieces by rubbing the
inner and outer edges with the side
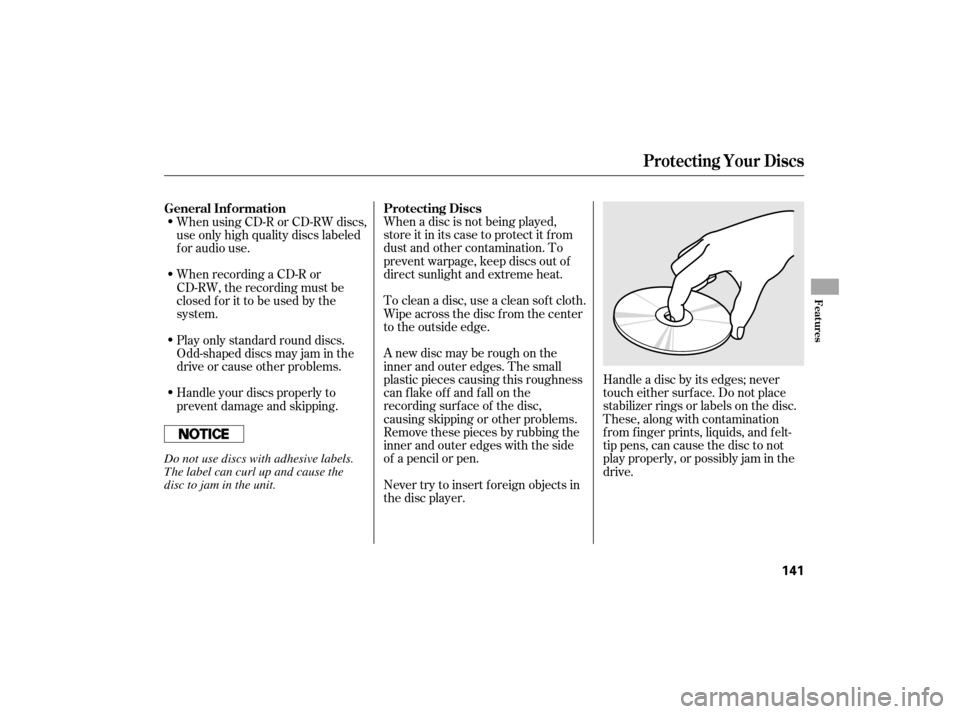
of a pencil or pen.Handle a disc by its edges; never
touch either surf ace. Do not place
stabilizer rings or labels on the disc.
These, along with contamination
f rom f inger prints, liquids, and f elt-
tip pens, can cause the disc to not
play properly, or possibly jam in the
drive.
When recording a CD-R or
CD-RW, the recording must be
closedforittobeusedbythe
system. When using CD-R or CD-RW discs,
use only high quality discs labeled
f or audio use.
Never try to insert f oreign objects in
the disc player.
Handle your discs properly to
prevent damage and skipping. Play only standard round discs.
Odd-shaped discs may jam in the
driveorcauseotherproblems.
General Inf ormation
Protecting Discs
Protecting Your Discs
Features
141
Do not use discs with adhesive labels.
The label can curl up and cause the
disc to jam in the unit.
Page 147 of 268

With the system set, you can still
open the trunk with the master key
or the remote transmitter without
triggering the alarm. The alarm will
sound if the trunk lock is forced, or
the trunk is opened with the trunk
release handle.
The security system will not set if
the hood, trunk, or any door is not
fully closed. If the system will not set,
check the door and trunk open
indicators on the instrument panel
(see page ) to see if the doors and
trunk are f ully closed. Since it is not
part of the monitor display, manually
check the hood.
To see if the system is set
af ter you exit the vehicle, press the
LOCK button on the remote
transmitter within 5 seconds. If the
system is set, the horn will beep
once.
The security system helps to protect
your vehicle and valuables f rom thef t.
The horn sounds and a combination
of headlights (low beam), parking
lights, side marker lights, and
taillights f lash if someone attempts
to break into your vehicle or remove
the radio. This alarm continues f or 2
minutes, then it stops. To reset an
alarming system before the 2
minutes have elapsed, unlock the
driver’s door with the key or the
remote transmitter.
The security system automatically
sets 15 seconds after you lock the
doors, hood, and trunk. For the
system to activate, you must lock the
doors f rom the outside with the key,
driver’s lock tab, door lock switch, or
remote transmitter. The security
system indicator on the instrument
panel starts blinking immediately to
show you the system is setting itself .
Once the security system is set,
opening any door, the trunk, or the
hood without using the key or the
remote transmitter will cause it to
alarm. It also alarms if the radio is
removed f rom the dashboard or the
wiring is cut.
Do not attempt to alter this system
or add other devices to it.62
Security System
144
NOTE:
SECURITY SYSTEM
INDICATOR
Page 155 of 268
If the hood latch handle moves
stiffly, or if you can open the hood
without lifting the handle, the
mechanism should be cleaned and
lubricated.
Put your fingers under the front
edge of the hood near the center.
Slide your hand to the left until
you feel the hood latch handle.
Push this handle up to release it.
Lift up the hood.
Push
the fuel fill door closed until
it latches.
Screw
the fuel fill cap back on
until it clicks at least once. If you
do not properly tighten the cap,
the malf unction indicator lamp
maycomeon(seepage ).You
will also see a ‘‘CHECK FUEL
CAP’’ message on the inf ormation
display.
Holding the grip, pull the support
rod out of its clip. Insert the end
into the designated hole in the
hood.
Park the vehicle, and set the
parking brake. Pull the hood
release handle located under the
lower lef t corner of the dashboard.
The hood will pop up slightly.
2. 1.
3.
5.
6.
229
Service Station Procedures
Opening and Closing the Hood
152
HOOD
RELEASE
HANDLE LATCH
Page 156 of 268
Remove the dipstick again, and
check the level. It should be
between the upper and lower
marks.
Wait
a few minutes after turning the
engine off before you check the oil.
Remove the dipstick (orange loop).
To
close the hood, lift it up slightly to
remove the support rod from the
hole. Put the support rod back into
its holding clip. Lower the hood to
about a foot (30 cm) above the
fender, then let it drop. Make sure it
is securely latched. If it is near or below the lower mark,
see
on page .
Wipe of f the dipstick with a clean
cloth or paper towel.
Insert the dipstick all the way back
into its hole.
2.
3. 1.
4.
189
Service Station Procedures
Oil Check
A dding Engine Oil
Bef ore Driving
153
DIPSTICK UPPER MARK
LOWER MARK
SUPPORT ROD
CLIP
GRIP
Page 157 of 268

Drive moderately. Rapid
acceleration, abrupt cornering,
and hard braking use more fuel.
Look at the coolant level in the
radiator reserve tank. Make sure it is
between the MAX and MIN lines. If
it is below the MIN line, see
on page for
information on adding the proper
coolant.
Refer to
on page for information
about checking other items on your
vehicle. Always
maintain your vehicle
according to the maintenance
messages displayed in the
information display. See
on page
.
The build-up of snow or mud on
your vehicle’s underside adds
weight and rolling resistance.
Frequent cleaning helps your f uel
mileage and reduces the chance of
corrosion. Engine oil also af f ects f uel
economy. The f uel ef f icient, low-
viscosity 0W-20 oil recommended
f or your Civic Hybrid is
f ormulated to help the engine use
less f uel. This oil is available at
your dealer. an underinf lated tire
causes more ‘‘rolling resistance,’’
which uses more f uel. You may find that your Civic Hybrid’s
unique combination of an engine and
an electric motor has driving
characteristics that are somewhat
dif f erent f rom what you are used to.
184
184 192
For example,
Service Station Procedures, Fuel Economy
Improving Fuel Economy
Engine Coolant Check
A dding
Engine Coolant
Owner’s Maintenance
Checks Owner’s
Maintenance Checks
154
MAX
MIN RESERVE TANK
Page 159 of 268

Your dealer has Honda accessories
that allow you to personalize your
vehicle. These accessories have
been designed and approved for your
vehicle, and are covered by warranty.
When properly installed, cellular
phones, alarms, two-way radios, and
low-powered audio systems should
not interfere with your vehicle’s
computer controlled systems, such
as your airbags and anti-lock brakes. Befo
re installing any accessory:
Make sure the accessory does not
obscure any lights, or interfere
with proper vehicle operation or
performance.
Modifying
your vehicle, or installing
some non-Honda accessories, can
make it unsafe. Before you make any
modifications or add any accessories,
be sure to read the following
info rmation.
Al though non-Honda accessories
may fit on your vehicle, they may not
meet factory specifications, and
could adversely affect your vehicle’s
handling and stability. Be sure electronic accessories do
not overload electrical circuits
(see page ) or interf ere with
the proper operation of your
vehicle.
Do not install accessories on the
side pillars or across the rear
windows. In these areas,
accessories may interf ere with
proper operation of the side
curtain airbags. Bef ore installing any electronic
accessory, have the installer
contact your dealer for assistance.
If possible, have your dealer
inspect the f inal installation.
231
A ccessories
A ccessories and Modif ications
156
Improper accessories or
modifications can affect your
vehicle’s handling, stability, and
performance, and cause a
crash in which you can be hurt
or killed.
Follow all instructions in this
owner’s manual regarding
accessories and modifications.
Page 161 of 268
Your vehicle has several convenient
storage areas:Glove box
Door pockets
However, carrying too much cargo,
or improperly storing it, can af f ect
your vehicle’s handling, stability,
stopping distance, and tires, and
make it unsaf e. Bef ore carrying any
type of cargo, be sure to read the
f ollowing pages. Trunk Console compartment
Center pocket
Carrying Cargo
158
CONSOLE COMPARTMENT CENTER POCKET
TRUNK DOOR POCKETS
GLOVE BOX