Page 65 of 268
The engine can be severely damaged
if this indicator flashes or stays on
when the engine is running. For
more information, see page .
If this indicator comes on when the
engine is running, the battery is not
being charged. For more information,
see page .
See
page . This indicator normally comes on for
a few seconds when you turn the
ignition switch to the ON (II)
position. If it comes on at any other
time, it indicates a problem in the
integrated motor assist (IMA)
system. With the IMA indicator on,
the vehicle may not accelerate as it
normally does. Have the vehicle
checked by the dealer as soon as
possible.
See pages and .
This
indicator comes on when the
security system is set. For more
info rmation, see page . 229
227
228 170 171
144
Instrument Panel Indicators
Security System Indicator Malf unction Indicator
Lamp
L ow Oil Pressure
Indicator
Charging System
Indicator IMA System Indicator
A uto Idle Stop Indicator
62
SECURITY SYSTEM INDICATOR
Page 66 of 268

If you turn the steering wheel to the
full left or right position repeatedly
while stopping or driving at very low
speed, you may feel slightly harder
steering due to overhe ating of the
steering gear box.
This
indicator normally comes on
when you turn the ignition to the ON
(II) position and goes off after the
engine starts. If it comes on at any
other time, there is a problem in the
electric power steering system. If
this happens, stop the vehicle in a
safe place and turn off the engine.
Reset the system by restarting the
engine. The indicator will not turn
off immediately. If it does not go off
after driving a short distance, or
comes on again while driving, take
the vehicle to your dealer to have it
checked. With the indicator on, the
EPS may be turn ed off, making the
vehicle harder to steer. This
indicator normally comes on for
a few seconds when you turn the
ignition switch to the ON (II)
position. When the brake system
indicator (amber) is on, there is the
problem with the Cooperative
Control with regenerative brake,
Creep Aid System or Brake Assist
(the normal brake operates properly).
Have your vehicle checked by your
dealer.
For more inf ormation, see page .
Continuously driving under those
conditions could damage the power
steering system.
173
Electric Power Steering
(EPS) Indicator
Brake System
Indicator
(A mber)
Instrument Panel Indicators
Inst rument s and Cont rols
63
U.S. Canada
Page 68 of 268

Every time you press the display
change button, the display changes
from the current fuel mileage to the
temperature gauge, or from the
temperature gauge to the current
fuel mileage.
Press and hold the display change
button until you hear a beep. Each
time you press the button, the
speedometer, trip meter, average
fuel mileage and current fuel
mile age readings switches their
measures.
Depending on the selected measures
(mph or km/h), the trip meter and
odometer readings are shown with
miles or km. The average fuel
mileage and current fuel mileage are
shown with mpg or l/100 km. This
display shows the current, or
instant fuel mileage you are getting.
It shows the number of mpg or l/100
km. This
shows the temperature of the
engine’s coolant. During normal
operation, the reading should be in
the middle of the gauge. In severe
driving conditions, such as very hot
weather or a long period of uphill
driving, the reading may reach near
the red mark. If it reaches the red
(Hot) mark, pull saf ely to the side of
theroad.Seepage for
instructions and precautions on
checking the engine’s cooling
system. 225
Gauges
Display Change Button
Current Fuel Mileage Temperature Gauge
Inst rument s and Cont rols
65
Page 71 of 268

The information display in the
instrument panel shows you the
engine oil life and maintenance
service items when the ignition
switch is in the ON (II) position. This
information helps to keep you aware
of the periodic maintenance your
vehicle needs for continued trouble-
free driving. Refer to page for
more information.
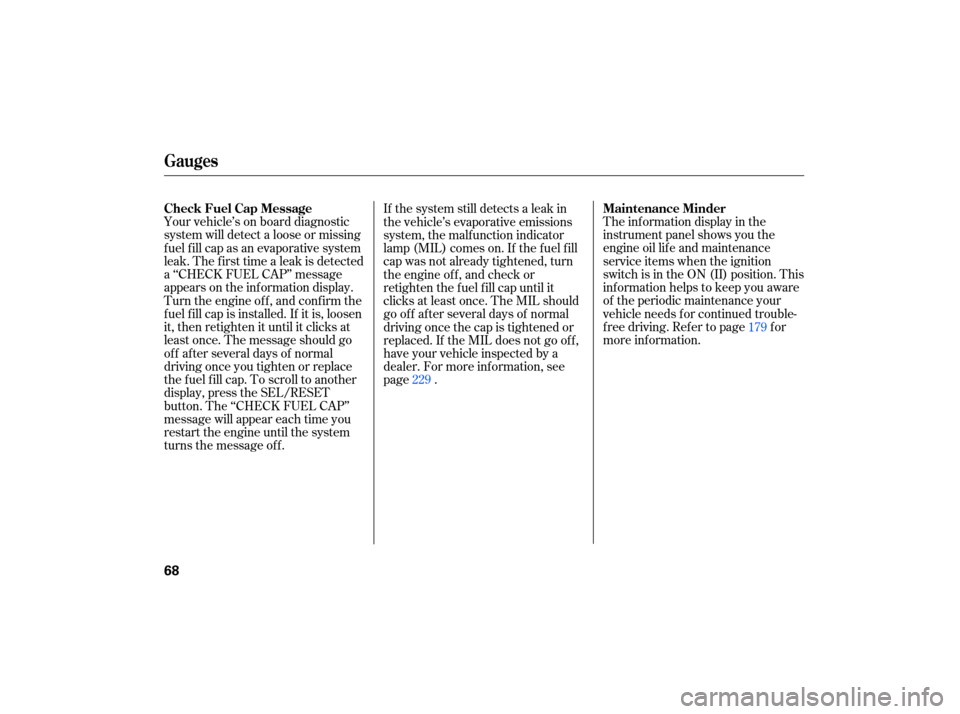
Your
vehicle’s on board diagnostic
system will detect a loose or missing
fuel fill cap as an evaporative system
leak. The first time a leak is detected
a ‘‘CHECK FUEL CAP’’ message
appears on the information display.
Turn the engine off, and confi rm the
fuel fill cap is installed. If it is, loosen
it, then retighten it until it clicks at
least once. The message should go
off after several days of normal
driving once you tighten or replace
the fuel fill cap. To scroll to another
display, press the SEL/RESET
button. The ‘‘CHECK FUEL CAP’’
message will appear each time you
restart the engine until the system
turns the message off. If
the system still detects a leak in
the vehicle’s evaporative emissions
system, the malfunction indicator
lamp (MIL) comes on. If the fuel fill
cap was not already tightened, turn
the engine off, and check or
retighten the fuel fill cap until it
clicks at least once. The MIL should
go off after several days of normal
driving once the cap is tightened or
replaced. If the MIL does not go off,
have your vehicle inspected by a
dealer. For more information, see
page . 179
229
Gauges
Maintenance Minder
Check Fuel Cap Message
68
Page 72 of 268

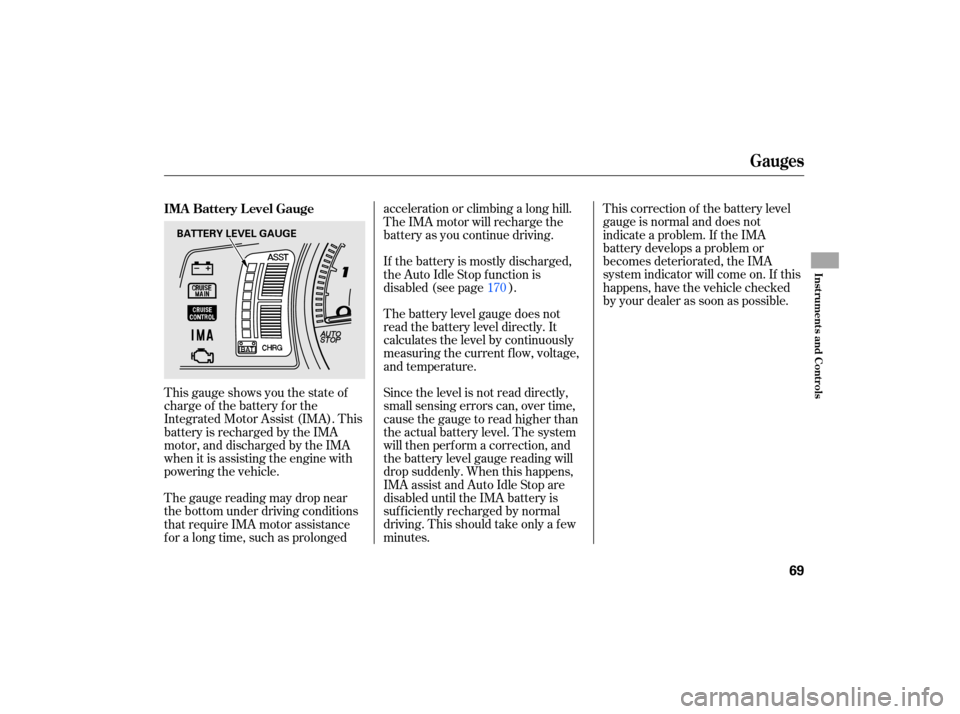
This gauge shows you the state of
charge of the battery for the
Integrated Motor Assist (IMA). This
battery is recharged by the IMA
motor, and discharged by the IMA
when it is assi sting the engine with
powering the vehicle. The
battery level gauge does not
read the battery level directly. It
calculates the level by continuously
measuring the current flow, voltage,
and temperature.
Since the level is not read directly,
small sensing errors can, over time,
cause the gauge to read higher than
the actual battery level. The system
will then perform a correction, and
the battery level gauge reading will
drop suddenly. When this happens,
IMA assist and Auto Idle Stop are
disabled until the IMA battery is
sufficiently recharged by normal
driving. This should take only a few
minutes. This
correction of the battery level
gauge is normal and does not
indicate a problem. If the IMA
battery develops a problem or
becomes deteriorate d, the IMA
system indicator will come on. If this
happens, have the vehic le checked
by your dealer as soon as possible.
The gauge reading may drop near
the bottom under driving conditions
that require IMA motor assistance
for a long time, such as prolonged acceleration or climbing a long hill.
TheIMAmotorwillrechargethe
battery as you continue driving.
If the battery is mostly discharged,
the Auto Idle Stop f unction is
disabled (see page ).
170
IMA Battery Level Gauge
Gauges
Inst rument s and Cont rols
69
BATTERY LEVEL GAUGE
Page 76 of 268

�µ
�µ �µ
Push
down on the
lever to signal a left turn and up to
signal a right turn. To signal a lane
change, push lightly on the lever,
and hold it. The lever will return to
center when you release it or
complete a turn.
Turning the switch to
the ‘‘ ’’ position turns on the
parking lights, taillights, instrument
panel lights, side-marker lights, and
rear license plate lights.
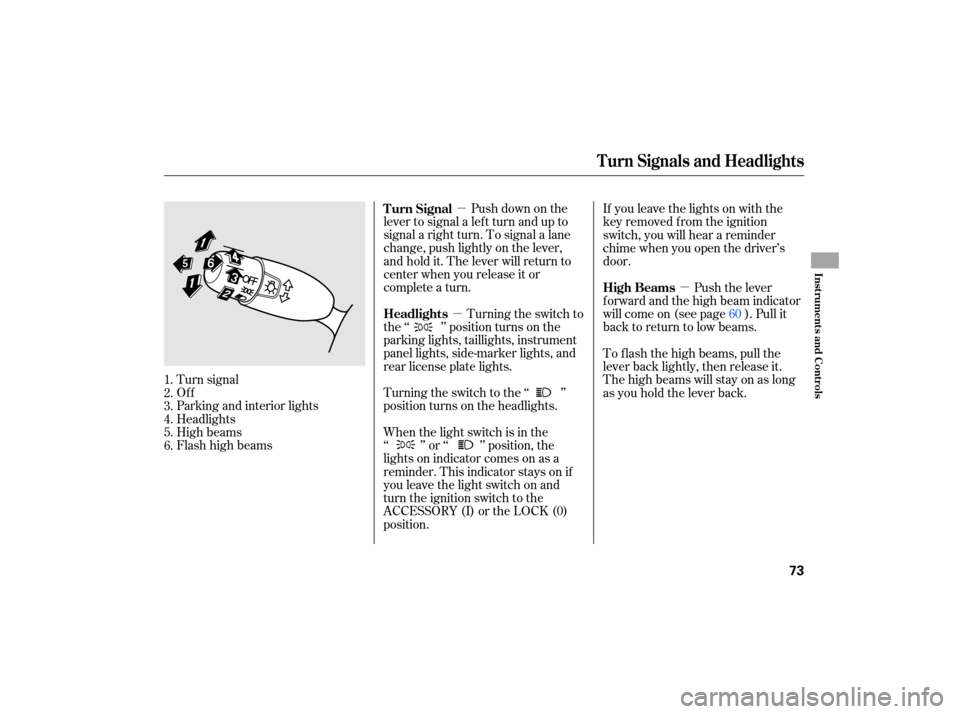
Tu rn signal
Off
Parking and interior lights
Headlights
High beams
Flashhighbeams Turning
the switch to the ‘‘ ’’
position turns on the headlights. If
you leave the lights on with the
key removed from the ignition
switch, you will hear a reminder
chime when you open the driver’s
door.
When the light switch is in the
‘‘ ’’ or ‘‘ ’’ position, the
lights on indicator comes on as a
reminder. This indicator stays on if
you leave the light switch on and
turn the ignition switch to the
ACCESSORY (I) or the LOCK (0)
position. Push the lever
f orward and the high beam indicator
will come on (see page ). Pull it
back to return to low beams.
To f lash the high beams, pull the
lever back lightly, then release it.
The high beams will stay on as long
as you hold the lever back.
1.
2.
3.
4.
5.
6. 60
Turn Signal
Headlights
High Beams
Turn Signals and Headlights
Inst rument s and Cont rols
73
Page 78 of 268

The rear window defogger will clear
fog, frost, and thin ice from the
window. Push the defogger button to
turn it on and off. The indicator in
the button comes on to show the
defogger is on. If you do not turn it
off, the defogger will shut itself off
after about 15 minutes. It also shuts
off when you turn off the ignition
switch. You have to turn the
defogger on again when you restart
the vehicle. Make
sure the rear window is clear
and you have good visibility before
starting to drive. Make
any steering wheel adjustment
befo re you start driving.
Thedefoggerwiresontheinsideof
the rear window can be accidentally
damaged. When cleaning the glass,
always wipe side-to-side.
Pushing this button also turns the
mirror heaters on or of f . For more
inf ormation, see page . 94
CONT INUED
On Canadian models
Rear Window Def ogger Steering Wheel A djustment
Rear Window Def ogger, Steering Wheel A djustment
Inst rument s and Cont rols
75
Canadian
model
U.S. model
Adjusting the steering wheel
position while driving may
cause you to lose control of the
vehicle and be seriously injured
inacrash.
Adjust the steering wheel only
when the vehicle is stopped.
Page 89 of 268

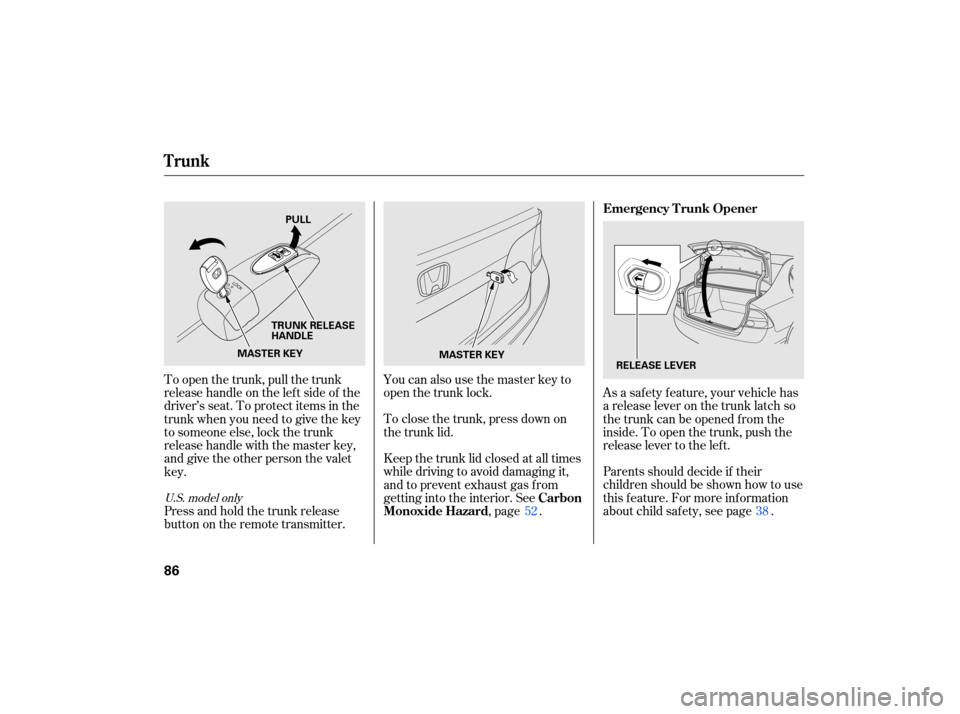
You can also use the master key to
open the trunk lock.
Parents should decide if their
children should be shown how to use
this feature. For more information
about child safety, see page .
To
close the trunk, press down on
the trunk lid.
Keep the trunk lid closed at all times
while driving to avoid damaging it,
and to prevent exhaust gas from
getting into the interior. See
,page .
Press and hold the trunk release
button on the remote transmitter. To open the trunk, pull the trunk
release handle on the lef t side of the
driver’s seat. To protect items in the
trunk when you need to give the key
to someone else, lock the trunk
release handle with the master key,
and give the other person the valet
key. As a saf ety f eature, your vehicle has
a release lever on the trunk latch so
the trunk can be opened f rom the
inside. To open the trunk, push the
release lever to the lef t.
52 38
U.S. model only
Emergency T runk Opener
Carbon
Monoxide Hazard
Trunk
86
MASTER KEY
MASTER KEY TRUNK RELEASE
HANDLE
RELEASE LEVER
PULL