Page 47 of 58

46
Enter the town, the street and the
house number and select:
– “OK”: to confirm the address and
access the “Navigation” function and
start navigating;
– “Save”: to store the address and
make it available later;
– “Position”: to view the current ad-
dress.Directory – Previous
destinations
The addresses selected for navigation
may be saved in the “Directory” and
“Previous destinations” menu.
Proceed as follows to select one of
these addresses as destination:
– turn and press the knob (16 - 40)
to select and confirm the “Directo-
ry” or “Previous destinations” func-
tions;
– select an address by turning the
pressing the knob (16 - 40);
– turn and press the knob (16 - 40)
to select and confirm “OK” function
to start navigating to the selected ad-
dress.GUIDANCE OPTIONS
Select “Guidance options” by turn-
ing and pressing the knob (16 - 40).
The following menu will appear on the
display:
– Define calculation criteria
– Set speech synthesis
– Map data base description
– Delete previous destinations.
Page 48 of 58

47
Define calculation criteria
Use the knob (16 - 40) to select and
confirm the item: a window will ap-
pear on the display for selecting the
criteria to be adopted to calculate the
required route:
– Fastest route
– Shortest route.
It is also possible to select whether
to include toll roads and ferries.Set speech synthesis
The function is used to activate, de-
activate and adjust the volume of voice
indications supplied by the syste dur-
ing navigation. Use the knob (16 - 40)
to select and confirm this item: a
graphic scale indicating the volume will
appear on the display. This value may
be varied using the knob (16 - 40).
The “Activate” and “Deactivate”
functions selected by means of the
knob (16 - 40) are used to switch the
voice indications on and off.
Map data base description
This function is used to display in-
formation about the CD-ROM insert-
ed in the CD drive.
Delete previous destinations.
This function is used to delete the
last stored addresses.TRAFFIC INFO TMC
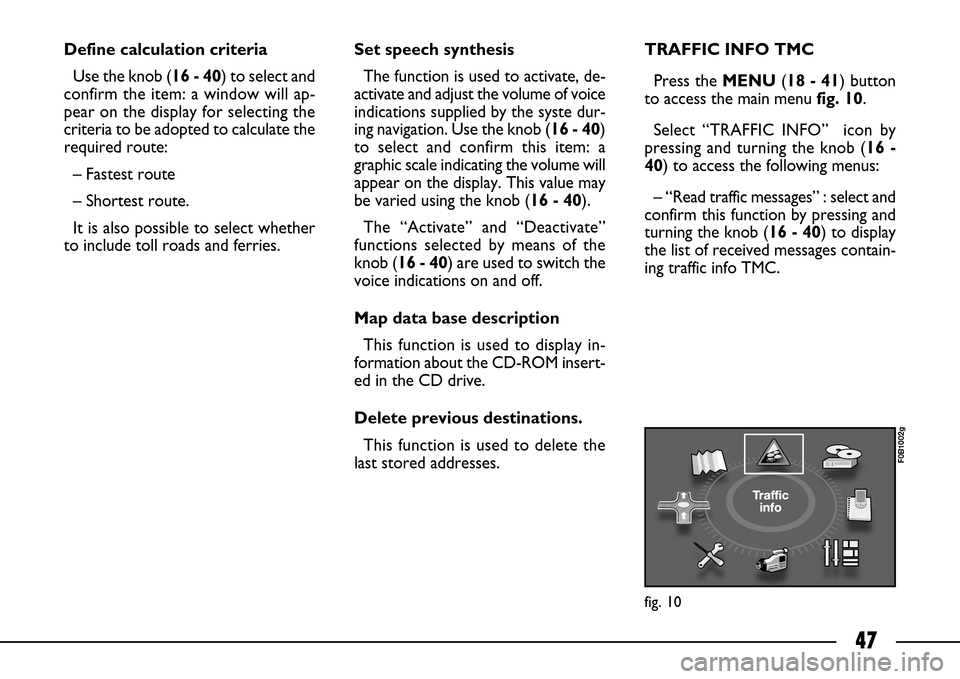
Press the MENU(18 - 41) button
to access the main menu fig. 10.
Select “TRAFFIC INFO” icon by
pressing and turning the knob (16 -
40) to access the following menus:
– “Read traffic messages” : select and
confirm this function by pressing and
turning the knob (16 - 40) to display
the list of received messages contain-
ing traffic info TMC.
fig. 10
F0B1002g
Page 50 of 58
49
“Urban/city information”
Select and confirm “Urban/city in-
formation” by turning and pressing the
knob (16 - 40) to select the required
information: ”Parking”, “Local trans-
port information”, “Events”.
Turn and press the knob (16 - 40) to
select and switch reception on and off.MAP
Proceed as follows to access the map
menu: press MENU(18 - 41), select
“MAP” fig. 11and press the knob (16
- 40) to confirm. The following mes-
sage will appear on the display:
– Map orientation
– Map details
– Map display
– Move the mapMove the map
Use the knob (16 - 40) to select and
confirm this item. The map may be
moved in the four directions using the
buttons
▲(10), ▼(17), ˜(14),
÷(19). Turn the knob (16 - 40) to
zoom in and out.
fig. 11
F0B1001g
Page 51 of 58
50
Map orientation
Turn the knob (16 - 40) to select
and confirm this item and orient the
map in two different ways:
– “North direction”: the map is
shown with north up and the cursor
moves on the map;
– “Vehicle direction”: the cursor is
positioned in tihe middle of the map
and the map moves automatically ac-
cording to the direction of advance-
ment of the car.
– “3D view”: this function is used to
view the map in three dimensions.Map details
Use the knob (16 - 40) to select and
confirm this item for selecting services
(hotels, restaurants, sports centres,
etc.) from a list and display their po-
sition directly on the map.Map display
The map view (full screen or in win-
dow) may be selected in navigation
mode.
Select and confirm “Full screen map”
by turning and pressing the knob (16
- 40) to view the map full screen.
Select and confirm “Map in window”
by turning and pressing the knob (16
- 40) to view the map in a window.
Page 52 of 58
51
fig. 12
F0B0293m
The AUDIO-VIDEO A-fig. 12sock-
et for connecting a camera to the
CONNECT Nav+ system is located
in the oddment compartment. This
connection may be used to view pre-
viously filmed pictures directly on the
system display.
The video function may only be
used when the car is not moving.Press the MENU(18 - 41) button
to access the general menu. Select the
“VIDEO” fig. 13icon by turning and
pressing the knob (16 - 40) to access
the following menus:
– “Activate video mode”: select and
confirm this function by rotating and
pressing the knob (16 - 40) to show
filmed pictures.– “Video parameters”: select and
confirm this function by turning and
pressing the knob (16 - 40) and access
the format, brightness, colour and
contrast adjustment menus.
fig. 13
F0B1006g
VIDEO FUNCTION
Page 53 of 58
52
After activating video mode, press
the right knob (16 - 40) to access the
following menus:
– “Display formats”: select and con-
firm this function by turning and press-
ing the knob (16 - 40) to select the
format (16/9 or 4/3).– “Adjust luminosity”: turn and press
the knob (16 - 40) to select and con-
firm to select the brightness adjust-
ment scale.
– “Set contrast”: turn and press the
knob (16 - 40) to select and confirm
to select the contrast adjustment
scale.– “Deactivate video mode”: select
and confirm this function by rotating
and pressing the knob (16 - 40) to
stop viewing filmed pictures.
– After making the required settings,
select and confirm “OK”, turn and
press the knob (16 - 40) to select and
confirm the setting and go back to the
previous menu.