Page 37 of 58
36
“BREAKDOWN”
FUNCTION
The breakdown call request will ap-
pear on the display if the services are
active and CONNECT (7) is pressed
for approximately two seconds.
Select “YES” to send the breakdown
message to the bCONNECToper-
ator along with the car coordinates to
allow positioning. If no option is se-
lected, the message will be forward-
ed after approximately 10 seconds.
To stop the function, simply hold the
CONNECT (7) button pressed for
approximately 8 seconds.This system allows to call the re-
quired service if the breakdown or
medical emergency call message was
not successfully sent. The call can on-
ly be made if the area is covered by the
GSM service.
The 112 emergency call request will
appear on the display if the service
centre cannot be contacted.
IMPORTANT The breakdown
number cannot be programmed by the
user.Medical emergency
and breakdown requests
All activated functions (except for
telephone functions) will be deactivat-
ed by during an emergency call.
These conditions will be maintained
for the entire time the emergency call
is in progress.
IMPORTANTAll emergency re-
quests will be sent. The bCONNECT
operator may not manage to call you
back if you receive or make a call after
sending an emergency request because
you telephone will be engaged.
A message will appear on the display
for approximately 7 seconds after
sending a request.
Page 38 of 58
37
If the service request cannot be sent
for any reason, a message prompting
you to call the centre will appear (*)
and ask for the required service will ap-
pear. The operative centre will not be
able to position the car in this case.
(*) The call is normally made to a toll-free
number. The user will be charged if the call is
made while the user is roaming.
INFOMOBILITY SERVICES
Press the CONNECT(7) button to
open a page for accessing the follow-
ing services and functions:
• Connect (*)
• Breakdown (*)
• Operator services
• Received messages
This page may alternatively be ac-
cessed by pressing MENU (18) and
select the telematics icon. The
bCONNECT(*) services are avail-
able to subscribers. The functions will
be deactivated and a specific message
will appear on the display if the user is
not subscribed. The stored data may
be consulted at any time even after
your bCONNECT subscription ex-
pires.“Connect” function
Turn and press the knob (16 - 40) to
select the function. The system will
send the information request.
A telephone connection will be es-
tablished when thebCONNECTre-
quest is received. Ask the operator for
the information you require once the
telephone connection is established.
A warning message will appear on
the display if the connection cannot be
established.
Some information may be provided
directly by the operator while other
information may be sent by text mes-
sages regardless of the activated mode.
Page 39 of 58
38
Select “Dial” to make the system au-
tomatically dial the telephone number
contained in the message (the message
will be saved).
If a sequence of messages is received,
the system will open a specific window
for each message for saving, deleting,
displaying on the map and dialling the
telephone number.
“Breakdown” function
Press the CONNECT(7) button
for approximately two seconds to ac-
tivate this function.
“Operator services” function
These are the functions offered by
the GSM operator using the SIM card.“Messages received” function
This function is used to read the re-
ceived and stored messages (the func-
tion is activated when at least one
message is stored).
Up to 300 messages may be stored.
The system will inform you that the
memory is nearly full when approxi-
mately 280 messages are stored, sug-
gesting you to delete some: the new
messages will be written over the old
300 messages.
Each message is identified by an icon
according to its its type (closed enve-
lope = new message; open envelope
= read message). The message will be displayed di-
rectly over the current display in a
window. The functions “Save”,
“Delete”, “Guide” (if the message con-
tains geographic indications) and “Call”
(if the message contains a telephone
number) will appear. Select “Save” to
save the message or “Delete” to
delete the message from the display
and the memory.
Select “Guide” to automatically dis-
play the point on the map as destina-
tion in the navigation system. The mes-
sage will be automatically stored in this
case.
Page 40 of 58
39
Select the “Messages received” by
turning and pressing the knob (16 -
40) to confirm to access the single
messages of the list which may contain
traffic information, points of interest
or weather information; scroll the list
until the message you want appears.
Press the knob (16 - 40) to show it on
the display.Traffic information
The “\” icon identities messages
containing traffic information (e.g. road
works, accidents, etc.). When a mes-
sage contains geographic information
for point positioning, the options
“Delete” and “Map” will also appear
on the display.
Select and confirm “Delete” by
means of the knob (16 - 40) to delete
a message from the list. The “Map”
functions displays the map showing the
point of interest contained in the mes-
sage.
Information on centres
of interest
The “<” icon identifies messages
containing information on points of in-
terest and generic information.
The “Delete”, “Guide” and “Dial”
function will be available when this
message is shown on the display.Select and confirm “Delete” using
the knob (16 - 40) and delete the mes-
sage from the list. “Guide” is used to
automatically display the point of in-
terest on the map and select is desti-
nation of the navigation system. The
“Dial” option (where present) can be
used to call the number shown in the
message.
Generic information
The “<” icon also identifies messages
containing generic information (weath-
er conditions, etc.).
Only the “Delete” option will appear
on the display when one of these mes-
sages not containing geographic infor-
mation is shown on the display. This
option may be used to delete the mes-
sage from the list.
Page 41 of 58
40
The voice controls are used to con-
trol the main system functions using
your voice only. Press (26) on the end
of the left stalk to activate the voice
control system.
VOICE CONTROL LIST
IMPORTANT A double tone will
be heard if the system does not un-
derstand the voice message. Utter “What can I say?” to show the
list of available voice controls that the
system is capable of recognising.
VOICE CONTROLS
help
cancel
help
map
navigator
trip computer
what can I say
telephone
help
cancel
auto store
list
memory
memory
memory
memory
previous
what can I say
next
help
cancel
random1 - 6
help
cancel
what can I say Help
Cancel
Call
Stop
no
yes
previous
what can I say
display
guide to
stop
next
delete
radio
cd player
1st level controls 2ndlevel controls 3rdlevel controls
Page 42 of 58
41
1st level controls 2ndlevel controls 3rdlevel controls
cd player
cd changer
navigator
telephone
smslist
track number
track number
track number
track number
previous track
next track
what can I say
repeat
scan
help
cancel
disk number
disk number
disk number
disk number
previous disk
next disk
random
list
track number
track number
track number
track number
previous track
next track
what can I say
repeat
scan
help
cancel
stop
what can I say
address book
restart
help
cancel
what can I say
address book
service
service
service
service
service
display
help
cancel
read
what can I say1 - 20
help
cancel
what can I say
1 - 7
help
cancel
what can I say
1 - 20
help
cancel
what can I say
help
cancel
messages
recall
what can I say
Page 43 of 58
42
How to associate a voice
control to a directory record
The system may be used to record
a voice control associated to a name
in the directory. This function allows to call a number
in the directory to which a voice con-
trol is associated (e.g.: “Call” / “Name
to which the voice control is associ-
ated”).
To record a voice control, select
“Consult” by turning and pressing the
knob (16 - 40) and then select “Di-
rectory file management”. Select and confirm the recording but-
ton which appears using the knob
(16 - 40) and follow the instructions
will appear on the display.
Page 45 of 58
44
The instantaneous position of the car
is identified using the navigation CD-
ROM and is shown on the map on the
display. The system may take a few
seconds to display the maps when ac-
cessing data from the CD-ROM.
– The navigation system requires
travelling for approximately 100 kilo-
metres during first use or when the
tyres are changed in order to be pre-
cise.
– The system may temporarily de-
tect an inexact position if wheel grip
comes repeatedly less (e.g. slipping on
ice).
– The position may not be detected
accurately during precision calibration.
The navigation function is fully man-
aged by the CONNECT Nav+ system.
The only operations required consist
in changing the navigation CD-ROM
to load the maps of another area or
updated maps.CD-ROM DRIVE
The navigation CD-ROM drive is
found on the front of the CONNECT
Nav+ system and is used also as CD
player. Consequently, you cannot play
an audio CD while a navigation CD-
ROM is inserted in the drive.
Repeat last voice information
Press button (26) on the left lever
for longer than two seconds to repeat
the last voice message generated by
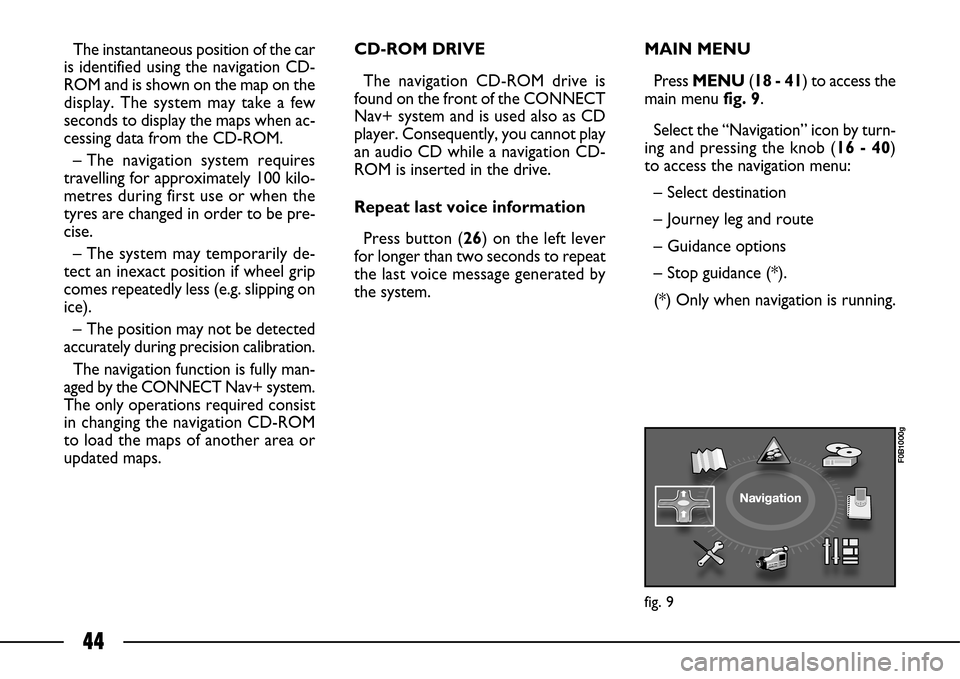
the system.MAIN MENU
Press MENU (18 - 41) to access the
main menufig. 9.
Select the “Navigation” icon by turn-
ing and pressing the knob (16 - 40)
to access the navigation menu:
– Select destination
– Journey leg and route
– Guidance options
– Stop guidance (*).
(*) Only when navigation is running.
fig. 9
F0B1000g