Page 21 of 166

20
CONNECT NAV+
With ignition key at ON, if authenti-
cation fails, system starts working as
usual, but the user is asked to enter the
4-digit “Master Code” to allow access
to the standard functions.
Master code is unique for each CON-
NECT Nav+, and is stored in its mem-
ory and can not be reset.To enter the code, access is made pos-
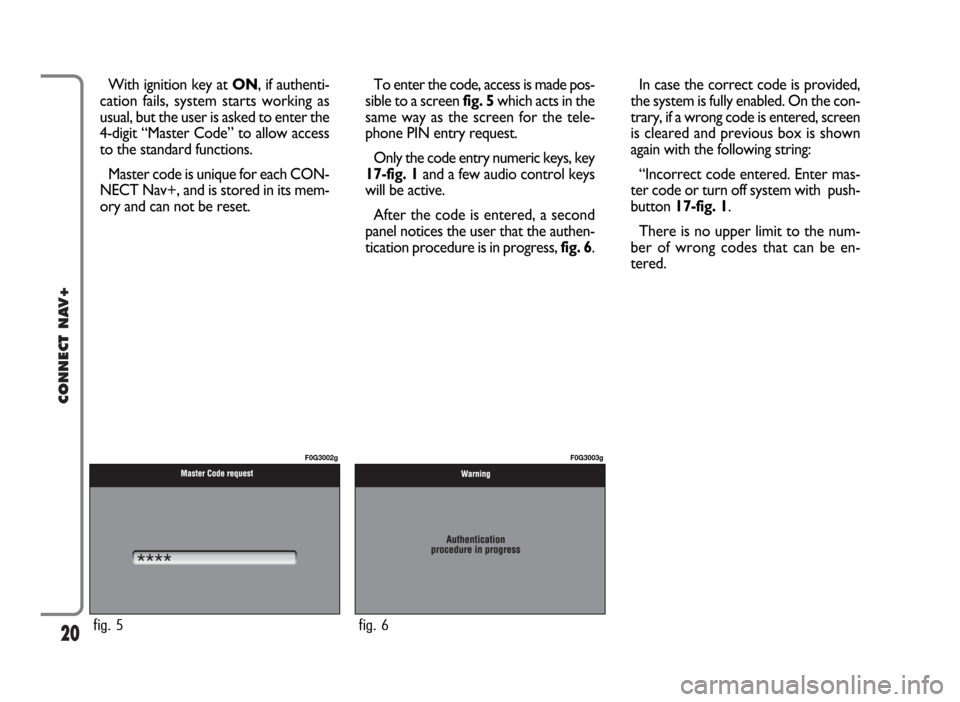
sible to a screen fig. 5which acts in the
same way as the screen for the tele-
phone PIN entry request.
Only the code entry numeric keys, key
17-fig. 1and a few audio control keys
will be active.
After the code is entered, a second
panel notices the user that the authen-
tication procedure is in progress, fig. 6.In case the correct code is provided,
the system is fully enabled. On the con-
trary, if a wrong code is entered, screen
is cleared and previous box is shown
again with the following string:
“Incorrect code entered. Enter mas-
ter code or turn off system with push-
button 17-fig. 1.
There is no upper limit to the num-
ber of wrong codes that can be en-
tered.
fig. 5
F0G3002g
fig. 6
F0G3003g
Page 22 of 166

21
CONNECT NAV+
The audio system is turned on by
pressing briefly the “AUDIO” key 20-
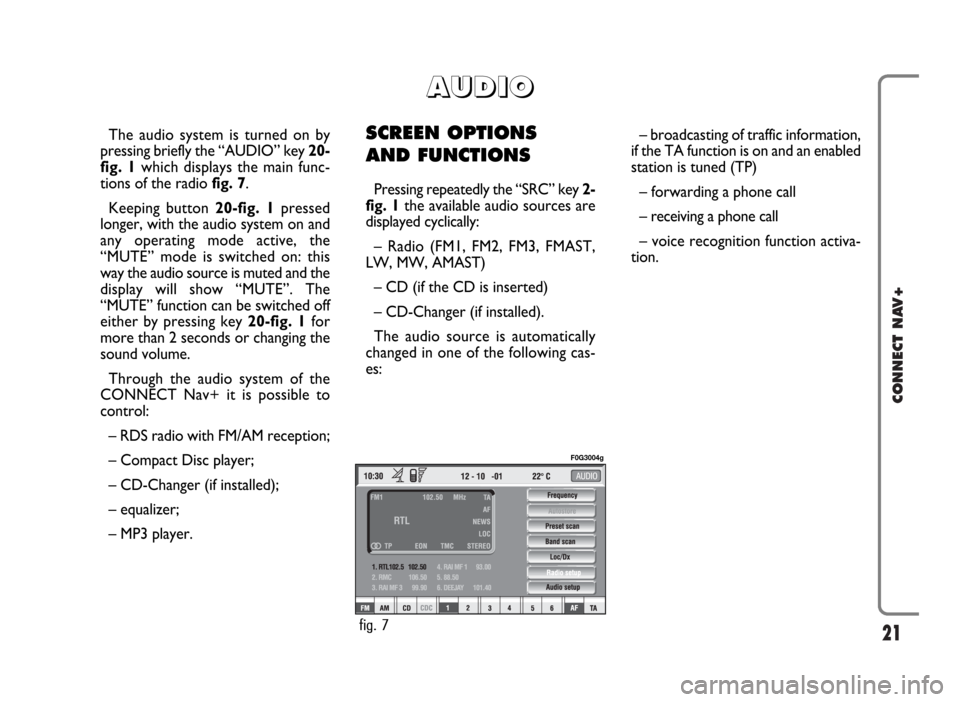
fig. 1which displays the main func-
tions of the radio fig. 7.
Keeping button 20-fig. 1pressed
longer, with the audio system on and
any operating mode active, the
“MUTE” mode is switched on: this
way the audio source is muted and the
display will show “MUTE”. The
“MUTE” function can be switched off
either by pressing key 20-fig. 1for
more than 2 seconds or changing the
sound volume.
Through the audio system of the
CONNECT Nav+ it is possible to
control:
– RDS radio with FM/AM reception;
– Compact Disc player;
– CD-Changer (if installed);
– equalizer;
– MP3 player.SCREEN OPTIONS
AND FUNCTIONS
Pressing repeatedly the “SRC” key 2-
fig. 1the available audio sources are
displayed cyclically:
– Radio (FM1, FM2, FM3, FMAST,
LW, MW, AMAST)
– CD (if the CD is inserted)
– CD-Changer (if installed).
The audio source is automatically
changed in one of the following cas-
es:– broadcasting of traffic information,
if the TA function is on and an enabled
station is tuned (TP)
– forwarding a phone call
– receiving a phone call
– voice recognition function activa-
tion.
A A
U U
D D
I I
O O
fig. 7
F0G3004g
Page 23 of 166
22
CONNECT NAV+
– frequency measure unit (MHz for
FM band and kHz for AM band);
– RDS channel name (if available) or
current station frequency;
– channel information (stereo signal,
TP, EON, etc..).
At the screen bottom is given the list
of stored stations (in the current band)
and the numbers corresponding to
storage keys.
There are 6 available memories for
each band.RADIO MODE
Choosing the radio source will dis-
play the following functions fig. 8:
– Frequency
– Autostore (active only on the
FMAST and AMAST bands)
– Preset scan
– Band scan
– Loc/DX
– Radio setup
– Audio setup.The radio is always set to receive sta-
tions in the RDS (Radio Data System)
mode.
The main screen is as follows fig. 8:
– the top section on the left of the
screen describes the radio status:
– active frequency band (e.g. FM1);
– tuned station frequency (e.g.
102.50);
fig. 8
F0G3004g
Page 28 of 166

27
CONNECT NAV+
During automatic storage the display
shows “Autostore”.
Stations will be stored automatically
on the preset keys from “1” to “6” of
the keypad16-fig. 1. After storage,
the radio tunes automatically to the
first station of the FMAST band, cor-
responding to the frequency stored on
the preset key “1” of the keypad 16-
fig. 1.
Every station is stored only once, ex-
cept in the case of regional pro-
grammes, which in certain cases might
be stored twice.The behaviour of the set during Au-
tostore is as follows:
– pressing one of the preset keys
from “1” to “6” the automatic storage
process is interrupted and the station
stored with that key is tuned
– changing the audio source (Radio,
CD, CD-Changer) during the auto-
matic storage process, the Autostore
function is interrupted. “Autostore” FUNCTION
(AUTOMATIC STATION
STORAGE)
After selecting the AMAST or
FMAST band, to turn on the Auto-
store function (automatic station stor-
age), select the “AUTOSTORE” icon
with the knob 15-fig. 1then press it
to confirm.
When this function is on, the radio
automatically stores the stations with
the strongest signal:
– 6 FM stations in the FMAST band
or
– 6 AM stations in the AMAST band.
Page 30 of 166

29
CONNECT NAV+
LOC/DX function
(tuner sensitivity adjustment)
With this function it is possible to
change the sensitivity of automatic ra-
dio station searching. When low sen-
sitivity “LOC” is set, only stations with
excellent reception are sought; when
high sensitivity “DX” is set, all the sta-
tions are sought. If you are in an area
with a large number of broadcasters
and you want the ones with the
strongest signal, choose low sensitivi-
ty “LOC”.
To choose between low or high
tuner sensitivity, select the “LOC/DX”
function with the knob 15-fig. 1and
then press it repeatedly. The abbre-
viation of the sensitivity chosen will be
shown on the display:
– LOC = low sensitivity;
– DX = high sensitivity.Mono/Stereo function
To pass from “Mono” to “Stereo” or
vice versa, select “Mono/Stereo” by
turning the knob 15-fig. 1and press
it to confirm. This function is only
available on FM band.
When stereo reception is on the dis-
play shows “STEREO”, when it is off
the display shows “MONO”.
When the signal of the station tuned
is weak, to improve the sound quality,
it is advisable to switch to “MONO”. “Radio setup” FUNCTION
To turn on the “Radio Setup” func-
tion, select the “Radio Setup” icon
with the knob 15-fig. 1and press it
to confirm. This function enables to
go to next window to adjust radio
settings. When in this window it is
not possible to change the audio
source. The following functions are
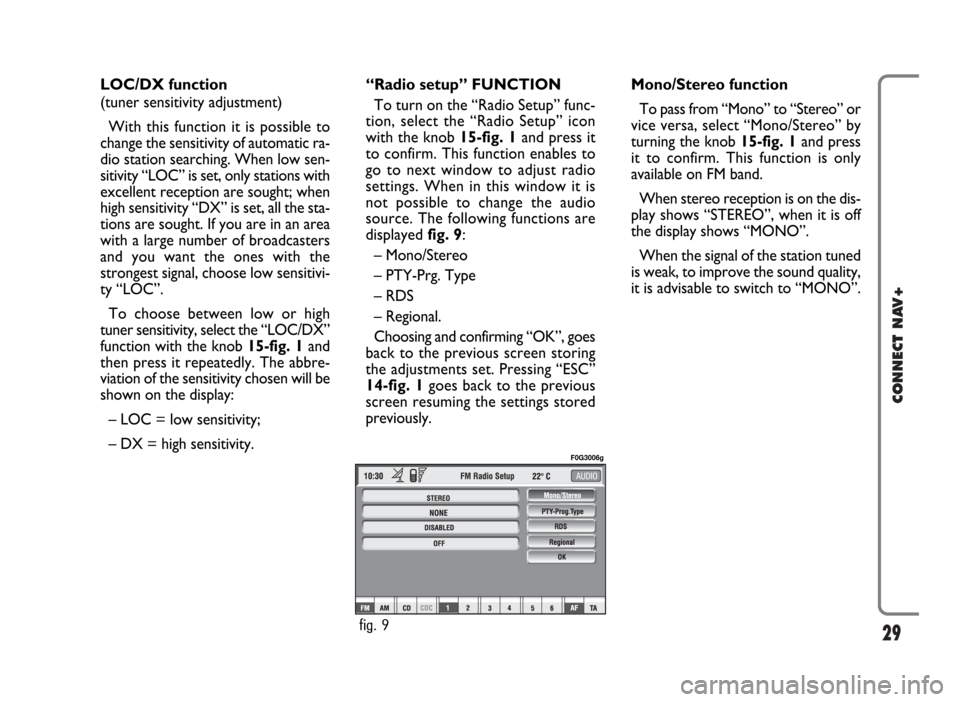
displayed fig. 9:
– Mono/Stereo
– PTY-Prg. Type
– RDS
– Regional.
Choosing and confirming “OK”, goes
back to the previous screen storing
the adjustments set. Pressing “ESC”
14-fig. 1goes back to the previous
screen resuming the settings stored
previously.
fig. 9
F0G3006g
Page 33 of 166
32
CONNECT NAV+
The adjustments available are fig. 10:
– Bass
– Treble
– Balance/Fader
– Loudness
– Equalizer
– Auto Vol. Cont.Choosing and confirming “OK”, goes
back to the previous screen storing
the adjustments set. Pressing “ESC”
14-fig. 1goes back to the previous
screen resuming the settings stored
previously. “AUDIO SETUP” FUNCTION
(AUDIO ADJUSTMENTS)
The audio parameters described in
this paragraph can be activated and ad-
justed with all the audio sources (Ra-
dio, CD, CD-Changer).
Select the “Audio setup” function
from the main menu of one of the au-
dio sources by turning and pressing
the knob 15-fig. 1. In this way access
to first level menu is provided.
fig. 10
F0G3007g
Page 38 of 166

CD MODE
IMPORTANTNever use 8 cm au-
dio or MP3 CDs, even with the spe-
cial adapter, since this format damages
the system.
Choosing the CD source will display
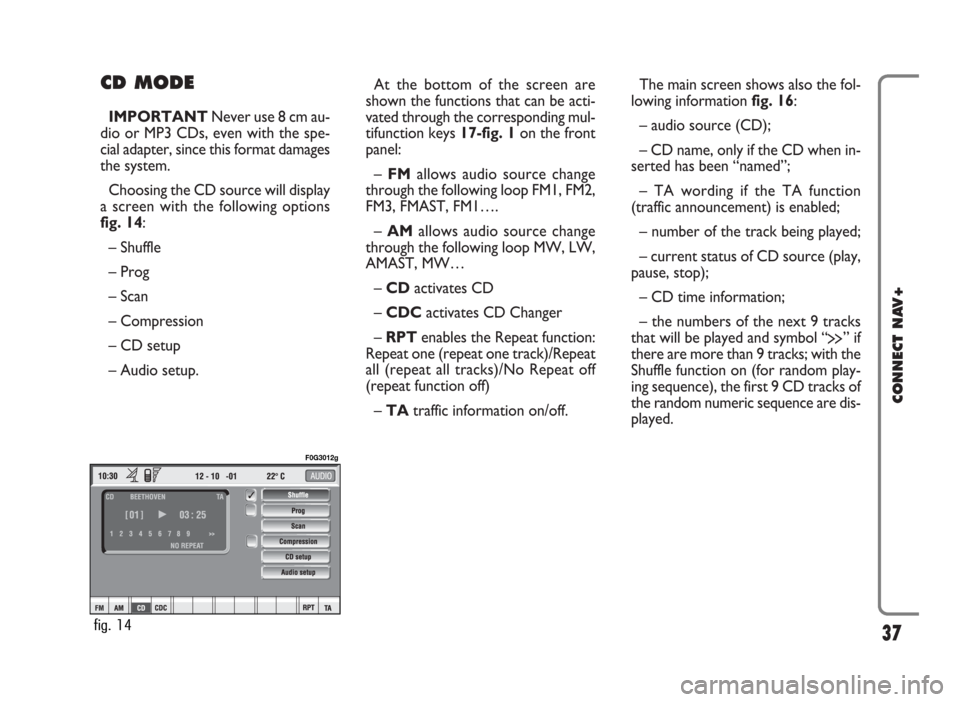
a screen with the following options
fig. 14:
– Shuffle
– Prog
– Scan
– Compression
– CD setup
– Audio setup.At the bottom of the screen are
shown the functions that can be acti-
vated through the corresponding mul-
tifunction keys 17-fig. 1on the front
panel:
– FMallows audio source change
through the following loop FM1, FM2,
FM3, FMAST, FM1….
– AMallows audio source change
through the following loop MW, LW,
AMAST, MW…
– CDactivates CD
– CDCactivates CD Changer
– RPTenables the Repeat function:
Repeat one (repeat one track)/Repeat
all (repeat all tracks)/No Repeat off
(repeat function off)
– TAtraffic information on/off.The main screen shows also the fol-
lowing information fig. 16:
– audio source (CD);
– CD name, only if the CD when in-
serted has been “named”;
– TA wording if the TA function
(traffic announcement) is enabled;
– number of the track being played;
– current status of CD source (play,
pause, stop);
– CD time information;
– the numbers of the next 9 tracks
that will be played and symbol “
§” if
there are more than 9 tracks; with the
Shuffle function on (for random play-
ing sequence), the first 9 CD tracks of
the random numeric sequence are dis-
played.
37
CONNECT NAV+
fig. 14
F0G3012g
Page 39 of 166

38
CONNECT NAV+
If the CD is not inserted, is illegible
or is not an audio CD, the display will
show the message “No CD” or “No
CD-DA” and all CD/CDC icon keys
are disabled.
Press respectively “
¯¯” 5-fig. 1or
“
˙˙” 6-fig. 1to play the previous or
the next track on the CD.
To stop the CD press briefly “
˙/II”
9-fig. 1. To restart CD playing, press
briefly again “
˙/II” 9-fig. 1. To pause
the CD player press continuously
“
˙/II” 9-fig. 1.
To eject the CD from the slot 7-
fig. 1press key 8-fig. 1.“Shuffle” FUNCTION
(RANDOM PLAYING)
To turn the “Shuffle” function on/off,
select it by turning the knob 15-
fig. 1and then press it to confirm.
When the Shuffle function is on, the
display shows “SHUFFLE” and symbol
“✓” is shown near the corresponding
icon.
With this function on, the CD
tracks are played in random se-
quence. To turn off this function,
press knob 15-fig. 1again. “Prog” FUNCTION
To turn the “Prog” function on/off, ro-
tate knob 15-fig. 1and then press it af-
ter selecting the function. This function
can only be selected with CD or CDC
at STOP.