2007 FIAT PANDA window
[x] Cancel search: windowPage 29 of 166

28
CONNECT NAV+
IMPORTANTIt may occur that
the Autostore function is unable to
find 6 stations with a strong signal; in
this case only the stations found are
stored.
IMPORTANTActivating the “Au-
tostore” function cancels the stations
stored previously in the FMAST or
AMAST band.“Band Scan” FUNCTION
The “Band scan” function activates
station scanning in the chosen fre-
quency band. Each station frequency
will be displayed for about 10 seconds.
To turn the “Band scan” function on,
select the “Band scan” icon with the
knob 15-fig. 1then press it to con-
firm.
During scanning, the display will
show “Band Scan”.
Scanning will be interrupted by press-
ing knob 15-fig. 1again (by taking care
to be positioned onto the “Preset
Scan” graphic key), or by selecting a
station previously memorized. “Preset Scan” FUNCTION
The “Preset scan” function activates
stored station scanning in the chosen
frequency band. Each stored station
will be played for about 10 seconds.
To turn on the “Preset scan” func-
tion, select the “Preset scan” icon with
the knob 15-fig. 1and then press it to
confirm.
During stations scan, the scanned
one is highlighted in the stored sta-
tions window and corresponding low-
bar button too. During operations the
string “Preset Scan” is displayed in the
main window.
Scanning will be interrupted by press-
ing knob 15-fig. 1again (by taking care
to be positioned onto the “Preset
Scan” graphic key), or by selecting a
station previously memorized.
Page 30 of 166

29
CONNECT NAV+
LOC/DX function
(tuner sensitivity adjustment)
With this function it is possible to
change the sensitivity of automatic ra-
dio station searching. When low sen-
sitivity “LOC” is set, only stations with
excellent reception are sought; when
high sensitivity “DX” is set, all the sta-
tions are sought. If you are in an area
with a large number of broadcasters
and you want the ones with the
strongest signal, choose low sensitivi-
ty “LOC”.
To choose between low or high
tuner sensitivity, select the “LOC/DX”
function with the knob 15-fig. 1and
then press it repeatedly. The abbre-
viation of the sensitivity chosen will be
shown on the display:
– LOC = low sensitivity;
– DX = high sensitivity.Mono/Stereo function
To pass from “Mono” to “Stereo” or
vice versa, select “Mono/Stereo” by
turning the knob 15-fig. 1and press
it to confirm. This function is only
available on FM band.
When stereo reception is on the dis-
play shows “STEREO”, when it is off
the display shows “MONO”.
When the signal of the station tuned
is weak, to improve the sound quality,
it is advisable to switch to “MONO”. “Radio setup” FUNCTION
To turn on the “Radio Setup” func-
tion, select the “Radio Setup” icon
with the knob 15-fig. 1and press it
to confirm. This function enables to
go to next window to adjust radio
settings. When in this window it is
not possible to change the audio
source. The following functions are
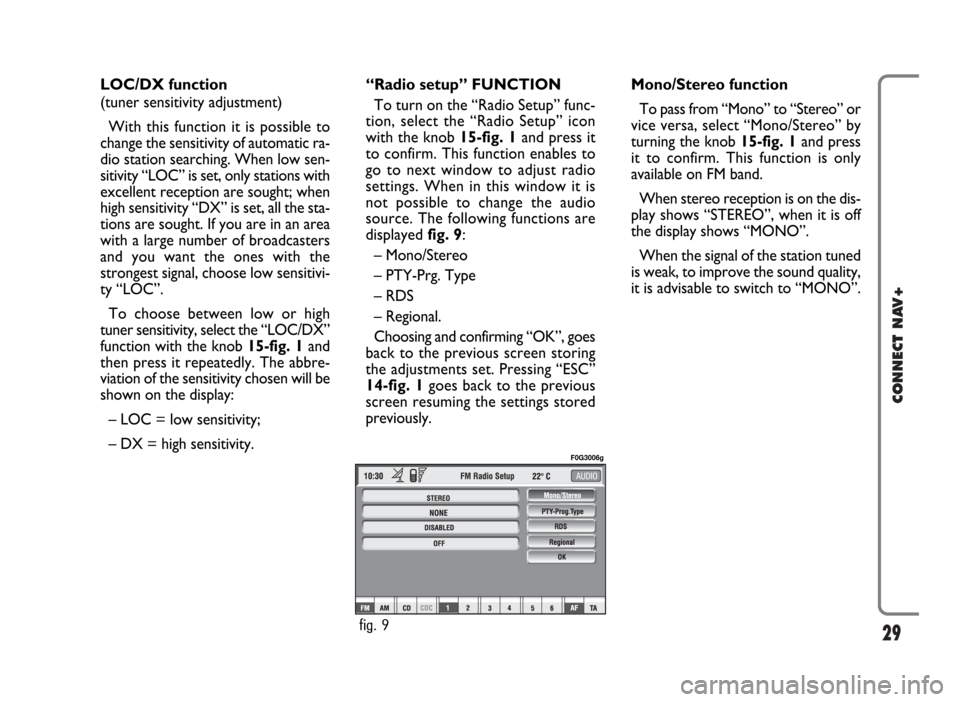
displayed fig. 9:
– Mono/Stereo
– PTY-Prg. Type
– RDS
– Regional.
Choosing and confirming “OK”, goes
back to the previous screen storing
the adjustments set. Pressing “ESC”
14-fig. 1goes back to the previous
screen resuming the settings stored
previously.
fig. 9
F0G3006g
Page 36 of 166

35
CONNECT NAV+
– turn the knob 15-fig. 1again to se-
lect the frequency band to be adjust-
ed, then confirm by pressing it;
– adjust the band selected turning the
knob 15-fig. 1, the press it to confirm;
– after adjusting all the bands, choose
and confirm “OK” by pressing the
knob 15-fig. 1to go back to the pre-
vious screen. If “ESC” 14-fig. 1is
pressed, you go back to the previous
screen with the settings stored previ-
ously.
When any tailored equalizer setting
has been set, the “MANUAL” writing
will appear on the display, and both
treble and bass cannot be set. To activate the chosen setting, pro-
ceed as follows:
– choose and confirm the “Equaliz-
er” function by turning and pressing
the knob 15-fig. 1;
– turn the knob 15-fig. 1again to se-
lect the setting chosen, then press it
to confirm.
The equalizer setting active is shown
on the display.
Changing the treble and bass settings
will cause the equalizer to be switched
off; the window with the preset equal-
izer curves will disappear, whereas the
“Equalizer” graphic key will remain
ON.To change the MANUAL setting and
to adjust manually the 5 equalizer fre-
quency bands, proceed as follows:
– select “Manual” with the knob 15-
fig. 1and press it to confirm; the dis-
play will show the screen in fig. 13;
fig. 13
F0G3010g
Page 51 of 166

50
CONNECT NAV+
To stop the MP3 CD, press briefly
“˙/II”9-fig. 1. To restart playing, press
briefly again ““˙/II” 9-fig. 1. To pause
the MP3 CD, press continuously
““˙/II” 9-fig. 1. “Stop” and “Pause”
cause the stop of track playing, main-
taining in the main screen information
about the last played song.
To eject MP3 CD 7-fig. 1press but-
ton 8-fig. 1.“Define Playlist” FUNCTION
“Define playlist” function allows the
management of max. 100 music pieces
among those included in the MP3 CD,
to be played in a specified sequence.
Dedicated windows allow the tracks
choice, addition or cancellation. It is
possible to add a single track or an en-
tire folder. This function is described
in detail in a specific paragraph below.
“Define playlist” icon key is disabled
when a MP3 CD is playing, you must
stop CD playing to enable it.“Playlist” FUNCTION
The “Playlist” function enables or dis-
ables playback of user’s previously
programmed track list. To turn this
function on/off, select the corre-
sponding icon with the knob 15-fig. 1
and then press it to confirm.
When the “Playlist” function is on,
symbol “✓” is shown near the corre-
sponding icon.
When inserting a MP3 CD coupled
to a playlist the “Playlist” function is
enabled automatically and symbol “✓”
will be displayed; otherwise the playlist
function is disabled automatically and
symbol “✓” near the icon will disap-
pear.
The icon key is disabled when a MP3
CD is playing, independently from
“Playlist” function enabling/disabling;
stop the CD to enable the icon key.
Page 55 of 166

54
CONNECT NAV+
Starting from “Stop” state (stop play-
ing by pressing “
˙/II”9-fig. 1, user can
create or modify the playlist (if any) by
means of the “Define playlist” func-
tion or set a track sequence by means
of the “Playlist” function. It is then pos-
sible to play the MP3 CD by pressing
again “
˙/II”9-fig. 1(“Play” key).DEFINE PLAYLIST
FUNCTION
The “Define playlist” function enables
to create a playlist.
Select “Define Playlist” function on
the main screen by rotating the knob
15-fig. 1and then press it to confirm.
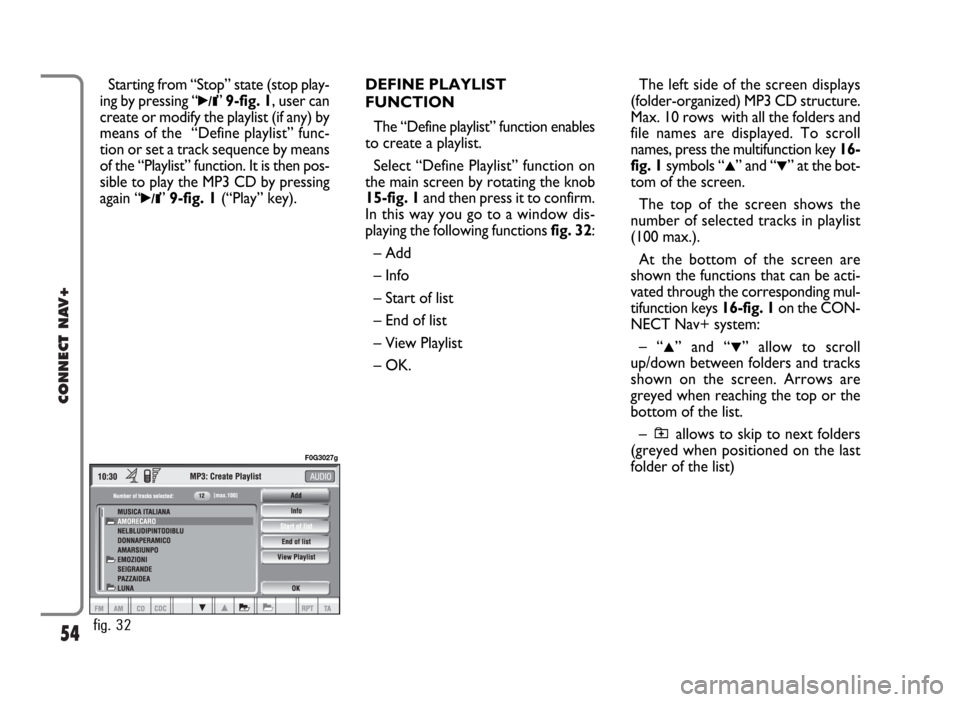
In this way you go to a window dis-
playing the following functions fig. 32:
– Add
– Info
– Start of list
– End of list
– View Playlist
– OK.The left side of the screen displays
(folder-organized) MP3 CD structure.
Max. 10 rows with all the folders and
file names are displayed. To scroll
names, press the multifunction key 16-
fig. 1symbols “
▲” and “▼” at the bot-
tom of the screen.
The top of the screen shows the
number of selected tracks in playlist
(100 max.).
At the bottom of the screen are
shown the functions that can be acti-
vated through the corresponding mul-
tifunction keys 16-fig. 1on the CON-
NECT Nav+ system:
– “
▲” and “▼” allow to scroll
up/down between folders and tracks
shown on the screen. Arrows are
greyed when reaching the top or the
bottom of the list.
– allows to skip to next folders
(greyed when positioned on the last
folder of the list)
fig. 32
F0G3027g
Page 66 of 166

INCOMING CALLS
Whichever is the CONNECT Nav+
system active mode, when an external
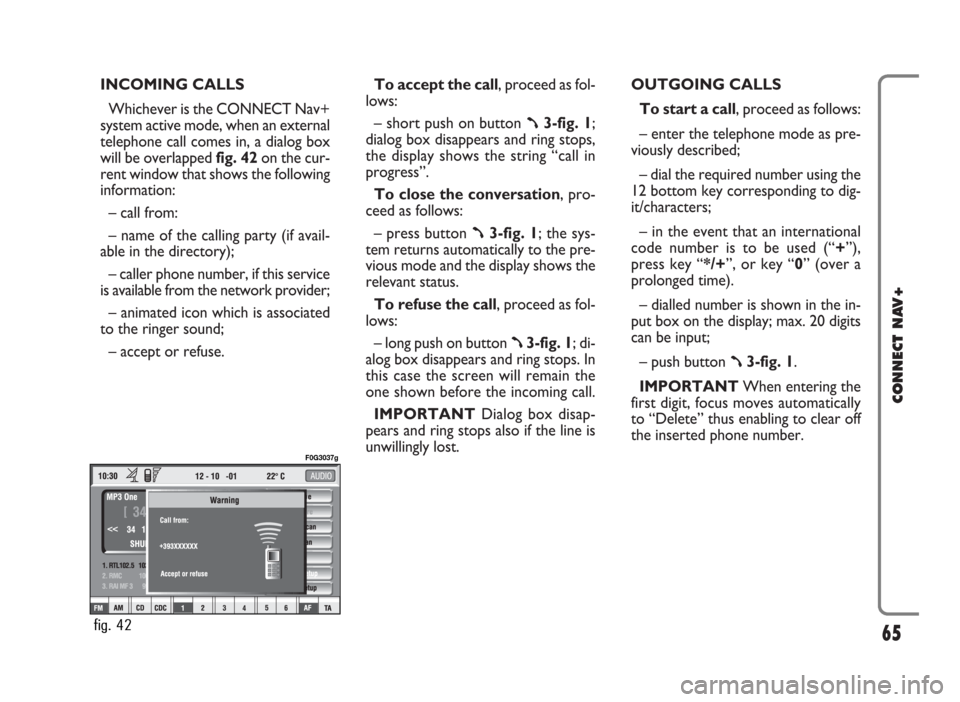
telephone call comes in, a dialog box
will be overlapped fig. 42on the cur-
rent window that shows the following
information:
– call from:
– name of the calling party (if avail-
able in the directory);
– caller phone number, if this service
is available from the network provider;
– animated icon which is associated
to the ringer sound;
– accept or refuse.To accept the call, proceed as fol-
lows:
– short push on button
ß3-fig. 1;
dialog box disappears and ring stops,
the display shows the string “call in
progress”.
To close the conversation, pro-
ceed as follows:
– press button
ß3-fig. 1; the sys-
tem returns automatically to the pre-
vious mode and the display shows the
relevant status.
To refuse the call, proceed as fol-
lows:
– long push on button
ß3-fig. 1; di-
alog box disappears and ring stops. In
this case the screen will remain the
one shown before the incoming call.
IMPORTANT Dialog box disap-
pears and ring stops also if the line is
unwillingly lost.OUTGOING CALLS
To start a call, proceed as follows:
– enter the telephone mode as pre-
viously described;
– dial the required number using the
12 bottom key corresponding to dig-
it/characters;
– in the event that an international
code number is to be used (“+”),
press key “*/+”, or key “0” (over a
prolonged time).
– dialled number is shown in the in-
put box on the display; max. 20 digits
can be input;
– push button
ß3-fig. 1.
IMPORTANTWhen entering the
first digit, focus moves automatically
to “Delete” thus enabling to clear off
the inserted phone number.
65
CONNECT NAV+
fig. 42
F0G3037g
Page 70 of 166

To call directly one of the entries in
the list proceed as follows:
– select an entry in the list by rotat-
ing the knob 15-fig. 1;
– push
ß3-fig. 1to start the call
(seefig. 40).
After selecting the required entry,
pressing the knob 15-fig. 1 opens a
window with detailed information re-
garding selected name and numberfig.
50. Icon keys “Call” and “Store” are
available on the display:
– select “Call” by rotating and press-
ing the knob 15-fig. 1: system starts
the call to the displayed number;– select “Store” by rotating and
pressing the knob 15-fig. 1: the sys-
tem stores the current name in the di-
rectory.
If the entry is already present in the
directory, “Store” key is disabled.“Last Numbers Called”
FUNCTION
“Last Numbers Called” pops up the
list of the last 10 made calls. The list
shows the name (if stored in the di-
rectory) and the phone number rele-
vant to the most recently made calls
fig. 51.
The list is managed and updated by
the system automatically.
To call directly one of the entries in
the list proceed as follows:
– select an entry in the list
by rotating the 15-fig. 1;
– push
ß3-fig. 1to start the call
(see fig. 40).
69
CONNECT NAV+
fig. 50
F0G3045g
fig. 51
F0G3046g
Page 71 of 166

After selecting the required entry,
pressing the knob 15-fig. 1opens a
window with detailed information re-
garding selected name and number fig.
52. Icon keys “Call” and “Store” are
available on the display:
– select “Call” by rotating and press-
ing the knob 15-fig. 1: system starts
the call to the displayed number;
– select “Store” by rotating and
pressing the knob 15-fig. 1: the sys-
tem stores the current name in the di-
rectory.
If the entry is already present in the
directory, “Store” key is disabled.“Directory” FUNCTION
“Directory” function makes access
to an electronic directory of person-
al phone numbers and names.
– select “Directory” by rotating and
pressing the knob 15-fig. 1; the screen
shown is that in fig. 53, with the fol-
lowing available icon keys: “Dial”,
“Add”, “Hear voice directory”,
“Delete voice directory” and a list
with the first items of the directory.“Dial” icon key
“Dial” icon key is used to select a di-
rectory phone number.
Select “Dial” by rotating and press-
ing the knob 15-fig. 1; the display
shows the keypad, the editing box and
the list of stored names fig. 54.
70
CONNECT NAV+
fig. 52
F0G3047g
fig. 53
F0G3048g
fig. 54
F0G3049g