2007 FIAT PANDA ignition
[x] Cancel search: ignitionPage 17 of 166

16
CONNECT NAV+
SYSTEM POWER ON
The CONNECT Nav+ can be
switched on according to two differ-
ent methods:
automatic switching onwith ig-
nition key to ON;
manual switching on:
– by button 17-fig. 1;Automatic switching on
Turning the ignition key to ON, will
turn the CONNECT Nav+ system on
automatically, thus activating or mak-
ing available all the functions described
in this manual.
Manual switching on
With ignition key to OFF, press but-
ton 17-fig. 1, to switch on the CON-
NECT Nav+ system thus making avail-
able the following modules:
– MAIN
– AUDIO
– NAV
– TEL
– SOS
– SERV (Infomobility bCONNECT
•).IMPORTANTWith manual
switch-on, the TRIP and MY CAR
functional modules can be accessed
with a few restrictions. These limita-
tions are normal when switching the
system on manually by button 17-
fig. 1, since with engine off (key at
OFF), the car data transmission de-
vices are not operating.
Turning the ignition key to ONwill
make all system functions active (See
TRIP computer and SETUP sections).
Page 18 of 166

17
CONNECT NAV+
SYSTEM POWER OFF
The CONNECT Nav+ system can
be switched off according to two dif-
ferent modes:
– deactivation dependenton ig-
nition key
– deactivation independentof ig-
nition key
The power-off mode can be chosen
in the SETUP module (see section
SETUP/ Power OFF).Deactivation dependent
on ignition key
(Key-dependent auto-off)
With this mode active, CONNECT
Nav+ can be switched off by turning
the ignition key to OFFor by press-
ing button 17-fig. 1.
The display will show the message
“PLEASE WAIT WHILE SYSTEM
TURNS OFF”.
IMPORTANTDeactivation with
ignition key to OFFis delayed and will
take place after 20 minutes if the sys-
tem has a destination set or a phone
call is in progress.Deactivation independent
of ignition key
(Key-independ. auto-off)
With this mode active, the radio-nav-
igation system can be switched off by
pressing button 1-fig. 1or automati-
cally after 20 minutes.
Page 19 of 166

18
CONNECT NAV+
MAIN MODE
The MAIN mode is activated by
pushing the “MAIN” button 21-fig. 1
on the front panel. This mode allows
to display the four main system mod-
ules fig. 3 - 4:
– AUDIO
– TELEPHONE
– NAVIGATOR
– TRIP.
The top status bar shows current
time, GPS and GSM field strength, date
(format dd, mm, yyyy), external tem-
perature and current active mode.IMPORTANTWith ignition key at
OFF, information concerning time,
date, external temperature and Trip
data is not available since in this con-
dition the car data transmission de-
vices are not operating.
The different panels on the left side
of the screen are dedicated to tele-
phone, audio and trip modes.The panel dedicated to the phone in-
cludes:
– network administrator GMS (if no
administrator is found, manual search
can be carried out; if the telephone is
turned off, the “TEL OFF” string will
appear, and no call can be made);
– Unread SMS message envelope-
shaped icon;
– Active call forward arrow-shaped
icon.
The panel dedicated to the current
audio source includes:
– In Radio mode: tuned band and fre-
quency, RDS string.
– In CD/CDC/MP3 mode: active
source CD or CD1 ÷ 5 or MP3, num-
ber of the track or MP3 file being
played and length.
fig. 3
F0G3000g
fig. 4
F0G3001g
Page 21 of 166

20
CONNECT NAV+
With ignition key at ON, if authenti-
cation fails, system starts working as
usual, but the user is asked to enter the
4-digit “Master Code” to allow access
to the standard functions.
Master code is unique for each CON-
NECT Nav+, and is stored in its mem-
ory and can not be reset.To enter the code, access is made pos-
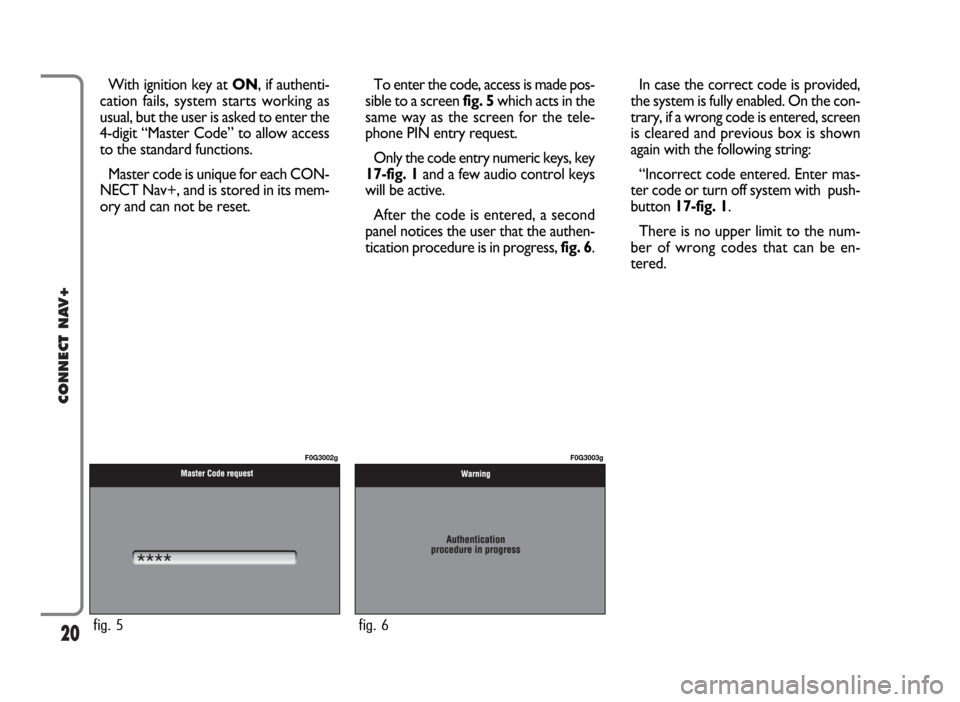
sible to a screen fig. 5which acts in the
same way as the screen for the tele-
phone PIN entry request.
Only the code entry numeric keys, key
17-fig. 1and a few audio control keys
will be active.
After the code is entered, a second
panel notices the user that the authen-
tication procedure is in progress, fig. 6.In case the correct code is provided,
the system is fully enabled. On the con-
trary, if a wrong code is entered, screen
is cleared and previous box is shown
again with the following string:
“Incorrect code entered. Enter mas-
ter code or turn off system with push-
button 17-fig. 1.
There is no upper limit to the num-
ber of wrong codes that can be en-
tered.
fig. 5
F0G3002g
fig. 6
F0G3003g
Page 62 of 166

– DTMF setting (Dual Tone Multi
Frequency) to repeat dialling and in-
hibit the own identification number
transmission
– selection of network provider
– setting volume and tone of incom-
ing calls
– displaying the remaining credit for
a pre-paid SIM card (if provided for by
the telephone company)
– display of signal field intensity and
other status warnings with symbols
and words.PRELIMINARY
OPERATIONS
ENTERING AND EXITING
THE TELEPHONE MODE
To enter the telephone mode pro-
ceed as follows:
– turn ignition key to ON;
– short push on “TEL” button 19-fig.
1on front panel.
The display shows the telephone
mode “main screen” fig. 39that pro-
vides the following information:
– Time.
– GSM field strength. If telephone
mode is “switched off” the display
shows “TEL OFF”. GSM signal
strength is shown even if no SIM card
is inserted.– Active GSM provider. If a SIM card
is inserted and validated by PIN and no
provider is available, the display will
show “FIND…”.
– An envelope-shaped symbol to in-
dicate unread SMS message/s.
– An arrow-shaped symbol to indi-
cate active call forward.
– Active AUDIO source information.
– “TEL” string to indicate that tele-
phone module is currently active.
– A box to input telephone number
with “DIAL NUMBER” string.
– An icon key: “Delete” to clear off
the telephone number input in the
box.
61
CONNECT NAV+
fig. 39
F0G3034g
Page 94 of 166

IMPORTANT NOTES
– Accurate self-adjustment of the
navigation system requires approx.
100 km of travel the first time and
when tyres are changed; during this
stage the calculated position could be
less accurate.
– Continuous lack of grip at the
wheels (for example skidding on ice),
makes the system temporarily detect
an incorrect position.
The navigation system is completely
managed by the telematic system,
therefore the only operations that
may be required are replacement of
the CD-ROM to set the map of an-
other area or an updated map.
Access to the navigation main func-
tions is gained by short push on “NAV”
key 18-fig. 1 , whereas a long push
(over 2 seconds) on the same key will
activate the NAV RPT function: navi-
gation voice instructions will be un-
available. To switch the function on
again press the “NAV” key 18-fig. 1for
over 2 seconds.When the system is switched on, the
display will, upon the first selection of
the navigating function, show the in-
structions for using the system. The
text will be as follows:
“The FIAT navigation system guides
you in traffic and helps you reach your
destination. Comply with all local traf-
fic regulations, which take precedence
over the manoeuvres indicated by the
navigation system. Full responsibility
for operating the vehicle and observ-
ing all traffic regulations lies with the
driver”.
This page will not be displayed as
long as the ignition key is to ON.SCREEN OPTIONS
AND FUNCTIONS
The main information and functions
provided and managed by the naviga-
tion system are:
– GPS signal symbol which differs in
colour depending on the quality of re-
ception ;
– voice and visual instructions with
indications of distance from the des-
tination and planned arrival time;
– detailed map in different colours
and with different scales to clearly
show the car position, route and des-
tination;
– customisation of the navigation sys-
tem with possibility of entering pre-
memorised destinations;
– automatic memorising of the last
10 destinations;
– name of current street;
93
CONNECT NAV+
Page 117 of 166

116
CONNECT NAV+
GENERAL INFORMATION
The on-board computer provides a
series of helpful data relevant to cur-
rent travel (e.g.: times, distances,
speed, fuel consumption). Certain in-
formation is only available with navi-
gation function on and depends on set
navigation route.
IMPORTANTCertain informa-
tion/operations hereafter described
are available/possible only with ignition
key turned to ON.
TRIP menu allows to set the desired
distance and fuel consumption mea-
sure unit.
TRIP menu also allows to input a
number of events (e.g. Tyre replace-
ment..., Birthday…) that can be trig-
gered both on set date or mileage.To display on-board computer
screen, press “TRIP” key 4-fig. 1.
To perform new settings or to have
information about TRIP settings, press
keypad16-fig. 1buttons: “TRIP”,
“TRIP B”, “SPEED”, “MY CAR”, “IN-
FO” or “RESET”.“GENERAL TRIP”
and “TRIP B” FUNCTION
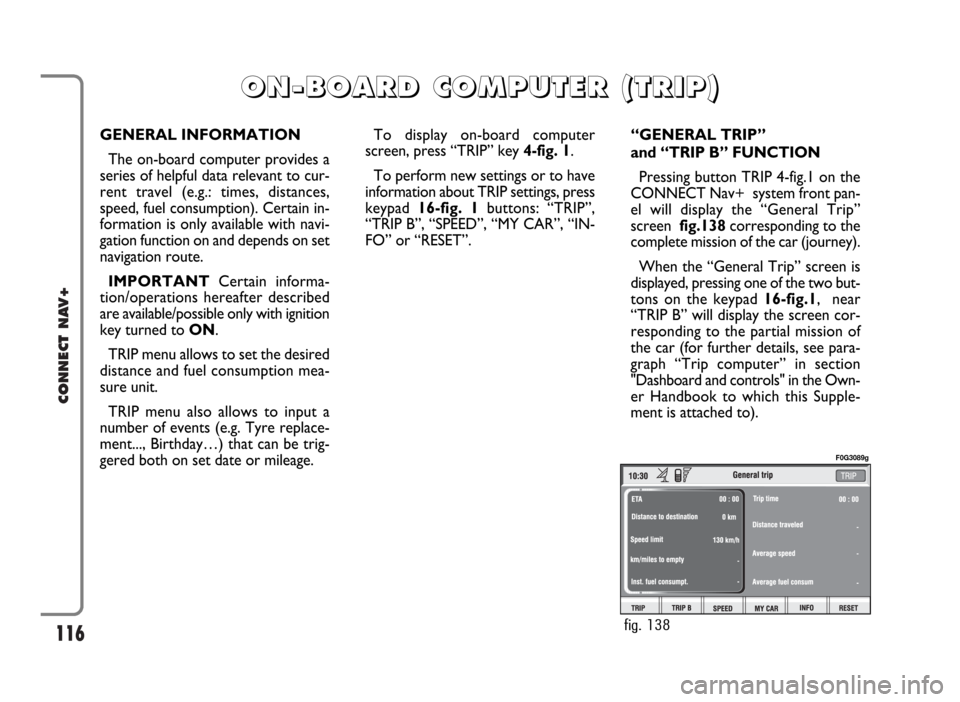
Pressing button TRIP 4-fig.1 on the
CONNECT Nav+ system front pan-
el will display the “General Trip”
screen fig.138corresponding to the
complete mission of the car (journey).
When the “General Trip” screen is
displayed, pressing one of the two but-
tons on the keypad 16-fig.1, near
“TRIP B” will display the screen cor-
responding to the partial mission of
the car (for further details, see para-
graph “Trip computer” in section
"Dashboard and controls" in the Own-
er Handbook to which this Supple-
ment is attached to).
O O
N N
- -
B B
O O
A A
R R
D D
C C
O O
M M
P P
U U
T T
E E
R R
( (
T T
R R
I I
P P
) )
fig. 138
F0G3089g
Page 120 of 166

119
CONNECT NAV+
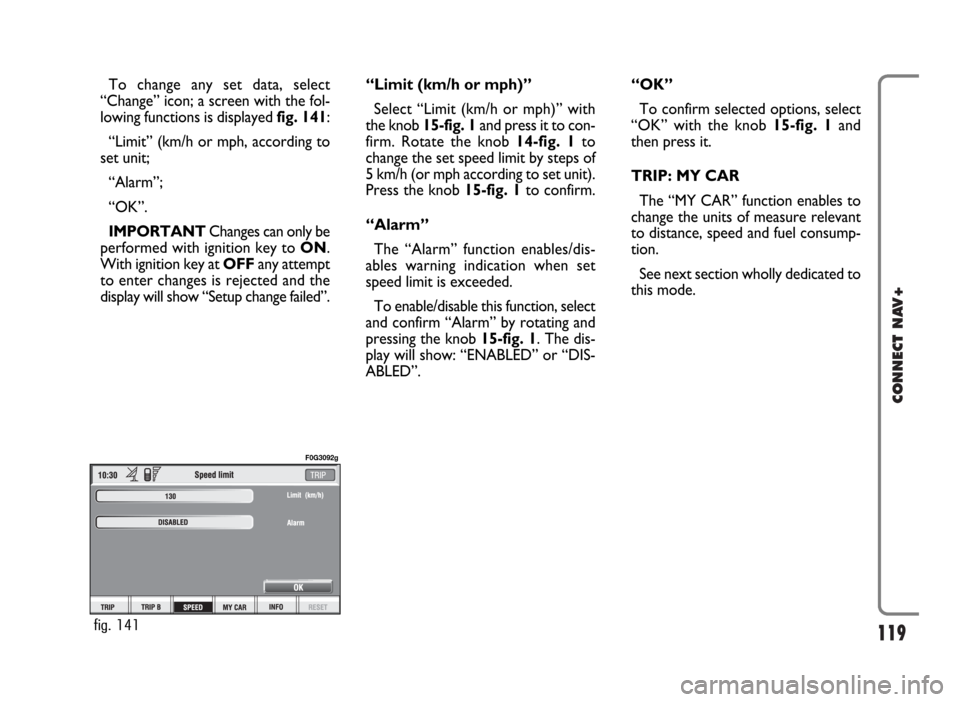
To change any set data, select
“Change” icon; a screen with the fol-
lowing functions is displayed fig. 141:
“Limit” (km/h or mph, according to
set unit;
“Alarm”;
“OK”.
IMPORTANTChanges can only be
performed with ignition key to ON.
With ignition key at OFFany attempt
to enter changes is rejected and the
display will show “Setup change failed”.“Limit (km/h or mph)”
Select “Limit (km/h or mph)” with
the knob 15-fig. 1and press it to con-
firm. Rotate the knob14-fig. 1to
change the set speed limit by steps of
5 km/h (or mph according to set unit).
Press the knob 15-fig. 1to confirm.
“Alarm”
The “Alarm” function enables/dis-
ables warning indication when set
speed limit is exceeded.
To enable/disable this function, select
and confirm “Alarm” by rotating and
pressing the knob 15-fig. 1. The dis-
play will show: “ENABLED” or “DIS-
ABLED”.“OK”
To confirm selected options, select
“OK” with the knob 15-fig. 1and
then press it.
TRIP: MY CAR
The “MY CAR” function enables to
change the units of measure relevant
to distance, speed and fuel consump-
tion.
See next section wholly dedicated to
this mode.
fig. 141
F0G3092g