2007 FIAT CROMA warning
[x] Cancel search: warningPage 97 of 166

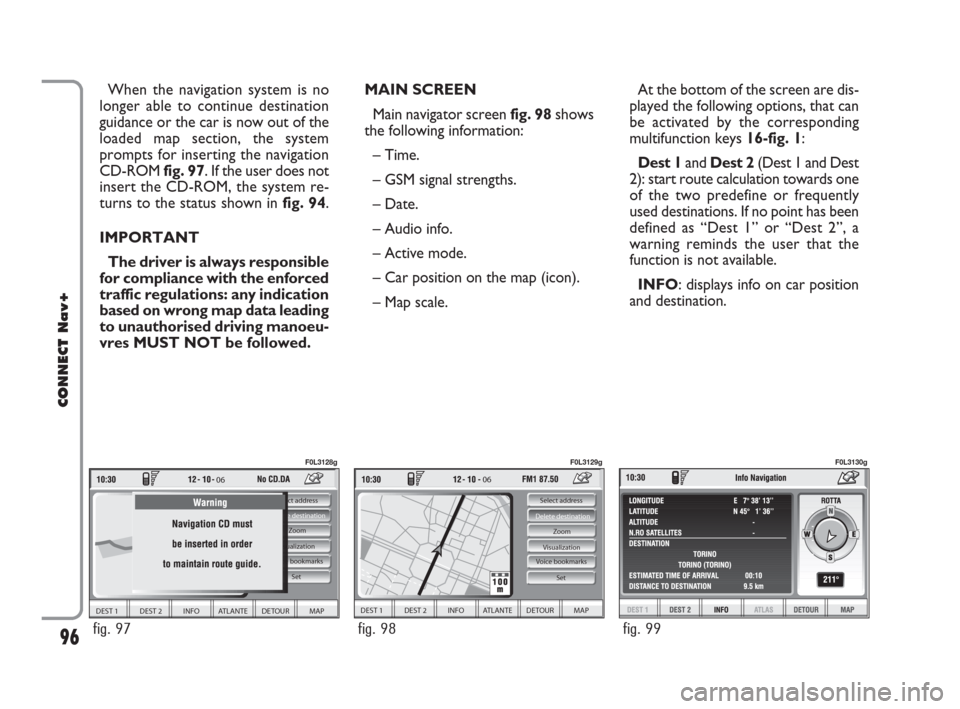
MAIN SCREEN
Main navigator screen fig. 98shows
the following information:
– Time.
– GSM signal strengths.
– Date.
– Audio info.
– Active mode.
– Car position on the map (icon).
– Map scale.At the bottom of the screen are dis-
played the following options, that can
be activated by the corresponding
multifunction keys 16-fig. 1:
Dest 1and Dest 2(Dest 1 and Dest
2): start route calculation towards one
of the two predefine or frequently
used destinations. If no point has been
defined as “Dest 1” or “Dest 2”, a
warning reminds the user that the
function is not available.
INFO: displays info on car position
and destination. When the navigation system is no
longer able to continue destination
guidance or the car is now out of the
loaded map section, the system
prompts for inserting the navigation
CD-ROM fig. 97. If the user does not
insert the CD-ROM, the system re-
turns to the status shown in fig. 94.
IMPORTANT
The driver is always responsible
for compliance with the enforced
traffic regulations: any indication
based on wrong map data leading
to unauthorised driving manoeu-
vres MUST NOT be followed.
96
CONNECT Nav+
06
DEST 1 DEST 2 INFO ATLANTE DETOUR MAP
Select address
Visualization
Voice bookmarks Zoom Delete destination
Set
fig. 97
F0L3128g
06
DEST 1 DEST 2 INFO ATLANTE DETOUR MAP
Select address
Visualization Zoom Delete destination
Set
Voice bookmarks
fig. 98
F0L3129g
fig. 99
F0L3130g
092-115 Connect CROMA GB 4-07-2007 14:06 Pagina 96
Page 103 of 166

102
CONNECT Nav+
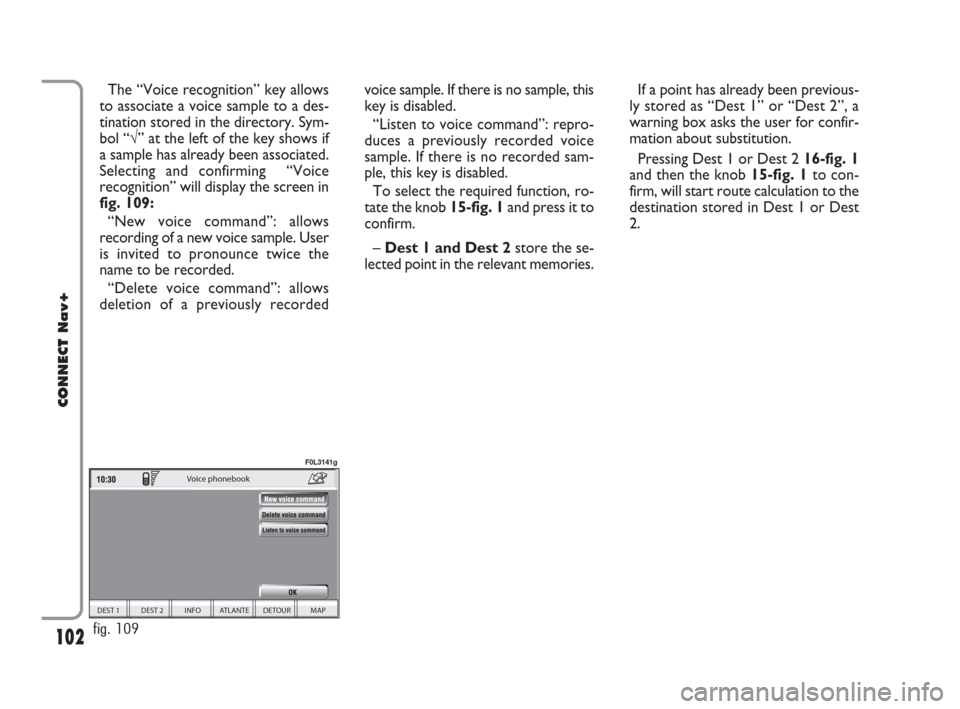
The “Voice recognition” key allows
to associate a voice sample to a des-
tination stored in the directory. Sym-
bol “√” at the left of the key shows if
a sample has already been associated.
Selecting and confirming “Voice
recognition” will display the screen in
fig. 109:
“New voice command”: allows
recording of a new voice sample. User
is invited to pronounce twice the
name to be recorded.
“Delete voice command”: allows
deletion of a previously recordedvoice sample. If there is no sample, this
key is disabled.
“Listen to voice command”: repro-
duces a previously recorded voice
sample. If there is no recorded sam-
ple, this key is disabled.
To select the required function, ro-
tate the knob 15-fig. 1and press it to
confirm.
– Dest 1 and Dest 2store the se-
lected point in the relevant memories.If a point has already been previous-
ly stored as “Dest 1” or “Dest 2”, a
warning box asks the user for confir-
mation about substitution.
Pressing Dest 1 or Dest 2 16-fig. 1
and then the knob 15-fig. 1to con-
firm, will start route calculation to the
destination stored in Dest 1 or Dest
2.
DEST 1 DEST 2 INFO ATLANTE DETOUR MAP
Voice phonebook
fig. 109
F0L3141g
092-115 Connect CROMA GB 4-07-2007 14:06 Pagina 102
Page 114 of 166

113
CONNECT Nav+
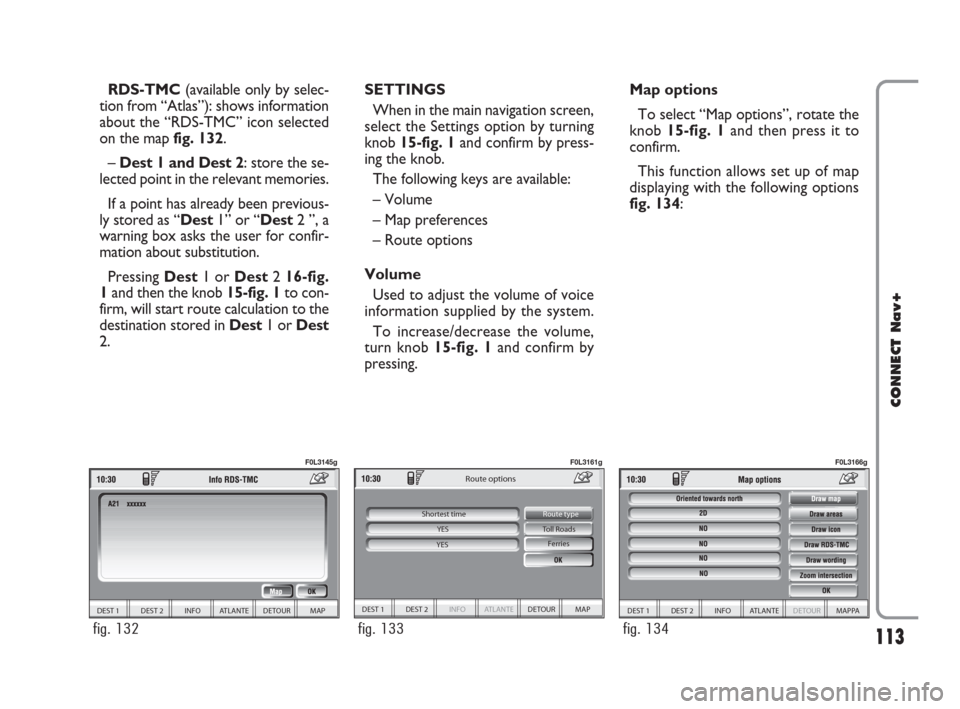
RDS-TMC(available only by selec-
tion from “Atlas”): shows information
about the “RDS-TMC” icon selected
on the map fig. 132.
–Dest 1 and Dest 2: store the se-
lected point in the relevant memories.
If a point has already been previous-
ly stored as “Dest1” or “Dest2 ”, a
warning box asks the user for confir-
mation about substitution.
Pressing Dest1 or Dest2 16-fig.
1and then the knob 15-fig. 1to con-
firm, will start route calculation to the
destination stored in Dest1 or Dest
2.SETTINGS
When in the main navigation screen,
select the Settings option by turning
knob 15-fig. 1and confirm by press-
ing the knob.
The following keys are available:
– Volume
– Map preferences
– Route options
Volume
Used to adjust the volume of voice
information supplied by the system.
To increase/decrease the volume,
turn knob 15-fig. 1and confirm by
pressing.Map options
To select “Map options”, rotate the
knob 15-fig. 1and then press it to
confirm.
This function allows set up of map
displaying with the following options
fig. 134:
DEST 1 DEST 2 INFO ATLANTE DETOUR MAP
Toll Roads
Route options
Ferries
Route type
Shortest time
YES
YES
fig. 133
F0L3161g
DEST 1 DEST 2 INFO ATLANTE DETOUR MAP
fig. 132
F0L3145g
DEST 1 DEST 2 INFO ATLANTE DETOUR MAPPA
fig. 134
F0L3166g
092-115 Connect CROMA GB 4-07-2007 14:06 Pagina 113
Page 120 of 166

119
CONNECT Nav+
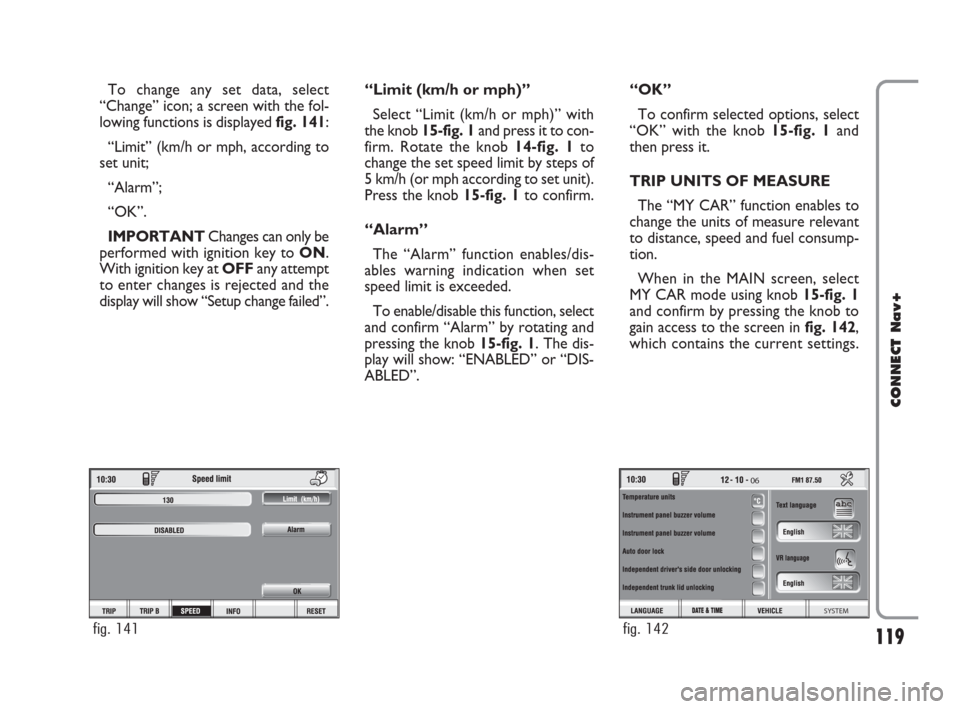
To change any set data, select
“Change” icon; a screen with the fol-
lowing functions is displayed fig. 141:
“Limit” (km/h or mph, according to
set unit;
“Alarm”;
“OK”.
IMPORTANTChanges can only be
performed with ignition key to ON.
With ignition key at OFFany attempt
to enter changes is rejected and the
display will show “Setup change failed”.“Limit (km/h or mph)”
Select “Limit (km/h or mph)” with
the knob 15-fig. 1and press it to con-
firm. Rotate the knob14-fig. 1to
change the set speed limit by steps of
5 km/h (or mph according to set unit).
Press the knob 15-fig. 1to confirm.
“Alarm”
The “Alarm” function enables/dis-
ables warning indication when set
speed limit is exceeded.
To enable/disable this function, select
and confirm “Alarm” by rotating and
pressing the knob 15-fig. 1. The dis-
play will show: “ENABLED” or “DIS-
ABLED”.“OK”
To confirm selected options, select
“OK” with the knob 15-fig. 1and
then press it.
TRIP UNITS OF MEASURE
The “MY CAR” function enables to
change the units of measure relevant
to distance, speed and fuel consump-
tion.
When in the MAIN screen, select
MY CAR mode using knob 15-fig. 1
and confirm by pressing the knob to
gain access to the screen in fig. 142,
which contains the current settings.
fig. 141
06
SYSTEM
fig. 142
116-123 Connect CROMA GB 2-07-2007 15:43 Pagina 119
Page 145 of 166

144
CONNECT Nav+
If the function is enabled, pressing the
“SOS” key 12-fig. 1, automatically
opens the screen with the “Automat-
ic medical advice”: function already
highlighted: if the user does not move
the cursor within 15 seconds using the
knob 15-fig. 1and call is not cancelled
for other 10 seconds, the request for
medical assistance will be forwarded
automatically. If not, the call will not
be sent and to activate it at a later
time, the user will have to select again
the “Medical advice” function and to
press the knob 15-fig.1to confirm.
“OK” icon key
To confirm settings, select “OK”
with the knob 15-fig. 1and press it to
confirm.CALLS FOR MEDICAL
ADVICE OR ROADSIDE
ASSISTANCE
During the forwarding of a call for as-
sistance to the operating centre, any
other operations activated are inter-
rupted and the volume of any audio
sources (except the phone) is muted.
These conditions will be maintained as
long as the call for assistance is active,
with the corresponding screen on the
display.
If a phone call is received while for-
warding a request for assistance, the
corresponding alert will not be shown
on the display but the ringer will ring.
If the user decides to accept the call
and briefly presses the
˜3-fig. 1, key,
the assistance call screen goes off the
display.
IMPORTANTThe call for assis-
tance is always forwarded; however, if
you accept the incoming call, the
bCONNECToperator might have
difficulty in contacting you since the
number could be busy. When the call has been sent, the dis-
play shows the corresponding call for-
warded message for about 4 seconds.
If for any reason the call for assis-
tance cannot be sent, the display
shows a warning message and the user
is then asked if he/she wants to acti-
vate a phone call in any case (*) to the
operating centre to avail of the service
required, even if in this case the op-
erating centre will no longer be able
to locate the car.
(*) The call is normally made using the toll-
free number, while it is at the user’s expense
if it is made in roaming conditions.
141-147 Connect CROMA GB 2-07-2007 15:44 Pagina 144
Page 146 of 166

145
CONNECT Nav+
INFOMOBILITY SERVICES
Press button
•13-fig. 1to display
screen fig. 153to be used for re-
questing services and info. Available
functions are:
– System
– Select.
bConnectoperator availability
(GSM field strength, etc...) is shown on
the left top of the screen, whereas
SMS sent to the bCONNECToper-
ator are listed at the bottom of the
screen.Services are available only upon sub-
scription. If the user hasn’t subscribed
yet or if bCONNECTsubscription
expired, then the “Connect” icon is
disabled and screen in fig. 154is dis-
played showing “Subscribed services
not enabled”.
User can call the bCONNECTop-
erator to get information to (re)acti-
vate the service.
If bCONNECTsubscription ex-
pired, it is always possible to consult
stored information.“System” function
Select this function through knob
15- fig. 1and press it to confirm: the
on-board device will send info request
to the bCONNECTOperational
Centre via a pre-configured SMS.
When receiving the request, bCON-
NECTwill call the user on the car
freehand set. When this phone con-
nection is active the user can request
info to the operator. If the telematic
connection cannot be activated, the
display will show the relevant warning
message. Some information will be giv-
en only vocally by the operator, while
others may also be sent with SMS
messages, that will be received re-
gardless of the function active (MAIN,
AUDIO, etc.). The message will be
shown directly on the screen active at
that moment, in a window fig. 155
containing the “Save”, “Delete”, “Map”
(if the message contains geographical
indications) and “Call” (if a telephone
number is present).
Choosing “Save” option the message
will be stored, while “Delete” will
clear it from the screen and from
memory.
System
06
Select
BULDING
fig. 153
06
User information
Subscribed services not enable Press sel
informati
Select
fig. 154
141-147 Connect CROMA GB 2-07-2007 15:44 Pagina 145
Page 149 of 166

148
CONNECT Nav+
The MY CAR mode enables to set
different car and CONNECT Nav+
system operating modes and parame-
ters.
Parameters and operating modes
have been grouped in the following
four areas:
– LANGUAGE
– DATE & TIME
– VEHICLE
– SYSTEM.
Every above area is then divided in
different sub-areas. Read carefully
through this chapter to learn any fea-
tures offered by CONNECT Nav+
system.
To enter MY CAR mode, when in
the MAIN screen, select MY CAR
mode using knob 15-fig. 1and con-
firm by pressing the knob. The sum-
mary screen infig. 160is displayed.IMPORTANTIf the ignition key is
at OFFcertain MY CAR informa-
tion/operations will only be accessible
for reference.
Any new setting on the CONNECT
Nav+, will be operative only after
check performed by car check com-
ponents; otherwise the warning mes-
sage “Setup change failed” will be dis-
played.
IMPORTANTTo be sure that any
new setting is positively received by
car check components, it is strictly
necessary that ignition key is at ON.
For each item on the display, symbol
“✓” indicates whether the item is set.On the right side of the display “Text
Language” shows which language for
written text is active, “VR language”
(Voice Recognition language) shows
which language is used by the system
for voice commands.
M M
Y Y
C C
A A
R R
06
SYSTEM
fig. 160
148-158 Connect CROMA GB 2-07-2007 15:47 Pagina 148
Page 151 of 166

150
CONNECT Nav+
The display will show the following
string:
“Insert Setup CD to change language
of messages and voice commands.
Press ESC to cancel”.
If the Setup CD is inserted the fol-
lowing message will be permanently
displayed:
“System will be unavailable for a few
seconds and calls in progress will be
terminated. Press ENTER to continue
or ESC to cancel”.
If the knob 15-fig. 1has been
pressed, the following message will be
displayed permanently:
“Message and voice command lan-
guage change in progress. Do not turn
off system. Please wait”.
The end of the procedure is indicat-
ed by the following message:
“Message and voice command lan-
guage change concluded correctly”.If some errors occur during language
updating, the following message will be
displayed:
“Language change failed. Please re-
peat procedure”.
This message asks the user to repeat
the above procedure.
Whenever the system is switched on
turning the ignition key to ON, the
language module is checked and if the
system finds a fault the following mes-
sage is displayed:
“Voice commands and messages not
available. Please change the language”.
This message asks the user to repeat
language change procedure.
The user shall set again the desired
language in the SETUP menu and then
follow the above procedure.DATE & TIME
To open the relevant screen page,
press one of the keypad keys 16-
fig. 1under DATE fig. 162.
IMPORTANTAny adjustment can
only be performed with ignition key at
ON. Otherwise setting is rejected and
the warning message “Setup change
failed” will be displayed.
Time displaying can be set accord-
ing to two modes: 12h or 24h.
SYSTEM VEHICLE
DATE & TIME LANGUAGE
Date & Time
Date and time
DATE & TIME
fig. 162
148-158 Connect CROMA GB 2-07-2007 15:47 Pagina 150