2007 CHEVROLET TRAIL BLAZER stop start
[x] Cancel search: stop startPage 120 of 574
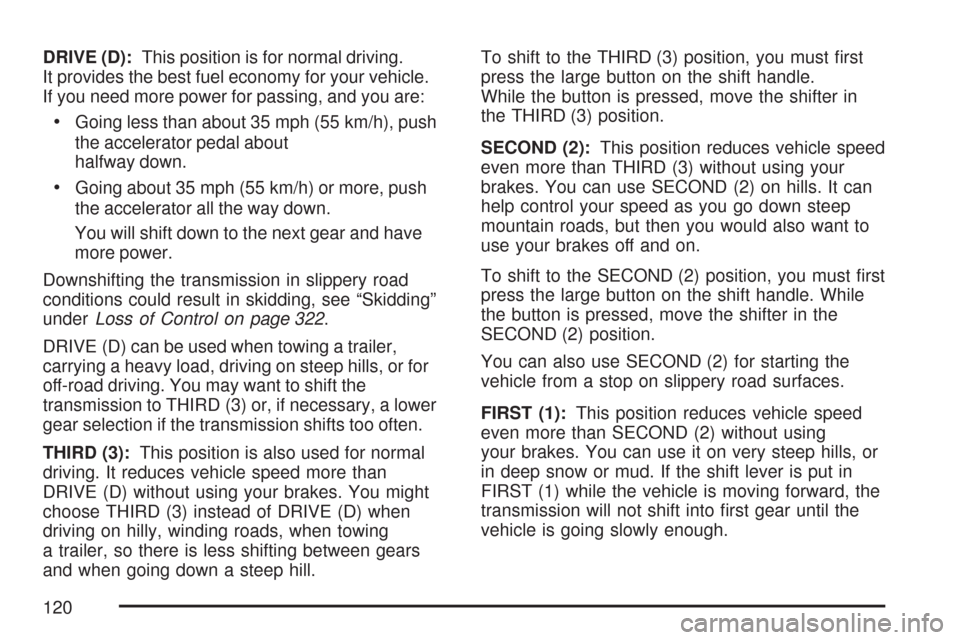
DRIVE (D):This position is for normal driving.
It provides the best fuel economy for your vehicle.
If you need more power for passing, and you are:
Going less than about 35 mph (55 km/h), push
the accelerator pedal about
halfway down.
Going about 35 mph (55 km/h) or more, push
the accelerator all the way down.
You will shift down to the next gear and have
more power.
Downshifting the transmission in slippery road
conditions could result in skidding, see “Skidding”
underLoss of Control on page 322.
DRIVE (D) can be used when towing a trailer,
carrying a heavy load, driving on steep hills, or for
off-road driving. You may want to shift the
transmission to THIRD (3) or, if necessary, a lower
gear selection if the transmission shifts too often.
THIRD (3):This position is also used for normal
driving. It reduces vehicle speed more than
DRIVE (D) without using your brakes. You might
choose THIRD (3) instead of DRIVE (D) when
driving on hilly, winding roads, when towing
a trailer, so there is less shifting between gears
and when going down a steep hill.To shift to the THIRD (3) position, you must �rst
press the large button on the shift handle.
While the button is pressed, move the shifter in
the THIRD (3) position.
SECOND (2):This position reduces vehicle speed
even more than THIRD (3) without using your
brakes. You can use SECOND (2) on hills. It can
help control your speed as you go down steep
mountain roads, but then you would also want to
use your brakes off and on.
To shift to the SECOND (2) position, you must �rst
press the large button on the shift handle. While
the button is pressed, move the shifter in the
SECOND (2) position.
You can also use SECOND (2) for starting the
vehicle from a stop on slippery road surfaces.
FIRST (1):This position reduces vehicle speed
even more than SECOND (2) without using
your brakes. You can use it on very steep hills, or
in deep snow or mud. If the shift lever is put in
FIRST (1) while the vehicle is moving forward, the
transmission will not shift into �rst gear until the
vehicle is going slowly enough.
120
Page 164 of 574
Convenience Net
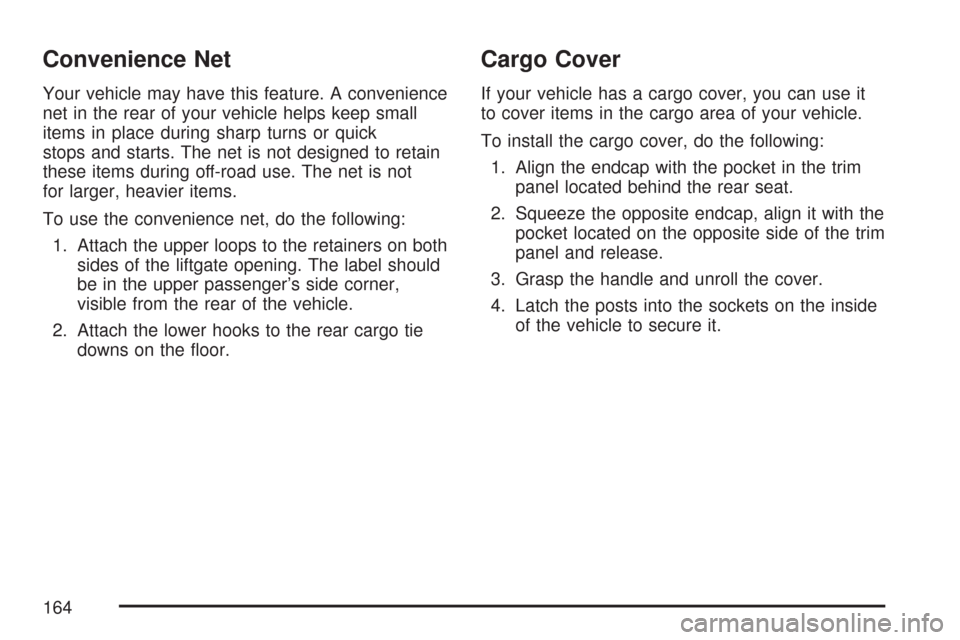
Your vehicle may have this feature. A convenience
net in the rear of your vehicle helps keep small
items in place during sharp turns or quick
stops and starts. The net is not designed to retain
these items during off-road use. The net is not
for larger, heavier items.
To use the convenience net, do the following:
1. Attach the upper loops to the retainers on both
sides of the liftgate opening. The label should
be in the upper passenger’s side corner,
visible from the rear of the vehicle.
2. Attach the lower hooks to the rear cargo tie
downs on the �oor.
Cargo Cover
If your vehicle has a cargo cover, you can use it
to cover items in the cargo area of your vehicle.
To install the cargo cover, do the following:
1. Align the endcap with the pocket in the trim
panel located behind the rear seat.
2. Squeeze the opposite endcap, align it with the
pocket located on the opposite side of the trim
panel and release.
3. Grasp the handle and unroll the cover.
4. Latch the posts into the sockets on the inside
of the vehicle to secure it.
164
Page 175 of 574
Headlamp High/Low-Beam Changer
To change the headlamps from low to high
beam, push the lever toward the instrument panel.
To return to low-beam headlamps, pull the
multifunction lever toward you. Then release it.
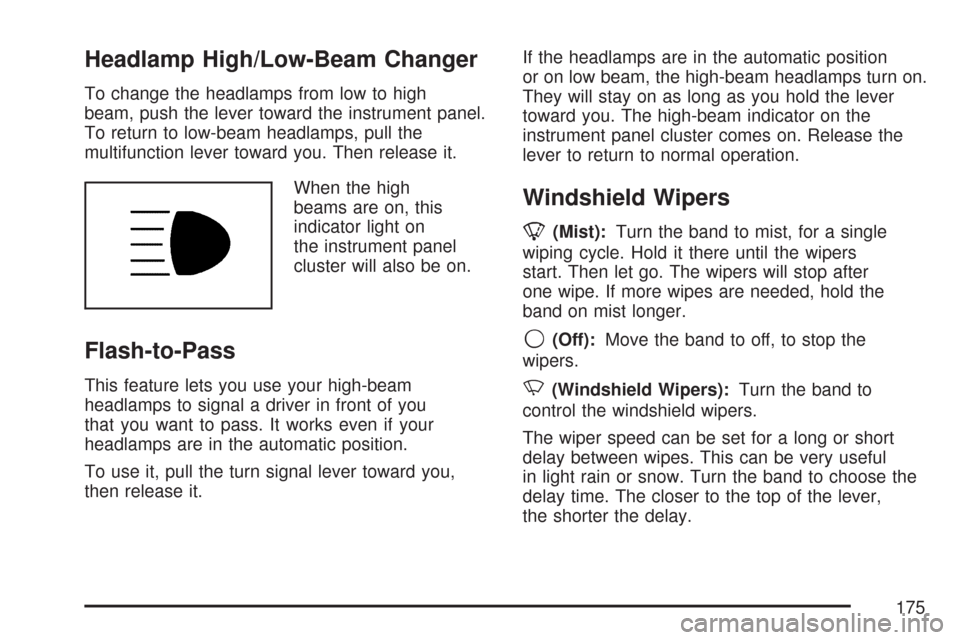
When the high
beams are on, this
indicator light on
the instrument panel
cluster will also be on.
Flash-to-Pass
This feature lets you use your high-beam
headlamps to signal a driver in front of you
that you want to pass. It works even if your
headlamps are in the automatic position.
To use it, pull the turn signal lever toward you,
then release it.If the headlamps are in the automatic position
or on low beam, the high-beam headlamps turn on.
They will stay on as long as you hold the lever
toward you. The high-beam indicator on the
instrument panel cluster comes on. Release the
lever to return to normal operation.
Windshield Wipers
8(Mist):Turn the band to mist, for a single
wiping cycle. Hold it there until the wipers
start. Then let go. The wipers will stop after
one wipe. If more wipes are needed, hold the
band on mist longer.
9(Off):Move the band to off, to stop the
wipers.
N(Windshield Wipers):Turn the band to
control the windshield wipers.
The wiper speed can be set for a long or short
delay between wipes. This can be very useful
in light rain or snow. Turn the band to choose the
delay time. The closer to the top of the lever,
the shorter the delay.
175
Page 209 of 574
If the light comes on while you are driving, pull
off the road and stop carefully. You may notice
that the pedal is harder to push or the pedal
may go closer to the �oor. It may take longer
to stop. If the light is still on, have the vehicle
towed for service. SeeTowing Your Vehicle
on page 362.
{CAUTION:
Your brake system may not be working
properly if the brake system warning light
is on. Driving with the brake system
warning light on can lead to an accident.
If the light is still on after you have pulled
off the road and stopped carefully, have
the vehicle towed for service.
Anti-Lock Brake System
Warning Light
With the Anti-Lock
Brake System (ABS),
this light will come
on when you start
your engine and may
stay on for several
seconds, that is normal.
A chime may also sound when the light comes on.
If the light stays on, or comes on when you are
driving, your vehicle needs service. If the regular
brake system warning light is not on, you still
have brakes, but you do not have anti-lock brakes.
If the regular brake system warning light is also
on, you do not have anti-lock brakes and there
is a problem with your regular brakes. See
Brake System Warning Light on page 208earlier
in this section.
The ABS warning light should come on brie�y
when you turn the ignition key to RUN. If the
light does not come on then, have it �xed so
it will be ready to warn you if there is a problem.
209
Page 213 of 574
Light Flashing— A mis�re condition has been
detected. A mis�re increases vehicle emissions
and may damage the emission control system
on your vehicle. Diagnosis and service may
be required.
Light On Steady— An emission control
system malfunction has been detected on
your vehicle. Diagnosis and service may be
required.
If the Light is Flashing
The following may prevent more serious damage
to your vehicle:
Reducing vehicle speed
Avoiding hard accelerations
Avoiding steep uphill grades
If you are towing a trailer, reduce the
amount of cargo being hauled as soon
as it is possibleIf the light stops �ashing and remains on steady,
see “If the Light Is On Steady” following.
If the light continues to �ash, when it is safe to
do so, stop the vehicle. Find a safe place to
park your vehicle. Turn the key off, wait at least
10 seconds and restart the engine. If the light
remains on steady, see “If the Light Is On Steady”
following. If the light is still �ashing, follow the
previous steps, and see your dealer for service
as soon as possible.
If the Light Is On Steady
You may be able to correct the emission system
malfunction by considering the following:
Did you recently put fuel into your vehicle?
If so, reinstall the fuel cap, making sure to fully
install the cap. SeeFilling the Tank on page 391.
The diagnostic system can determine if the
fuel cap has been left off or improperly installed.
A loose or missing fuel cap will allow fuel to
evaporate into the atmosphere. A few driving
trips with the cap properly installed should turn
the light off.
213
Page 222 of 574
You can also reset the TRIP A or TRIP B while
they are displayed by pressing the reset stem on
the cluster. If you press and hold the reset stem or
the select button for more than four seconds, the
display will show the distance traveled since the
last ignition cycle for TRIP A or TRIP B.
Tire Pressures:Press the trip information button
until TIRE PRESSURES appears on the display.
This mode shows the tire pressure in pounds
per square inch (psi) or kilopascals (kPa).
Press the select button to scroll through the
following information:
LF TIRE shows the tire pressure for the
front driver’s side tire.
RF TIRE shows the tire pressure for the
front passenger’s side tire.
LR TIRE shows the tire pressure for the
rear driver’s side tire.
RR TIRE shows the tire pressure for the
rear passenger’s side tire.Timer:The DIC can be used as a timer. Press
the select button while TIMER is displayed to
start the timer. The display will show the amount
of time that has passed since the timer was
last reset, not including time the ignition is off.
Time will continue to be counted as long as
the ignition is on, even if another display is being
shown on the DIC. The timer will record up to
99 hours, 59 minutes and 59 seconds (99:59:59)
after which the display will roll back to zero.
To stop the counting of time, press the select
button brie�y while TIMER is displayed.
To reset the timer to zero, press and hold the
select button while TIMER is displayed.
Fuel Information Button
t
(Fuel Information):Press the fuel information
button to scroll through the range, fuel used,
average fuel economy, and the engine oil
life system.
222
Page 227 of 574
OIL PRESSURE LOW/STOP ENGINE
Notice:If you drive your vehicle while
the engine oil pressure is low, severe engine
damage may occur. If a low oil pressure
warning appears on the Driver Information
Center (DIC), stop the vehicle as soon as
possible. Do not drive the vehicle until the
cause of the low oil pressure is corrected. See
Engine Oil on page 402for more information.
This message displays if low oil pressure levels
occur. Stop the vehicle as soon as safely possible
and do not operate it until the cause of the low oil
pressure has been corrected. Check the oil as soon
as possible and have your vehicle serviced by your
dealer/retailer. SeeEngine Oil on page 402.
PASSENGER DOOR AJAR
This message displays and a chime sounds if the
passenger’s door is not fully closed. Stop and turn
off the vehicle, check the door for obstructions,
and close the door again. Check to see if the
message still appears on the DIC. Press any of
the DIC buttons, or the trip stem, to acknowledge
this message and clear it from the DIC display.
REAR ACCESS OPEN
This message displays and a chime sounds if the
liftgate or liftglass is open while the ignition is in
RUN. Turn off the vehicle and check the liftgate
and liftglass. SeeLiftgate/Liftglass on page 104.
Restart the vehicle and check for the message on
the DIC display. Press any of the DIC buttons, or
the trip stem, to acknowledge this message and
clear it from the DIC display.
RIGHT REAR DOOR AJAR
This message displays and a chime sounds if
the passenger’s side rear door is not fully closed.
Stop and turn off the vehicle, check the door
for obstructions, and close the door again.
Check to see if the message still appears on the
DIC. Press any of the DIC buttons, or the trip stem,
to acknowledge this message and clear it from
the DIC display.
227
Page 228 of 574
SERVICE AIR BAG
This message displays if there is a problem with
the airbag system. Have your dealer/retailer
inspect the system for problems. SeeAirbag
Readiness Light on page 202andAirbag System
on page 69for more information. Press any of
the DIC buttons, or the trip stem, to acknowledge
this message and clear it from the DIC display.
SERVICE BRAKE SYSTEM
This message displays if a problem occurs with
the brake system. If this message appears, stop
as soon as possible and turn off the vehicle.
Restart the vehicle and check for the message
on the DIC display. If the message is still
displayed, or appears again when you begin
driving, the brake system needs service.
See your dealer/retailer.
SERVICE CHARGING SYS (System)
This message displays if there is a problem with the
battery charging system. Under certain conditions,
the charging system light may also turn on in the
instrument panel cluster. SeeCharging System
Light on page 206. The battery will not be charging
at an optimal rate and the vehicle will lose the ability
to enter the fuel economy mode. The vehicle is safe
to drive, however you should have the electrical
system checked by your dealer/retailer. Press any
of the DIC buttons, or the trip stem, to acknowledge
this message and clear it from the DIC display.
SERVICE STABILITRAK
If this message displays, it means there may be
a problem with the StabiliTrak®system. If this
message appears, try to reset the system by
performing the following: stop; turn off the engine;
then start the engine again. If this message still
comes on, it means there is a problem. You should
see your dealer/retailer for service. The vehicle is
safe to drive, however, you do not have the bene�t
of StabiliTrak
®, so reduce your speed and drive
accordingly. Press any of the DIC buttons, or the
trip stem, to acknowledge this message and clear it
from the DIC display.
228