2007 CHEVROLET TRAIL BLAZER wipers
[x] Cancel search: wipersPage 112 of 574
Ignition Positions
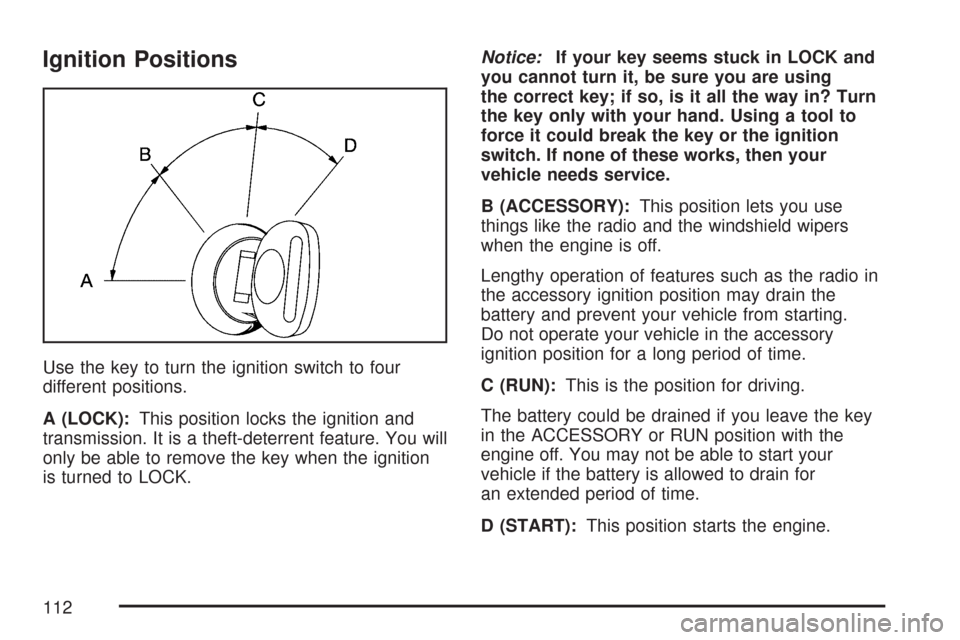
Use the key to turn the ignition switch to four
different positions.
A (LOCK):This position locks the ignition and
transmission. It is a theft-deterrent feature. You will
only be able to remove the key when the ignition
is turned to LOCK.Notice:If your key seems stuck in LOCK and
you cannot turn it, be sure you are using
the correct key; if so, is it all the way in? Turn
the key only with your hand. Using a tool to
force it could break the key or the ignition
switch. If none of these works, then your
vehicle needs service.
B (ACCESSORY):This position lets you use
things like the radio and the windshield wipers
when the engine is off.
Lengthy operation of features such as the radio in
the accessory ignition position may drain the
battery and prevent your vehicle from starting.
Do not operate your vehicle in the accessory
ignition position for a long period of time.
C (RUN):This is the position for driving.
The battery could be drained if you leave the key
in the ACCESSORY or RUN position with the
engine off. You may not be able to start your
vehicle if the battery is allowed to drain for
an extended period of time.
D (START):This position starts the engine.
112
Page 167 of 574
Instrument Panel Overview........................ 170
Hazard Warning Flashers.......................... 172
Other Warning Devices............................. 172
Horn.......................................................... 172
Tilt Wheel.................................................. 173
Turn Signal/Multifunction Lever.................. 173
Turn and Lane-Change Signals................. 174
Headlamp High/Low-Beam Changer.......... 175
Flash-to-Pass............................................ 175
Windshield Wipers..................................... 175
Windshield Washer.................................... 176
Rear Window Wiper/Washer...................... 176
Cruise Control........................................... 177
Headlamps................................................ 180
Headlamps on Reminder........................... 181
Daytime Running Lamps (DRL)................. 181
Automatic Headlamp System..................... 182
Fog Lamps................................................ 183
Instrument Panel Brightness...................... 183
Dome Lamps............................................. 183
Dome Lamp Override................................ 184
Entry Lighting............................................ 184
Exit Lighting.............................................. 184
Reading Lamps......................................... 184Electric Power Management...................... 185
Battery Run-Down Protection..................... 186
Accessory Power Outlet(s)........................ 186
Ashtray(s) and Cigarette Lighter................ 187
Climate Controls......................................... 187
Dual Climate Control System..................... 187
Dual Automatic Climate Control System....... 190
Outlet Adjustment...................................... 195
Rear Climate Control System.................... 196
Warning Lights, Gages, and Indicators..... 198
Instrument Panel Cluster........................... 199
Speedometer and Odometer...................... 200
Trip Odometer........................................... 200
Tachometer............................................... 201
Safety Belt Reminder Light........................ 201
Passenger Safety Belt Reminder Light....... 202
Airbag Readiness Light............................. 202
Passenger Airbag Status Indicator............. 203
Charging System Light.............................. 206
Voltmeter Gage......................................... 207
Brake System Warning Light..................... 208
Anti-Lock Brake System Warning Light...... 209
StabiliTrak
®Service Light........................... 210
Section 3 Instrument Panel
167
Page 173 of 574
Tilt Wheel
The steering wheel should be adjusted before
you drive.
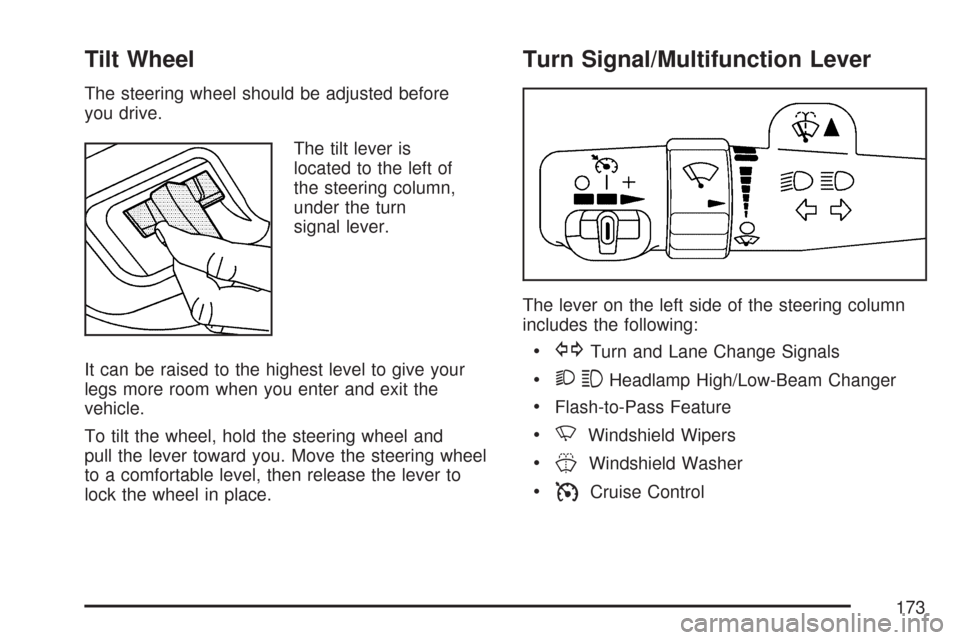
The tilt lever is
located to the left of
the steering column,
under the turn
signal lever.
It can be raised to the highest level to give your
legs more room when you enter and exit the
vehicle.
To tilt the wheel, hold the steering wheel and
pull the lever toward you. Move the steering wheel
to a comfortable level, then release the lever to
lock the wheel in place.
Turn Signal/Multifunction Lever
The lever on the left side of the steering column
includes the following:
GTurn and Lane Change Signals
23Headlamp High/Low-Beam Changer
Flash-to-Pass Feature
NWindshield Wipers
JWindshield Washer
ICruise Control
173
Page 175 of 574
Headlamp High/Low-Beam Changer
To change the headlamps from low to high
beam, push the lever toward the instrument panel.
To return to low-beam headlamps, pull the
multifunction lever toward you. Then release it.
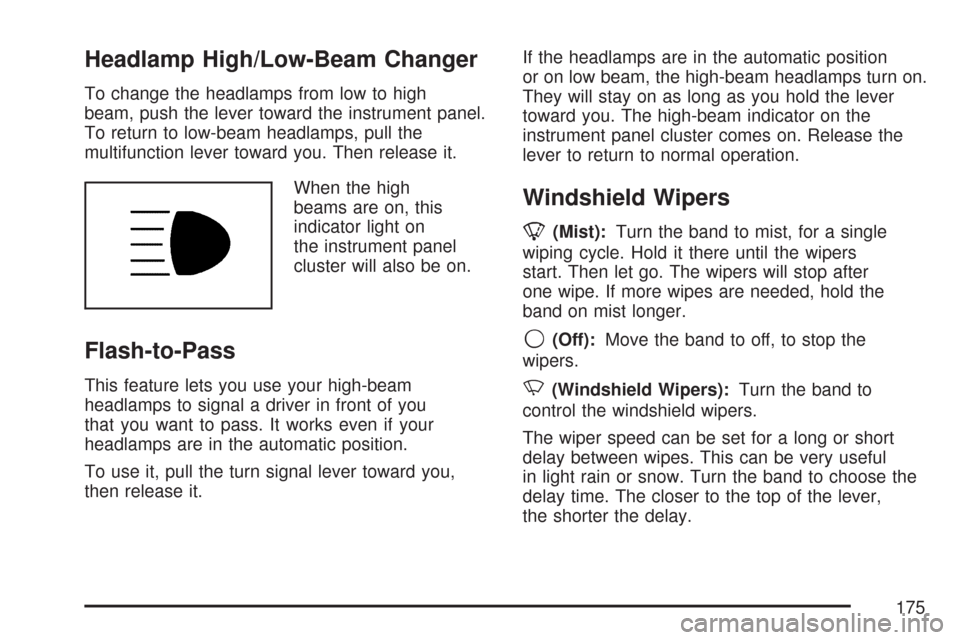
When the high
beams are on, this
indicator light on
the instrument panel
cluster will also be on.
Flash-to-Pass
This feature lets you use your high-beam
headlamps to signal a driver in front of you
that you want to pass. It works even if your
headlamps are in the automatic position.
To use it, pull the turn signal lever toward you,
then release it.If the headlamps are in the automatic position
or on low beam, the high-beam headlamps turn on.
They will stay on as long as you hold the lever
toward you. The high-beam indicator on the
instrument panel cluster comes on. Release the
lever to return to normal operation.
Windshield Wipers
8(Mist):Turn the band to mist, for a single
wiping cycle. Hold it there until the wipers
start. Then let go. The wipers will stop after
one wipe. If more wipes are needed, hold the
band on mist longer.
9(Off):Move the band to off, to stop the
wipers.
N(Windshield Wipers):Turn the band to
control the windshield wipers.
The wiper speed can be set for a long or short
delay between wipes. This can be very useful
in light rain or snow. Turn the band to choose the
delay time. The closer to the top of the lever,
the shorter the delay.
175
Page 176 of 574
For steady wiping at low speed, turn the band
away from you to the �rst solid band past the
delay settings. For high-speed wiping, turn
the band further, to the second solid band past
the delay settings. To stop the wipers, move
the band to off.
Be sure to clear ice and snow from the wiper
blades before using them. If they are frozen to
the windshield, carefully loosen or thaw them.
If the blades do become worn or damaged,
get new blades or blade inserts.
Windshield Washer
L(Windshield Washer):To spray washer �uid
on the windshield, press the windshield washer
paddle. The wipers will clear the window and then
either stop or return to your preset speed.
{CAUTION:
In freezing weather, do not use your
washer until the windshield is warmed.
Otherwise the washer �uid can form ice
on the windshield, blocking your vision.
Rear Window Wiper/Washer
{CAUTION:
In freezing weather, do not use your
washer until the windshield is warmed.
Otherwise the washer �uid can form ice
on the windshield, blocking your vision.
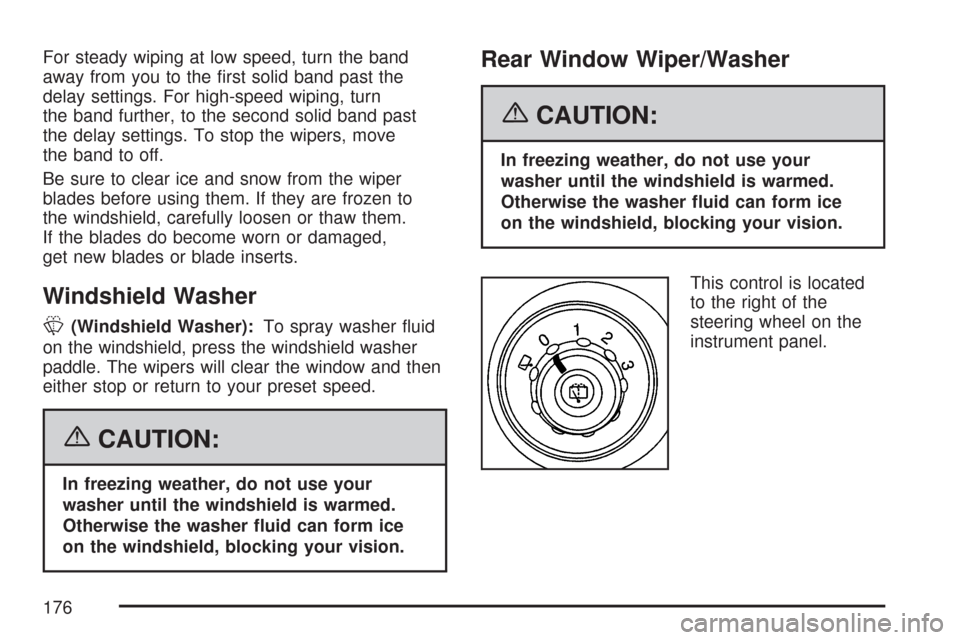
This control is located
to the right of the
steering wheel on the
instrument panel.
176
Page 497 of 574
Protecting Exterior Bright Metal Parts
Bright metal parts should be cleaned regularly to
keep their luster. Washing with water is all
that is usually needed. However, you may use
chrome polish on chrome or stainless steel trim,
if necessary.
Use special care with aluminum trim. To avoid
damaging protective trim, never use auto or
chrome polish, steam or caustic soap to clean
aluminum. A coating of wax, rubbed to high polish,
is recommended for all bright metal parts.
Windshield, Backglass, and
Wiper Blades
Clean the outside of the windshield and backglass
with glass cleaner.
Clean the rubber blades using a lint free cloth or
paper towel soaked with windshield washer �uid or
a mild detergent. Wash the windshield thoroughly
when you clean the blades. Bugs, road grime,
sap and a buildup of vehicle wash/wax treatments
may cause wiper streaking. Replace the wiper
blades if they are worn or damaged.
Wipers can be damaged by:
Extreme dusty conditions
Sand and salt
Heat and sun
Snow and ice, without proper removal
497
Page 511 of 574
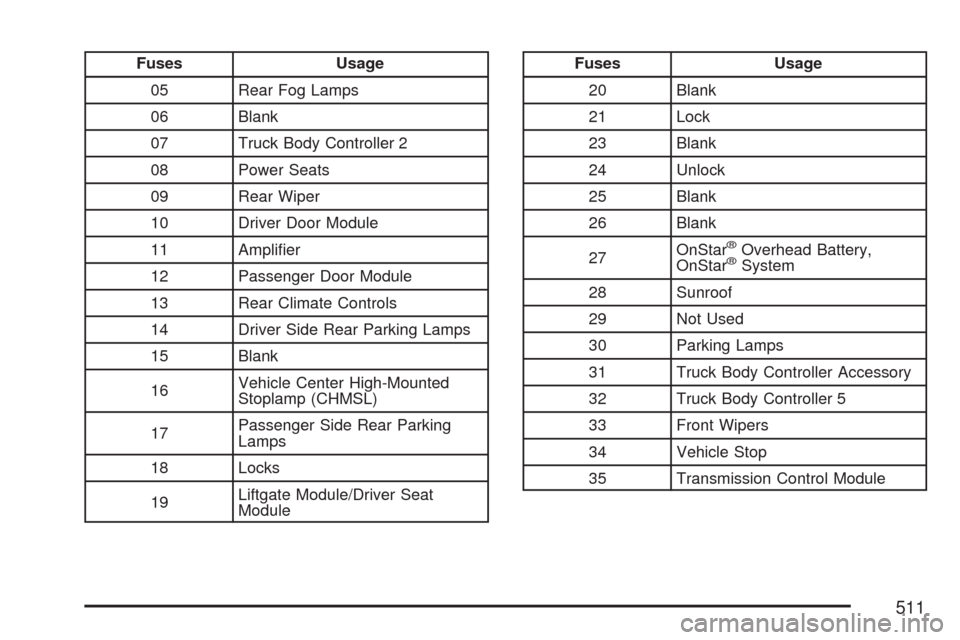
Fuses Usage
05 Rear Fog Lamps
06 Blank
07 Truck Body Controller 2
08 Power Seats
09 Rear Wiper
10 Driver Door Module
11 Ampli�er
12 Passenger Door Module
13 Rear Climate Controls
14 Driver Side Rear Parking Lamps
15 Blank
16Vehicle Center High-Mounted
Stoplamp (CHMSL)
17Passenger Side Rear Parking
Lamps
18 Locks
19Liftgate Module/Driver Seat
ModuleFuses Usage
20 Blank
21 Lock
23 Blank
24 Unlock
25 Blank
26 Blank
27OnStar
®Overhead Battery,
OnStar®System
28 Sunroof
29 Not Used
30 Parking Lamps
31 Truck Body Controller Accessory
32 Truck Body Controller 5
33 Front Wipers
34 Vehicle Stop
35 Transmission Control Module
511
Page 574 of 574
Wheels
Alignment and Tire Balance..................... 470
Different Size........................................... 468
Replacement............................................ 470
Where to Put the Restraint............................ 52
Windows..................................................... 105
Power...................................................... 106
Windshield
Backglass, and Wiper Blades, Cleaning..... 497
Washer.................................................... 176
Washer Fluid........................................... 427
Wiper Blade Replacement........................ 444
Wiper Fuses............................................ 502
Wipers..................................................... 175
Windshield, Rear Washer/Wiper................... 176
Winter Driving............................................. 350
Winter Tires................................................. 449X
XM Radio Messages................................... 280
XM™ Satellite Radio Antenna System......... 303
Y
Your Vehicle and the Environment............... 517
574