2007 CHEVROLET TRAIL BLAZER air suspension
[x] Cancel search: air suspensionPage 305 of 574
Your Driving, the Road, and Your Vehicle. 306
Defensive Driving...................................... 306
Drunken Driving........................................ 307
Control of a Vehicle.................................. 310
Braking...................................................... 310
Anti-Lock Brake System (ABS).................. 311
Braking in Emergencies............................. 313
Locking Rear Axle..................................... 313
StabiliTrak
®System................................... 313
All-Wheel Drive (AWD) System
(TrailBlazer SS)...................................... 318
Steering.................................................... 318
Off-Road Recovery.................................... 320
Passing..................................................... 321
Loss of Control.......................................... 322
Competitive Driving................................... 323
Off-Road Driving (Except SS).................... 323
Driving at Night......................................... 339
Driving in Rain and on Wet Roads............ 340City Driving............................................... 344
Freeway Driving........................................ 345
Before Leaving on a Long Trip.................. 346
Highway Hypnosis..................................... 347
Hill and Mountain Roads........................... 348
Winter Driving........................................... 350
If Your Vehicle is Stuck in Sand,
Mud, Ice, or Snow................................. 354
Rocking Your Vehicle to Get It Out........... 354
Recovery Hooks........................................ 355
Loading Your Vehicle................................ 356
Adding a Snow Plow or Similar
Equipment.............................................. 362
Towing........................................................ 362
Towing Your Vehicle................................. 362
Recreational Vehicle Towing...................... 362
Electronically Controlled Air
Suspension System................................ 367
Towing a Trailer........................................ 368
Section 4 Driving Your Vehicle
305
Page 359 of 574
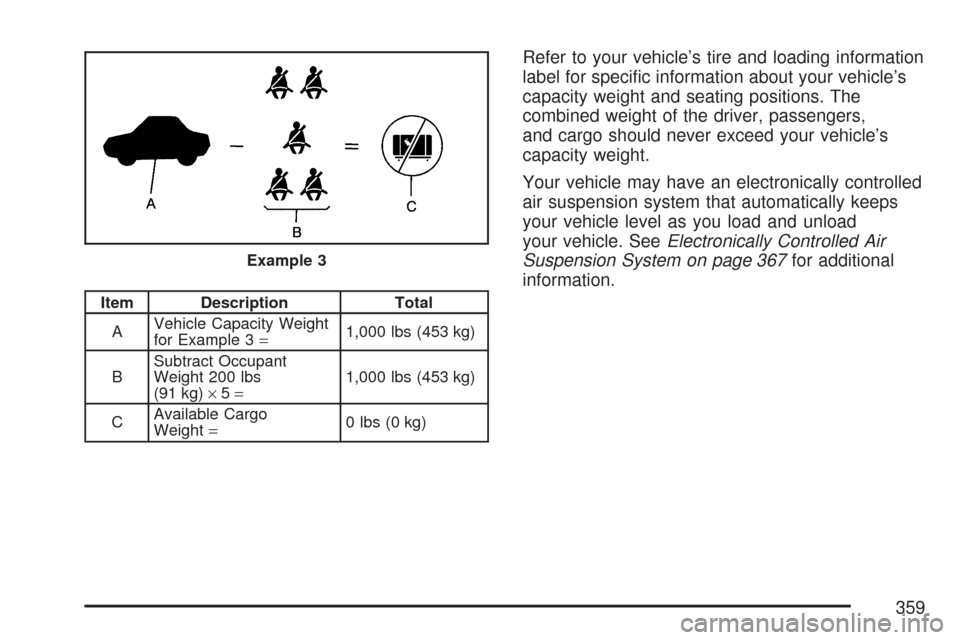
Item Description Total
AVehicle Capacity Weight
for Example 3=1,000 lbs (453 kg)
BSubtract Occupant
Weight 200 lbs
(91 kg)×5=1,000 lbs (453 kg)
CAvailable Cargo
Weight=0 lbs (0 kg)
Refer to your vehicle’s tire and loading information
label for speci�c information about your vehicle’s
capacity weight and seating positions. The
combined weight of the driver, passengers,
and cargo should never exceed your vehicle’s
capacity weight.
Your vehicle may have an electronically controlled
air suspension system that automatically keeps
your vehicle level as you load and unload
your vehicle. SeeElectronically Controlled Air
Suspension System on page 367for additional
information.
Example 3
359
Page 361 of 574
{CAUTION:
Do not load your vehicle any heavier than
the Gross Vehicle Weight Rating (GVWR),
or either the maximum front or rear Gross
Axle Weight Rating (GAWR). If you do,
parts on your vehicle can break, and it
can change the way your vehicle handles.
These could cause you to lose control
and crash. Also, overloading can shorten
the life of your vehicle.
Using heavier suspension components to get
added durability might not change your vehicle’s
weight ratings. Ask your dealer to help you
load your vehicle the right way.
Notice:Overloading your vehicle may cause
damage. Repairs would not be covered by your
warranty. Do not overload your vehicle.
If you put things inside your vehicle — like
suitcases, tools, packages, or anything else — they
will go as fast as the vehicle goes. If you have to
stop or turn quickly, or if there is a crash, they will
keep going.
{CAUTION:
Things you put inside your vehicle can
strike and injure people in a sudden stop
or turn, or in a crash.
Put things in the cargo area of your
vehicle. Try to spread the weight
evenly.
Never stack heavier things, like
suitcases, inside the vehicle so that
some of them are above the tops of
the seats.
Do not leave an unsecured child
restraint in your vehicle.
When you carry something inside the
vehicle, secure it whenever you can.
Do not leave a seat folded down
unless you need to.
There is also important loading information for
off-road driving in this manual. See “Loading Your
Vehicle for Off-Road Driving” underOff-Road
Driving (Except SS) on page 323.
361
Page 367 of 574
Electronically Controlled Air
Suspension System
Your vehicle may be equipped with an
electronically controlled air suspension system that
automatically keeps your vehicle level as you
load and unload. The system includes a
compressor, two height sensors and two air
springs supporting the rear axle.
The system also has an internal clock to prevent
overheating if the in�ator is used for prolonged
periods. If the system overheats, all leveling
function stops until the system cools down. During
this time, the indicator light on the air in�ator
switch will be �ashing.
The ignition has to be on for the system to in�ate,
in order to raise the vehicle to the standard ride
height after loading. The system can lower
the vehicle to the standard ride height after
unloading with the ignition on and also for up to
30 minutes after the ignition has been turned off.You may hear the compressor operating when you
load your vehicle, and periodically as the system
adjusts the vehicle to the standard ride height.
Load leveling will not function normally with
the in�ator hose attached to the in�ator outlet.
Remove the in�ator hose from the outlet during
loading and unloading.
If the vehicle is parked for an extended period of
time, some bleed down of the suspension is
normal. Upon starting the vehicle, proper height
will be achieved.
Overload Protection
The air suspension system is equipped with
overload protection. Overload protection is
designed to protect the air suspension system,
and it is an indicator to the driver that the vehicle
is overloaded. When the overload protection
mode is on, it will not allow damage to the
air compressor. However, do not overload the
vehicle. SeeLoading Your Vehicle on page 356.
367
Page 368 of 574
If the suspension remains at a low height, the rear
axle load has exceeded GAWR (Gross Axle
Weight Rating). When the overload protection
mode is activated, the compressor operates
for about 30 seconds to one minute without raising
the vehicle depending on the amount of overload.
This will continue each time the ignition is
turned on until the rear axle load is reduced
below GAWR.
Indicator Light
The indicator light on the in�ator switch in the rear
passenger compartment also serves as an
indicator for internal system error. If the indicator
light is �ashing without the load leveling function
or the in�ator being active, turn off the ignition. The
next day turn on the ignition and check the
indicator light. The vehicle can be driven with the
light �ashing, but if it is you should have the
vehicle serviced as soon as possible.
Towing a Trailer
{CAUTION:
If you do not use the correct equipment
and drive properly, you can lose control
when you pull a trailer. For example, if the
trailer is too heavy, the brakes may not
work well — or even at all. You and your
passengers could be seriously injured. You
may also damage your vehicle; the
resulting repairs would not be covered by
your warranty. Pull a trailer only if you have
followed all the steps in this section. Ask
your dealer for advice and information
about towing a trailer with your vehicle.
368
Page 472 of 574
Tire Chains
{CAUTION:
Do not use tire chains. There is not
enough clearance. Tire chains used on a
vehicle without the proper amount of
clearance can cause damage to the
brakes, suspension, or other vehicle
parts. The area damaged by the tire
chains could cause you to lose control
of your vehicle and you or others may be
injured in a crash. Use another type of
traction device only if its manufacturer
recommends it for use on your vehicle
and tire size combination and road
conditions. Follow that manufacturer’s
instructions. To help avoid damage to
your vehicle, drive slowly, re-adjust or
remove the device if it is contacting your
vehicle, and do not spin your wheels.
If you do �nd traction devices that will �t,
install them on the rear tires.
Accessory In�ator
Your vehicle may have an accessory in�ator
system. You can in�ate things like basketballs and
bicycle tires. You can also use it to bring your tire
pressure up to the proper pressure. It is not
designed to in�ate large objects which will require
more than �ve minutes to in�ate, such as an air
mattress.
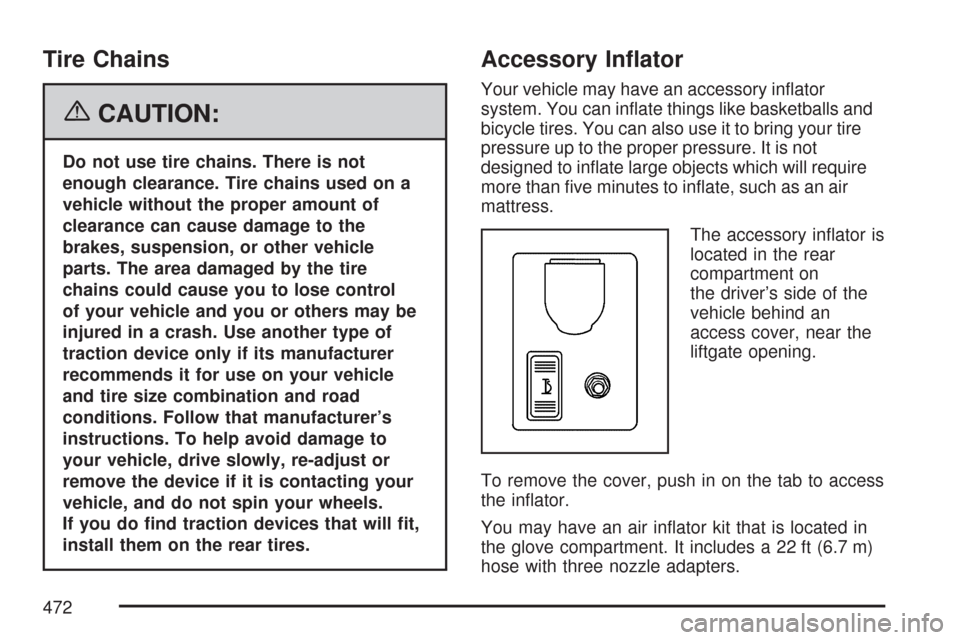
The accessory in�ator is
located in the rear
compartment on
the driver’s side of the
vehicle behind an
access cover, near the
liftgate opening.
To remove the cover, push in on the tab to access
the in�ator.
You may have an air in�ator kit that is located in
the glove compartment. It includes a 22 ft (6.7 m)
hose with three nozzle adapters.
472
Page 473 of 574
To use the accessory in�ator, do the following:
1. Attach the appropriate nozzle adapter
to the end of the hose, if required.
{CAUTION:
In�ating something too much can make it
explode, and you or others could be
injured. Be sure to read the in�ator
instructions, and in�ate any object only to
its recommended pressure.
2. Attach that end of the hose to the object you
wish to in�ate.
3. Attach the other end of the hose to the outlet.
4. Press and release the switch to turn the
air in�ator on. The indicator light will
remain on when the in�ator is running.
The system has an internal clock to
prevent the system from overheating.
The system will allow about �ve minutes of
running time, then the compressor will stop.The indicator light will then begin to �ash.
When the indicator is off, the in�ator can be
started again by pressing the switch. If the
compressor is still hot, it may only run
for a short time before shutting off again.
5. Press and release the switch to turn the
in�ator off.
Place the in�ator kit tools in the pouch and store it
in its proper location. Remove the in�ator hose
from the outlet during loading and unloading.
Load leveling will not function with the in�ator hose
attached to the in�ator outlet. SeeElectronically
Controlled Air Suspension System on page 367
for more information.
To reinstall the cover, line up the tabs at the back
of the cover, put it in place and latch the tabs.
A continuous �ashing indicator light may also
indicate a malfunction in the air suspension
system. SeeElectronically Controlled Air
Suspension System on page 367for more
information.
473
Page 504 of 574
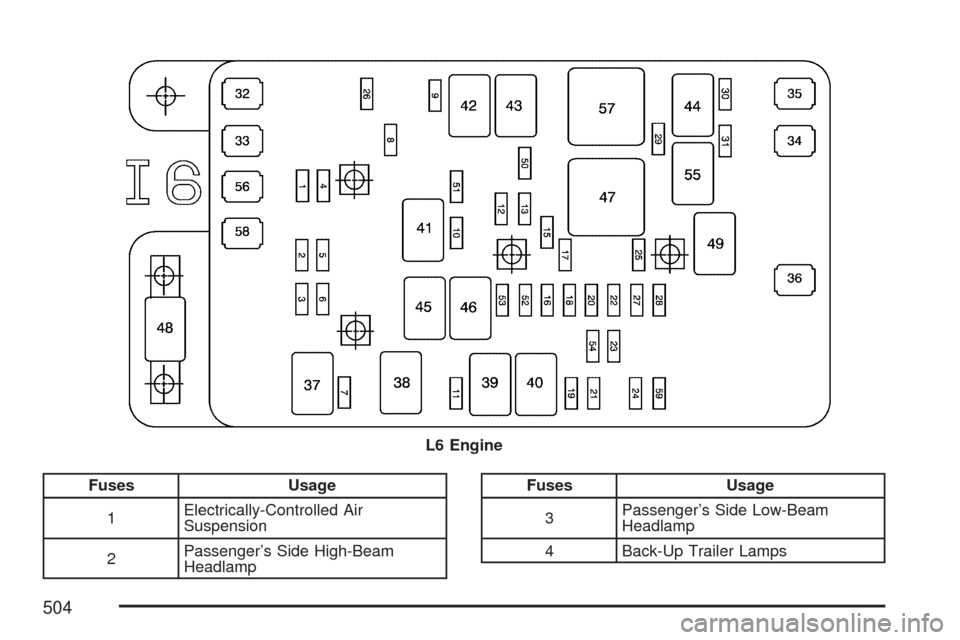
Fuses Usage
1Electrically-Controlled Air
Suspension
2Passenger’s Side High-Beam
HeadlampFuses Usage
3Passenger’s Side Low-Beam
Headlamp
4 Back-Up Trailer Lamps L6 Engine
504