2007 CHEVROLET MALIBU buttons
[x] Cancel search: buttonsPage 10 of 510
Heated Seats
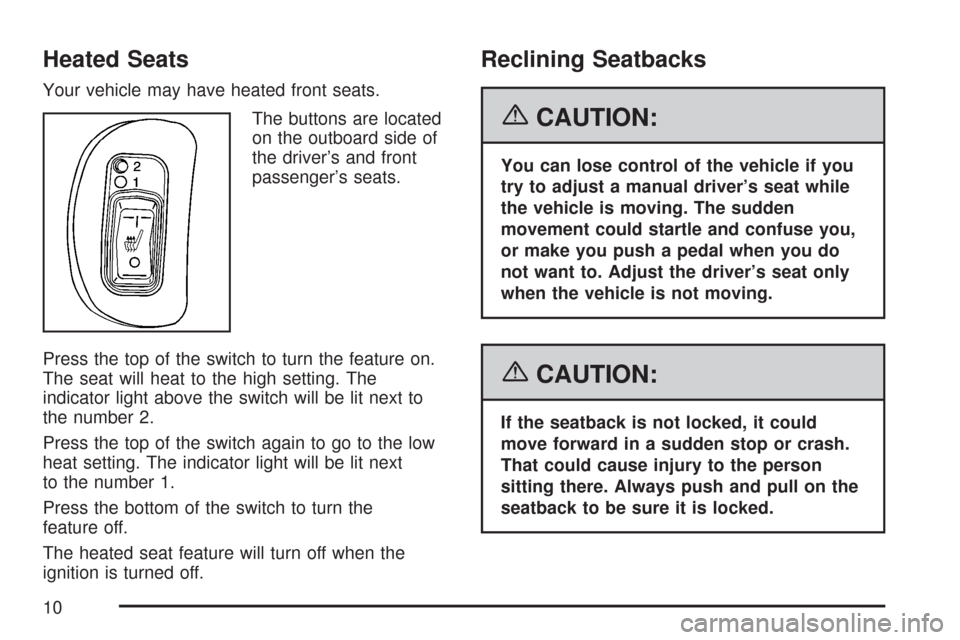
Your vehicle may have heated front seats.
The buttons are located
on the outboard side of
the driver’s and front
passenger’s seats.
Press the top of the switch to turn the feature on.
The seat will heat to the high setting. The
indicator light above the switch will be lit next to
the number 2.
Press the top of the switch again to go to the low
heat setting. The indicator light will be lit next
to the number 1.
Press the bottom of the switch to turn the
feature off.
The heated seat feature will turn off when the
ignition is turned off.
Reclining Seatbacks
{CAUTION:
You can lose control of the vehicle if you
try to adjust a manual driver’s seat while
the vehicle is moving. The sudden
movement could startle and confuse you,
or make you push a pedal when you do
not want to. Adjust the driver’s seat only
when the vehicle is not moving.
{CAUTION:
If the seatback is not locked, it could
move forward in a sudden stop or crash.
That could cause injury to the person
sitting there. Always push and pull on the
seatback to be sure it is locked.
10
Page 114 of 510
Disarming the System
You can disarm the system by doing any one of
the following:
Press the remote keyless entry transmitter
unlock button.
Turn the ignition on.
Turn the driver’s door key lock cylinder
counterclockwise.
Once the system is disarmed, the security light
will stop �ashing.
How the System Alarm is Activated
If the system is armed, it can be activated
by either:
Opening the driver’s door or liftgate
(MAXX model). This will cause a
ten second pre-alarm chirp followed by a
thirty second full alarm of horn and lights.
Opening any other door. This will immediately
cause a full alarm of horn and lights for
thirty seconds.
When an alarm event has �nished, the system
will re-arm itself automatically.
How to Turn Off the System Alarm
To turn off the system alarm, do one of the
following:
Press the lock button on the remote keyless
entry transmitter. The system will then
re-arm itself.
Press the unlock button on the remote keyless
entry transmitter. This will also disarm the
system.
Insert the key in the driver’s door key lock
cylinder and turn it counterclockwise.
This will also disarm the system.
Insert the key in the ignition and turn it on.
This will also disarm the system.
How to Detect a Tamper Condition
If you hear three chirps when you press the
unlock or lock buttons on the remote keyless
entry transmitter, it means that the content theft
security system alarm was triggered previously.
114
Page 138 of 510

Mirrors
Manual Rearview Mirror
This mirror can be adjusted two ways. First, to
adjust the angle of the mirror, move the mirror
to a position that allows you to see out of the
back window. To adjust the height of the mirror,
adjust the support that connects the mirror to
the windshield.
To reduce glare from lights behind you, move
the lever toward you to the night position.
Manual Rearview Mirror with
OnStar
®
If your vehicle has this feature, this mirror has a
knob located at the bottom of the mirror. It is used
to change the mirror from day to night position.
To reduce glare from headlamps behind you while
driving at night, rotate the knob clockwise. For
daytime driving, turn the knob counterclockwise.
There are also three OnStar
®buttons located
at the bottom of the mirror face. See your dealer
for more information on the system and how
to subscribe to OnStar
®. SeeOnStar®System
on page 144for more information about the
services OnStar
®provides.
138
Page 139 of 510

Automatic Dimming Rearview Mirror
with OnStar
®and Compass
Your vehicle may have an automatic dimming
rearview mirror with a compass and OnStar®
controls. For more information about OnStar®,
seeOnStar®System on page 144.
The automatic dimming feature turns on each time
the vehicle is started. To turn automatic dimming
off or on, press the left button below the mirror.
A green indicator light will be on when automatic
dimming is on.
There are also three OnStar
®buttons located at
the bottom of the mirror. See your dealer/retailer
for more information on the system and how
to subscribe to OnStar
®. SeeOnStar®System
on page 144for more information about the
service OnStar
®provides.
Compass Operation
Press the on/off button once to turn the compass
on or off.
When the ignition and the compass feature are
on, the compass will show two character boxes for
a few seconds. After a few seconds, the mirror
will display the current compass direction.
Compass Calibration
If after a few seconds the display does not show
a compass direction, (N for North for example),
there may be a strong magnetic �eld interfering
with the compass. Such interference may be
caused by a magnetic antenna mount, note pad
holder, or similar object. If the letter C appears
in the compass window, the compass may need
to be reset or calibrated.
The mirror can be calibrated by driving the vehicle
in circles at 5 mph (8 km/h) or less until the
display reads a direction.
139
Page 147 of 510

How OnStar®Service Works
In order to provide you with OnStar®services,
your vehicle’s OnStar®system has the capability
of recording and transmitting vehicle information.
This information is automatically sent to an
OnStar
®Call Center at the time of an OnStar®
button press, Emergency button press or if
your airbags or AACN system deploys. The vehicle
information usually includes your GPS location
and, in the event of a crash, additional information
regarding the accident that your vehicle has
been involved in (e.g. the direction from which
your vehicle was hit). When you use the Virtual
Advisor feature of OnStar
®Hands-Free Calling,
your vehicle also sends OnStar®your GPS
location so that we can provide you with
location-based services.
OnStar
®service cannot work unless your vehicle
is in a place where OnStar®has an agreement
with a wireless service provider for service in
that area. OnStar
®service also cannot work unless
you are in a place where the wireless service
provider OnStar
®has hired for that area has
coverage, network capacity and reception when
the service is needed, and technology that iscompatible with the OnStar
®service. Not all
services are available everywhere, particularly
in remote or enclosed areas, or at all times.
OnStar
®service that involves location information
about your vehicle cannot work unless GPS
satellite signals are unobstructed and available in
that place as well.
Your vehicle must have a working electrical
system (including adequate battery power) for the
OnStar
®equipment to operate. There are other
problems OnStar®cannot control that may prevent
OnStar®from providing OnStar®service to you
at any particular time or place. Some examples are
damage to important parts of your vehicle in an
accident, hills, tall buildings, tunnels, weather
or wireless phone network congestion.
Your Responsibility
You may need to increase the volume of your
radio to hear the OnStar®advisor. If the light next
to the OnStar®buttons is red, this means that
your system is not functioning properly and should
be checked by your dealer/retailer. If the light
appears clear (no light is appearing), your OnStar
®
subscription has expired. You can always press
the OnStar®button to con�rm that your OnStar®
equipment is active.
147
Page 148 of 510
Universal Home Remote
System
System Identi�cation
Your vehicle may have a Universal Home
Remote System.
Determine which Universal Home Remote your
vehicle has and then read the pages following for
instructions on programming your speci�c system.
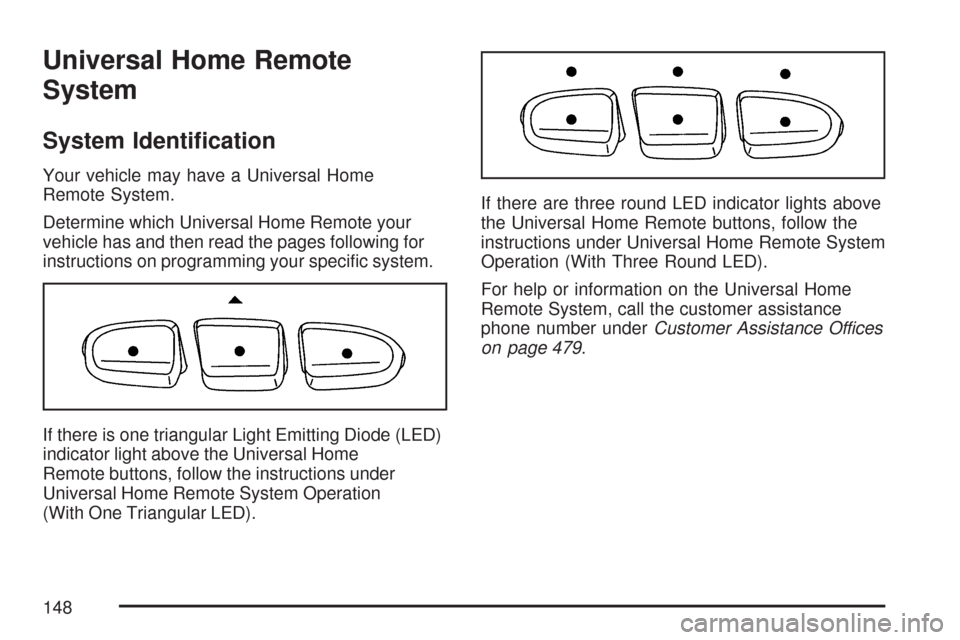
If there is one triangular Light Emitting Diode (LED)
indicator light above the Universal Home
Remote buttons, follow the instructions under
Universal Home Remote System Operation
(With One Triangular LED).If there are three round LED indicator lights above
the Universal Home Remote buttons, follow the
instructions under Universal Home Remote System
Operation (With Three Round LED).
For help or information on the Universal Home
Remote System, call the customer assistance
phone number underCustomer Assistance Offices
on page 479.
148
Page 149 of 510
Universal Home Remote System
The Universal Home Remote System provides
a way to replace up to three hand-held
Radio-Frequency (RF) transmitters used to
activate devices such as garage door openers,
security systems, and home lighting.
This device complies with Part 15 of the
FCC Rules. Operation is subject to the
following two conditions:
1. This device may not cause harmful
interference.
2. This device must accept any interference
received, including interference that may
cause undesired operation.
This device complies with RSS-210 of
Industry Canada. Operation is subject to
the following two conditions:
1. This device may not cause interference.
2. This device must accept any interference
received, including interference that may
cause undesired operation of the device.
Changes or modi�cations to this system by other
than an authorized service facility could void
authorization to use this equipment.
Universal Home Remote System
Operation (With One Triangular LED)
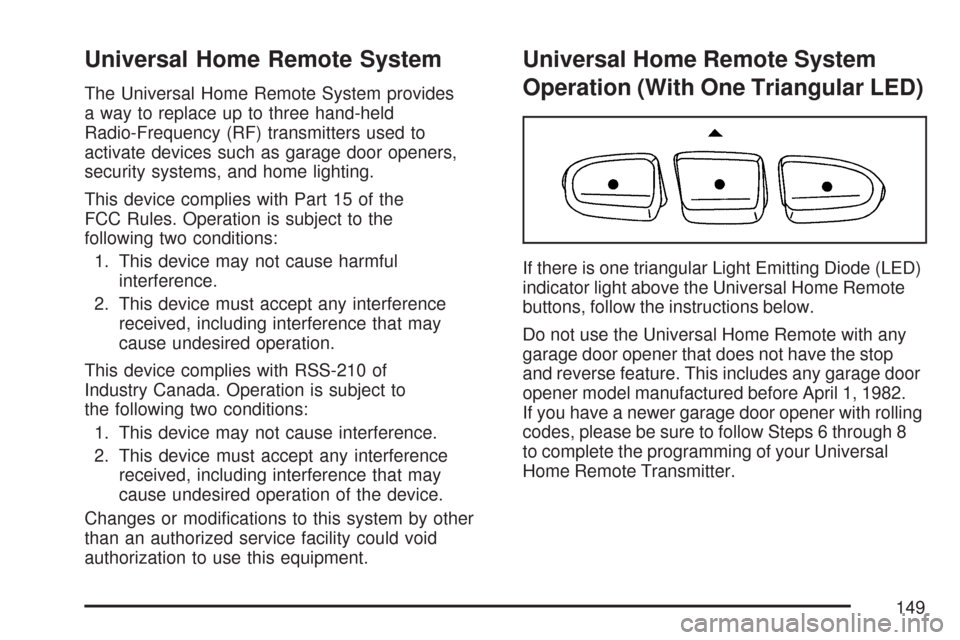
If there is one triangular Light Emitting Diode (LED)
indicator light above the Universal Home Remote
buttons, follow the instructions below.
Do not use the Universal Home Remote with any
garage door opener that does not have the stop
and reverse feature. This includes any garage door
opener model manufactured before April 1, 1982.
If you have a newer garage door opener with rolling
codes, please be sure to follow Steps 6 through 8
to complete the programming of your Universal
Home Remote Transmitter.
149
Page 150 of 510
Read the instructions completely before attempting
to program the Universal Home Remote.
Because of the steps involved, it may be helpful
to have another person available to assist you
in the programming steps.
Keep the original hand-held transmitter for use in
other vehicles as well as for future Universal Home
Remote programming. It is also recommended
that upon the sale of the vehicle, the programmed
Universal Home Remote buttons should be erased
for security purposes. See “Erasing Universal
Home Remote Buttons” later in section.
When programming a garage door, it is advised
to park outside of the garage. Be sure that people
and objects are clear of the garage door or
gate operator you are programming.
It is recommended that a new battery be installed in
your hand-held transmitter for quicker and more
accurate transmission of the radio-frequency signal.Programming the Universal Home
Remote System
Follow these steps to program up to three devices:
1. Press and hold down the two outside
Universal Home Remote buttons, releasing
only when the Universal Home Remote
indicator light begins to �ash, after
20 seconds. Do not hold down the buttons
for longer than 30 seconds and do not
repeat this step to program a second and/or
third hand-held transmitter to the remaining
two Universal Home Remote buttons.
2. Hold the end of your hand-held transmitter
about 1 to 3 inches (3 to 8 cm) away from
the Universal Home Remote buttons
while keeping the indicator light in view.
3. At the same time, press and hold both the
desired Universal Home Remote button and
the hand-held transmitter button. Do not
release the buttons until Step 4 has been
completed.
Some entry gates and garage door openers
may require you to substitute Step 3 with
the procedure noted in “Gate Operator and
Canadian Programming” later in this section.
150