Page 290 of 512
Finding a Station
Press the BAND key to switch between AM, FM1,
FM2, XM1, XM2, or WX, if equipped. Touch
the desired audio source to select it.
Preset Station Menu
Up to 36 stations, 6 AM, 6 FM 1, 6 FM 2, 6 XM 1,
6 XM 2, and 6 WX, if equipped, can be
programmed for home and for away. To store
presets, do the following:
1. Turn the audio system on.
2. Touch AM, FM, XM, or WX, if equipped, to
display the desired source. The preset
station menu will appear.
3. Tune to the desired station by using the
TUNE/SEEK arrows.
4. Touch SOUND to set the bass, mid-range,
treble, and DSP for your preset, if desired.
See “Sound Menu” later in this section
for more information.
5. Touch and hold one of the six numbered
preset buttons for more than two seconds
until you hear a beep.
6. Repeat the steps for each preset and source.
FM1 audio source shown, other sources similar
290
Page 291 of 512

SCAN:To scan stations, touch SCAN. The radio
will go to a station, play for a few seconds,
then go on to the next station. Touch SCAN again
to stop scanning.
To scan preset stations, touch and hold SCAN for
two seconds. It will only scan the audio source
it is in, with the exception of FM 1 and FM 2, which
will both be scanned if in that source. Touch
SCAN again to stop scanning.
RDS (Radio Data System):See “Radio Data
System (RDS)” later in this section for more
information.
MSG (Message):See “Radio Data System
(RDS)” later in this section for more information.
AutoSet:Touch AutoSet to replace currently
stored preset stations with the strongest stations
available in the immediate area. Touch AutoSet
again to return to the original preset stations.
SOUND:See “Sound Menu” following for more
information.
DSP:See “Adjusting the Speakers” later in this
section for more information.Sound Menu
Touch SOUND at the bottom of the main audio
screen, source menu, or DSP menu to change the
tone, DSP, if equipped, fade, and balance for all
sources. The audio system has a separate setting
for these features for each source preset.
However, the audio system keeps one fade and
one balance setting for all audio sources.
291
Page 292 of 512

To adjust sound settings, do the following:
1. Touch the plus (+) or minus (−) signs to adjust
treble, mid-range, and bass.
2. Touch the L for left or R for right to adjust the
balance of the speakers.
3. Touch the F for front or R for rear to adjust
the fade of the speakers.
4. Touch DSP to adjust your DSP, if equipped.
See “Adjusting the Speakers” later in this
section for more information.
After adjustments are made, touch any source
screen button. This will take you back to the preset
station menu. Whenever you touch that screen
button, the previously stored information you have
entered for each preset station will be recalled.To adjust the tone for each preset, do the
following:
1. Press the BAND key.
2. Touch AM, FM1, FM2, XM1, XM2, or WX, if
equipped, to access the desired preset
screen.
3. Touch SOUND.
4. Touch the plus (+) or minus (−) signs to adjust
treble, mid-range, and bass.
5. Touch Return to exit. This will take you to the
preset station menu.
6. Touch and hold one of the six preset screen
buttons for more than two seconds until you
hear a beep.
Whenever you touch that preset for less than
two seconds, the station and previously
stored information you have entered for each
preset station will be recalled.
7. Repeat the steps for additional presets.
292
Page 293 of 512

Adjusting the Speakers
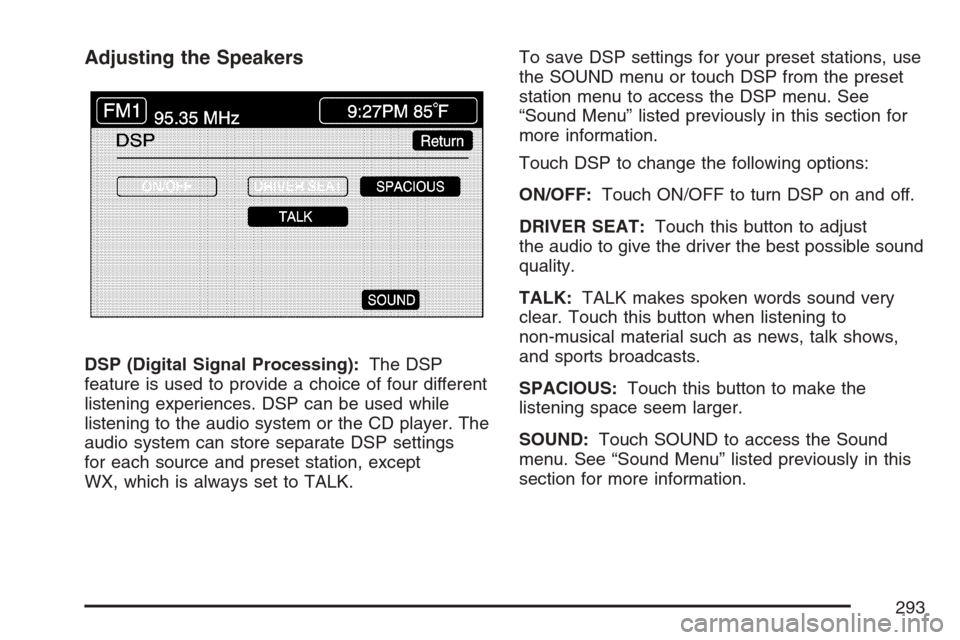
DSP (Digital Signal Processing):The DSP
feature is used to provide a choice of four different
listening experiences. DSP can be used while
listening to the audio system or the CD player. The
audio system can store separate DSP settings
for each source and preset station, except
WX, which is always set to TALK.To save DSP settings for your preset stations, use
the SOUND menu or touch DSP from the preset
station menu to access the DSP menu. See
“Sound Menu” listed previously in this section for
more information.
Touch DSP to change the following options:
ON/OFF:Touch ON/OFF to turn DSP on and off.
DRIVER SEAT:Touch this button to adjust
the audio to give the driver the best possible sound
quality.
TALK:TALK makes spoken words sound very
clear. Touch this button when listening to
non-musical material such as news, talk shows,
and sports broadcasts.
SPACIOUS:Touch this button to make the
listening space seem larger.
SOUND:Touch SOUND to access the Sound
menu. See “Sound Menu” listed previously in this
section for more information.
293
Page 294 of 512
Radio Data Systems (RDS)The audio system has a Radio Data System
(RDS). RDS features are available for use only on
FM stations that broadcast RDS information.
With RDS, the radio can do the following:
Seek to stations broadcasting the selected
type of programming
Receive announcements concerning local and
national emergencies
Display messages from radio stations
Seek to stations with traffic announcements
RDS:Touch RDS to use alternate RDS functions
located in the preset menu. When you touch
RDS, you will only have about �ve seconds to
choose RDS ON/OFF, TA, MSG, PTY, or
SEL PTY. If you do not make a selection, the
system will return to the previous menu.
294
Page 296 of 512

When a traffic announcement comes on the
current radio station or a related network station,
you will hear it even if the volume is muted or
a CD is playing. If the audio system tunes
to a related network station for a traffic
announcement, it will return to the original station
when the announcement is �nished. If the CD
player was being used, the CD will stay in
the player and resume play at the point where it
stopped.
Touch RDS followed by TA again to turn TA off.
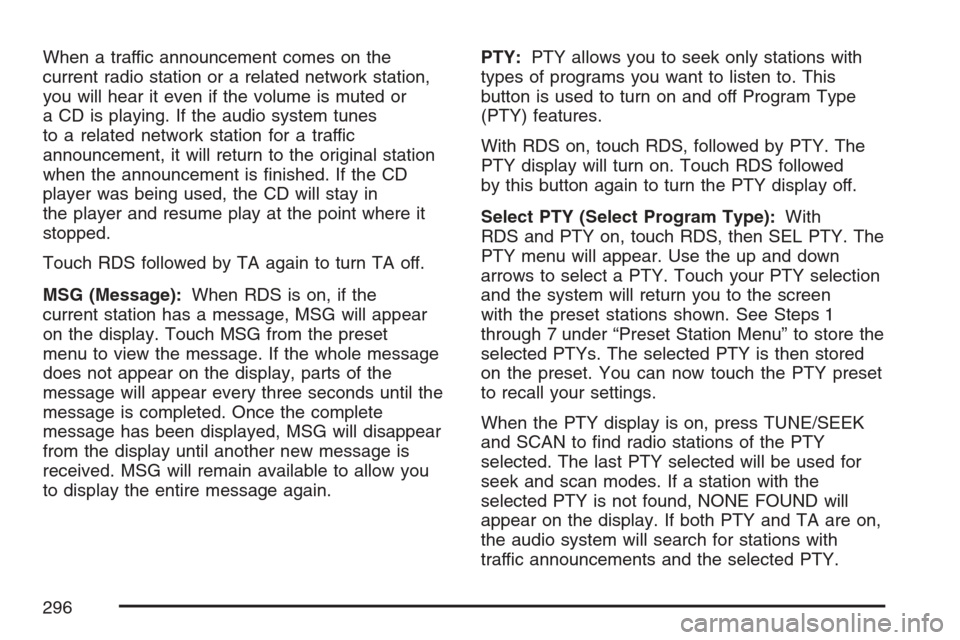
MSG (Message):When RDS is on, if the
current station has a message, MSG will appear
on the display. Touch MSG from the preset
menu to view the message. If the whole message
does not appear on the display, parts of the
message will appear every three seconds until the
message is completed. Once the complete
message has been displayed, MSG will disappear
from the display until another new message is
received. MSG will remain available to allow you
to display the entire message again.PTY:PTY allows you to seek only stations with
types of programs you want to listen to. This
button is used to turn on and off Program Type
(PTY) features.
With RDS on, touch RDS, followed by PTY. The
PTY display will turn on. Touch RDS followed
by this button again to turn the PTY display off.
Select PTY (Select Program Type):With
RDS and PTY on, touch RDS, then SEL PTY. The
PTY menu will appear. Use the up and down
arrows to select a PTY. Touch your PTY selection
and the system will return you to the screen
with the preset stations shown. See Steps 1
through 7 under “Preset Station Menu” to store the
selected PTYs. The selected PTY is then stored
on the preset. You can now touch the PTY preset
to recall your settings.
When the PTY display is on, press TUNE/SEEK
and SCAN to �nd radio stations of the PTY
selected. The last PTY selected will be used for
seek and scan modes. If a station with the
selected PTY is not found, NONE FOUND will
appear on the display. If both PTY and TA are on,
the audio system will search for stations with
traffic announcements and the selected PTY.
296
Page 297 of 512

PTY (Program Type) Presets:The six presets
let you return to your favorite PTYs. These presets
have factory PTY preset stations. See “RDS
Program Type (PTY) Selections” later in
this section. You can set up to 12 PTYs, 6 FM 1
and 6 FM2. To save a PTY preset, do the
following:
1. Touch FM1 or FM2.
2. Touch RDS to enter the RDS menu.
3. Touch RDS ON/OFF to turn RDS on.
4. Touch PTY.
5. Touch SEL PTY and select the desired PTY
from the list.
6. Touch and hold one of the six presets for
more than two seconds until you hear a
beep. Whenever you touch that numbered
preset for less than two seconds, the PTY you
set will return.
7. Repeat the steps for each preset.
Once you have stored a PTY for each of your
preset stations, you can recall a PTY preset
by touching the preset station for less than
two seconds. Then use TUNE/SEEK or SCAN
to locate a station for that PTY selection.ALERT:This type of announcement warns of
national or local emergencies. You will not be able
to turn off alert announcements. Alert
announcements will come on even if RDS mode is
turned off. ALERT appears on the display when
an alert announcement plays. The audio
system uses TA volume during these
announcements. To increase volume, touch the
VOL button on your steering wheel or use the VOL
up and down buttons during the announcement.
See “Voice Guidance Volume Settings” under
Setup Menu on page 243for more information.
When an alert announcement comes on the tuned
radio station or a related network station, you
will hear it even if the volume is muted or a CD is
playing. If the audio system tunes to a related
network station for an alert announcement, it will
return to the original station when the
announcement is �nished. If the CD player is
playing, the player will stop for the announcement
and resume when the announcement is �nished.
297
Page 299 of 512

XL (Explicit Language Channels):XL on the
radio display, after the channel name, indicates
content with explicit language. These channels, or
any others, can be blocked at a customer’s request,
by calling; in the U.S. 1-800-852-XMXM (9696) or in
Canada 1-877-GET-XMSR (438-9677).
Setting Program Type (PTY) Preset
Stations
S
CATT(Category):Press the arrows to select
a category.
Once the desired category is displayed, press
TUNE/SEEK to select the category and take you
to the category’s �rst station. If you want to go
to another station within that category, press
TUNE/SEEK once.
Touch and hold one of the desired P1-P6 presets
to store the selected station as a preset. If
PTY times out and is no longer on the display,
start again.SCAN:Use this button to scan through the
channels within a category or scan through the
preset stations. To scan through the channels in a
category, do the following:
1. Select a category by using the category
arrows.
2. Once the desired category is displayed, touch
SCAN. The radio will begin scanning within
the chosen category.
3. Touch SCAN again to stop scanning.
To scan through your preset stations, touch and
hold SCAN. Touch SCAN again to stop scanning.
299