Page 45 of 166

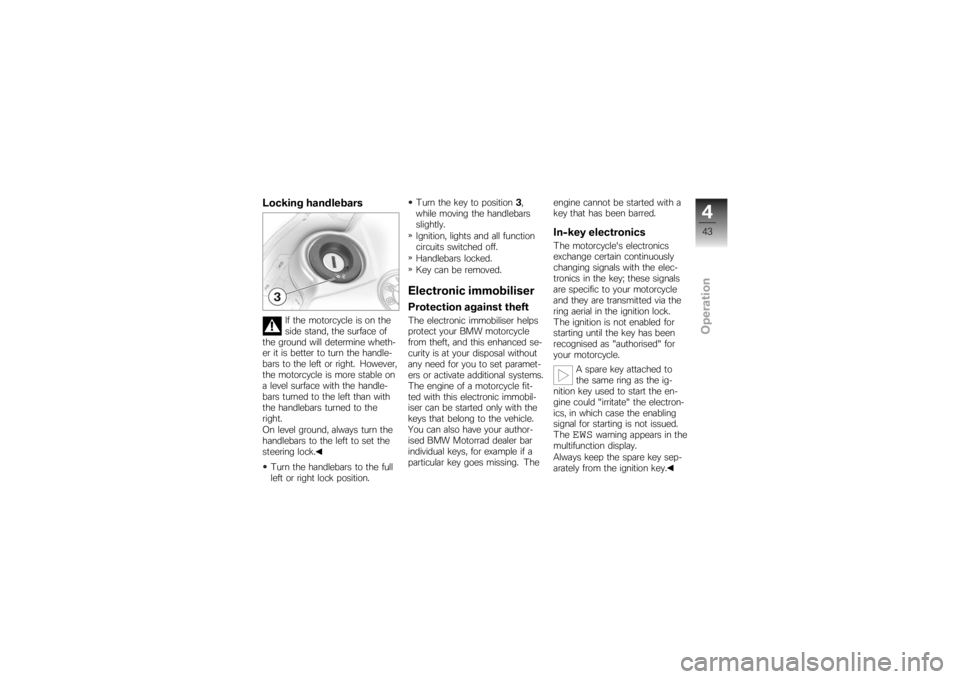
Locking handlebars
If the motorcycle is on the
side stand, the surface of
the ground will determine wheth-
er it is better to turn the handle-
bars to the left or right. However,
the motorcycle is more stable on
a level surface with the handle-
bars turned to the left than with
the handlebars turned to the
right.
On level ground, always turn the
handlebars to the left to set the
steering lock.
Turn the handlebars to the full
left or right lock position. Turn the key to position
3,
while moving the handlebars
slightly.
Ignition, lights and all function
circuits switched off.
Handlebars locked.
Key can be removed.
Electronic immobiliserProtection against theftThe electronic immobiliser helps
protect your BMW motorcycle
from theft, and this enhanced se-
curity is at your disposal without
any need for you to set paramet-
ers or activate additional systems.
The engine of a motorcycle fit-
ted with this electronic immobil-
iser can be started only with the
keys that belong to the vehicle.
You can also have your author-
ised BMW Motorrad dealer bar
individual keys, for example if a
particular key goes missing. The engine cannot be started with a
key that has been barred.
In-key electronicsThe motorcycle's electronics
exchange certain continuously
changing signals with the elec-
tronics in the key; these signals
are specific to your motorcycle
and they are transmitted via the
ring aerial in the ignition lock.
The ignition is not enabled for
starting until the key has been
recognised as "authorised" for
your motorcycle.
A spare key attached to
the same ring as the ig-
nition key used to start the en-
gine could "irritate" the electron-
ics, in which case the enabling
signal for starting is not issued.
The
EWS
warning appears in the
multifunction display.
Always keep the spare key sep-
arately from the ignition key.
443zOperation
Page 46 of 166

Replacement and extra
keysYou can obtain replacement/extra
keys only through an authorised
BMW Motorrad dealer. The keys
are part of an integrated secur-
ity system, so the dealer is un-
der an obligation to check the
legitimacy of all applications for
replacement/extra keys. If you
want to have a lost key barred,
you have to bring with you all
the other keys that belong to
the motorcycle. A key that has
been barred can subsequently be
cleared and reactivated for use.ClockSetting clock
Attempting to set the clock
while riding the motorcycle
can lead to accidents.
Set the clock only when the mo-
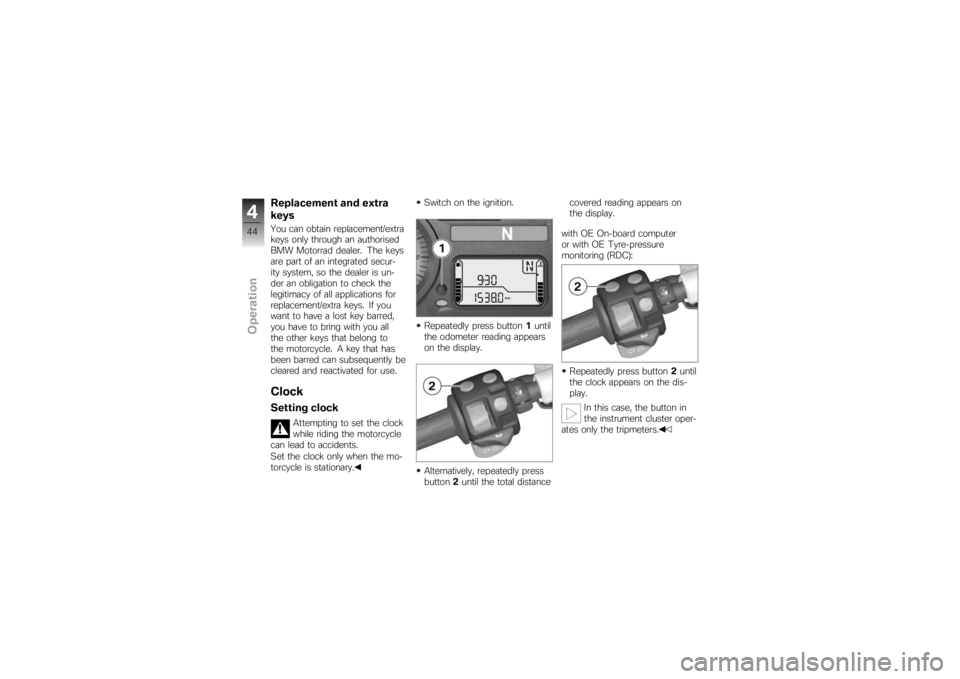
torcycle is stationary. Switch on the ignition.
Repeatedly press button
1until
the odometer reading appears
on the display.
Alternatively, repeatedly press
button 2until the total distance covered reading appears on
the display.
with OE On-board computer
or with OE Tyre-pressure
monitoring (RDC):
Repeatedly press button 2until
the clock appears on the dis-
play.
In this case, the button in
the instrument cluster oper-
ates only the tripmeters.
444zOperation
Page 47 of 166
Hold down the button.
Hours reading3flashes.
Press the button.
The hours reading increments
by one each time you press
the button.
Hold down the button.
Minutes reading 4flashes.
Press the button.
The minutes reading incre-
ments by one each time you
press the button.
Either press and hold down the
button or wait without pressing
a button. The clock is now set and the
time appears on the display.
Odometer and
tripmetersSelecting readingsSwitch on the ignition.
Press button
1. If you prefer, you can use but-
ton
2for this purpose.
The display starts with the cur-
rent value and each time the but-
ton is pressed it moves one step
through the following sequence:
445zOperation
Page 53 of 166

The readings mean:OK
: Oil level is correct.
CHECK
: Check the oil level the
next time you stop for fuel.
---
: Oil level cannot be meas-
ured (conditions as stated above
not satisfied).
If you call up another read-
ing on the on-board com-
puter, this symbol remains visible
until the sensor again registers a
correct oil level.
The most recently measured
level is displayed for 5 seconds
when you next switch on the ig-
nition.
The oil sensor might be
defective if the "Check oil
level" message reappears even
though the oil level shown by the
oil tank's level indicator is correct.
In this case, consult your author-
ised BMW Motorrad dealer.
Tyre pressure
monitoring RDC
OE
Viewing tyre-pressure
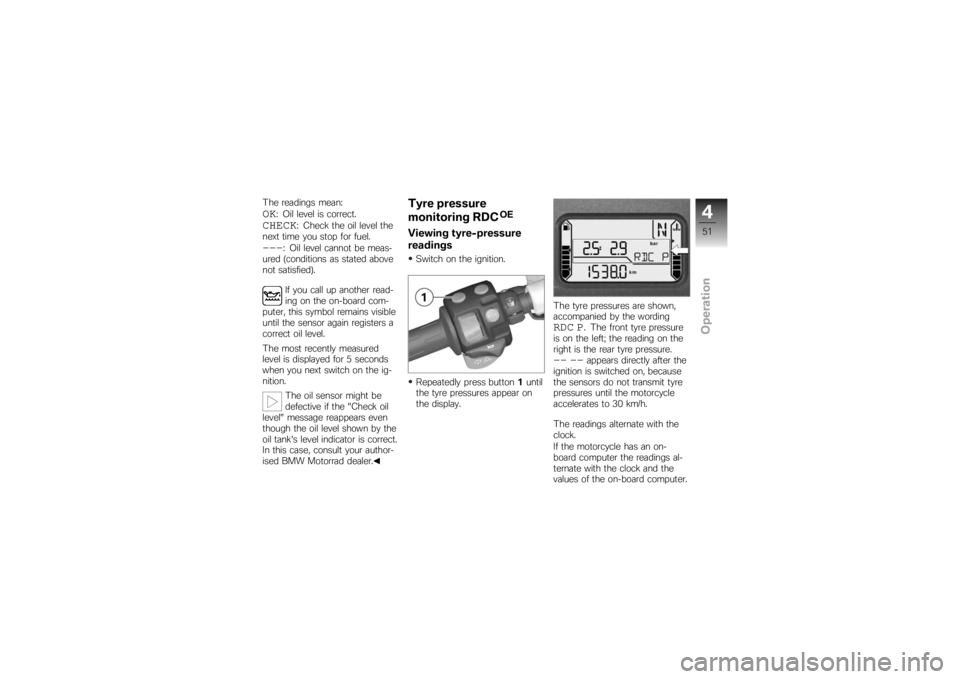
readingsSwitch on the ignition.
Repeatedly press button 1until
the tyre pressures appear on
the display. The tyre pressures are shown,
accompanied by the wording
RDC P
. The front tyre pressure
is on the left; the reading on the
right is the rear tyre pressure.
-- --
appears directly after the
ignition is switched on, because
the sensors do not transmit tyre
pressures until the motorcycle
accelerates to 30 km/h.
The readings alternate with the
clock.
If the motorcycle has an on-
board computer the readings al-
ternate with the clock and the
values of the on-board computer.
451zOperation
Page 56 of 166

warning flashers for longer than
absolutely necessary.If you press a turn-indicat-
or button with the ignition
switched on, the turn-indicator
function is activated instead of
the hazard warning flashers, and
remains active until you release
the button. The hazard warning
flashers recommence flashing as
soon as the button is released.
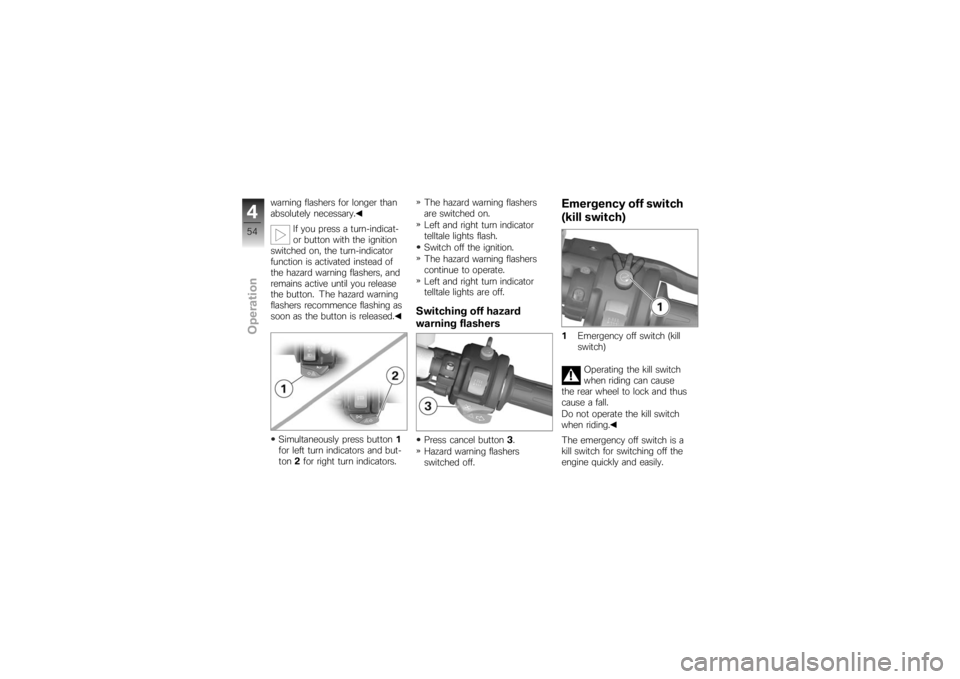
Simultaneously press button 1
for left turn indicators and but-
ton 2for right turn indicators. The hazard warning flashers
are switched on.
Left and right turn indicator
telltale lights flash.
Switch off the ignition.
The hazard warning flashers
continue to operate.
Left and right turn indicator
telltale lights are off.
Switching off hazard
warning flashersPress cancel button
3.
Hazard warning flashers
switched off.
Emergency off switch
(kill switch)1 Emergency off switch (kill
switch)
Operating the kill switch
when riding can cause
the rear wheel to lock and thus
cause a fall.
Do not operate the kill switch
when riding.
The emergency off switch is a
kill switch for switching off the
engine quickly and easily.
454zOperation
Page 59 of 166
Turn adjusting screw1clock-
wise.
The adjusting screw is
indexed and is easier to
turn if you push the clutch lever
forward.
Span between handlebar grip
and clutch lever increases.
Turn adjusting screw 1
counter-clockwise.
Span between handlebar grip
and clutch lever decreases.
BrakesAdjusting handbrake lever
Changing the position of
the brake-fluid reservoir can
allow air to penetrate the brake
system.
Do not twist the handlebar fitting
or the handlebars.
Attempting to adjust the
brake lever while riding the
motorcycle can lead to accidents.
Do not attempt to adjust the
brake lever unless the motorcycle
is at a standstill. Turn adjusting screw
1clock-
wise.
The adjusting screw is in-
dexed and is easier to turn
if you push the handbrake lever
forward.
Span between handlebar grip
and handbrake lever increases.
Turn adjusting screw 1
counter-clockwise.
Span between handlebar grip
and handlebar lever decreases.
457zOperation
Page 66 of 166
Turn the key counter-clockwise
in the seat lock.
Press the seat down at the
same time.Lift the rear of the seat.
The seat can be damaged
at the edges if it is placed
on a rough surface.
Lay the seat upholstered side
down on a smooth, clean sur-
face, such as the fuel tank.
Release the key and pull the
seat back out of its holder.
Installing seat
If too much pressure is ap-
plied in the forward direc-
tion, there is a danger that the
motorcycle will be pushed off its
stand.
Always make sure that the
motorcycle is stable and firmly
supported.
Push the seat forward into
holders 1.
464zOperation
Page 67 of 166
Push down firmly on the seat,
applying pressure to the point
above the latch.
The seat engages with an aud-
ible click.Helmet holderSecuring helmet to
motorcycleRemove the seat ( 63)Use the wire rope available as
an optional accessory to se-
cure the helmet to one of the
helmet holders
1or 2. The helmet catch can
scratch the panelling.
Make sure the lock is out of the
way when you hook the helmet
into position.
Pass the steel cable through
the helmet and push it onto
the helmet holder.
Install the seat ( 64)
465zOperation