Page 54 of 168
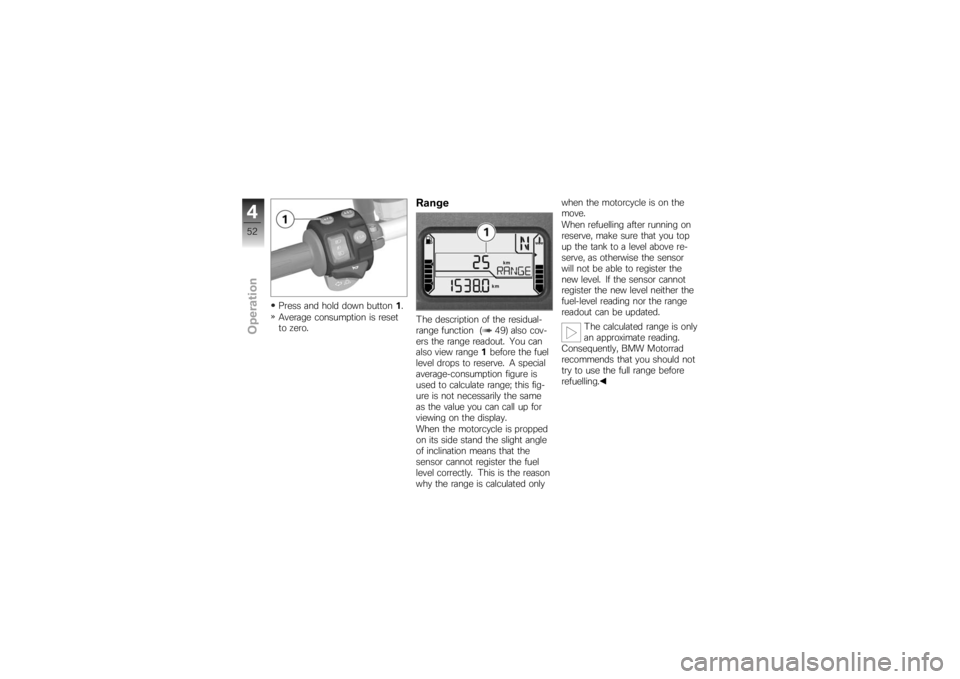
Press and hold down button1.
Average consumption is reset
to zero.
RangeThe description of the residual-
range function ( 49) also cov-
ers the range readout. You can
also view range 1before the fuel
level drops to reserve. A special
average-consumption figure is
used to calculate range; this fig-
ure is not necessarily the same
as the value you can call up for
viewing on the display.
When the motorcycle is propped
on its side stand the slight angle
of inclination means that the
sensor cannot register the fuel
level correctly. This is the reason
why the range is calculated only when the motorcycle is on the
move.
When refuelling after running on
reserve, make sure that you top
up the tank to a level above re-
serve, as otherwise the sensor
will not be able to register the
new level. If the sensor cannot
register the new level neither the
fuel-level reading nor the range
readout can be updated.
The calculated range is only
an approximate reading.
Consequently, BMW Motorrad
recommends that you should not
try to use the full range before
refuelling.
452zOperation
Page 55 of 168
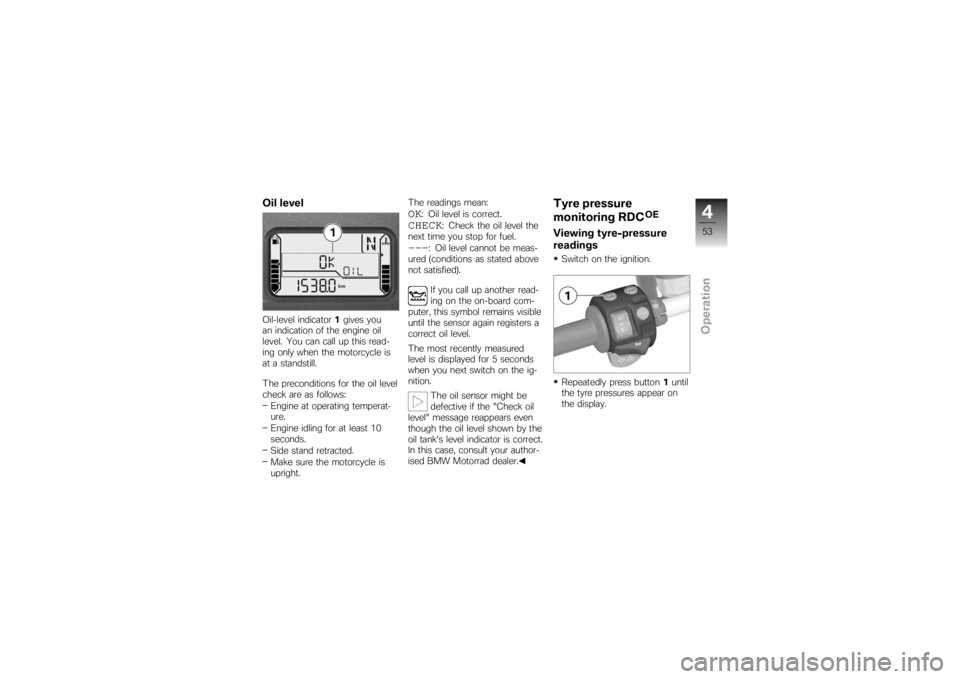
Oil levelOil-level indicator1gives you
an indication of the engine oil
level. You can call up this read-
ing only when the motorcycle is
at a standstill.
The preconditions for the oil level
check are as follows:
Engine at operating temperat-
ure.
Engine idling for at least 10
seconds.
Side stand retracted.
Make sure the motorcycle is
upright. The readings mean:
OK
: Oil level is correct.
CHECK
: Check the oil level the
next time you stop for fuel.
---
: Oil level cannot be meas-
ured (conditions as stated above
not satisfied).
If you call up another read-
ing on the on-board com-
puter, this symbol remains visible
until the sensor again registers a
correct oil level.
The most recently measured
level is displayed for 5 seconds
when you next switch on the ig-
nition.
The oil sensor might be
defective if the "Check oil
level" message reappears even
though the oil level shown by the
oil tank's level indicator is correct.
In this case, consult your author-
ised BMW Motorrad dealer.
Tyre pressure
monitoring RDC
OE
Viewing tyre-pressure
readingsSwitch on the ignition.
Repeatedly press button 1until
the tyre pressures appear on
the display.
453zOperation
Page 56 of 168
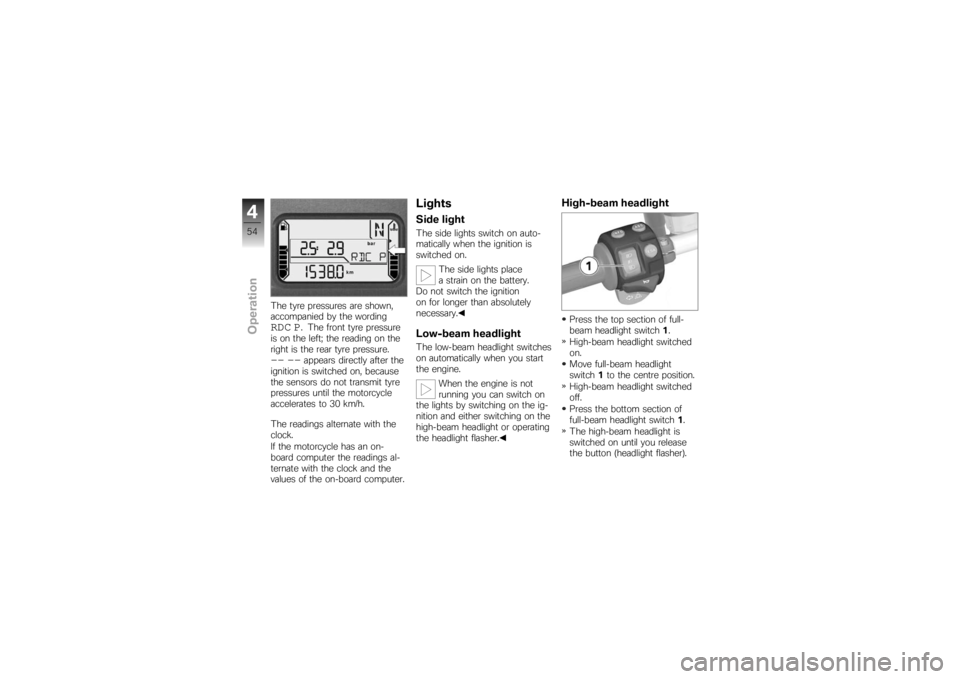
The tyre pressures are shown,
accompanied by the wordingRDC P
. The front tyre pressure
is on the left; the reading on the
right is the rear tyre pressure.
-- --
appears directly after the
ignition is switched on, because
the sensors do not transmit tyre
pressures until the motorcycle
accelerates to 30 km/h.
The readings alternate with the
clock.
If the motorcycle has an on-
board computer the readings al-
ternate with the clock and the
values of the on-board computer.
LightsSide lightThe side lights switch on auto-
matically when the ignition is
switched on.
The side lights place
a strain on the battery.
Do not switch the ignition
on for longer than absolutely
necessary.Low-beam headlightThe low-beam headlight switches
on automatically when you start
the engine.
When the engine is not
running you can switch on
the lights by switching on the ig-
nition and either switching on the
high-beam headlight or operating
the headlight flasher.
High-beam headlightPress the top section of full-
beam headlight switch 1.
High-beam headlight switched
on.
Move full-beam headlight
switch 1to the centre position.
High-beam headlight switched
off.
Press the bottom section of
full-beam headlight switch 1.
The high-beam headlight is
switched on until you release
the button (headlight flasher).
454zOperation
Page 76 of 168
an authorised BMW Motorrad
dealer.ABS self-diagnosis
OE
BMW Motorrad ABS performs
self-diagnosis to ensure its op-
erability. Self-diagnosis is per-
formed automatically when you
switch on the ignition. The mo-
torcycle has to move forward at
a speed above 5 km/h for the
wheel sensors to be tested.
Phase 1Test of the diagnosis-compat-
ible system components with
the motorcycle at a standstill. ABS warning light flashes.
Possible national variant of
the ABS warning light.
Phase 2 Test of the wheel sensors as
the motorcycle pulls away from
rest. ABS warning light flashes.
Possible national variant of
the ABS warning light.
ABS self-diagnosis
completed The ABS warning light goes
out.
If an indicator showing an ABS
fault appears when ABS self-dia-
gnosis completes: You can continue to ride. Bear
in mind that neither the ABS
function nor the integral brak-
ing function is available.
Have the fault rectified as
quickly as possible by a
specialist workshop, preferably
an authorised BMW Motorrad
dealer.
ASC self-diagnosis
OE
BMW Motorrad ASC performs
self-diagnosis to ensure its op- erability. Self-diagnosis is per-
formed automatically when you
switch on the ignition. The en-
gine must be running and the
motorcycle must reach a speed
of at least 5 km/h in order for
ASC self-diagnosis to complete.
Phase 1
Test of the diagnosis-compat-
ible system components with
the motorcycle at a standstill. ASC symbol flashes.
Phase 2 Test of the diagnosis-compat-
ible system components while
the motorcycle is on the move. ASC symbol flashes.
ASC self-diagnosis
completed The ASC warning light goes
out.
574zRiding
Page 88 of 168

If the front wheel lifts clear of the
ground under severe accelera-
tion, the ASC reduces engine
torque until the front wheel re-
gains contact with the ground.
Under these circumstances,
BMW Motorrad recommends
rolling the throttle slightly closed
so as to restore stability with the
least possible delay.
When riding on a slippery sur-
face, never snap the throttle
twistgrip fully closed without
pulling the clutch at the same
time. Engine braking torque can
cause the rear wheel to lock, with
a corresponding loss of stability.
The BWM Motorrad ASC is un-
able to control a situation of this
nature.
Tyre pressure
monitoring RDC
OE
FunctionA sensor integrated into each
tyre measures the air temperat-
ure and the air pressure inside
the tyre and transmits this in-
formation to the control unit.
Each sensor has a centrifugal-
force tripswitch that does not
enable transmission of the meas-
ured values until the motorcycle
has accelerated to about 30 km/
h. The display shows
--
for
each tyre until the tyre-pressure
signal is received for the first
time. The sensors continue to
transmit the measured-value sig-
nals for approximately 15 minutes
after the motorcycle comes to a
stop.
The control unit can adminis-
trate four sensors, so two dif-
ferent sets of wheels with RDC
sensors can be alternated on the motorcycle. An error mes-
sage is issued if wheels without
sensors are fitted to a motorcycle
equipped with an RDC control
unit.
Temperature
compensationThe tyre-pressure readings
shown by the multifunction
display are temperature-
compensated; the reference tyre
temperature for these readings
is always 20 °C. The air lines
available to the public in petrol
stations and motorway service
areas almost invariably show
temperature-dependent tyre
pressures, so in most instances
these gauge readings will not
tally with the readings shown by
the multifunction display.
686zEngineering details
Page 109 of 168
Measure the tyre tread depth
in the main tread grooves with
wear marks.Tyres have wear indicators
integrated into the main
tread grooves. The tyre is worn
out when the tyre tread has worn
down to the level of the marks.
The locations of the marks are
indicated on the edge of the tyre,
e.g. by the letters TI, TWI or by
an arrow.
If the tyre tread is worn to minim-
um:
Replace tyre or tyres, as applic-
able.RimsVisual inspectionMake sure the ground is level
and firm and place the motor-
cycle on its stand.
Visually inspect the rims for
defects. Have damaged rims checked
and, if necessary, replaced by a
specialist workshop, preferably
an authorised BMW Motorrad
dealer.
WheelsRecommended tyresFor each size of tyre BMW Mo-
torrad tests and classifies as
roadworthy certain makes. BMW
Motorrad cannot assess the suit-
ability or provide any guarantee
of road safety for other tyres.
BMW Motorrad recommends
using only tyres tested by BMW
Motorrad.
You can obtain detailed informa-
tion from your authorised BMW
Motorrad dealer or on the Inter-
net at www.bmw-motorrad.com.
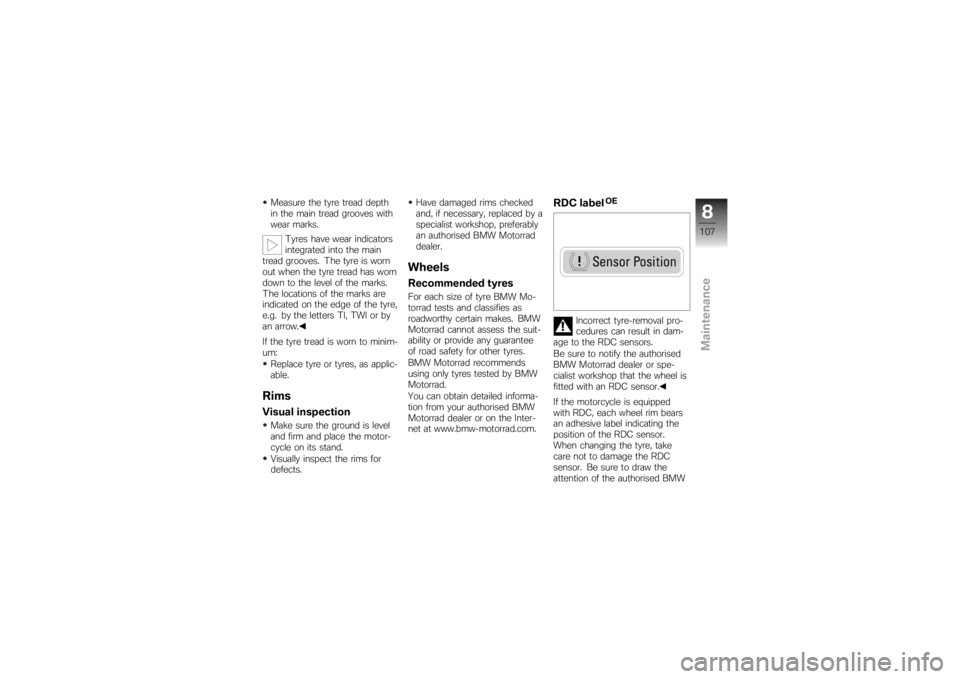
RDC label
OE
Incorrect tyre-removal pro-
cedures can result in dam-
age to the RDC sensors.
Be sure to notify the authorised
BMW Motorrad dealer or spe-
cialist workshop that the wheel is
fitted with an RDC sensor.
If the motorcycle is equipped
with RDC, each wheel rim bears
an adhesive label indicating the
position of the RDC sensor.
When changing the tyre, take
care not to damage the RDC
sensor. Be sure to draw the
attention of the authorised BMW
8107zMaintenance
Page 110 of 168
Motorrad dealer or specialist
workshop to the fact that the
wheel is fitted with an RDC
sensor.Remove the front wheelPlace the motorcycle on an
auxiliary stand; BMW Motorrad
recommends the BMW Motor-
rad rear-wheel stand.
Install the rear-wheel stand
( 117)
with OA Centre stand:
Make sure the ground is level
and firm and place the motor-
cycle on its centre stand. Remove screws
1on left and
right.
Remove covers 2on left and
right. Once the calipers have
been removed, there is
a risk of the brake pads being
pressed together to the extent
that they cannot be slipped back
over the brake disc on reas-
sembly.
Do not operate the handbrake
lever when the brake calipers
have been removed.
Remove securing screws 3of
the brake calipers on left and
right.
8108zMaintenance
Page 111 of 168
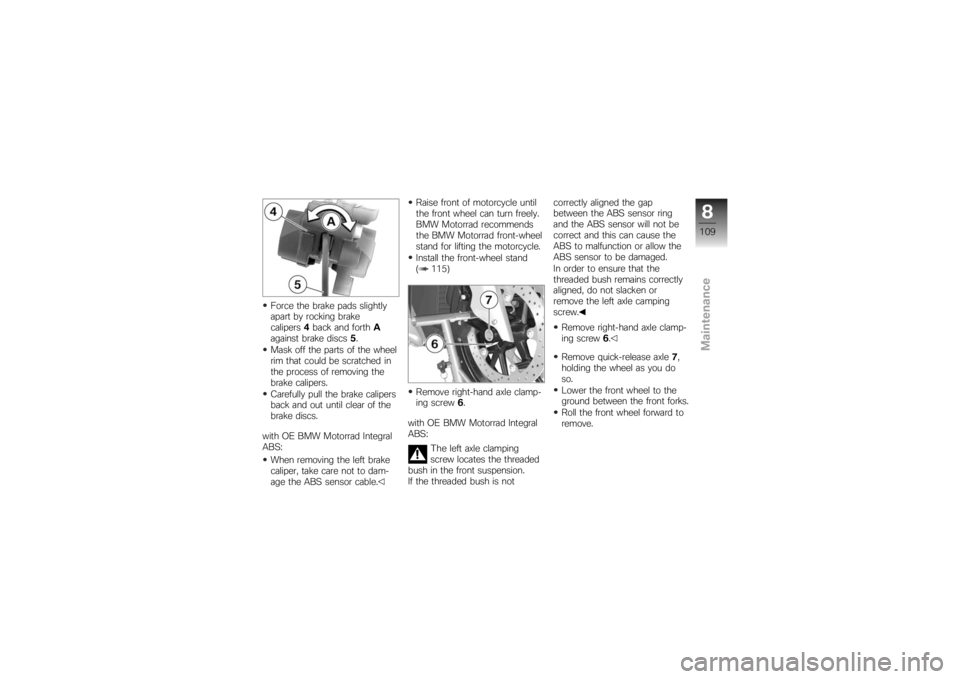
Force the brake pads slightly
apart by rocking brake
calipers4back and forth A
against brake discs 5.
Mask off the parts of the wheel
rim that could be scratched in
the process of removing the
brake calipers.
Carefully pull the brake calipers
back and out until clear of the
brake discs.
with OE BMW Motorrad Integral
ABS: When removing the left brake
caliper, take care not to dam-
age the ABS sensor cable. Raise front of motorcycle until
the front wheel can turn freely.
BMW Motorrad recommends
the BMW Motorrad front-wheel
stand for lifting the motorcycle.
Install the front-wheel stand
( 115)
Remove right-hand axle clamp-
ing screw
6.
with OE BMW Motorrad Integral
ABS: The left axle clamping
screw locates the threaded
bush in the front suspension.
If the threaded bush is not correctly aligned the gap
between the ABS sensor ring
and the ABS sensor will not be
correct and this can cause the
ABS to malfunction or allow the
ABS sensor to be damaged.
In order to ensure that the
threaded bush remains correctly
aligned, do not slacken or
remove the left axle camping
screw.
Remove right-hand axle clamp-
ing screw 6.
Remove quick-release axle 7,
holding the wheel as you do
so.
Lower the front wheel to the
ground between the front forks.
Roll the front wheel forward to
remove.
8109zMaintenance