Page 79 of 168

Oil or grease on brakes
Oil and grease on the brake
discs and pads considerably
diminish braking efficiency.
Especially after repair and main-
tenance work, make sure that the
brake discs and brake pads are
free of oil and grease.
Dirt or mud on brakes
When riding on loose sur-
faces or muddy roads, the
brakes may fail to take effect
immediately because of dirt or
moisture on the discs or brake
pads.
Apply the brakes in good time
until the brakes have been
cleaned.
Parking your
motorcyclePlacing motorcycle on
side stand
If the ground is soft or un-
even, there is no guaran-
tee that the motorcycle will rest
firmly on the stand.
Always check that the ground
under the stand is level and
firm.
Switch off the engine.
Pull the handbrake lever.
Hold the motorcycle upright
and balanced.
Use your left foot to extend the
side stand fully. The side stand is designed
to support only the weight
of the motorcycle.
Do not lean or sit on the
motorcycle with the side stand
extended. Slowly lean the motorcycle to
the side until its weight is taken
by the stand and dismount to
the left.
If the motorcycle is on the
side stand, the surface of
the ground will determine wheth-
er it is better to turn the handle-
bars to the left or right. However,
the motorcycle is more stable on
a level surface with the handle-
bars turned to the left than with
the handlebars turned to the
right.
On level ground, always turn the
handlebars to the left to set the
steering lock.
Turn the handlebars to full left
or right lock.
Check that the motorcycle is
standing firmly. On a gradient, the motor-
cycle should always face
uphill; select 1st gear.
Lock the steering lock.
577zRiding
Page 80 of 168

Removing motorcycle
from side standUnlock the steering lock.
From the left, grip the handle-
bars with both hands.
Pull the handbrake lever.
Swing your right leg over the
seat and lift the motorcycle to
the upright position.
Hold the motorcycle upright
and balanced.An extended side stand can
catch on the ground when
the motorcycle is moving and
lead to a fall.
Retract the side stand before
moving the motorcycle.
Sit on the motorcycle and use
your left foot to retract the side
stand.
Placing motorcycle on
centre stand
OA
If the ground is soft or un-
even, there is no guaran-
tee that the motorcycle will rest
firmly on the stand.
Always check that the ground
under the stand is level and
firm.
Switch off the engine.
Dismount and keep your left
hand on the left handlebar grip.
With your right hand, grip the
rear grab handle or the rear
frame.
Place your right foot on the pin
of the centre stand, and press
the stand down until its curved
feet touch the ground.
Place your full body weight on
the centre stand and at the
same time pull the motorcycle
to the rear. Excessive movements
could cause the centre
stand to retract, and the
motorcycle would topple in
consequence.
Do not lean or sit on the mo-
torcycle with the centre stand
extended.
Check that the motorcycle is
standing firmly.
Lock the steering lock.
Removing motorcycle
from centre stand
OA
Unlock the steering lock.
Place your left hand on the left
handlebar grip.
With your right hand, grip the
rear grab handle or the rear
frame.
Push the motorcycle forward
off the centre stand.
Check that the centre stand
has fully retracted.
578zRiding
Page 101 of 168

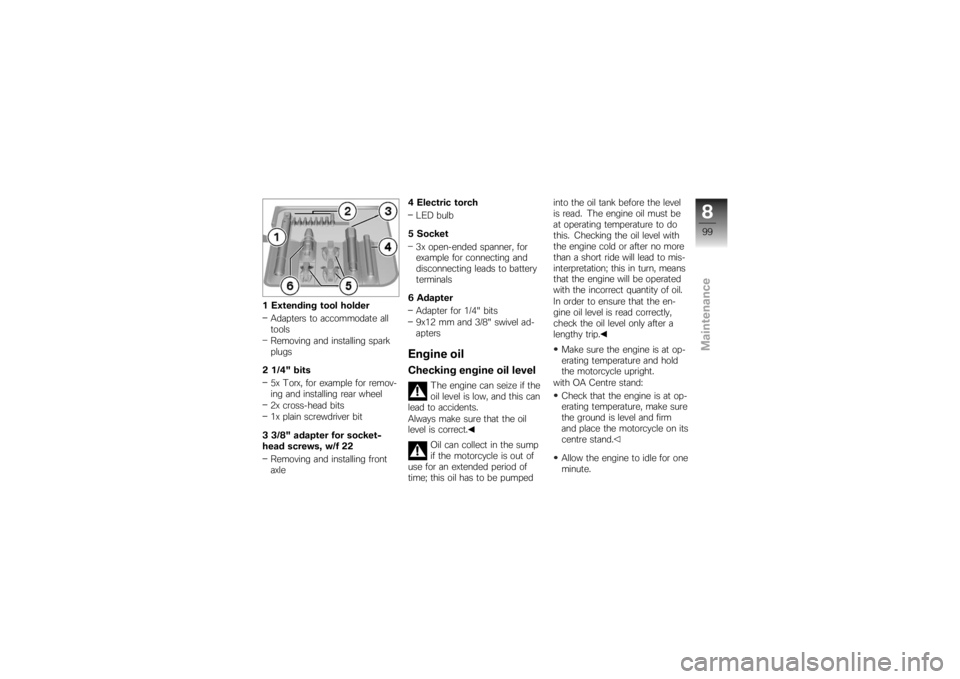
1 Extending tool holderAdapters to accommodate all
tools
Removing and installing spark
plugs
2 1/4" bits 5x Torx, for example for remov-
ing and installing rear wheel
2x cross-head bits
1x plain screwdriver bit
3 3/8" adapter for socket-
head screws, w/f 22 Removing and installing front
axle 4 Electric torch
LED bulb
5 Socket 3x open-ended spanner, for
example for connecting and
disconnecting leads to battery
terminals
6 Adapter Adapter for 1/4" bits
9x12 mm and 3/8" swivel ad-
apters
Engine oilChecking engine oil level
The engine can seize if the
oil level is low, and this can
lead to accidents.
Always make sure that the oil
level is correct.
Oil can collect in the sump
if the motorcycle is out of
use for an extended period of
time; this oil has to be pumped into the oil tank before the level
is read. The engine oil must be
at operating temperature to do
this. Checking the oil level with
the engine cold or after no more
than a short ride will lead to mis-
interpretation; this in turn, means
that the engine will be operated
with the incorrect quantity of oil.
In order to ensure that the en-
gine oil level is read correctly,
check the oil level only after a
lengthy trip.
Make sure the engine is at op-
erating temperature and hold
the motorcycle upright.
with OA Centre stand:
Check that the engine is at op-
erating temperature, make sure
the ground is level and firm
and place the motorcycle on its
centre stand.
Allow the engine to idle for one
minute.
899zMaintenance
Page 102 of 168
Switch off the ignition.
Check the oil level in oil-level
indicator1. Engine oil, specified level
Between MIN and MAX
marks
If the oil level is below the MIN
mark: Top up the engine oil ( 100)
If the oil level is above the MAX
mark: Drain the engine oil ( 101)
Topping up engine oilRemove the seat ( 66) Damage to the engine
can result if it is operated
without enough oil, but the same
also applies if the oil level is too
high.
Always make sure that the oil
level is correct.
Wipe the area around the filler
neck clean.
Remove cap of oil filler neck 1
by turning it counter-clockwise.
Top up the engine oil to the
specified level.
Check the engine oil level
( 99)
8100zMaintenance
Page 103 of 168

Install cap of oil filler neck1
and turn it clockwise to close.
Install the seat ( 67)Draining engine oilRemove the seat ( 66)
Damage to the engine
can result if it is operated
without enough oil, but the same
also applies if the oil level is too
high.
Always make sure that the oil
level is correct.
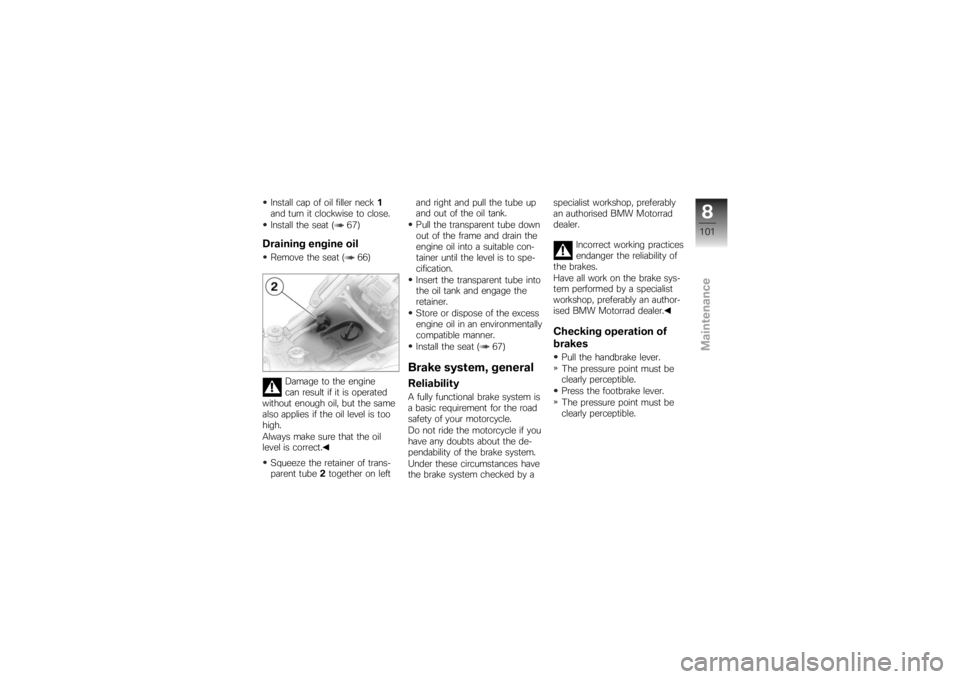
Squeeze the retainer of trans-
parent tube 2together on left and right and pull the tube up
and out of the oil tank.
Pull the transparent tube down
out of the frame and drain the
engine oil into a suitable con-
tainer until the level is to spe-
cification.
Insert the transparent tube into
the oil tank and engage the
retainer.
Store or dispose of the excess
engine oil in an environmentally
compatible manner.
Install the seat ( 67)
Brake system, generalReliabilityA fully functional brake system is
a basic requirement for the road
safety of your motorcycle.
Do not ride the motorcycle if you
have any doubts about the de-
pendability of the brake system.
Under these circumstances have
the brake system checked by a specialist workshop, preferably
an authorised BMW Motorrad
dealer.
Incorrect working practices
endanger the reliability of
the brakes.
Have all work on the brake sys-
tem performed by a specialist
workshop, preferably an author-
ised BMW Motorrad dealer.
Checking operation of
brakesPull the handbrake lever.
The pressure point must be
clearly perceptible.
Press the footbrake lever.
The pressure point must be
clearly perceptible.
8101zMaintenance
Page 164 of 168

D
DampingAdjusting, 11, 61
E
Electrics Technical data, 146
Emergency off switch (kill switch), 17, 57
Engine Technical data, 139
Warning for engine
electronics, 26
Engine oil Checking level, 13, 99
Draining, 101
Topping up, 15, 100
Warning for engine oil level, 31
Warning for engine oil
pressure, 27
Equipment, 7
ESA, 16, 62
EWS, 45 Warning, 26 F
Frame
Technical data, 147
Front-wheel stand, 115
Fuel Quantity reading, 22
Refuelling, 13, 79
Technical data, 140
Warning for fuel down to
reserve, 26
Fuses, 146
G
Gear indicator, 22
Grip heating, 17, 57
H
Handlebar fittings General view, left side, 16
General view, right side, 17
Hazard warning flashers, 16, 17 Switching off, 56
Switching on, 56 Headlight
Adjustment for driving on left/
driving on right, 65
Beam throw, 66
High-beam headlight, 19
Low-beam headlight, 19
Side light, 19
Helmet holder, 15, 67
High-beam headlight, 16
Horn, 16
I
Ignition Switching off, 44
Switching on, 44
Immobiliser, 45 Warning, 26
Instrument cluster Overview, 18
Sensor for instrument-cluster
lighting, 18
J
Jump starting, 125
12162zIndex
Page 166 of 168

Spring preloadAdjusting, 11, 61
Starter, 17
Steering lock Locking, 45
T
Technical data Battery, 146
Brakes, 143
Bulbs, 147
Clutch, 141
Electrics, 146
Engine, 139
Frame, 147
Fuel, 140
Rear-wheel drive, 142
Running gear, 142
Spark plugs, 146
Standards, 7
Transmission, 141
Wheels and tyres, 143
Telltale lights, 18 Toolkit, 15
Service kit, 98
Standard kit, 98
Torques, 137
Transmission For starting, 72
Technical data, 141
Troubleshooting chart, 136
Turn indicators Left, 16, 55
Right, 17, 55
Switching off, 17, 56
Tyre pressure monitoring RDC Label on wheel rim, 107
Operation, 53
Status indicators, 53
Warning, 35
Tyres Checking inflation pressure, 65
Measuring tread depth, 106
Recommended tyres, 107
Running in, 75
Technical data, 143 V
Vehicle identification number, 13
W
Warning lights, 18
Warnings
Mode of presentation, 24
Warnings, overview, 25, 30, 32, 34, 37, 41
Wheels Installing front wheel, 110
Installing rear wheel, 113
Remove the front wheel, 108
Removing rear wheel, 111
Technical data, 143
12164zIndex