2006 VOLKSWAGEN GOLF PLUS buttons
[x] Cancel search: buttonsPage 10 of 541
Instrument cluster:
- Instr
uments .................................. o o o............ 16
- Disp lay ............................ o o 16
-Warning and in dicator lig hts ............... ..... o o o ... 13
Lever for windshi eld wip er and washer ........ o o
-Imermittent o pe rat ion for windshi eld wip ers .
-wiping" 1x
- W
indshield
- Rear window wip er
- Aut om ati c wipe/wash rea r
-Lever with buttons for the Volkswagen Information
Ignit ion lock or starter butto n (Keyless Ent ry .............
..... ........................................................ .......
Lever for adjustable s teering wheel ........................... o o
Horn (o nl y work s w hen the ign ition is sw itched o n)
Driver front airbag ............................... ........... o o o
o o
Pa ssenger compartment 8 9
172
179
56
Page 17 of 541
this section informa tion on the lowing:
Instrument overview ...............•.........
Displays
Compass .................................. .
Service reminder displ
ay
More information:
Warn ing and indi cator page 13
in the ins trument
16
17
19
Display of th e se lec ted gea rs (a utoma tic trans
m iss ion) p age 179
reminder Bookle t Wnrbooklet.
Driver di strn ction con en usc nccidcnts and seriou s personal injury.
Never usc the buttons in the in strument clus te r driving .
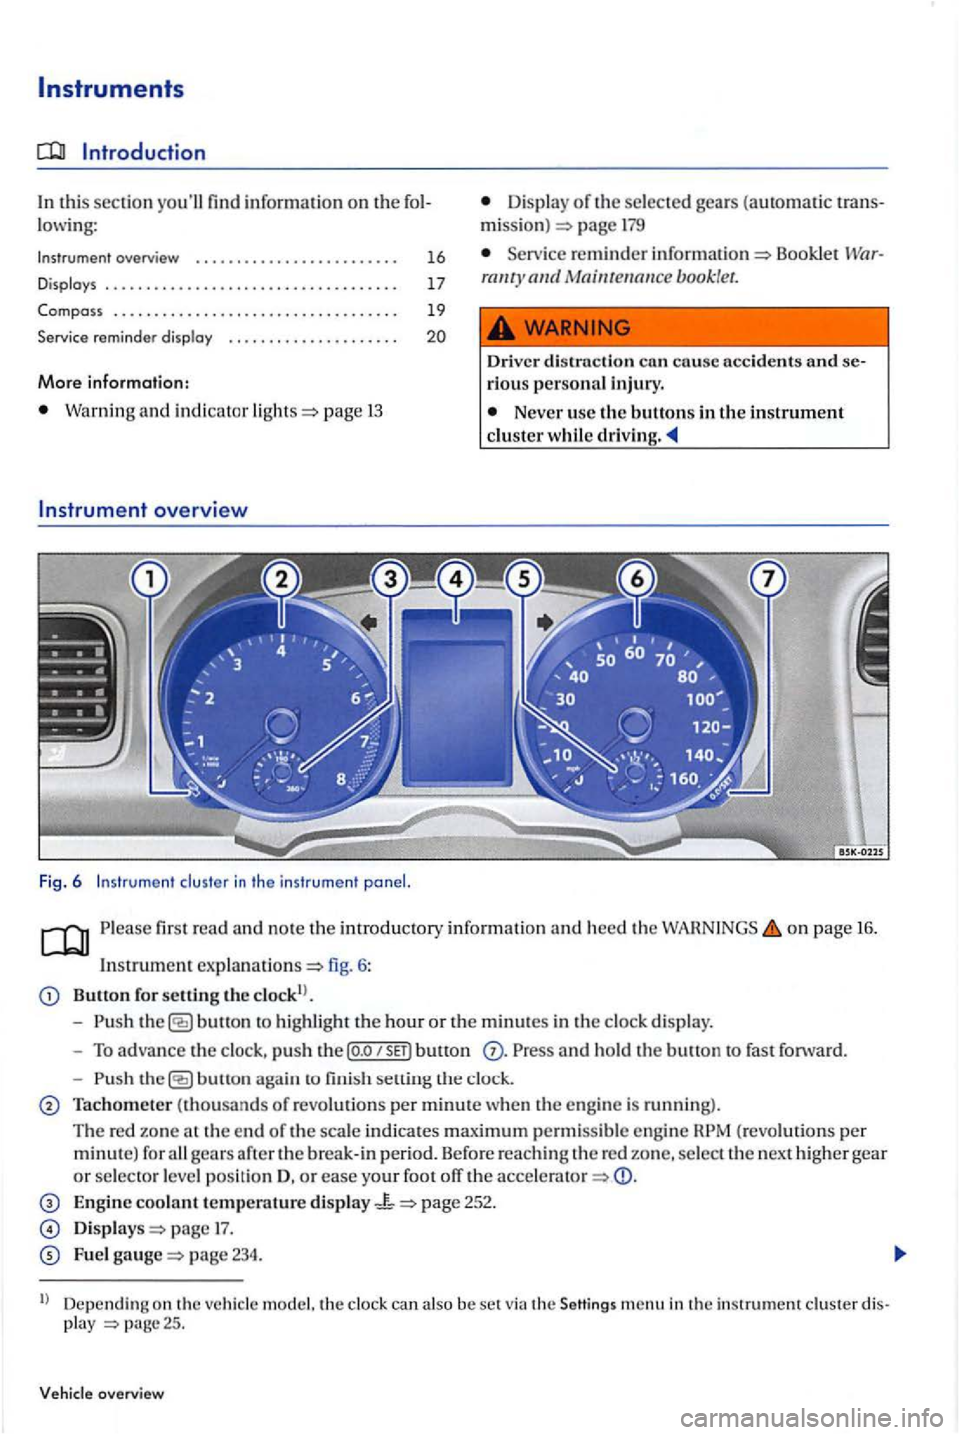
first read and no te the imroductory informati on and heed th e on page 16.
In strum ent
Button for setting the clo ck!).
- Push
button to hi ghli ght the hour or the minut es in the clo ck di splay.
- To advance the clock , pu sh t
he P ress a nd hold th e buu o n to fast fo rward.
-
button aga in to fini sh se llin g th e clock.
Tachometer (thousands of revolut io ns per minute w hen the engine is running).
The re d zo ne at th e e nd of th e scale indica tes maximu m permis s ible eng in e gears
page 17.
Fue l page 234.
ll Depending on th e ve hicle model. th e clock can also be set via the Seltings menu in th e instrument clus ter disp lay
Page 22 of 541
th is sec tion you'll find information on the fo l
l owi ng:
Menu structure -overview . . . . . . . . . . . . . . . . . . . . 21
Using menus in th e instrument cluster . . . . . . . . . . . 22
Main menu ... .... ....................•.....
MFD menu (Multi -function disploy)
Settings
menu ........... ......... .•..•.....
Convenience menu ....... ............... .
lights &
co nvenience settings ................. .
23
24
25
26
27
27
W he n the ig nition is sw itch ed on, different disp lay functions can be accessed via the m enus.
ve hicl es with the m ulti -fun ctio n steerin g w heel, the re are no buttons fo r the information sys te m on the w indshi eld wiper l ever. The multi-functi on
d is pl ay is controlled onl y w ith the buttons on the
multi -fun ction steerin g wheel.
The number of menus in the in strument clu ste r
d is p lay dep ends on the e lec tronic s and equipment on the ve hicl e.
Menu structure -overview
Please firs t read and note the in tr od uctory informati on and heed the on page 21.
Multi-function display (MFD) =>page 24
Trave l time
fu el con sumptio n
Average fuel consumptio n
H a nge
D is tan
ce
A ve rage speed
Digit al speed displ ay
temperature
S peed wa rnin g
Audio
=> Bookl et Radio o r=> Booklet Nav igation sys te m
Nav igation=> Booklet
package
A ny authorize d can ad d o r m odify
functions d ep endin g your ve hicle's trim le ve l and optional e qui pm ent.
m enu item s can onl y be ac cessed whe n the
ve hicl e is not movi ng.
As lon g as a priority warning m essage is dis
pla yed, no m enus can be accessed. order to dis
pla y m enus, first co nfirm warning messages with button.
More information:
Outside mirrors=> page
Driver distract ion can cause ac cid ents and serious personal inju ry.
Never access menus when the ve hicl e is
Assistant
light
status page 23
Settings
=> page 25
M ulti-fun cti on displ ay (MFD) data
- Traveltime
-
-Average s p eed
- Digita l s p
eed display
- Oil te m pe
rature
Spee d warning
page 26
- D
oor opening function
Page 36 of 541
Folding the key bit in or out
Press ing page 34, fig. releases the
k ey bit.
To
fold th e key bit
this button in emergencies! After pushin g th e button, the horn will sound and the turn signal s will the button aga in to
sw itch off the panic fe ature.
Replacement keys
The ve hicl e id entifi cation number is required to
ge t a replacement k ey or an additiona l vehicle key.
No more th an eight ve hicl e keys , w hi ch have been
cut. coded and syn chroni zed can be used with your ve hicle .
E a c h n
ew key contains a microchip and must be coded w ith the data from the ve hicle's electroni c immobilizer. A key will not work if it does not co n
t a in a mi crochip o r co ntains a chip that is not coded, even if the key bit was cut co rrectly.
You can obtain additional or duplicate remote co ntrol keys from authorize d Volkswagen dealers,
authorize d Volkswage n Service Facilities and from certain indep end ent repai r facilities and locksmiths which are qualifi ed to make these remote control keys.
Eac h key must be programmed to wo rk with your pag e 37.
key
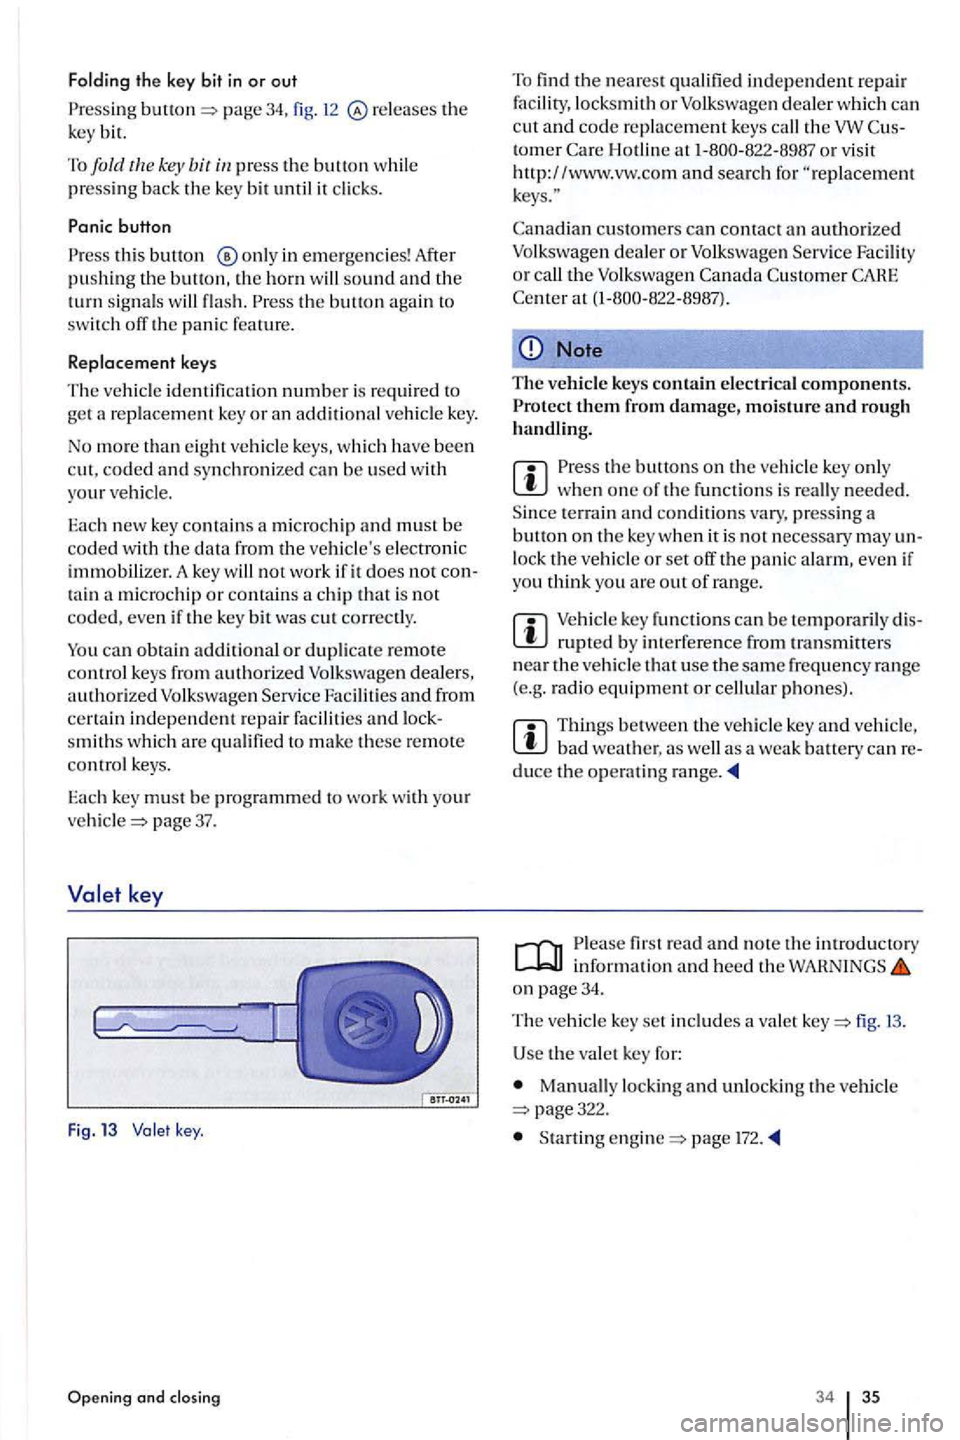
Fig . 13 key .
Opening and closing
To find the nearest qualifi ed ind ep endent repair fac ility, locksmith or Volkswag en d eal er w hi ch ca n
c ut and co de re placement keys call the tomer H otlin e at
cu stomers can contact an authorized Volkswagen dea ler or Volksw age n Serv ice Facility or call the Volk swage n
Note
The vehicle keys contain electrica l components.
the buttons on the ve hicl e key onl y when one of th e fun ctions is re all y needed .
S ince terrain and condition s vary , pressing a button on the key whe n it is not ne cess ary may un
l ock the vehicle or set off the panic alarm, eve n if
yo u think yo u are out of rang e.
m key fun ctions can be te mporaril y dis
bad weather. as well as a weak battery can reduce the operating range.
fir st read and note the introductory information and heed the WAHNINGS on page 34.
The ve hicl e key set includes a valet fig.
U se the va le t key for:
Manually locking and unlock ing the v ehicle page322.
Startin g page l72.
34 35
Page 40 of 541
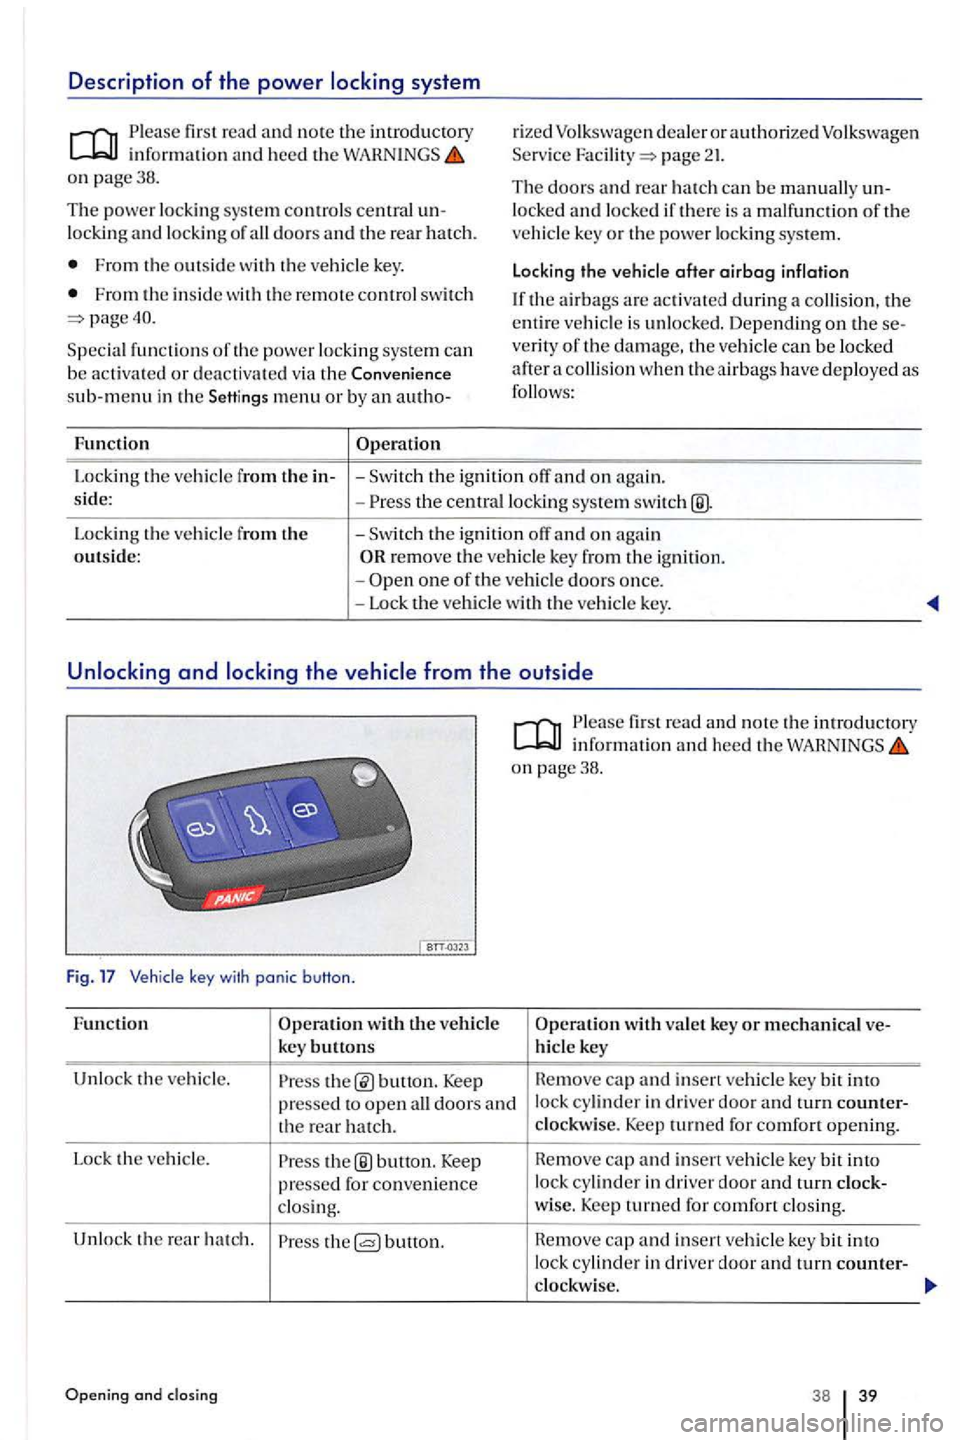
Description of the power system
firs t rea d and no te th e in troduc tory in for mation and heed the on page38.
T he pow er lockin g syst em co ntrols central un
locki ng and lock in g of all doors and the rea r hatc h .
Fro m tl1e outsid e wit h the vehicl e key.
Fro m the in sid e w ith th e remote contro l switch
Speci al fu nct io ns of the power locking syste m can
b e ac tiva ted or dea ctiva te d via the su b-m en u i n the Sett in g s menu or by an au tho-
Fun cti
on
rize d Volkswagen dealer or author ized Volkswage n
Service page 21.
T he doors an d rear h a tc h can b e manually un
l o ck e d and locke d if there is a m alf unc tio n of th e
ve hicl e key or th e power locking sys te m .
L ocki ng the vehicle
after airbag inf la tio n
the airba gs are activated during
the centra l lockin g sys tem
Locking th e ve hicle from th e
outs ide: -Swi tc h th e ig nit ion off and o n again re m ove th e vehicl e key from the ig niti on.
the
with the ve hicl e
k ey buttons
Unlo ck th e ve hicle.
firs t read and note th e introductory infor ma tion and heed th e on page38.
bunon. Keep cap and insert ve hicle key bit into
pres
sed for co nve nien ce lock i
n driver door a nd turn clock-
clo sing. w
ise. Keep turn ed for comfo rt clos ing.
U nlo ck the re a r h atc h .
butto n. cap a nd insert ve hicle key bit int o
lock cy lin der in driver door turn cowller-
clockwise.
Ope ni ng and 38 39
Page 42 of 541

Unlocking and locking vehicles with
Fig. 19
on page38.
sta rting and system which unlocks and lock s the vehicle without active use of a vehicle key. For this, a valid ve hicle key must simply be in proximity of the
General information
If a va lid vehicl e key is in the proximity range fig . 19 of lock and start system recognizes desired access. T he system verifie s access authorization and enables the followin g functions without actively using the vehicle key:
Keyless entry: Unlocking the vehicle with the door handles fo r the front doors o r the rear hatch.
Keyless go: Start engine and drive. For this. a
valid vehicle key mus t be in the passenger com
partment.
Keyless exi t: Locking the vehicle via the door handle of the driver or fro nt passenger door.
T he power locking system an d the closing system fu nction similarly to th e unlockin g and locking system. the operating con trols are
Veh icle unlocking is indicated by double fla shing. locking by a single fla shing of all turn signals.
the vehicle was unlocked and within the next few seconds n o door o r the rear ha tch has been opened. the vehicle is automatically locked again.
and closing
Fig. lock and start system :
Grasp the door handle of the driver or front passenger fig . (arrow
the driver door.
the outer button in door h andle fig. (arrow The door on whic h the
h andle is operated mus t be closed.
Unlocking and locking the rear hatch
If a va lid vehicle key is in the fig. 19 of the rear hatch, th e rear hatch is unlocked automat
i c ally.
and close the rear hatch as you would a page 45.
The rear hatch automatically locks afte r it is closed unless there is a vali d ve hicl e ke y inside the ve
hicle.
Locking with a second vehicle key
I f a vehicle key is ins ide th e passenger compartment. the vehicl e can only be locked from the outside if a second vali d vehicle key is within proximity of the vehicle outside th e vehicle.
Automatic deactivation of sensors
If the vehicle has not been unlocked or locked fora longer period of time, tJ1e proximity sensor in the passenger door is automatically deactivated.
If an o uter button on a door handle is activated excessively o n the locked vehicle, for instance by rubbing against a bush, all outer buttons on the af-
fected ve hicle side are switched for about
Page 55 of 541
Programming the garage door opener
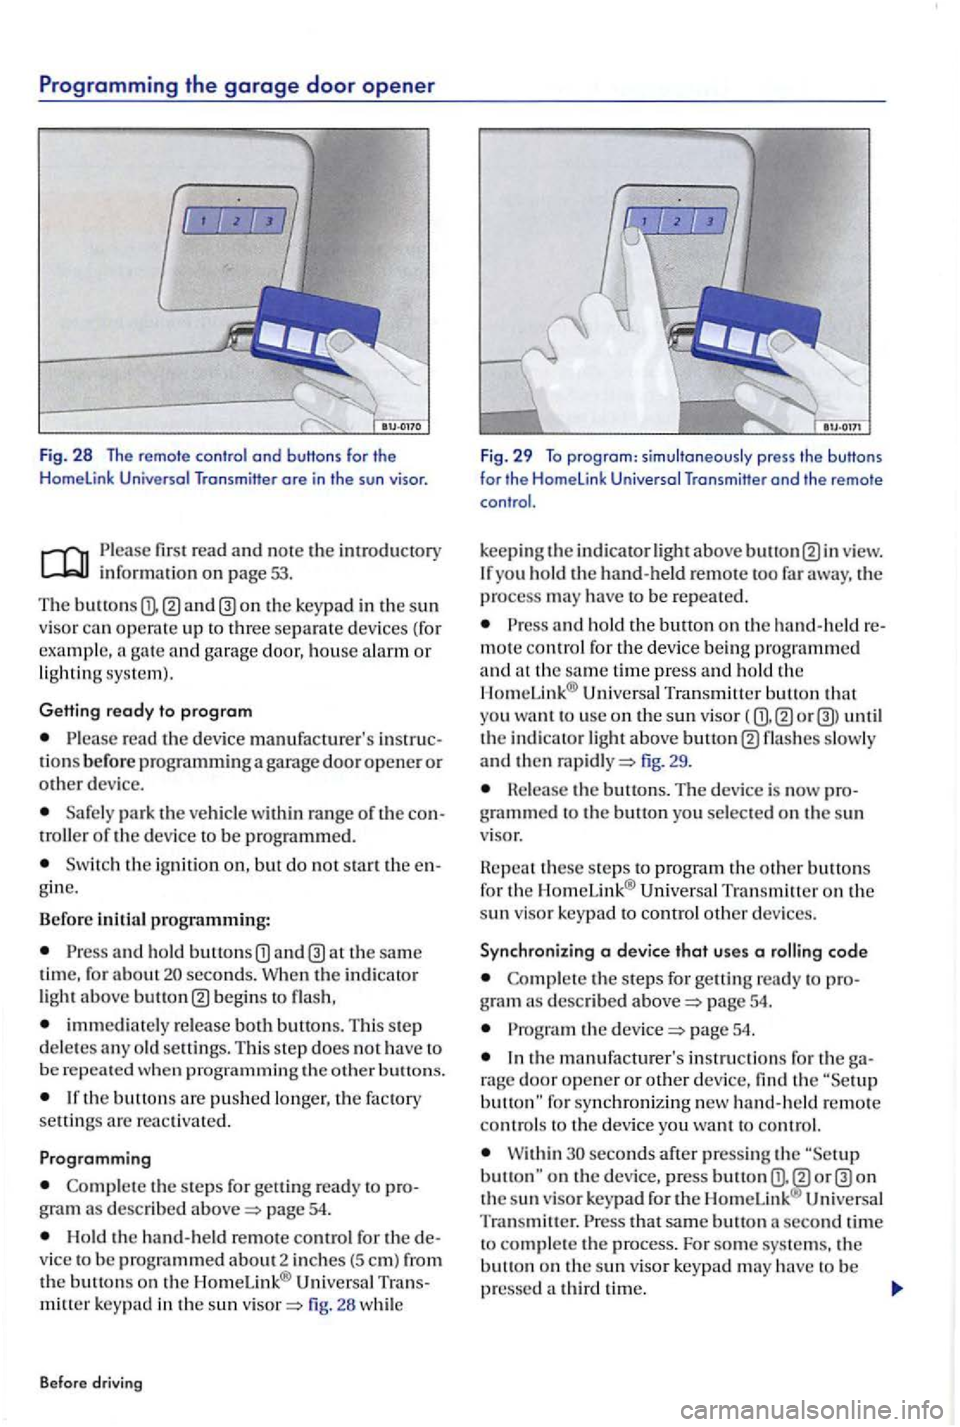
Fig. 28 The remo te contro l ond buttons for the Homelink Universal Transmitter ore in the sun visor.
fir s t r ead and note th e int ro d uctory info rm ation on page 53.
The buttons
read the dev ic e manufacturer's tions b efo re programmin g a gara ge door open er o r dev ice.
Sa fe ly pa rk t he o f the d evic e to b e programmed.
S w itch the ig nition o n, but do no t sta rt the gin e.
B efo re initial
programming:
and ho ld b utton s seconds. Whe n th e indic at or light above begin s to
immedi a te ly rel ea se both buttons. T his s te p
d e letes an y o ld se ttin gs. Thi s s te p does h av e to
b e
th e s te ps for getti ng ready to gram a s describ ed pag e 54.
Hold the han d -h e ld remote contr o l f or the
m itt er key pad in the sun fig . 26 whil e
B efo re
driving
Fig. 29 To program : simultaneously press the buttons
for the Home link Universal Transmitter end the remo te
control.
k
eepi ng the indica to r ligh t above view. yo u ho ld the hand-held remote too far away, the process may have to be repeate d .
and ho ld the button o n the hand-held m ote contro l fo r th e device bein g prog rammed and at the sa m e time press and ho ld the Un iv e rsal Tran smitter button th at
yo u want to use on th e sun visor ( until the indi c a to r light abov e fig. 29 .
Hele ase the buttons. The device is now
these ste ps to p rogra m th e o ther buttons
f o r th e Hom eLink® Universal Tra nsmitt er on the
s u n visor k ey p ad to contro l o ther dev ic es.
S y nchronizing a
device that uses a
the steps for ge tt in g re ad y to g ra m described page 54.
the page 54.
th e m anufacturer's instr u c tions fo r th e rage door o pe ne r or other device, find the button " fo r synch ron iz ing new han d-h eld remote
co ntro ls to th e device yo u wa nt to co n trol.
W ithin second s aft er p ress ing the on th e su n visor ke ypad for the H om cLink ® Uni versal
Tran sm itter. t h at sa me button second tim e
t o comple te the process. For som e sys te m s. th e
b u tto n on t he s un visor key p ad m ay have to be
pressed
Page 56 of 541
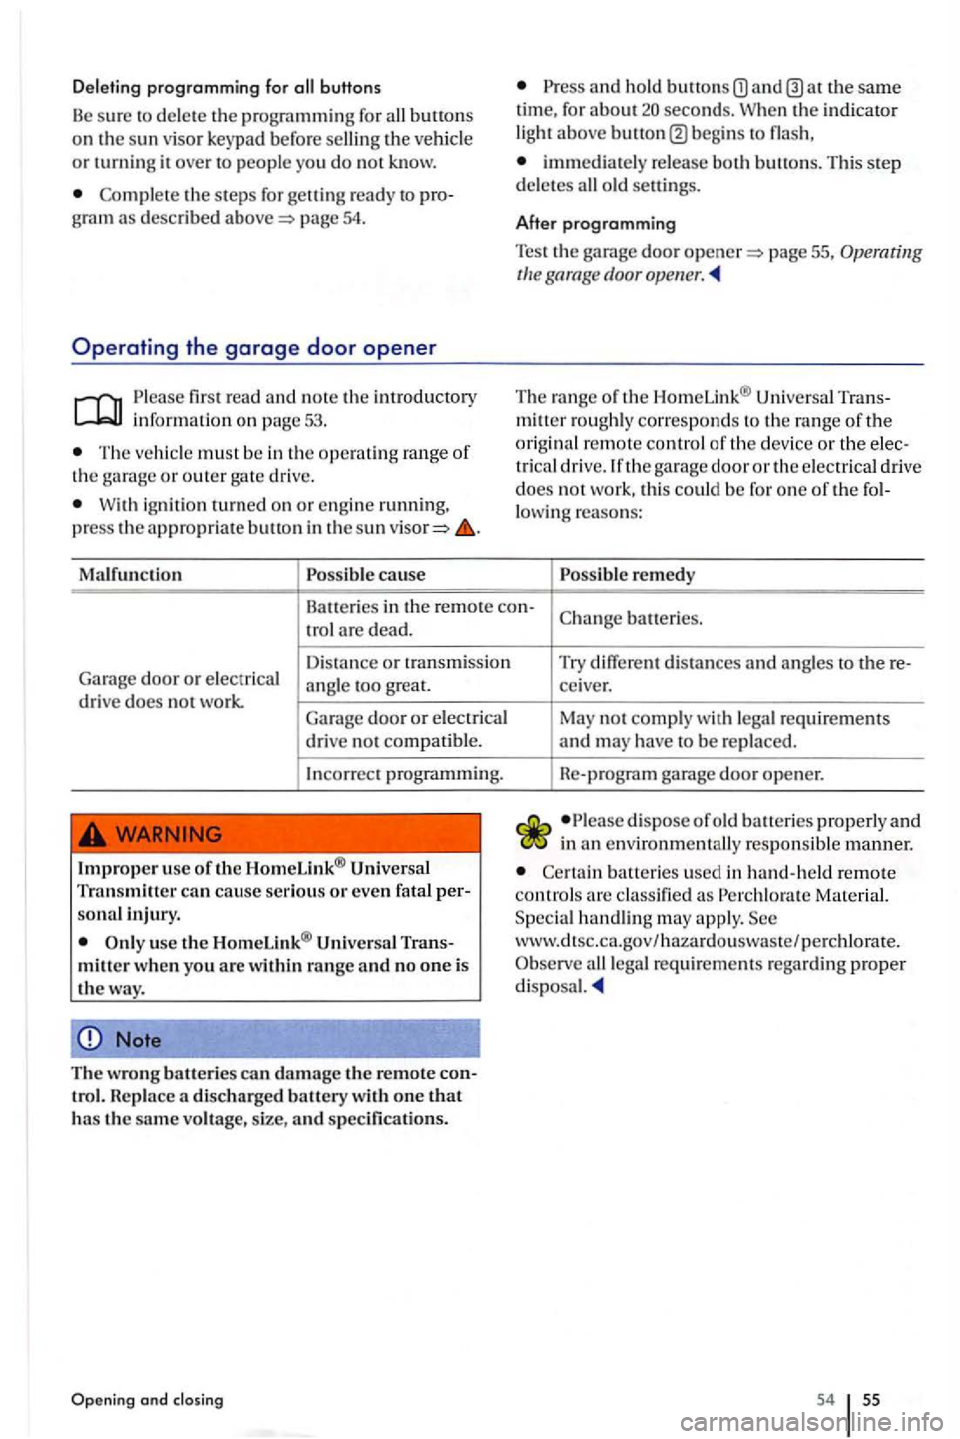
Deleting programming for
pro gramming for th e or turning it ove r to people you do not know.
the s te p s for getting ready to pro
gram as describ ed p age 5 4.
Operating the garage door opener
fir st re ad and note the introductory information on page 53.
The vehicl e must be in the operating range of th e garage or outer ga te drive.
W ith ig nit ion on or engin e running, press the appropriate button in th e sun
an d h old at the same tim e, for about seco nds. When the indicator
light abov e b egi ns to
immediately re lease both buttons. Thi s step dele tes
page 55, door
The rang e of th e 1-lomeLink® Trans
m itt er roughly
corresponds to th e range of the orig inal re mot e control of the device or th e e lec
tri ca l drive. Jfthe garage door or the e lec trical drive
does not work, this coul d be fo r o ne o f the fol
lo wing reasons:
re medy
Batteri es in th e remote con-batteries.
tr ol are dead.
Dis ta nce
or tr ansmission
G arag e door or e lectrica l
angl e too great.
dri ve does not work. Garage door or electrical
drive no t compatible.
In co rre ct programmin g.
usc th e HomcLink ® Trans
mi tter when you arc within range and no one is
th e way.
Note
The wro n g batteries can damage the remote control. Rep lace a discharge d battery wi th one that has th e sam e vo ltage , size , and specifications.
Opening and closin g
Try differe nt dista nces and angles to there-ce iver.
May not co mpl y with legal requirements and may have to be r e placed .
Re-program garage d
oor opener.
di spose of old batteries properly and in a n envir onmentally respon sibl e manner.
clas sified Material. S pec ial handling m ay apply. Se c wwlv.cltsc.ca .gov/ haza rdou swaste/perchlorate . lega l requir ements rega rdin g proper
54 5 5