2006 VOLKSWAGEN GOLF MK5 display
[x] Cancel search: displayPage 9 of 444

Coolant 3.2: 47
Level 3.2:
49
Loss 3.2:49
Coolant leve l
Warning light 3.2: 48
Coolant temperature
Gauge 3.1:9 Safe ty instru ctions 3.2:48
Trail er towing 3.2: 48
Warning light 3.2 : 4 8
C
ras h recorders 3.2: 34
C rui
se control system
Indicator light 3.1:96
without display 3.1: 96
C up ho ld ers 3.
1: 67
in the front center consol e 3 .1: 67
the rear center console 3.1:67
Curbs 3.3:4
Curb weight 3.3 : 6
C
urrent f u el con sumptio n 3.1:21
C
urtain airbags 2.1:
Custome r Center 2.1: 28
D
Danger of fittin g a child seat on the front pas
senger seat 2.1:
Daytime dri ving lights 3.1:4 3
Daytime Hunning Light s 3.1: 43
D
eactiv ating the switchabl e lockin g
2.1: 67
Depress brake ped al 3.1: 6
Determining correct load l im it 3.2: 71
Diff
erential lock 6
Digit al cl
ock 3.1:8
Dimensio n s 3.3: 4, 7
Disp la y 3.1: 1 3
D is t
ance b etween driver and steerin g
w h
eel 2.1:4
D is ta n
ce travele d 3.1: 21
Door re lease h andle 3.1: 3
Doors 3.1:33
close 3.1: 33 closing 3.1: Warning li gh t 3.1: 33
Drive economically 3.2: 19
6 Key words
Drive economic all y and he lp protect the
environment 3.2: 19
Driv er See Seating position
Drivin g outside of the
Driving safety 2.1: 3
Driving lime 3
.1:
E
EDL 3.2:6
See also Electronic Differ ential Lock
Warning light 3.2:5
Electrical socket 3.1: 68
E
lectronic diff ere nti al lock 3.2: 6
Electroni c Differential Lock
Warning light 3.2: 5
Ele c
tronic immobilizer 3.1:85
E l
ectronic Co ntrol 3.2: 9
E l
ectronic Stabilization
How it works 3.2: 6
Eme rge ncy
L
ockin g driver's door 3.2: 88
Opening l eve r for the rear lid 3.2: 89
Unl ocki ng
driver's door 3.2: 88
Em ergency closing 3.2: 88
E m er
gency nasher 3.1: 45
E m
ergency locki ng all doors 3.2: 88
Emergency ope nin g 3.2: 88 Doors 3.1: 34
Emer gency
unlocking of rear lid 3.2: 89
E ng
ine Break-in 3.2: 12
Eng in e compartment
Cleaning 3.2 :27 you should take when work
i
ng in sid e the e ngin e
compartment 3.2:39 Work ing in the engine
compartment 3.2: 39
E n g in e
compartment la yout 3.3 : 5
E n
gine compartment overview 3.3: 5
Page 102 of 444
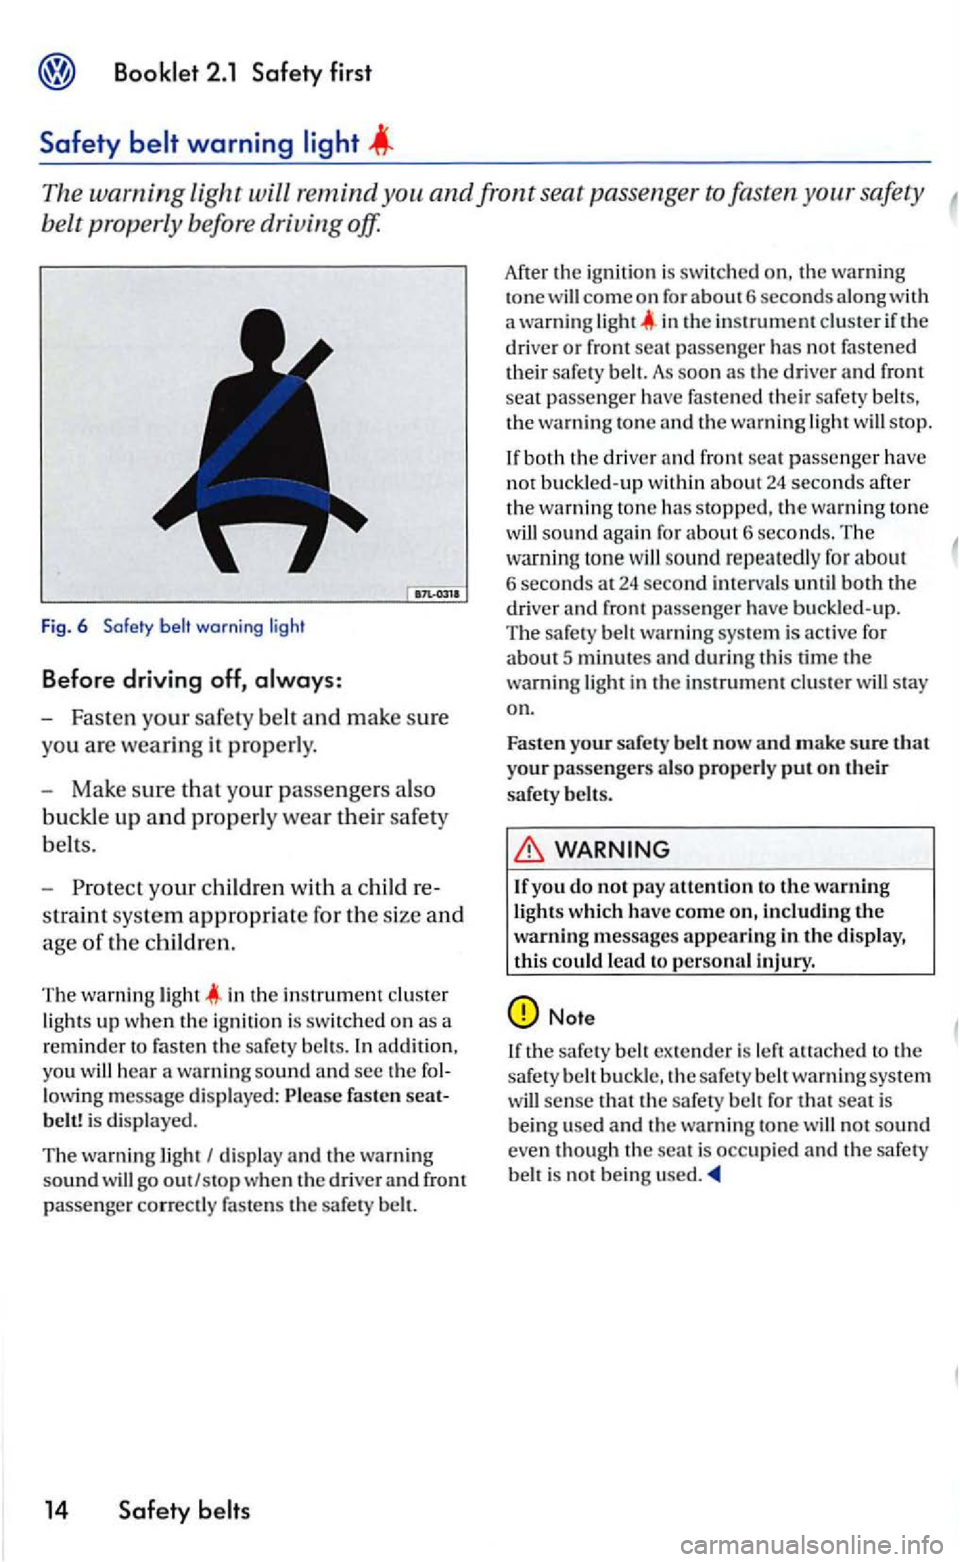
The warning Light will remind safety
belt prop erly before driving off.
Fig . 6 Safety warn in g l ig ht
Before driving off,
-Fast en your safety belt and make sure
you are wea ring it properly.
- Mak e sure that your passengers als o
buckle
up and properly wear their safety
b elts.
- Pro tec t yo
ur children with a child re
s traint sys
tem appropria te for the size and
age of th e children.
T he wa rnin g in the in strument lights up w he n the ig niti on is switched o n as a
reminder to fasten th e safety addition,
yo u
14 Safety
Afte r the ig nition is swit ch ed th e warning tone come on for about6 second s along with warning light in the in strument if th e drive r or front seat passe nge r has not fastened their safet y bel t. As soon as the driver and front seat passe nger have fastened their safety the wa rnin g ton e and the warning light stop .
sound aga in for about 6 second s. The
ton e w ill sound repeatedly for about 6 seconds 24 second interva ls until both drive r and front passenger have buckled-up .
T he safety wa rnin g system is active for about 5 minutes and during thi s time the warni ng light in the instrument clus te r wiU stay
on.
Fa s
ten your safe ty belt now and make sure t hat your passengers also properly put o n their
safery belts.
WARNING
If yo u do not pay attenti on to the warning
li ghts whic h h ave come including the warning messages appearing in the display, this could lead to pe rsonal injury.
ex tender is left attac h ed to the
s afery warning sys tem will sense th at th e safe ty n o t sound even though th e is occ upie d and the safery
Page 173 of 444
Booklet 3.1 Controls and Equipment
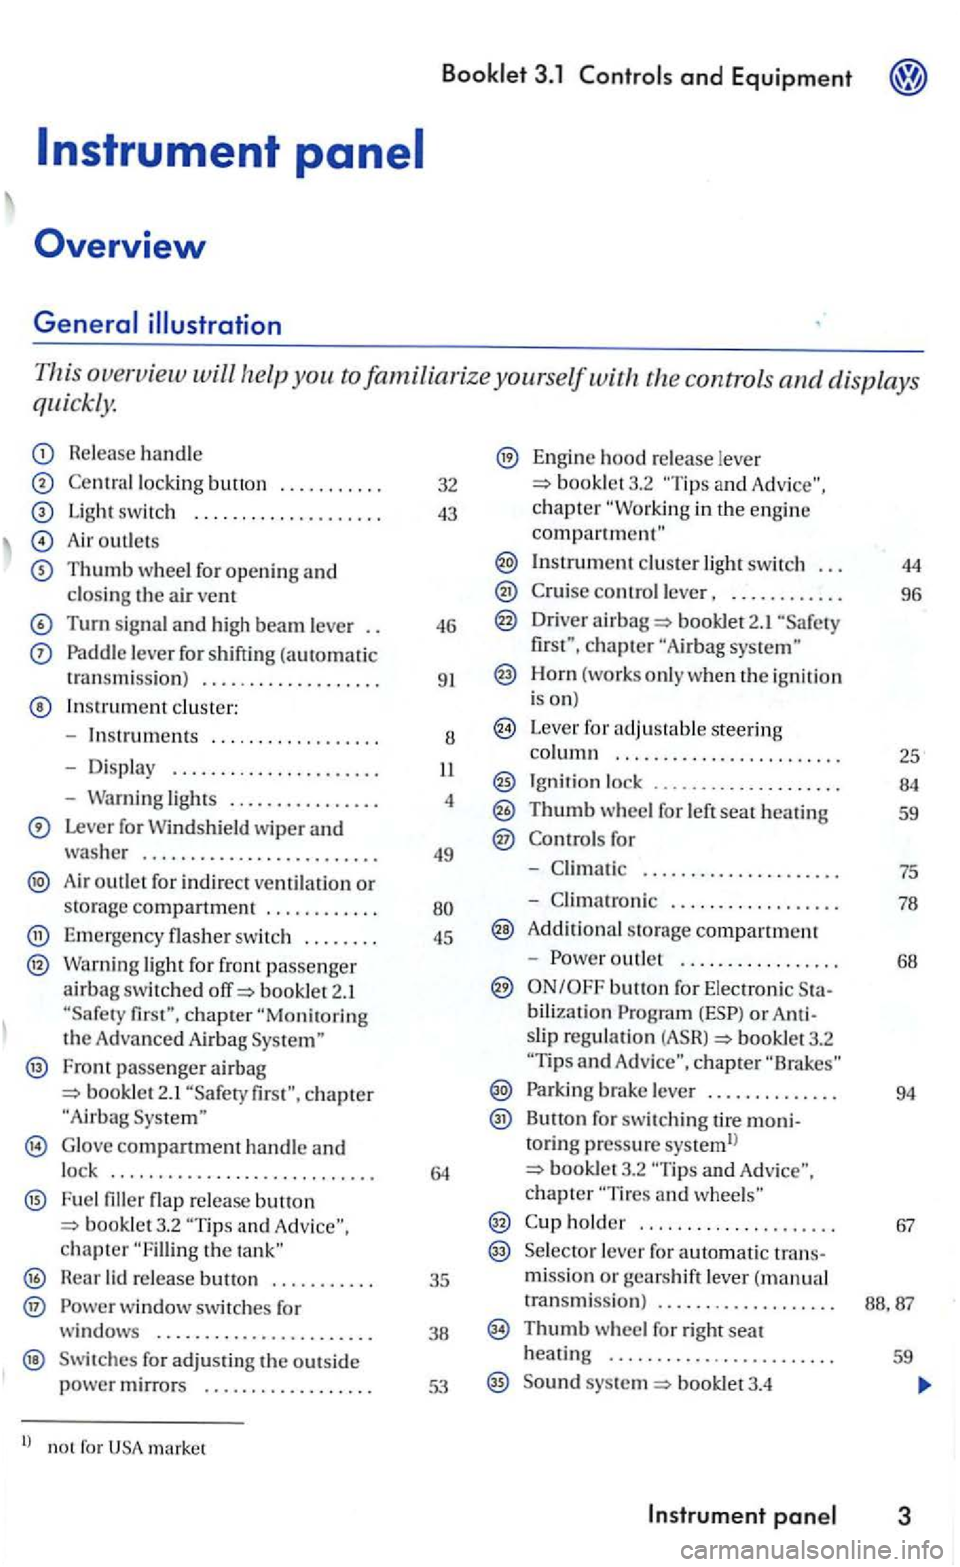
This overview will the controls and displays
quickly.
Release handle
lock ing button ...... .... .
Light switc h ................... .
Air outlet s
Thumb wheel for opening and closin g the a ir vent
Turn signal and high beam leve r
Paddle leve r for shifting (automatic
t ransmiss ion ) .................. .
In strument cluste r:
- Instru
ments ... ...........• ...
- Dis pla y ..
-Warning lights ............... .
Lever for Windshield wiper and washer ........................ .
Air outlet for in d irect ventilatio n or storag e compartment ........... .
Emerge ncy flasher sw itch ....... .
Warning light for front passenge r airbag switc hed booklet 2.1
Fron t passenger airbag bookle t 2.1
G lo ve compartment handle and lock ........................... .
F u e l flap re lease button and chapter the
H ear lid re lease .......... .
® w indow switches for
windows ...................... .
Swit ches for adjus ti n g the outs id e power mirrors ................. .
l) no t for market 32
43
46
9
1
8
4
49
45
35
38
53
Engine hood re lease lever booklet3.2 and c h a pter in the engin e compartment"
Instrument cluster light switch . . . 44
control lever, . . . . . . . . . . . . 96
Driver airba g 2.1 chapter
Horn (works o nly when the ig niti on
i s on)
Leve r for adjus table steering column . . . . . . . . . . .. . . . . . . . . . . . . 25
Ignit ion lock ...... 00............ 84
Thumb wheel for left seat heating 59
for
-. . . . . . . . . . . . . . . . . . . . . 75
- Climatro nic . . . . . . . . . . . . . . . . . . 78
A ddit iona l s torage compartment
-
outle t . . . . . . . . . . . . . . . . . 68
bilization or slip regulatio n booklet3.2 and chapte r
Parki ng brake lever . . . . . . . . . . . . . . 94
Button for switc hing tire moni-toring p ressure systemll booklet3.2 chapter
holder . . . . . . . . . . . . . . . . . . . . . 67
Se lecto r lever fo r automatic trans-missio n or gears h ift lever ( m anual
transmissi o n) . . . . . . . . . . . . . . . . . . .
Thumb w heel for right seat
heatin g . . . . . . . . . . . . . . . . . . . . . . . . 59
Sound syste m booklet3.4
Page 174 of 444
and Equipment
Tips
features mer1tioned are standard equipment on some models only and options on others.
Warning
For technical reasons, the
The governing factor is th e symbol on the swi tch
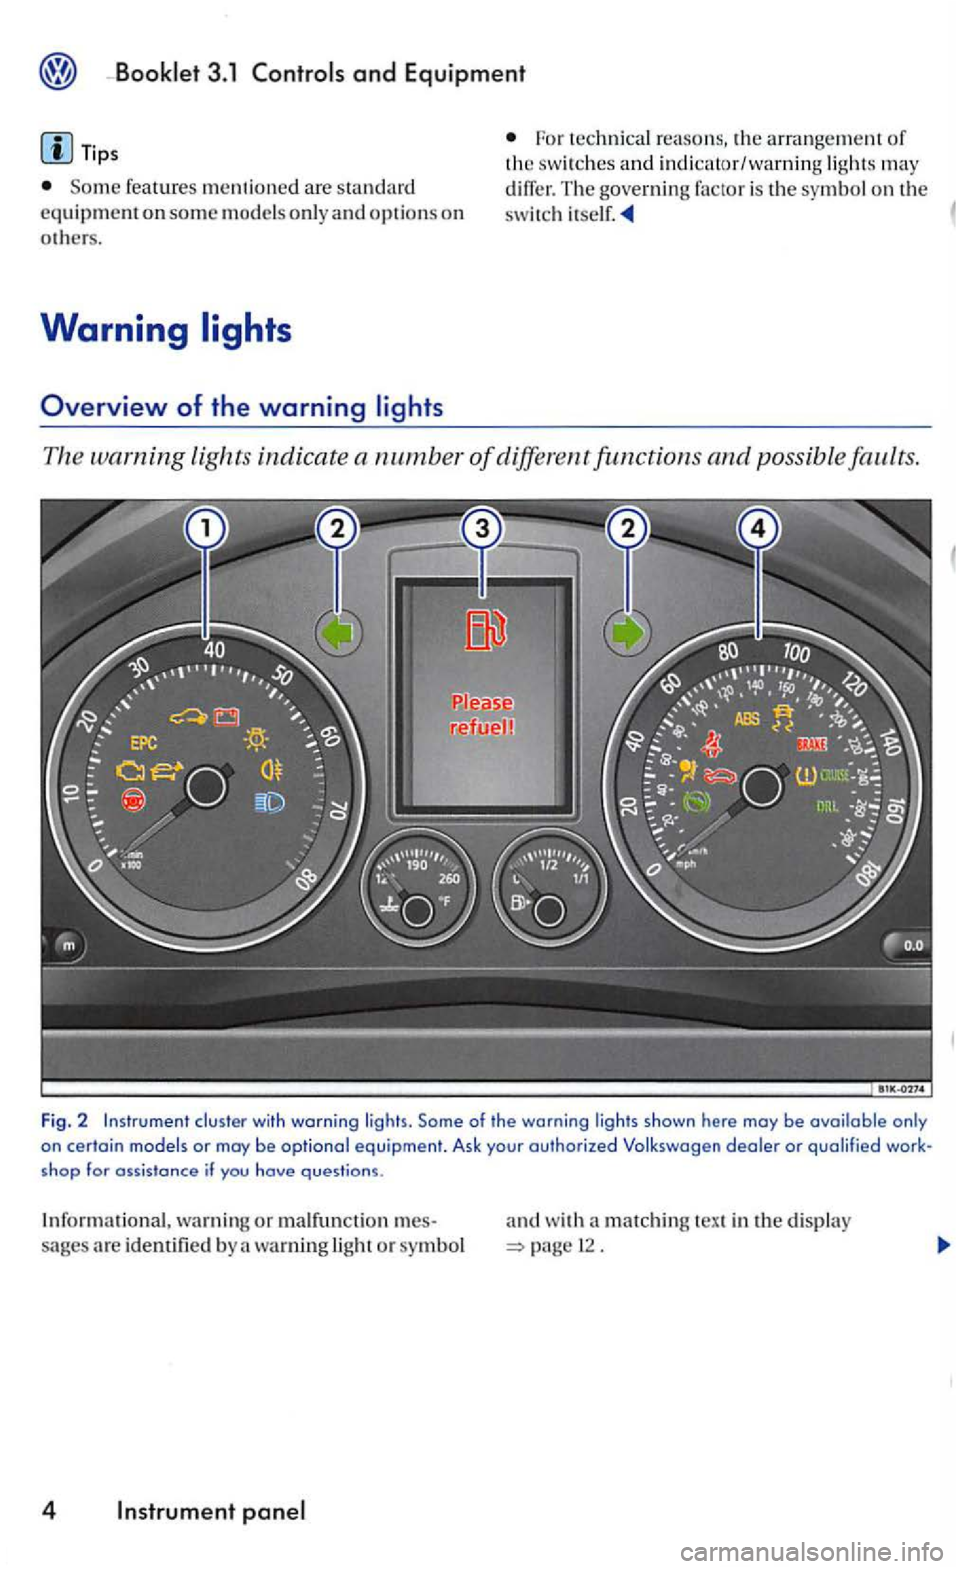
The warning lights indicate a number of different functions and possible faults.
Fig. 2 cluster with warning lights.
for if you hove questions.
Informational, warning or malfunction mes
sages are identifie d b y a warnin g light or symbol
4
and w ith a matching text in the display page 12.
Page 177 of 444
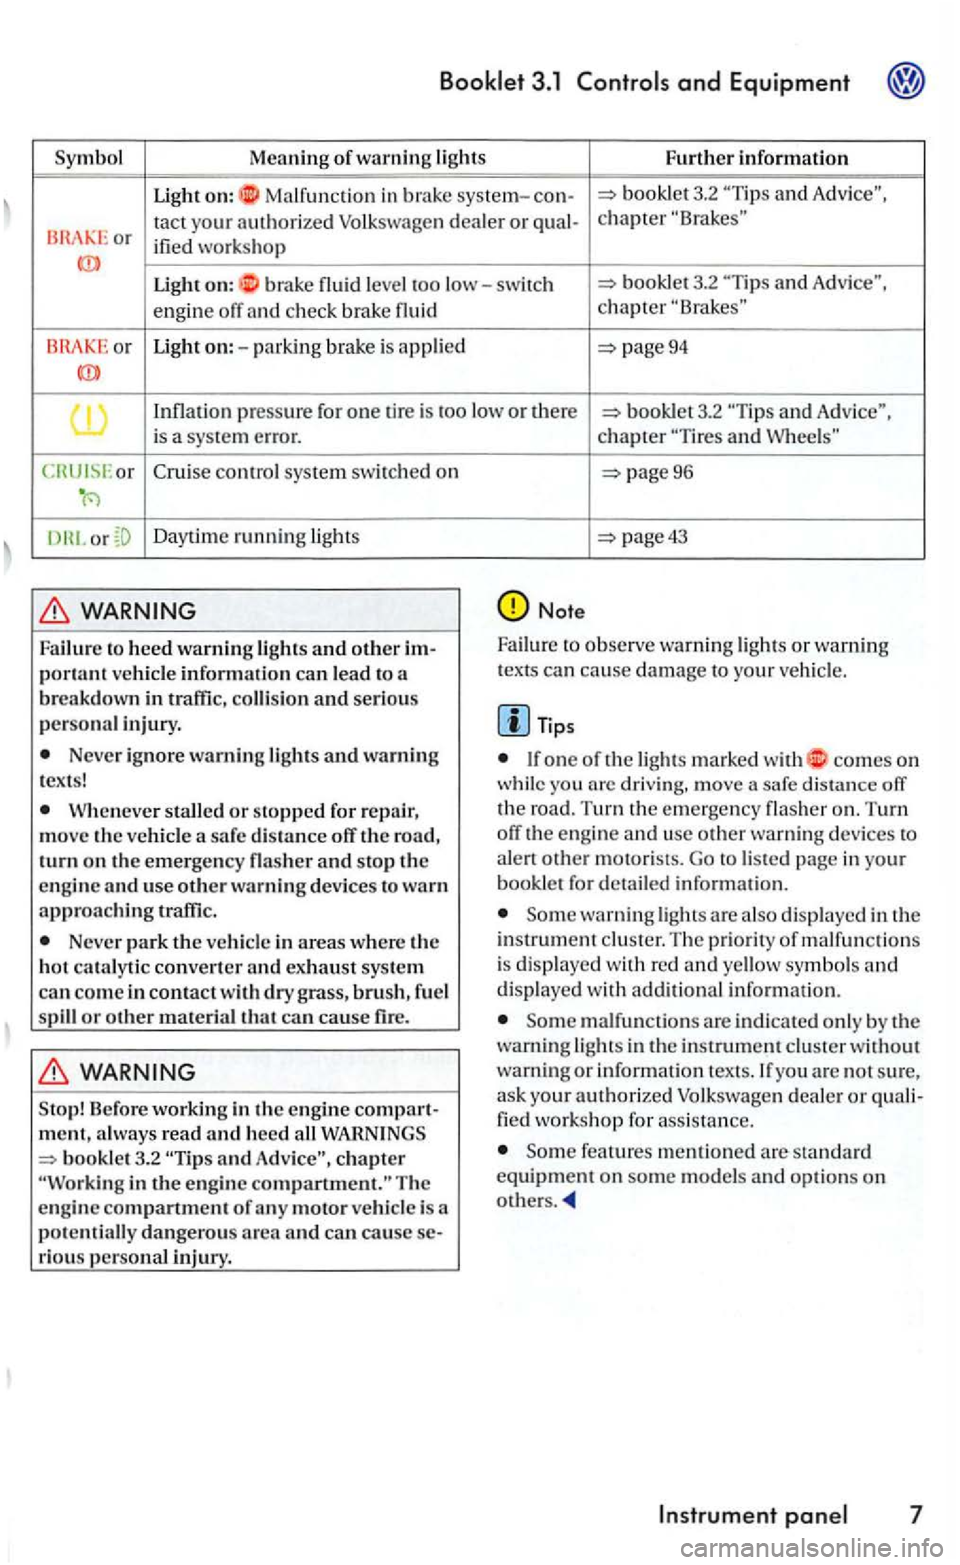
Symbol Meaning o
f warning lights Furt h er informati o n
Ligh t on: Ma lfun ction in brake system-3.2 and
or tact your a u thorized Volk swage n dealer or ified wo rks ho p
Ligh t on: b rake leve l too low-switc h 3.2 and
engin e off and ch ec k b rak e chapter
Light on:-pa rkin g brake is appli ed page94
pressure for one tir e is too lo w o r th ere an d Adv ice",
i s a sys te m err or.
or
Cru ise con trol system switc h ed on
D ayt im e ru nning ligh ts
Failure to heed warnin g lights and o ther p o rl ant vehicle informati o n ca n lead t o a
b reakdow n in traffic , and serious
perso na l in jury.
Ne ver ig no re warning lights a nd warning
t e x ts !
stal led or stoppe d for re p air, m ove th e v eh icle a sa fe dis ta n ce off th e road,
turn on t h e em erge ncy flash er and stop the
e n gi ne and use o th e r warnin g d evices to warn approachin g traffi c.
Ne ver park the ve hicle in areas where the ho t cataly tic co nvcrlc r and exh au st sys tem can co m e i n contact w ith dry gra ss, brus h , fu el
s pill or oth er materi al that ca n cause fire.
Sto p ! B efore workin g in the en g ine m ent , a lwa ys rea d and heed all 3.2 in the engin e comparlmcnt." The
e ngine c ompartment of any motor vehicle i s a
p ote n tiall y da ngerou s area and can ca u se rious personal in jury.
chapter and
page96
page43
Note
Failure to observ e wa rnin g lig hts or wa rning texts can ca use damage to you r ve hicle .
If one of the lig hts marked with comes on while you arc driv ing. move a safe distance off
th e road. Turn the em ergency flas her on. T urn off the engine and usc other warni ng devices to
ale rt other motoris ts. Go to listed page in your bookle t for detailed informat ion.
Some warning lights are also displayed in the instr ument cluster. Th e priority of m alfun ctions is dis played with re d and yellow symbols and
disp layed with additio na l informa tion.
Some malfu nction s arc in dicated only by th e
warni ng lights in the instrument cluster without warn ing or i nformation texts. If you are not sure ,
as k you r authorized Volkswagen dealer or worksho p for ass istance.
Some features menti oned are s tandard equipment on some mod els and optio ns on others .
Instrument 7
Page 178 of 444
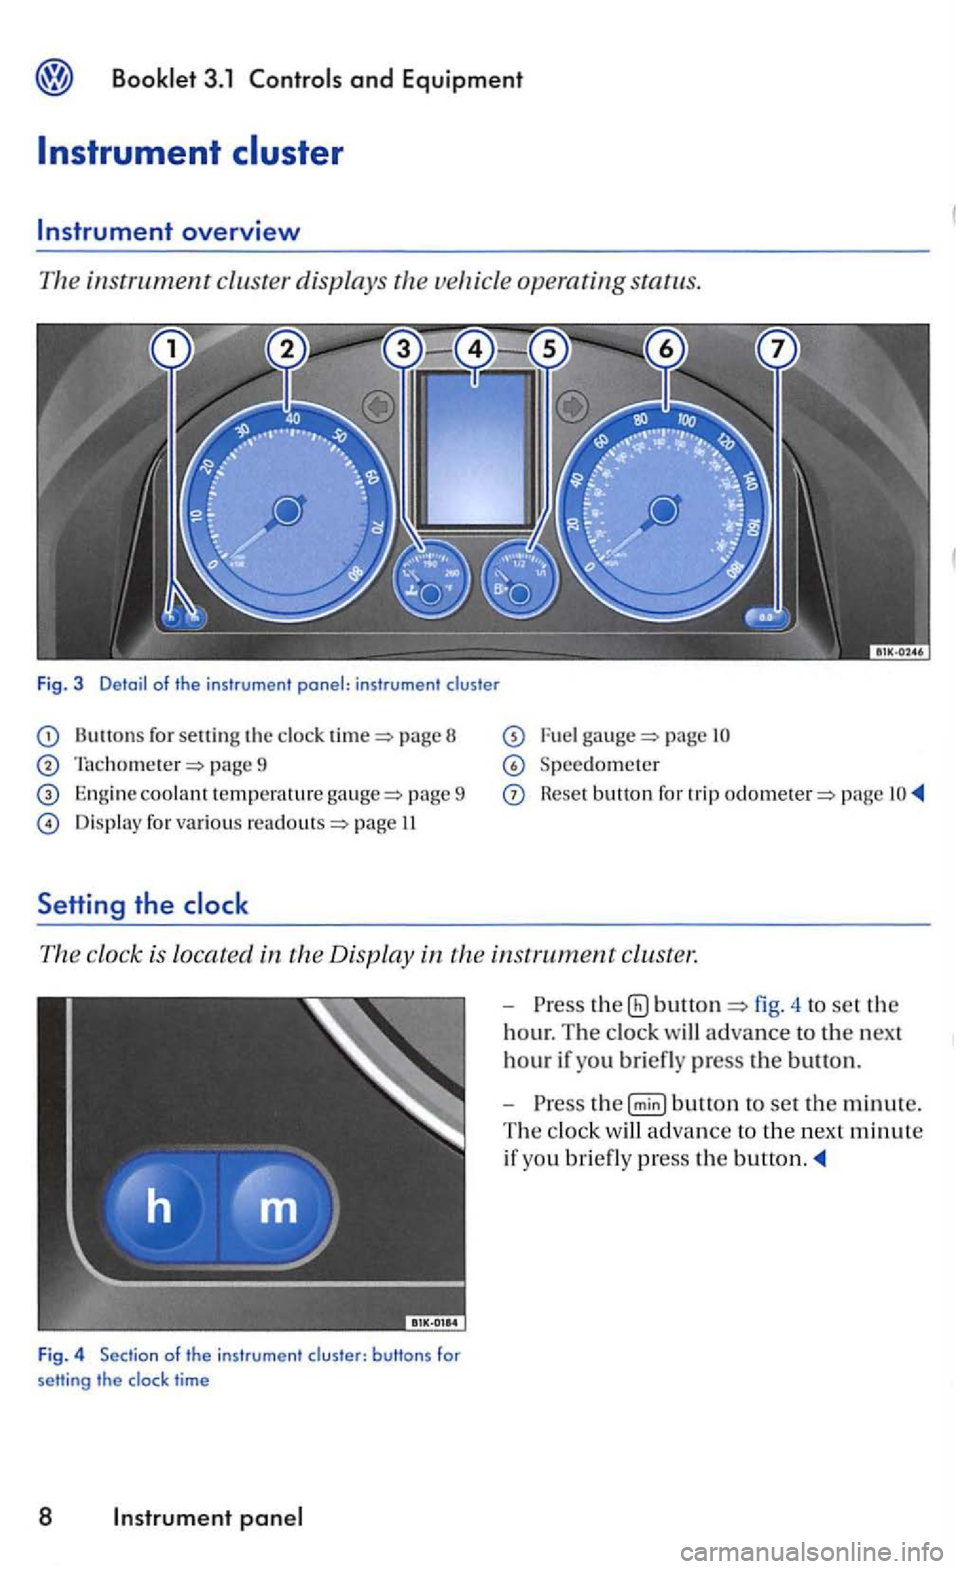
and Equipm ent
Instrument
for sett in g the page 8
page 9
Engine coolant te mpera tu re pa ge 9
Display for various page II
Setti ng the
page
Speedometer
Reset button for trip page
The clock is locat ed in the Display in
time
8 Instr um ent
-the fig. 4 to set the
hour. The clock will advance to the next
hour if you briefl y press the button.
-
Page 180 of 444
and Equipment
The front spoiler also en sures proper bution of the cooling a ir w hen t he vehicle is mov in g. The engin e could overheat if th e spoiler
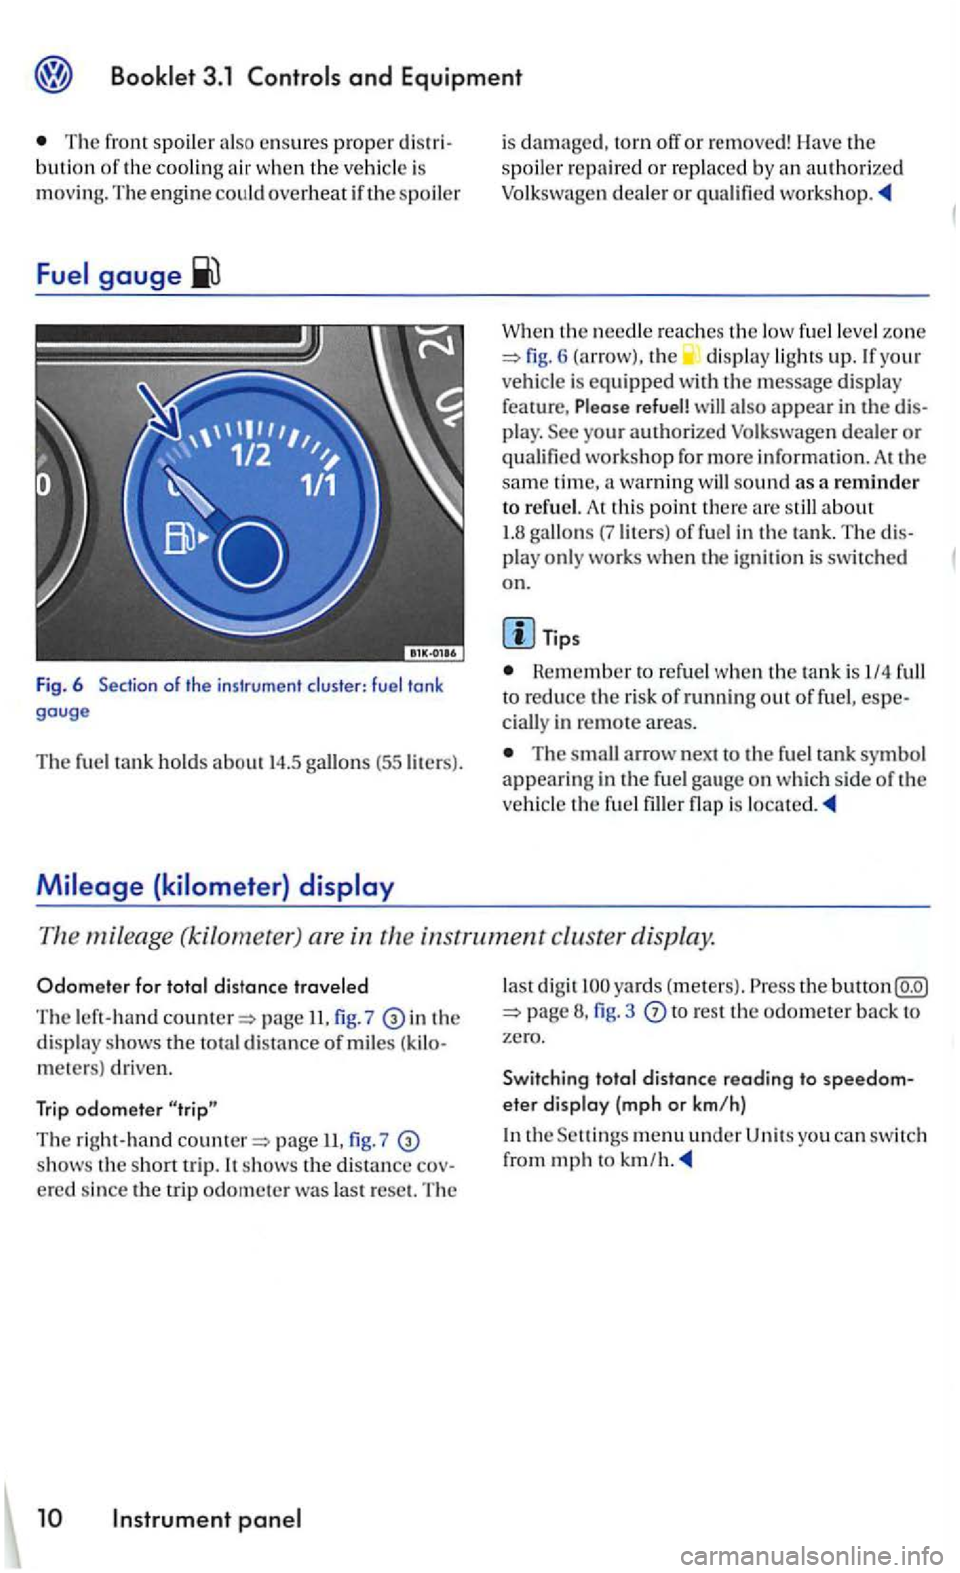
Fig. 6 of the instrument cluster: fuel tank gauge
Th e fuel tank hold s about 14.5 (55 liters).
is damaged, torn off or removed! Ha ve the spoil er repaire d or rep laced by an autho rized Volkswagen deale r or
W he n the needle reaches th e low fuel le ve l zo ne 6 (arrow), the displa y ligh ts up. If you r
ve hicle is equipped with th e message display
fea ture, Please refuel! a lso appear in the play. workshop fo r more informatio n. At the sam e tim e, a warning sound as a reminder to refu el. A t thi s point th ere
Tips
Rem ember to refuel when th e tank is I/4 to reduce the risk of running out of fuel, in remote a reas.
The arrow n ex t to the fue l tank symbol appearing in the fu el gau ge o n wh ic h side of th e
ve hicl e th e fuel is
mileage (kilometet ) are in th e in strument cluster display.
Odom ete r f or t otal distance travele d
The left-han d page II. 7 in th e displ ay shows the to tal distance of mile s meters) driven.
Trip odomete r
T he right-hand page 7 shows th e s ho rt trip. It shows th e distance
la st di gi t yards ( mete rs) . Press the button 3 to res t th e odometer back to zero.
Swit ching tota l
distance reading to eter display (mp h o r km/h)
the men u under U ni ts you can switc h
from mph to km /h.
Page 181 of 444
Informational or malfunction messages are identified by a warning light or
symbo l and, depending on the
kind of instrument cluster in your vehicle , with a
matching text in the display.
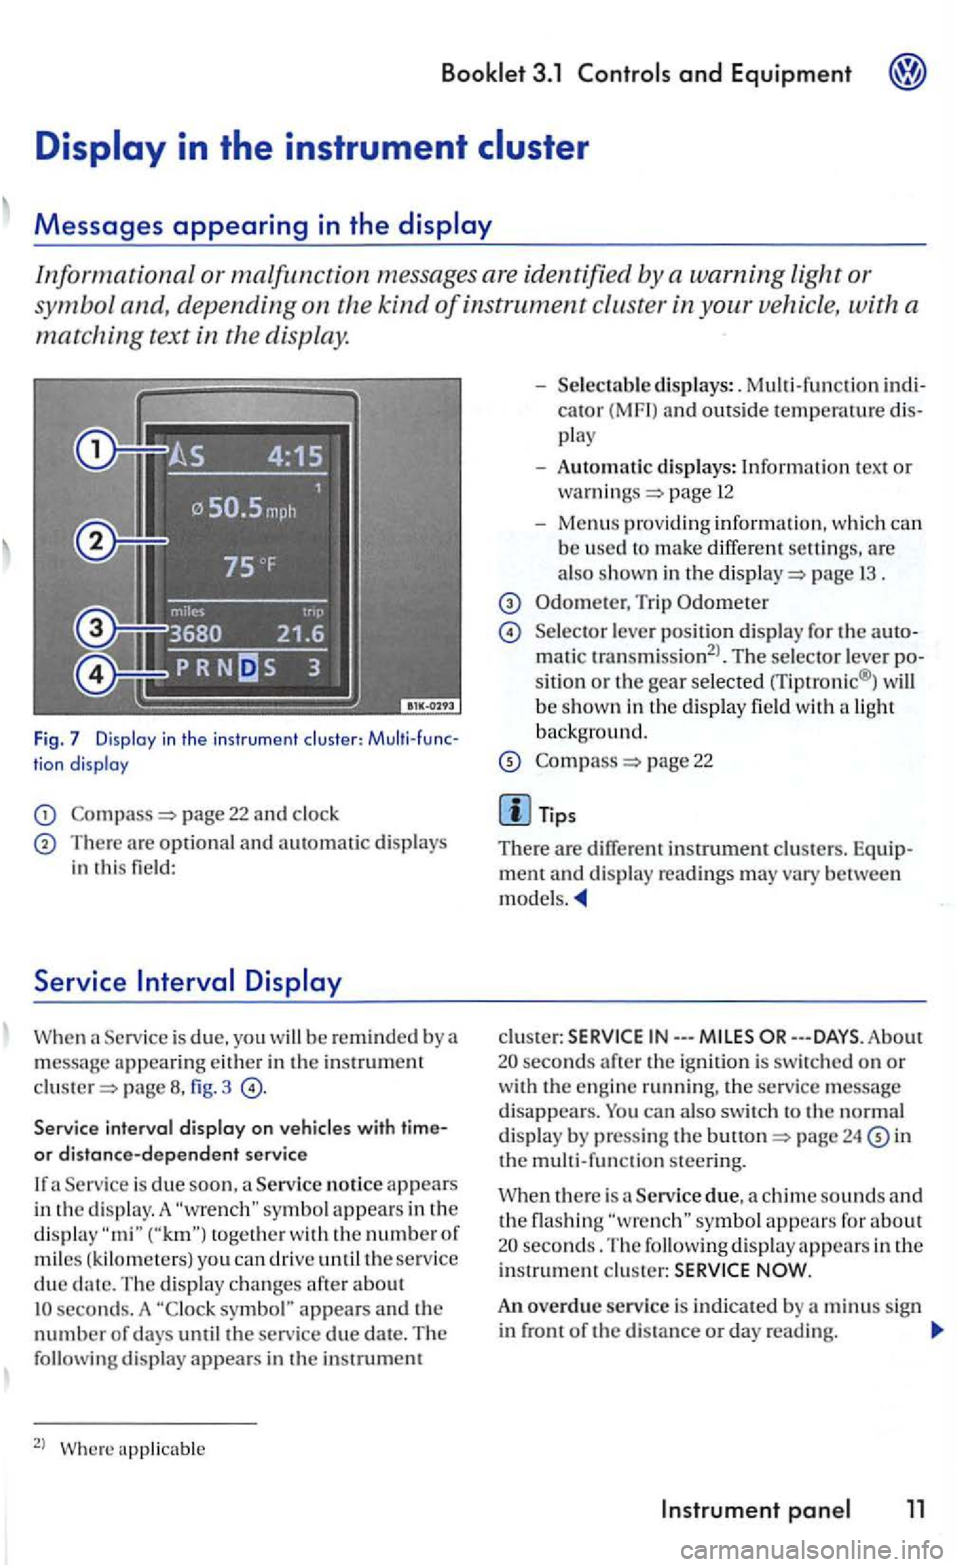
Fig. 7 Display in the in str umen t clu ste r: tion display
page 22 and clock
There are optional and automatic displays in this field:
Serv ice
page fig. 3
Service interval display on
Service is due soon , a Service notice appears
i n the d is play. A togeth e r with the numbe r of miles ( kilom ete rs) you can driv e until the service due seconds. A symbol" appears and the number of days until the service due date. The following display appear s in the instrumem
2
l
cator (MF I) and outside temperawre play
- Automatic displays: Information tex t or page 12
-Menus providing informatio n, w hich can b e used to make differ ent are also shown in the page 1 3 .
Trip Odometer
Selecto r lever positio n di splay for the matic transmission2
l. The selector lever sitio n or the gear selected rriptronic® ) will
b e show n in th e display field wit h a light backg round.
page 22
m ent and disp lay rea dings may vary between models.
clus te r: IN---
24 in the m ult i-function steering.
Service due, a chime sounds and the flashing seconds. The following display appears in the i nstrument c lu ster:
An overdue service is indicated by a m inus sign in front of the di sta nce or day reading.
Instrument 11