2006 VOLKSWAGEN GOLF MK5 engine
[x] Cancel search: enginePage 9 of 444

Coolant 3.2: 47
Level 3.2:
49
Loss 3.2:49
Coolant leve l
Warning light 3.2: 48
Coolant temperature
Gauge 3.1:9 Safe ty instru ctions 3.2:48
Trail er towing 3.2: 48
Warning light 3.2 : 4 8
C
ras h recorders 3.2: 34
C rui
se control system
Indicator light 3.1:96
without display 3.1: 96
C up ho ld ers 3.
1: 67
in the front center consol e 3 .1: 67
the rear center console 3.1:67
Curbs 3.3:4
Curb weight 3.3 : 6
C
urrent f u el con sumptio n 3.1:21
C
urtain airbags 2.1:
Custome r Center 2.1: 28
D
Danger of fittin g a child seat on the front pas
senger seat 2.1:
Daytime dri ving lights 3.1:4 3
Daytime Hunning Light s 3.1: 43
D
eactiv ating the switchabl e lockin g
2.1: 67
Depress brake ped al 3.1: 6
Determining correct load l im it 3.2: 71
Diff
erential lock 6
Digit al cl
ock 3.1:8
Dimensio n s 3.3: 4, 7
Disp la y 3.1: 1 3
D is t
ance b etween driver and steerin g
w h
eel 2.1:4
D is ta n
ce travele d 3.1: 21
Door re lease h andle 3.1: 3
Doors 3.1:33
close 3.1: 33 closing 3.1: Warning li gh t 3.1: 33
Drive economically 3.2: 19
6 Key words
Drive economic all y and he lp protect the
environment 3.2: 19
Driv er See Seating position
Drivin g outside of the
Driving safety 2.1: 3
Driving lime 3
.1:
E
EDL 3.2:6
See also Electronic Differ ential Lock
Warning light 3.2:5
Electrical socket 3.1: 68
E
lectronic diff ere nti al lock 3.2: 6
Electroni c Differential Lock
Warning light 3.2: 5
Ele c
tronic immobilizer 3.1:85
E l
ectronic Co ntrol 3.2: 9
E l
ectronic Stabilization
How it works 3.2: 6
Eme rge ncy
L
ockin g driver's door 3.2: 88
Opening l eve r for the rear lid 3.2: 89
Unl ocki ng
driver's door 3.2: 88
Em ergency closing 3.2: 88
E m er
gency nasher 3.1: 45
E m
ergency locki ng all doors 3.2: 88
Emergency ope nin g 3.2: 88 Doors 3.1: 34
Emer gency
unlocking of rear lid 3.2: 89
E ng
ine Break-in 3.2: 12
Eng in e compartment
Cleaning 3.2 :27 you should take when work
i
ng in sid e the e ngin e
compartment 3.2:39 Work ing in the engine
compartment 3.2: 39
E n g in e
compartment la yout 3.3 : 5
E n
gine compartment overview 3.3: 5
Page 10 of 444
Engine coo lant 3.2:47
Add i
tive s 3.2:47
Ca n I
add plain water to the en gi ne coolant ? 3.2 :
Engine data 3.3: 5
Eng ine
hood 3.2: 41
How do unlock the engin e hood? 3.2: 41 Warn ing light 3.2: 41
Engin e management 3.2: 9
E ngin e oi l 3.2: 42
Adding 3.2: 45
Add itives 3.2: 46
Check ing leve l 3.2: 44
Consumption 3.2: 4 3
Dip s
tick 3.2: 44
How do know how much oil m y e ngine is
consuming ? 3.2: 43 c h an ge 3.2: 46
S p ecifica tion s 3.2: 42
Specificatio ns gaso line engine 3.2: 42
Wha t kind of e ngine oil should put in my ve hicle? 3.2: 42
When should check the e n gi ne oi l
l eve l? 3.2 : 4 3
Where is th e oil dip stick 3.2:
44
E ngin e oil pr essure
Warning light 3.2: 45
Eng ine oil
senso r
Warning light 3.2:
44
Environme nt
Avoidi ng pollution 3.2:23,36
C le
aning th e e ngin e compartment 3.2 : 28 Drive economicall y 3.2:
Warni ng ligh t 3.2: 9 also Elec tronic Co ntrol
3.2:6
B utt on 3.2 : 7
Warning
lig ht 3.2: 7
Even t Data Hecorder 3.2:
34
Examples of improper seating
position s 2.1:
Infant seats 2.1: 59
Sa fe ty belt ex te
nder 2.1: 24
Sa fet y belts 2.1:
F loor mat s 2.1: 9
Fog light s 3.1
:43
F r
ont ai rbags
De
scription 2.1:32
Front air b ag sys tem
2.1: 32
A irb ag deploym ent zone 2.1:38
Th e bas ics 2.1: 32
Fronta l
collisions and the laws of
physics
1 5
Fr
ont center armres t 3.1: 65
Front seats 3.1: 58
F u el
fille r cap
Warni ng light 3.2:35
Fuel ga uge
Displa y 3.1:
F ue l level 3.1:
Fuse box
th e in strume nt panel, left 3.2: 92 the instrument panel, rig ht 3.2: 92
Fu ses 3.2:
Page 15 of 444
Safety instructions
Belt pretensioners 2.1: 27
Child restraint on the front seat 2.1:
Child seats 2.1 : 56
Coolant tempera ture 3.2:48
Loading
the lu ggage compartment 2.1:
seating position for passengers in
r
ear seat s 2.1: 6 seating position for
driver 2.1: 4
seating position for the front
passenger 2.1: 5
Safety belt extender 2.1: 23
Sa fet y
belts 2.1: 17 S id e airbag s 2.1: 48
Side Curtain ProtectionTM airbags 2.1: 52
Screw-on decorati ve covers 3.2: 58
Seat adjustment 3.1: 55, 58
Seat heating
Front 3.1:
59
Seating ca pacity 2.1: 13
Sea ting
position
Di s
tance between driver and ste erin g
w
hee l 2.1:4 Dr iver 2.1: 4
Fron t passen ger 2.1: 5 Improper seatin g position s 2.1: 8
Speed rating le tter code 3.2: 74
Speed warning 3.1: 21
Starting th e engine W ith the ig nition key 3.1:85
S tartin g
with jumper cables 3.2: 99
Stee rin g 3.1: 25
S
teering lock 3.1: 84
S te ering
wheel
Di s
tance to the driver 2.1: 4
Steerin g wheel height adjustment 3.1: 25
S
teps for determining co rrect load limit 3.2: 71
Sticker on th e left door jamb 3.3 : 3
Stopping the en gine 3.1:8 6
Sto rage
area
Roof 3.1:65
S torage
compartment 3.1: 64
additional sto rage 3.1: 66
Front center armrest 3.1: 65
S torage for
the vehicle literature 3.1: 64
Sunroof 3.1: 41
Sunshade
power roof 3.1:41
Sun viso r 3.1:49
Sw itch
able loc king feature
Activatin g 2.1: 65
D
eacti va tin g 2.1: 67
Sw itches Em ergency flasher 3.1: 45
Light swit ches 3.1: 43 outside mirrors 3.1: 53 ro of 3.1:41 windows 3.1: 38
Sw itching off the engin e
W ith the ignit ion key 3.1: 86
Sw itch
lig htin g 3.1: 3
T
Tachometer 3.1: 9
Ta
ilga te 3.1:35
Page 17 of 444
Booklet
v
Vehicle Lifting 3.2:
Location 3.2:
Vehicle Weights 3.3: 6
Ventil atio n slit s 2.1:
Volk s wagen Servic e Repair Manuals 3.2 :
w
Warn ing light
3.2: 5
Brake
pads worn 3.2: 2
Brake system 3.2: 2
Bulb failure 3.2:
93
3.2:5
Eng ine hood 3.2:41
Engine oil pressure 3.2: 45
E n
gin e oil se nsor 3.2:44 3.2:9
3.2:7 Exhaust gas syste m 3.2:
Fuel fille r cap 3.2 : 3 5
Gen erat or 3.2: 56 MIL
steering 3.2: 8
Safe ty belts 2.1: 14
mode ls) 3.2 : 62
Wind shi eld washer fluid 3.2 :
Warning light (Ca nada models)
Tire pressure m onitorin g di spla y 3.2: 65
14 Key words
Warn ing light s 3.1: 4
Emergency
flasher 3.1: 45
I n strume nt clus te r 3.1: 4
Washi ng by hand 3.2:22
Wash in g th e ve hicle 3.2: 22
Washin g with power cleaners 3.2: 23
Waxing How often s
hould I wax my car? 3.2: 24
Wear indicator 3.2:
72
Weights 3.3: 3.
What does it mean when I feel a slight vi bra-tion o n the brake pedal ? 3.2: 4
W h
at happens if yo u do not wear your safe ty
b elt ? 2.1: 16
happe n s if you wear yo ur safe ty belt too
l oose?
2.1: 21
happe n s to occupants not wearin g
safe ty belt s? 2.1:
if I purchase poor quality fuel? 3.2: 37
is the correct brake fluid leve l?. 3.2: 53
What is the r ight way to break-in my
ve hicl
e? 3.2: 12
kind of brake fluid should I u se? 3.2: 54
What kind of engine oil should 1 put in my
ve hicle ? 3.2: 42
What should I d o a fter changing a
w heel? 3.2: 69, 87
should I do after re pla cing
wheels? 3.2:
should I do if! want t o add an acces sory
t o my vehic le? 3.2: 31
sh o uld I do if I want to modify m y
ve hicle? 3.2: 32
should I do if I want to re p air my
ve hicle? 3.2: 32
What sh o uld I
do if the brake wa rnin g light
comes on? 3.2: 2, 53
What wou ld
happen if I put leaded gaso line
i n m y car? 3.2: 37
W h
at you must do after reconnect th e battery 3.2: 55
Page 28 of 444
Service
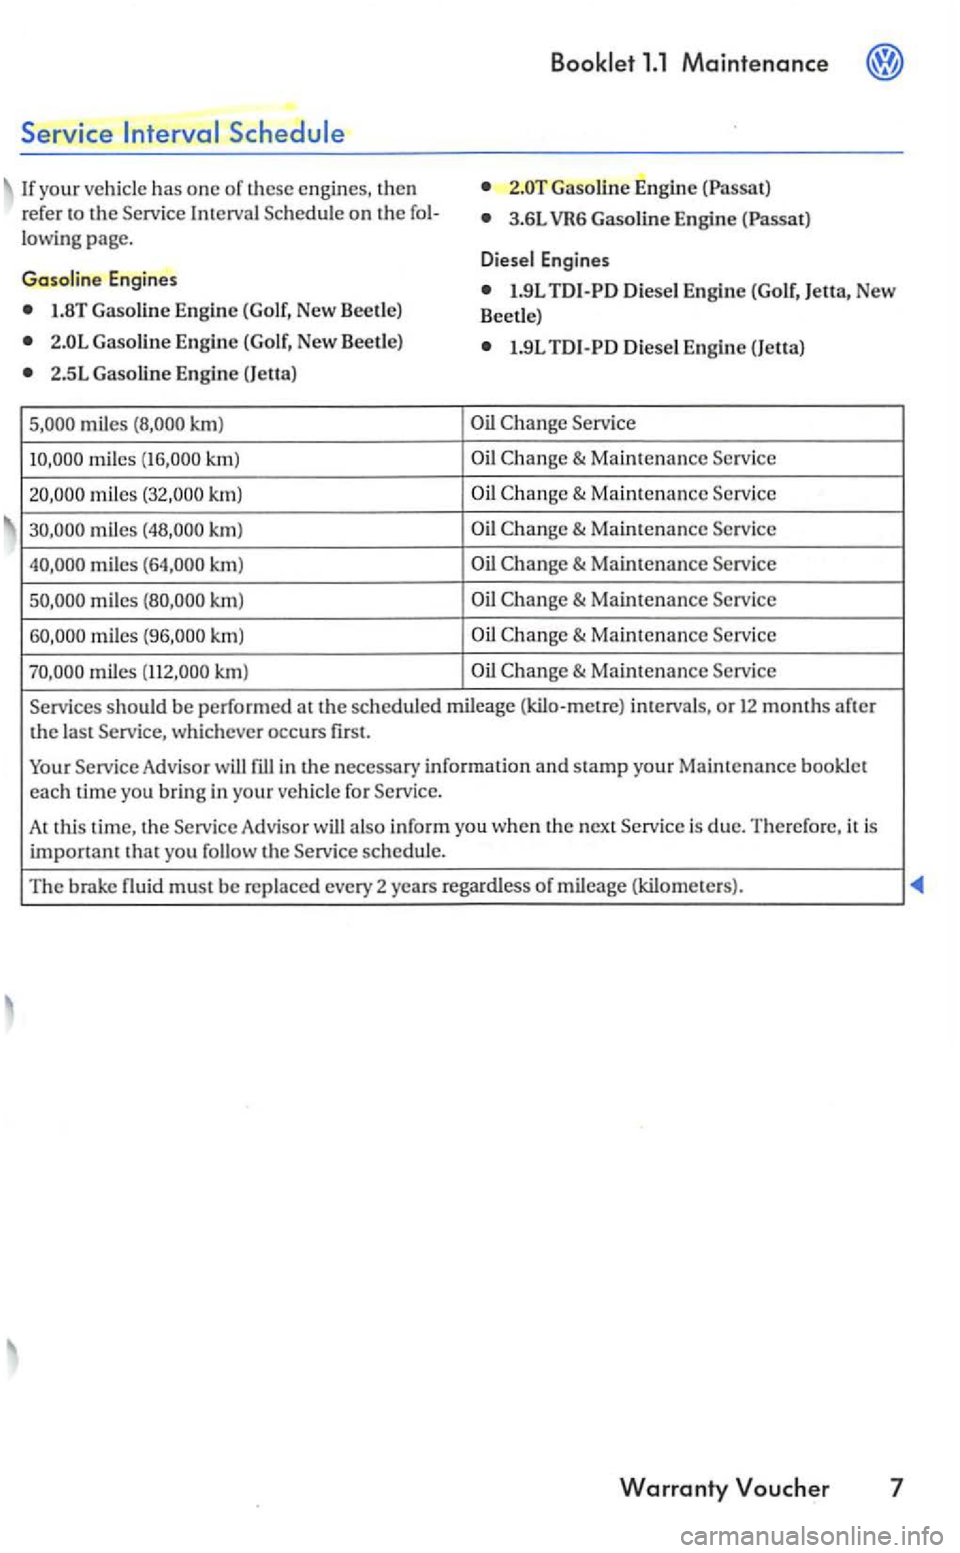
If yo ur vehicle has o ne of Interva l
Gas olin e Engin e (Golf, Ne w Beetle)
km)
mil es
miles
km )
km)
mil es km)
miles km)
miles
1.1 Mai ntenance
Gaso line Engin e (Passat)
3.6 L VR6 Gaso line E ngi ne
D iesel Engines
1.9L TD I- PD Diese l Engine (G olf, )etta, New
Beetl e)
Services sh ould be performed at the sc heduled mileage (kilo-metre) intervals, or 12 months after the last
Advisor will also in for m yo u w hen th e next is due. Therefore, it is important that you follow th e sch ed ule.
The brake fluid must be replaced every 2 years regardless of mileage (kilometers).
Warranty Vou ch er 7
Page 29 of 444

out the necessary information and stamp your Maintenance book to confirm that t11e necessary
services have been performed.
Automobile technology changes
na nce informa tion for your Volk swagen model.
D eli very Ins
pectio n
It is possible that th is in formation may differ
from the c heck points list ed in this bookle t. Your Volkswag en Service Advisor can answer any questions you may have.
If you arc not sure when t o bring you r ca r in
for service, ask your Volkswagen v ice Advisor.
Bef ore your is delivered to yo u, it is in spected according to factory guidelines. The Delivery Inspection was performe d on:
Next
Today's date whic h eve r first and Volkswagen Dealer stamp
Service at
Engine: C hange oil and oil filter
Next Water sep ara tor: D rain water (TDI en g ine onl y)
Today's
date and Volkswagen Dea ler stamp
Page 30 of 444

miles
Engine: Change oil and oil filter
e ng in e only)
Windshie ld wa sher: Check flu id lev el, add if
nece ssary
Automatic shift lock : Ch eck operation cluding park/ neutral position switch
Brak e sys tem: Check for damage /leaks, brake
Wheels: Ro ta te from front to rear
Next Service:
Date: ........................
Miles/km: ...................
whichever occurs
regardless of mil eage (kilometr es)
start er and aux iliary battery : check (wh ere applicable)
Tires: Check trea d depth, adjust pressure
if necessary.
cable).
Today's
Engi ne: Change oil and oil
Next Service :
Date: ............ ............
Miles/km: ...................
w hic hever occurs first Today
's date and Volks wagen Dealer stamp
Warranty Vouch er 9
Page 31 of 444
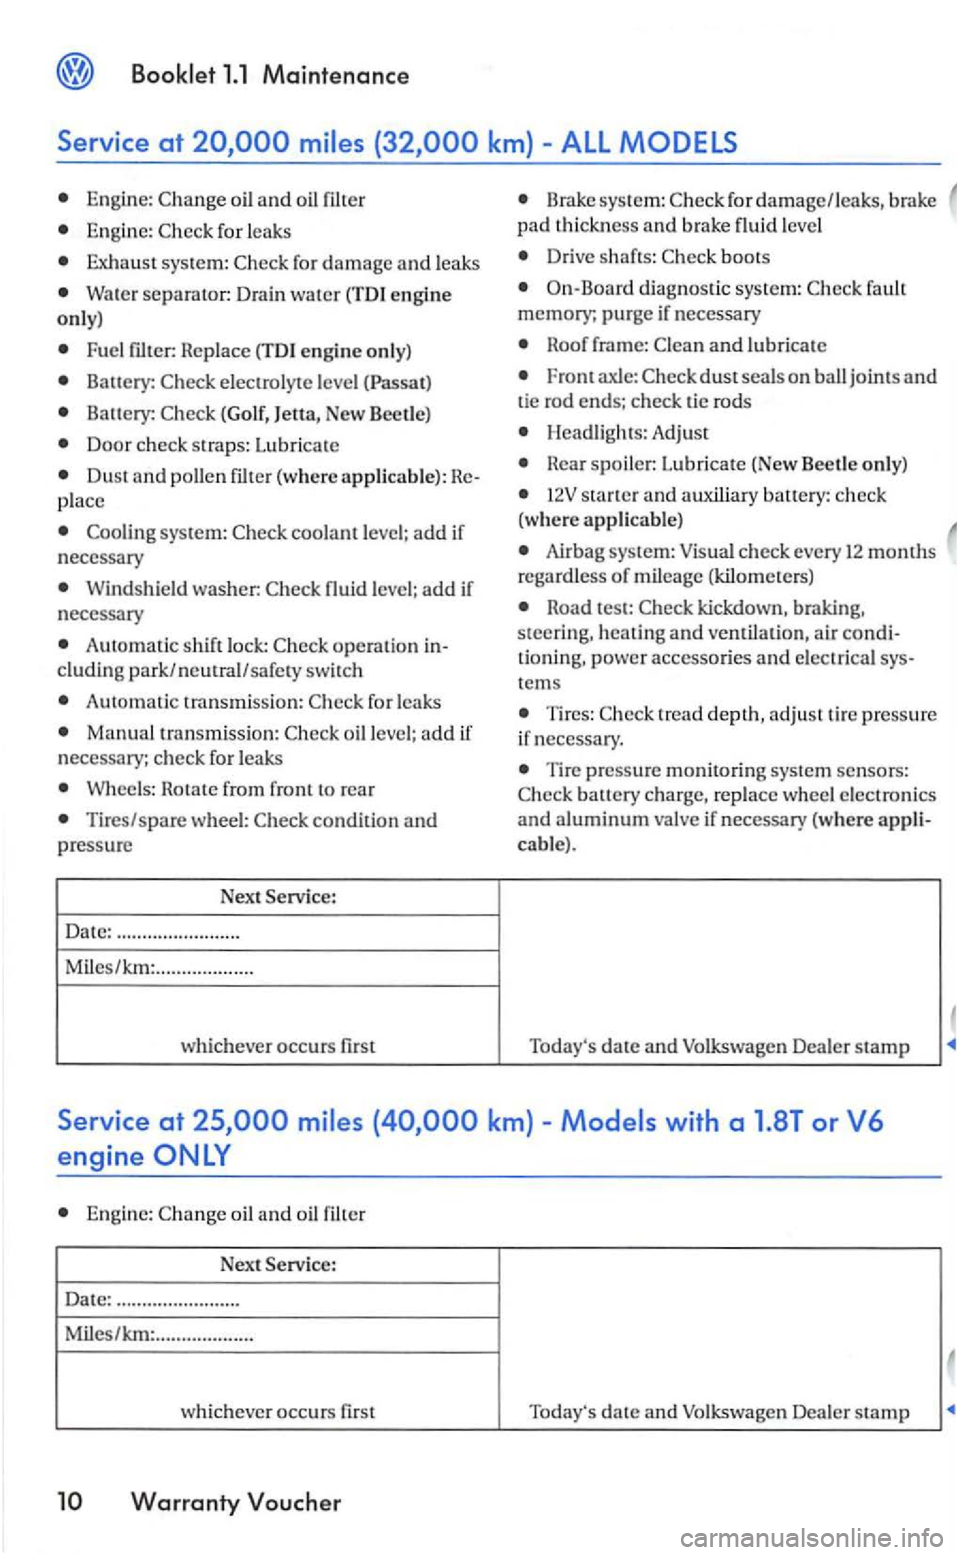
1.1 Maintenance
Service at
Engine: oil and
Eng ine: for leaks
sys tem: for damage and leaks
Wate r separator: Drain water (TDI engin e only)
Fuel Replace (TDI en gin e o nly)
Battery: electrolyte level
Battery: (Golf, )etta, Ne w
Door ch eck str aps: Lubr ica te
Dus t a nd place
Wind shi eld washer: fluid level; add if
nece ssary
Automatic shift lock: cluding park /neutral/safe ty swi tc h
Automatic transmi ssion: for leaks
Manua l transmission:
W hee ls: Rotate from front to rea r
Tires/spa re wheel: condition and
pressur e
Next Serv ice:
Date: ........... .. ....
.......
Miles/km: ...................
wh ic h ever
occurs first
Brake syste m : for damage/leaks, brake pad thickness and brake fluid level
Drive shafts:
diagnos tic sys tem: fault memory; pur ge if necessary
Roof frame:
Front axle: joint s and tie rod ends; check lie rods
lleadligh ts: Adjust
Rear spoiler: Lubricate (New Beet le o nly)
sta rter a nd auxiliary battery: check
(where applicable)
Airbag system: regardles s of mileage (kilometer s)
Road test:
t ioning, power accessories and electrica l sys-
Tires : tread dep th , adj ust tire pressure
if necessary .
Tire pressu re mon ito rin g system sensors: battery ch arge, replace whee l e lectronics and aluminum valve if necessary (where
Engine: and
Dea ler stamp