Page 61 of 455
61
22p005b
Seat belts with an adjustable shoulder
anchor—
Adjust the shoulder anchor position to
your size.
To raise: Slide the anchor up.
To lower: Push in the lock release button
and slide the anchor down.
After adjustment, make sure the anchor is
locked in position.
CAUTION
Always make sure the shoulder belt
is positioned across the center of
your shoulder. The belt should be
kept away from your neck, but not
falling off your shoulder. Failure to
do so could reduce the amount of
protection in an accident and cause
death or serious injuries in a colli-
sion.
22p004a
To release the belt, press the buckle
release button and allow the belt to
retract.
If the belt does not retract smoothly, pull
it out and check for kinks or twists. Then
make sure it remains untwisted as it re-
tracts.
Page 63 of 455

63
�Do not use the seat belt extender
when installing a child restraint
system on the front or rear passen-
ger seat. If installing a child re-
straint system with the seat belt
extender connected to the seat belt,
the seat belt will not securely hold
the child restraint system, which
could cause death or serious injury
to the child or other passengers in
the event of collision.
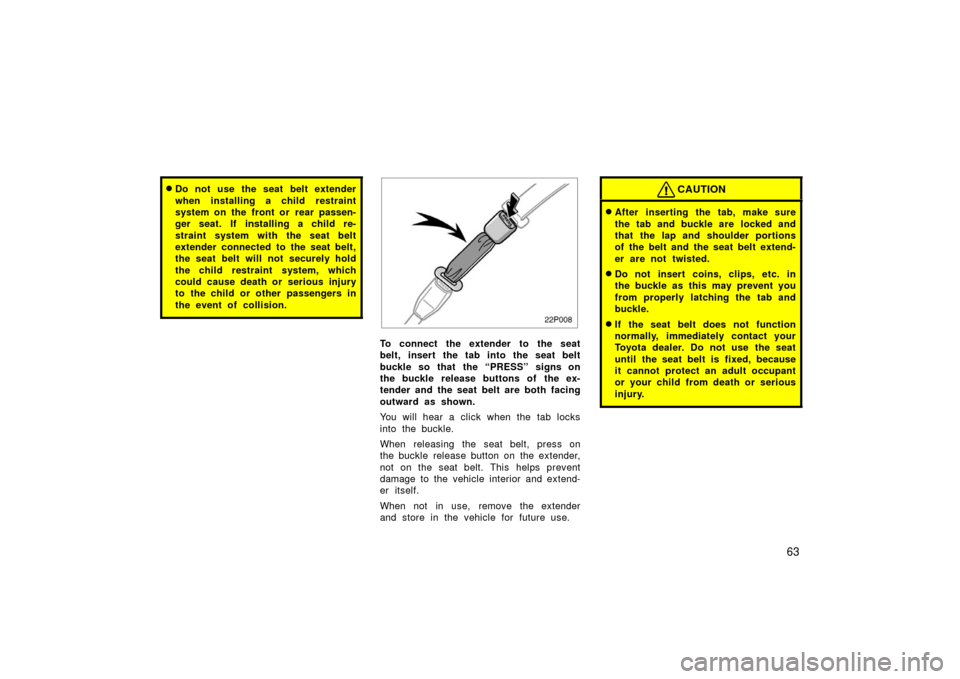
22p008
To connect the extender to the seat
belt, insert the tab into the seat belt
buckle so that the “PRESS” signs on
the buckle release buttons of the ex-
tender and the seat belt are both facing
outward as shown.
You will hear a click when the tab locks
into the buckle.
When releasing the seat belt, press on
the buckle release button on the extender,
not on the seat belt. This helps prevent
damage to the vehicle interior and extend-
er itself.
When not in use, remove the extender
and store in the vehicle for future use.
CAUTION
�After inserting the tab, make sure
the tab and buckle are locked and
that the lap and shoulder portions
of the belt and the seat belt extend-
er are not twisted.
�Do not insert coins, clips, etc. in
the buckle as this may prevent you
from properly latching the tab and
buckle.
�If the seat belt does not function
normally, immediately contact your
Toyota dealer. Do not use the seat
until the seat belt is fixed, because
it cannot protect an adult occupant
or your child from death or serious
injury.
Page 91 of 455
91
22p039c
3. While pressing the infant seat firmlyagainst the seat cushion and seatback,
let the shoulder belt retract as far as
it will go to hold the infant seat secure-
ly.
22p040c
CAUTION
Push and pull the child restraint sys-
tem in different directions to be sure
it is secure. Follow all the installation
instructions provided by its manufac-
turer.
22p041c
4. To remove the infant seat, press the buckle release button and allow the
belt to retract completely. The belt will
move freely again and be ready to
work for an adult or older child passen-
ger.
Page 95 of 455
95
22p049c
CAUTION
Push and pull the child restraint sys-
tem in different directions to be sure
it is secure. Follow all the installation
instructions provided by its manufac-
turer.
22p050b
4. To remove the convertible seat, pressthe buckle release button and allow the
belt to retract completely. The belt will
move freely again and be ready to
work for an adult or older child passen-
ger.
22p051c
(C) BOOSTER SEAT INSTALLATION
A booster seat must be used in for-
ward�facing position only.
Page 97 of 455

97
CAUTION
�Always make sure the shoulder belt
is positioned across the center of
child’s shoulder. The belt should be
kept away from child’s neck, but
not falling off child’s shoulder.
Otherwise, the child may be killed
or seriously injured in case of sud-
den braking or a collision.
�Both high�positioned lap belts and
loose�fitting belts could cause
death or serious injuries due to
sliding under the lap belt during a
collision or other unintended event.
Keep the lap belt positioned as low
on a child’s hips as possible.
�For child’s safety, do not place the
shoulder belt under child’s arm.
�After inserting the tab, make sure
the tab and buckle are locked and
that the lap and shoulder portions
of the belt are not twisted.
�Do not insert coins, clips, etc. in
the buckle as this may prevent you
from properly latching the tab and
buckle.
�If the seat belt does not function
normally, it cannot protect your
child from death or serious injury.
Contact your Toyota dealer immedi-
ately. Do not install the child re-
straint system on the seat until the
seat belt is fixed.
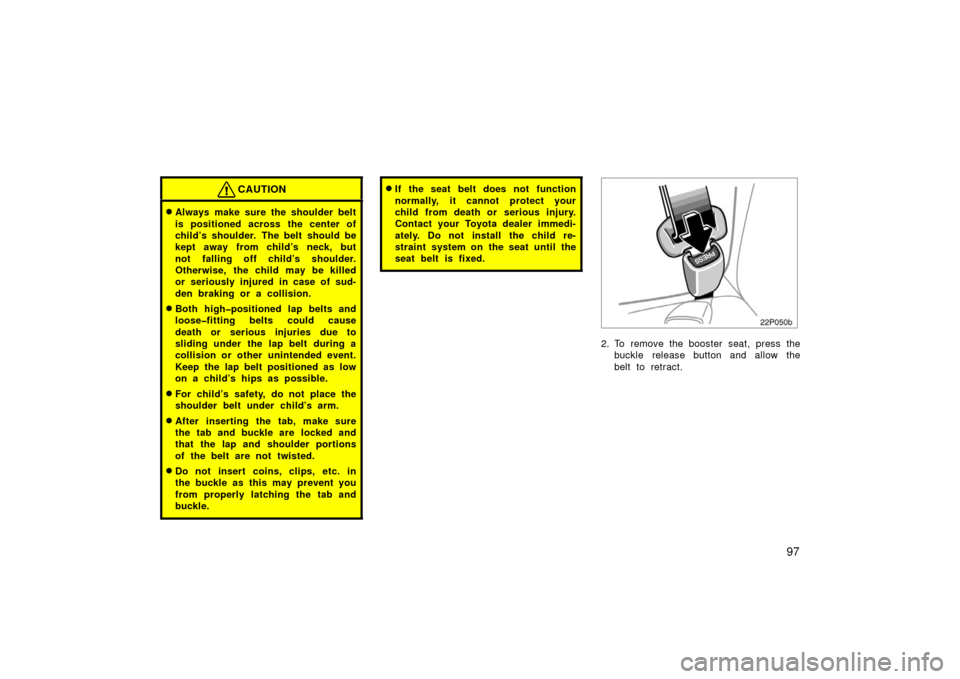
22p050b
2. To remove the booster seat, press the buckle release button and allow the
belt to retract.
Page 118 of 455
11 8
For instructions on adding washer fluid,
see “Adding washer fluid” on page 418.
NOTICE
Do not operate the rear wiper if the
rear window is dry. It may scratch the
glass.
24p116
Ty p e 1
23p009c
Ty p e 2
To defog or defrost the rear window,
push the “CLIMATE” button to display
air conditioner screen and touch the
switch.
Operating the steering switch can also de-
fog or defrost the rear window. (See “Cli-
mate remote control” on page 297.)
The hybrid system must be in the “IG−
ON” mode.
The thin heater wires on the inside of the
rear window will quickly clear the surface.
An indicator will come on to indicate the
defogger is operating.
Touch the switch once again to turn the
defogger off.
The system will automatically shut off af-
ter the defogger has operated about 15
minutes.
Rear window and outside rear
view mirror defoggers
Page 121 of 455
121
OPERATION OF INSTRUMENTS AND
CONTROLS
Gauges, Meters and Service reminder indicators
Fuel gauge122
. . . . . . . . . . . . . . . . . . . . . . . . . . . . . . . . . . . . .\
. . . . . . . . . . .
Odometer and two trip meterss 123
. . . . . . . . . . . . . . . . . . . . . . . . . . . . . .
Km/h or MPH button 124
. . . . . . . . . . . . . . . . . . . . . . . . . . . . . . . . . . . . \
. . . .
Service reminder indicators and warning buzzers 125
. . . . . . . . . . . . . .
SECTION 2– 5
Page 124 of 455
124
3. Trip meter reset button—Resets thetwo trip meters to zero, and also
change the meter display.
To change the meter display, quickly
push and release the button. The meter
display changes in the order from the
odometer to trip meter A to trip meter
B, then back to the odometer each
time you push.
To reset the trip meter A to zero, dis-
play the meter A reading, then push
and hold the button until the meter is
set to zero. The same process can be
applied for resetting the trip meter B.
Km/h or MPH button
24p115
You can switch the display between
km/h and MPH by pressing the button.