2006 SUBARU IMPREZA phone
[x] Cancel search: phonePage 10 of 365
7
CONTINUED
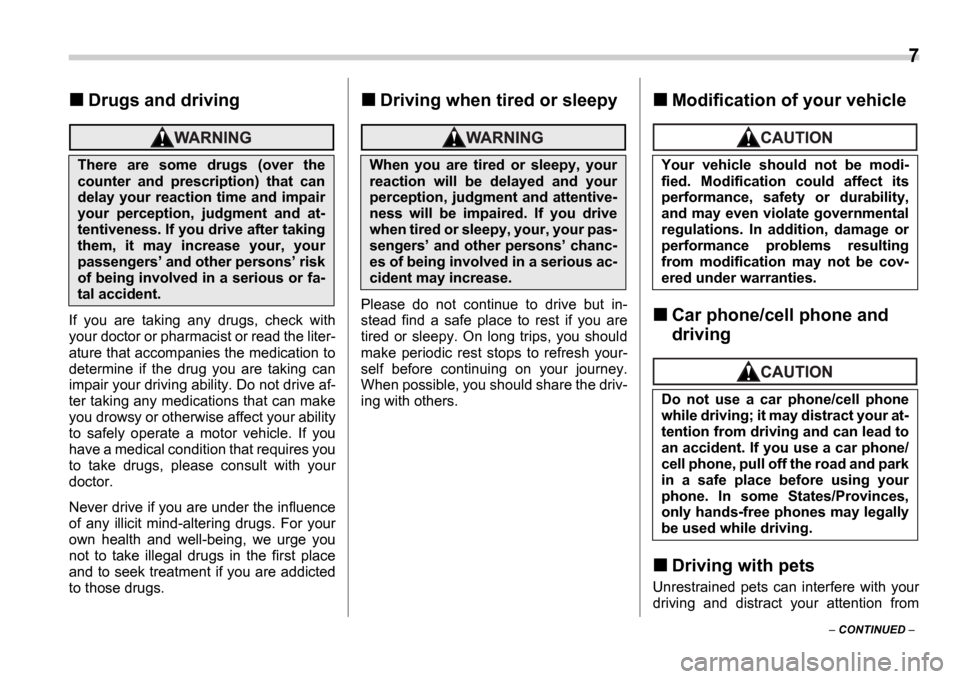
Drugs and driving
If you are taking any drugs, check with
your doctor or pharmacist or read the liter-
ature that accompanies the medication to
determine if the drug you are taking can
impair your driving ability. Do not drive af-
ter taking any medications that can make
you drowsy or otherwise affect your ability
to safely operate a motor vehicle. If you
have a medical condition that requires you
to take drugs, please consult with your
doctor.
Never drive if you are under the influence
of any illicit mind-altering drugs. For your
own health and well-being, we urge you
not to take illegal drugs in the first place
and to seek treatment if you are addicted
to those drugs.
Driving when tired or sleepy
Please do not continue to drive but in-
stead find a safe place to rest if you are
tired or sleepy. On long trips, you should
make periodic rest stops to refresh your-
self before continuing on your journey.
When possible, you should share the driv-
ing with others.
Modification of your vehicle
Car phone/cell phone and
driving
Driving with pets
Unrestrained pets can interfere with your
driving and distract your attention from
There are some drugs (over the
counter and prescription) that can
delay your reaction time and impair
your perception, judgment and at-
tentiveness. If you drive after taking
them, it may increase your, your
passengers and other persons risk
of being involved in a serious or fa-
tal accident.When you are tired or sleepy, your
reaction will be delayed and your
perception, judgment and attentive-
ness will be impaired. If you drive
when tired or sleepy, your, your pas-
sengers and other persons chanc-
es of being involved in a serious ac-
cident may increase.Your vehicle should not be modi-
fied. Modification could affect its
performance, safety or durability,
and may even violate governmental
regulations. In addition, damage or
performance problems resulting
from modification may not be cov-
ered under warranties.
Do not use a car phone/cell phone
while driving; it may distract your at-
tention from driving and can lead to
an accident. If you use a car phone/
cell phone, pull off the road and park
in a safe place before using your
phone. In some States/Provinces,
only hands-free phones may legally
be used while driving.
Page 77 of 365
1-50 Seat, seatbelt and SRS airbags
might not necessarily require deployment
of driver s/driver s and front passenger s
SRS frontal airbag(s). If the vehicle strikes
an object, such as a telephone pole or
sign pole, or if it slides under a truck s load
bed, or if it sustains an oblique offset fron-
tal impact, the driver s/driver s and front
passenger s SRS frontal airbag(s) may
not deploy depending on the level of acci-
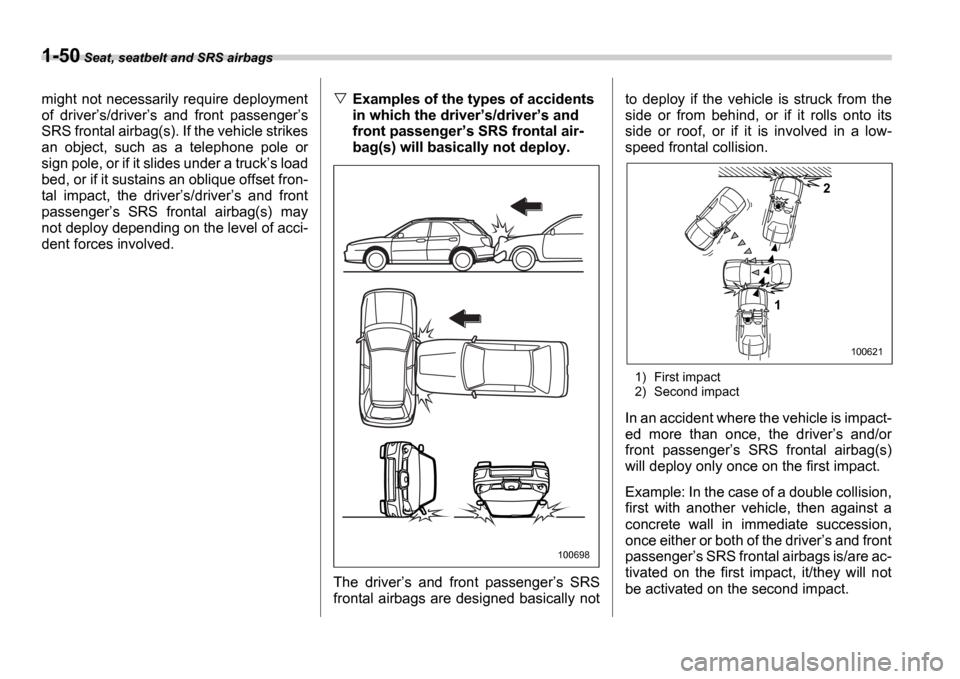
dent forces involved.Examples of the types of accidents
in which the driver s/driver s and
front passenger s SRS frontal air-
bag(s) will basically not deploy.
The driver s and front passenger s SRS
frontal airbags are designed basically not to deploy if the vehicle is struck from the
side or from behind, or if it rolls onto its
side or roof, or if it is involved in a low-
speed frontal collision.
1) First impact
2) Second impact
In an accident where the vehicle is impact-
ed more than once, the driver
s and/or
front passenger s SRS frontal airbag(s)
will deploy only once on the first impact.
Example: In the case of a double collision,
first with another vehicle, then against a
concrete wall in immediate succession,
once either or both of the driver s and front
passenger s SRS frontal airbags is/are ac-
tivated on the first impact, it/they will not
be activated on the second impact.
100698
2
1
100621
Page 82 of 365
Seat, seatbelt and SRS airbags 1-55
CONTINUED
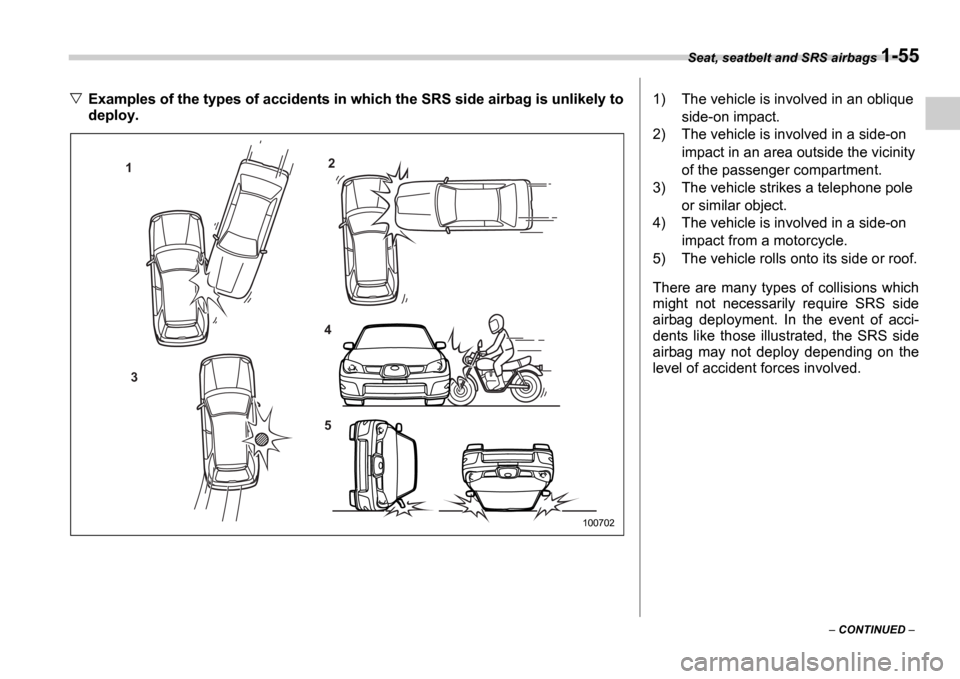
Examples of the types of accidents in which the SRS side airbag is unlikely to
deploy.
1 2
3 4 5
100702
1) The vehicle is involved in an oblique
side-on impact.
2) The vehicle is involved in a side-on
impact in an area outside the vicinity
of the passenger compartment.
3) The vehicle strikes a telephone pole or similar object.
4) The vehicle is involved in a side-on impact from a motorcycle.
5) The vehicle rolls onto its side or roof.
There are many types of collisions which
might not necessarily require SRS side
airbag deployment. In the event of acci-
dents like those illustrated, the SRS side
airbag may not deploy depending on the
level of accident forces involved.
Page 169 of 365
5-6 Audio
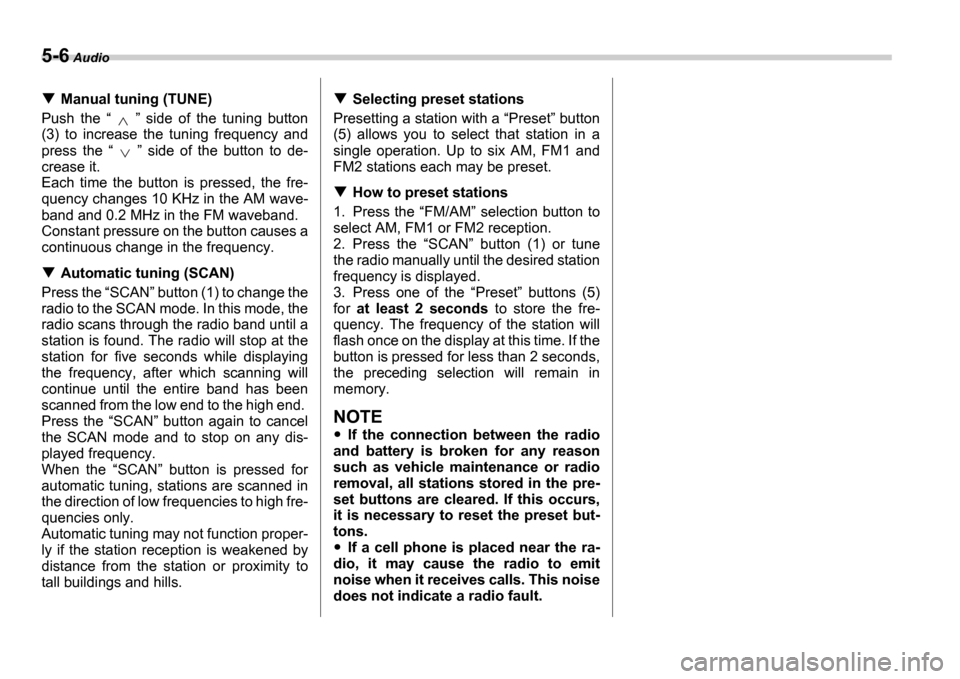
Manual tuning (TUNE)
Push the side of the tuning button
(3) to increase the tuning frequency and
press the side of the button to de-
crease it.
Each time the button is pressed, the fre-
quency changes 10 KHz in the AM wave-
band and 0.2 MHz in the FM waveband.
Constant pressure on the button causes a
continuous change in the frequency.
Automatic tuning (SCAN)
Press the SCAN button (1) to change the
radio to the SCAN mode. In this mode, the
radio scans through the radio band until a
station is found. The radio will stop at the
station for five seconds while displaying
the frequency, after which scanning will
continue until the entire band has been
scanned from the low end to the high end.
Press the SCAN button again to cancel
the SCAN mode and to stop on any dis-
played frequency.
When the SCAN button is pressed for
automatic tuning, stations are scanned in
the direction of low frequencies to high fre-
quencies only.
Automatic tuning may not function proper-
ly if the station reception is weakened by
distance from the station or proximity to
tall buildings and hills.
Selecting preset stations
Presetting a station with a Preset button
(5) allows you to select that station in a
single operation. Up to six AM, FM1 and
FM2 stations each may be preset.
How to preset stations
1. Press the FM/AM selection button to
select AM, FM1 or FM2 reception.
2. Press the SCAN button (1) or tune
the radio manually until the desired station
frequency is displayed.
3. Press one of the Preset buttons (5)
for at least 2 seconds to store the fre-
quency. The frequency of the station will
flash once on the display at this time. If the
button is pressed for less than 2 seconds,
the preceding selection will remain in
memory.
NOTE
If the connection between the radio
and battery is broken for any reason
such as vehicle maintenance or radio
removal, all stations stored in the pre-
set buttons are cleared. If this occurs,
it is necessary to reset the preset but-
tons.
If a cell phone is placed near the ra-
dio, it may cause the radio to emit
noise when it receives calls. This noise
does not indicate a radio fault.
Page 177 of 365
5-14 Audio
operate and stop automatically on the
next station.
Continue this operation until you find the
desired station.
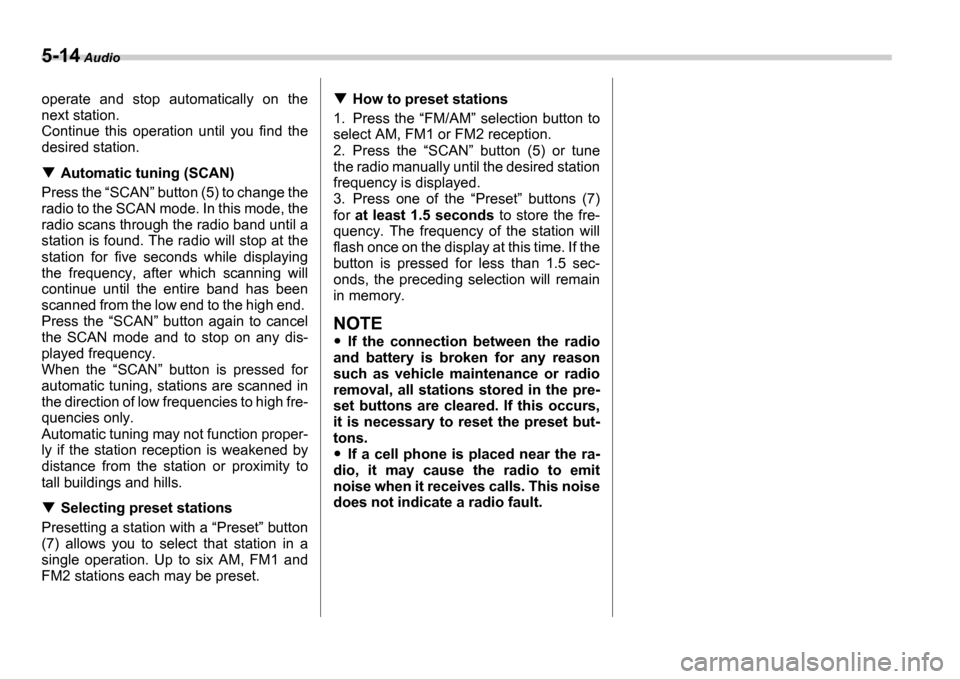
Automatic tuning (SCAN)
Press the SCAN button (5) to change the
radio to the SCAN mode. In this mode, the
radio scans through the radio band until a
station is found. The radio will stop at the
station for five seconds while displaying
the frequency, after which scanning will
continue until the entire band has been
scanned from the low end to the high end.
Press the SCAN button again to cancel
the SCAN mode and to stop on any dis-
played frequency.
When the SCAN button is pressed for
automatic tuning, stations are scanned in
the direction of low frequencies to high fre-
quencies only.
Automatic tuning may not function proper-
ly if the station reception is weakened by
distance from the station or proximity to
tall buildings and hills.
Selecting preset stations
Presetting a station with a Preset button
(7) allows you to select that station in a
single operation. Up to six AM, FM1 and
FM2 stations each may be preset.
How to preset stations
1. Press the FM/AM selection button to
select AM, FM1 or FM2 reception.
2. Press the SCAN button (5) or tune
the radio manually until the desired station
frequency is displayed.
3. Press one of the Preset buttons (7)
for at least 1.5 seconds to store the fre-
quency. The frequency of the station will
flash once on the display at this time. If the
button is pressed for less than 1.5 sec-
onds, the preceding selection will remain
in memory.
NOTE
If the connection between the radio
and battery is broken for any reason
such as vehicle maintenance or radio
removal, all stations stored in the pre-
set buttons are cleared. If this occurs,
it is necessary to reset the preset but-
tons.
If a cell phone is placed near the ra-
dio, it may cause the radio to emit
noise when it receives calls. This noise
does not indicate a radio fault.
Page 192 of 365
Interior equipment 6-7
CONTINUED
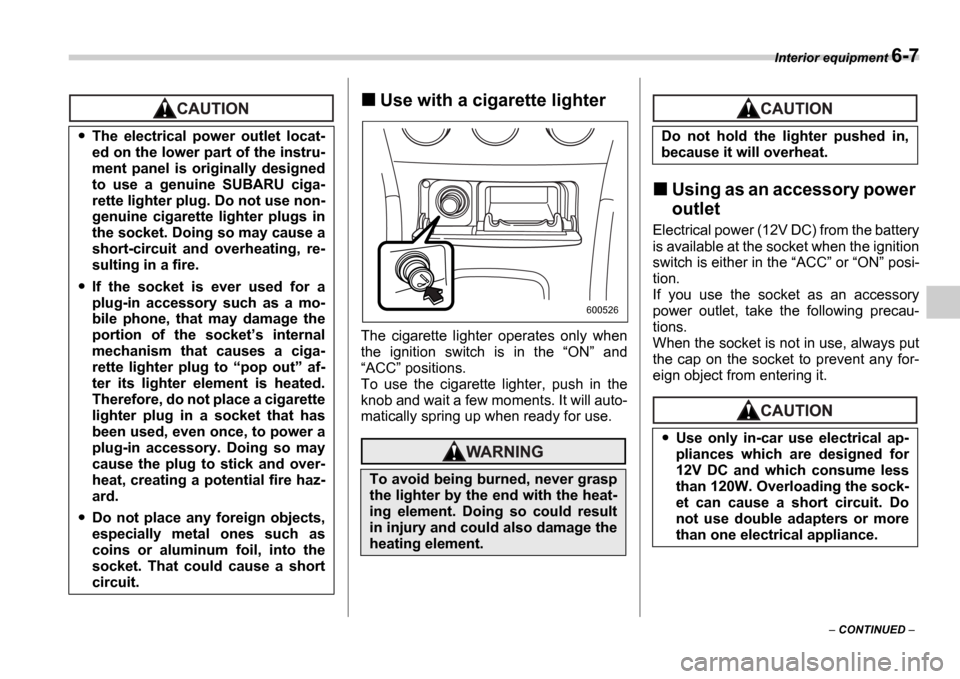
Use with a cigarette lighter
The cigarette lighter operates only when
the ignition switch is in the ON and
ACC positions.
To use the cigarette lighter, push in the
knob and wait a few moments. It will auto-
matically spring up when ready for use.
Using as an accessory power
outlet
Electrical power (12V DC) from the battery
is available at the socket when the ignition
switch is either in the ACC or ON posi-
tion.
If you use the socket as an accessory
power outlet, take the following precau-
tions.
When the socket is not in use, always put
the cap on the socket to prevent any for-
eign object from entering it.
The electrical power outlet locat-
ed on the lower part of the instru-
ment panel is originally designed
to use a genuine SUBARU ciga-
rette lighter plug. Do not use non-
genuine cigarette lighter plugs in
the socket. Doing so may cause a
short-circuit and overheating, re-
sulting in a fire.
If the socket is ever used for a
plug-in accessory such as a mo-
bile phone, that may damage the
portion of the socket s internal
mechanism that causes a ciga-
rette lighter plug to pop out af-
ter its lighter element is heated.
Therefore, do not place a cigarette
lighter plug in a socket that has
been used, even once, to power a
plug-in accessory. Doing so may
cause the plug to stick and over-
heat, creating a potential fire haz-
ard.
Do not place any foreign objects,
especially metal ones such as
coins or aluminum foil, into the
socket. That could cause a short
circuit.
To avoid being burned, never grasp
the lighter by the end with the heat-
ing element. Doing so could result
in injury and could also damage the
heating element.
600526
Do not hold the lighter pushed in,
because it will overheat.
Use only in-car use electrical ap-
pliances which are designed for
12V DC and which consume less
than 120W. Overloading the sock-
et can cause a short circuit. Do
not use double adapters or more
than one electrical appliance.
Page 233 of 365
8-6 Driving tips
Off road drivingAll AWD models except
OUTBACK SPORT and vehi-
cles with 17 inch tires
Your AWD vehicle is neither a convention-
al off-road vehicle nor an all terrain vehi-
cle. It is a passenger vehicle designed pri-
marily for on-road use. The AWD feature
gives it some limited off-road capabilities
in situations in which driving surfaces are
relatively level, obstruction-free and other-
wise similar to on-road driving conditions.
Operating it under other than those condi-
tions could subject the vehicle to exces-
sive stress which might result in damage
not eligible for repair under warranty. If
you do take your SUBARU off road, you
should review the common sense precau-
tions in the next section (applicable to the
OUTBACK SPORT) for general guidance.
But please keep in mind that your vehi-
cles off-road capabilities are more limited
than those of the OUTBACK SPORT.
Never attempt to drive through pools and
puddles, or roads flooded with water. Wa-
ter entering the engine air intake or the ex-
haust pipe or water splashing onto electri-
cal parts may damage your vehicle and
may cause it to stall.
OUTBACK SPORT
Your Subaru can be driven on ordinary roads or off-road. But please keep in mind
that an AWD SUBARU is a passenger ve-
hicle and is neither a conventional off-road
vehicle nor an all-terrain vehicle. If you do
take your Subaru off-road, certain com-
mon sense precautions such as the fol-
lowing should be taken:
Make certain that you and all of your
passengers are wearing seatbelts.
Carry some emergency equipment,
such as a towing rope or chain, a shovel,
wheel blocks, first aid kit and cell phone or
citizens band radio.
Drive carefully. Do not take unneces-
sary risks by driving in dangerous areas or
over rough terrain.
Slow down and employ extra caution at
all times. When driving off-road, you will
not have the benefit of marked traffic
lanes, banked curves, traffic signs and the
like.
Do not drive across steep slopes. In-
stead, drive either straight up or straight
down the slopes. A vehicle can much
more easily tip over sideways than it can
end over end. Avoid driving straight up or
down slopes that are too steep.
Avoid sharp turning maneuvers, espe-
cially at higher speeds.
Do not grip the inside or spokes of the
steering wheel. A bad bump could jerk the
wheel and injure your hands. Instead drive
Always maintain a safe driving
speed according to the road and
weather conditions in order to
avoid having an accident on a
sharp turn, during sudden braking
or under other similar conditions.
Always use the utmost care in
driving overconfidence because
you are driving an All-Wheel Drive
vehicle could easily lead to a seri-
ous accident.
Do not drive on rough roads or over
curbs in a vehicle that has 17-inch or
other ultra-low-profile tires. The
wheels and tires could be damaged
by shock forces, leading to abnor-
mal vibration or poor straight-line
tracking. Driving would then be
more difficult.
Page 358 of 365

Index 14-3
Oil and oil filter ................................ ............................. 11-8
Charge warning light .............................. .......................... 3-16
CHECK ENGINE warning light/Malfunction indicator lamp .............................................. ................................ 3-16
Checking Brake pedal free play ............................... .................. 11-27
Brake pedal reserve distance ........................... ......... 11-27
Clutch function ..................................... ...................... 11-28
Clutch pedal free play .............................. .................. 11-28
Engine oil level ................................... ......................... 11-8
Fluid level ................................. 11-20 , 11-24, 11-25, 11-26
Gear oil level ..................................... ... 11-18, 11-21, 11-22
Child restraint systems ............................... ...................... 1-23
Installation with A/ELR seatbelt ................... ................ 1-26
Lower and tether anchorages ........................ .............. 1-30
Child safety ........................................ .................................... 5
Locks ................................................ ........................... 2-18
Chime Key ................................................ ................................ 3-5
Seatbelt .......................................... .................... 1-11, 3-14
Cigarette lighter socket ............................ ........................... 6-6
Cleaning Aluminum wheels .................................... .................... 10-3
Interior .......................................... ............................... 10-5
Ventilator grille ................................. ............................ 4-11
Climate control system Automatic ......................................... .............................. 4-7
Manual ............................................ ............................... 4-3
Clock ............................................... ................................. 3-22
Clutch fluid ....................................... ............................... 11-26
Clutch pedal ....................................... ............................ 11-28
Coat hook .......................................... ................................. 6-9Coin tray ..........................................
................................... 6-4
Cooling system ....................................... ........................ 11-12
Corrosion protection ................................ ................ 8-10, 10-4
Cruise control ...................................... .............................. 7-27
Indicator light .................................... ............................ 3-20
Set indicator light ................................ ......................... 3-20
Cup holder ........................................ .................................. 6-5
D
Daytime running light system ......................... ................... 3-23
Differential gear oil Front ............................................. .............................. 11-21
Rear .............................................. ............................. 11-22
Dimensions .......................................... ............................. 12-2
Disarming the system ................................. ...................... 2-15
Disc brake pad wear warning indicators ................ ........... 7-22
Dome light ........................................ ........................ 6-2, 11-50
Door locks ......................................... .................................. 2-4
Door open warning light ........................... ......................... 3-19
Drive belts ........................................ ............................... 11-18
Driver s control center differential ....................... .............. 7-12
Drivers control center differential Auto indicator light ............................... ........................ 3-20
Indicator lights .................................... .......................... 3-21
Driving Car phone/cell phone ............................... ......................... 7
Drinking ........................................... .................................. 6
Drugs .............................................. .................................. 7
Foreign countries ................................... ........................ 8-4
Pets ............................................... .................................... 7
Snowy and icy roads ................................... ................... 8-9
Tips ............................................... .............. 7-10, 7-12, 8-5