2006 SUBARU IMPREZA window
[x] Cancel search: windowPage 102 of 365
Keys and doors 2-15
CONTINUED
automatically arm and doors will automat-
ically lock.
To arm the system using power
door locking switches
1. Close all windows.
2. Remove the key from the ignition
switch.
3. Open the doors and get out of the vehi-
cle.
4. Make sure that the engine hood is
locked.
5. Close the doors (and the rear gate on
the Wagon) but leave only the driver s
door or the front passenger s door open.
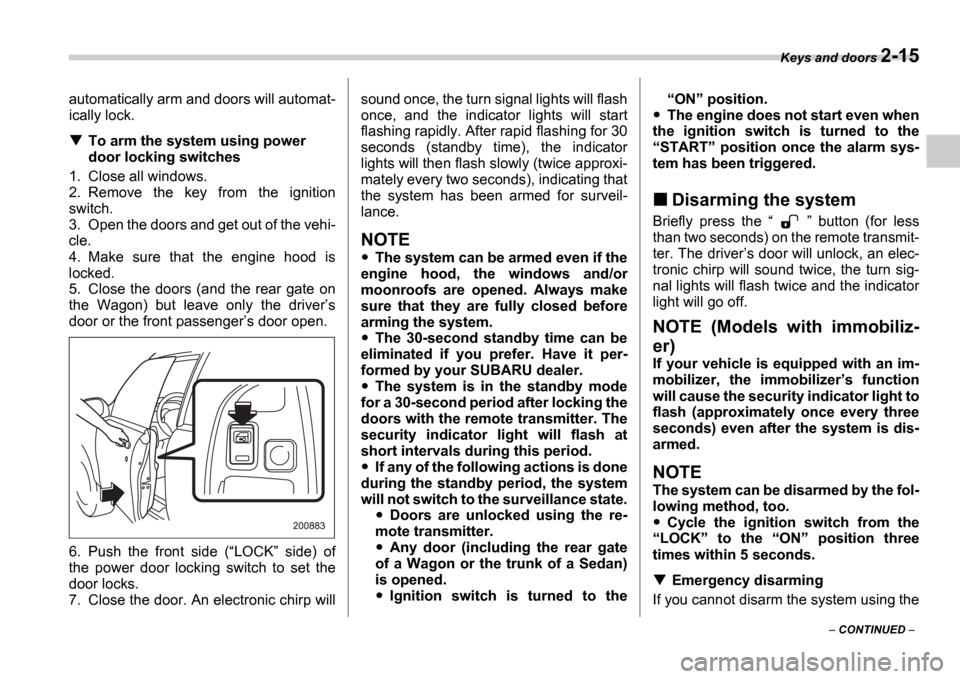
6. Push the front side ( LOCK side) of
the power door locking switch to set the
door locks.
7. Close the door. An electronic chirp will sound once, the turn signal lights will flash
once, and the indicator lights will start
flashing rapidly. After rapid flashing for 30
seconds (standby time), the indicator
lights will then flash slowly (twice approxi-
mately every two seconds), indicating that
the system has been armed for surveil-
lance.
NOTE
The system can be armed even if the
engine hood, the windows and/or
moonroofs are opened. Always make
sure that they are fully closed before
arming the system.
The 30-second standby time can be
eliminated if you prefer. Have it per-
formed by your SUBARU dealer.
The system is in the standby mode
for a 30-second period after locking the
doors with the remote transmitter. The
security indicator light will flash at
short intervals during this period.
If any of the following actions is done
during the standby period, the system
will not switch to the surveillance state.
Doors are unlocked using the re-
mote transmitter.
Any door (including the rear gate
of a Wagon or the trunk of a Sedan)
is opened.
Ignition switch is turned to the
ON position.
The engine does not start even when
the ignition switch is turned to the START position once the alarm sys-
tem has been triggered.
Disarming the system
Briefly press the button (for less
than two seconds) on the remote transmit-
ter. The driver s door will unlock, an elec-
tronic chirp will sound twice, the turn sig-
nal lights will flash twice and the indicator
light will go off.
NOTE (Models with immobiliz-
er)
If your vehicle is equipped with an im-
mobilizer, the immobilizer s function
will cause the security indicator light to
flash (approximately once every three
seconds) even after the system is dis-
armed.
NOTE
The system can be disarmed by the fol-
lowing method, too.
Cycle the ignition switch from the
LOCK to the ON position three
times within 5 seconds.
Emergency disarming
If you cannot disarm the system using the
Page 105 of 365
2-18 Keys and doors
Child safety locks
Each rear door has a child safety lock that
prevents the doors from being opened
even if the inside door handle is pulled.
When the child safety lock lever is in the
lock position, the door cannot be opened
from inside regardless of the position of
the inner door handle lock lever. The door
can only be opened from the outside.
Windows
Power windows
The power windows operate only when
the ignition switch is in the ON position.
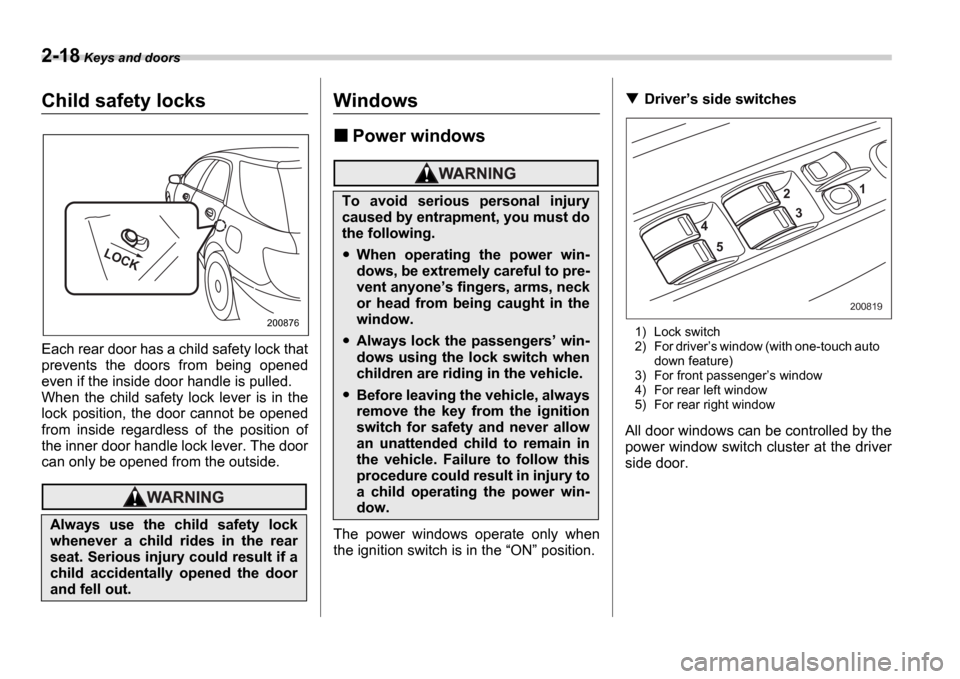
Driver s side switches
1) Lock switch
2) For driver s window (with one-touch auto
down feature)
3) For front passenger s window
4) For rear left window
5) For rear right window
All door windows can be controlled by the
power window switch cluster at the driver
side door.
Always use the child safety lock
whenever a child rides in the rear
seat. Serious injury could result if a
child accidentally opened the door
and fell out.
L O CK
200876
To avoid serious personal injury
caused by entrapment, you must do
the following.
When operating the power win-
dows, be extremely careful to pre-
vent anyone
s fingers, arms, neck
or head from being caught in the
window.
Always lock the passengers win-
dows using the lock switch when
children are riding in the vehicle.
Before leaving the vehicle, always
remove the key from the ignition
switch for safety and never allow
an unattended child to remain in
the vehicle. Failure to follow this
procedure could result in injury to
a child operating the power win-
dow.
1
2
4 5 3
200819
Page 106 of 365
Keys and doors 2-19
CONTINUED
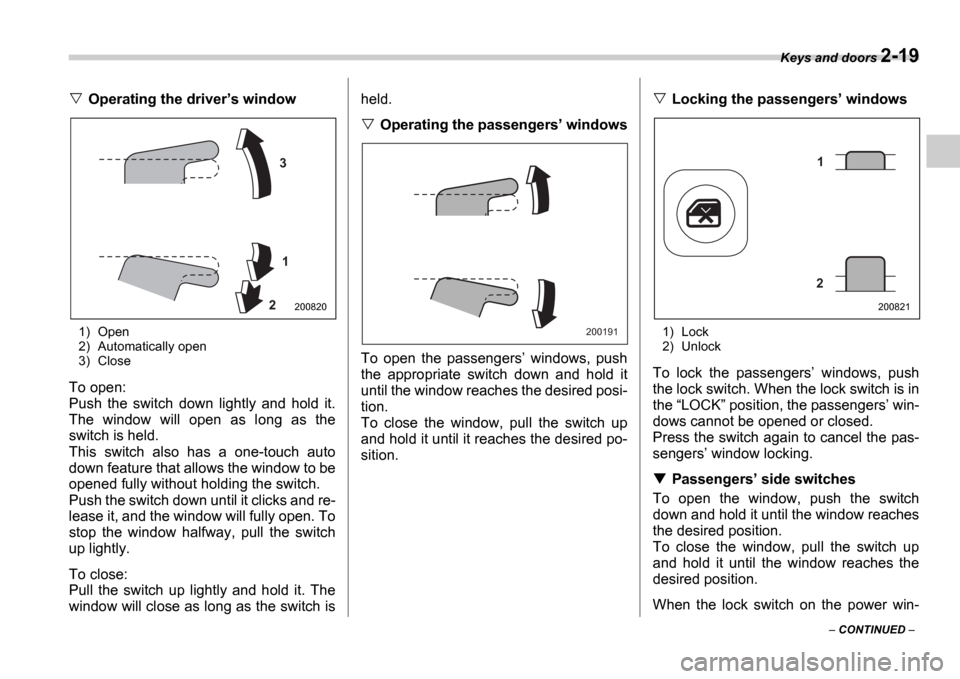
Operating the driver s window
1) Open
2) Automatically open
3) Close
To open:
Push the switch down lightly and hold it.
The window will open as long as the
switch is held.
This switch also has a one-touch auto
down feature that allows the window to be
opened fully without holding the switch.
Push the switch down until it clicks and re-
lease it, and the window will fully open. To
stop the window halfway, pull the switch
up lightly.
To close:
Pull the switch up lightly and hold it. The
window will close as long as the switch is held.
Operating the passengers
windows
To open the passengers windows, push
the appropriate switch down and hold it
until the window reaches the desired posi-
tion.
To close the window, pull the switch up
and hold it until it reaches the desired po-
sition.
Locking the passengers windows
1) Lock
2) Unlock
To lock the passengers windows, push
the lock switch. When the lock switch is in
the LOCK position, the passengers win-
dows cannot be opened or closed.
Press the switch again to cancel the pas-
sengers window locking.
Passengers side switches
To open the window, push the switch
down and hold it until the window reaches
the desired position.
To close the window, pull the switch up
and hold it until the window reaches the
desired position.
When the lock switch on the power win-
3
1
2
200820
200191
1
2
200821
Page 107 of 365
2-20 Keys and doors
dow switch cluster, located on the driver s
side door, is in the LOCK position, the
passengers windows cannot be operated
with the passengers switches.Trunk lid (Sedan)To open and close the trunk
lid from outside
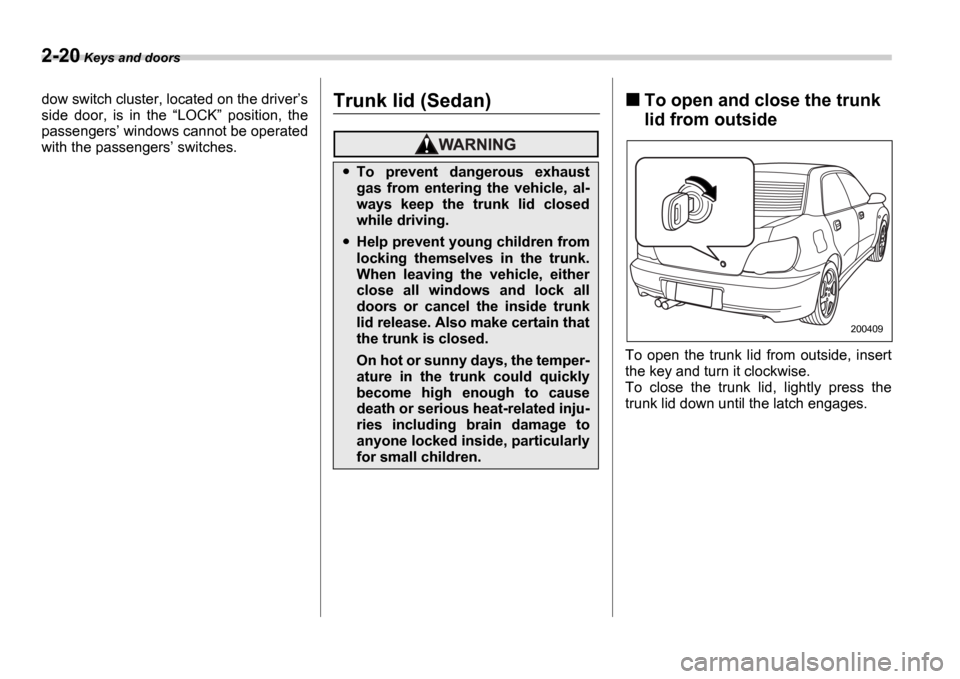
To open the trunk lid from outside, insert
the key and turn it clockwise.
To close the trunk lid, lightly press the
trunk lid down until the latch engages.
To prevent dangerous exhaust
gas from entering the vehicle, al-
ways keep the trunk lid closed
while driving.
Help prevent young children from
locking themselves in the trunk.
When leaving the vehicle, either
close all windows and lock all
doors or cancel the inside trunk
lid release. Also make certain that
the trunk is closed.
On hot or sunny days, the temper-
ature in the trunk could quickly
become high enough to cause
death or serious heat-related inju-
ries including brain damage to
anyone locked inside, particularly
for small children.
200409
Page 115 of 365

Instruments and controls
Clock .................................................................... 3-22
Light control switch .............................. ............. 3-22
Headlights ........................................ ....................... 3-22
High/low beam change (dimmer) ..................... ..... 3-23
Headlight flasher ................................. ................... 3-23
Daytime running light system ...................... ......... 3-23
Turn signal lever ................................. ................ 3-24
Illumination brightness control ................... ...... 3-25
Headlight beam leveler (U.S.-spec. WRX-STI) .............................. ........ 3-25
Parking light switch .............................. ............. 3-25
Front fog light button (if equipped) .............. .... 3-26
Wiper and washer .................................. ............. 3-26
Windshield wiper and washer switches .............. . 3-27
Rear window wiper and washer switch Wagon ............................................ .................... 3-28
Rear window defogger button ....................... .... 3-29
Windshield wiper deicer (if equipped) ............. . 3-30
Intercooler water spray switch (WRX-STI) ....... 3-3 1
Mirrors ........................................... ...................... 3-32
Inside mirror ..................................... ...................... 3-32
Outside mirrors ................................... .................... 3-33
Tilt steering wheel ............................... ............... 3-35
Horn .............................................. ....................... 3-35
Page 117 of 365
3-4 Instruments and controls
NOTE
Keep the ignition switch in the
LOCK position when the engine is
not running.
Using electrical accessories for a
long time with the ignition switch in the ON or ACC position can cause the
battery to go dead.
If the ignition switch will not move from
the LOCK position to the ACC po-
sition, turn the steering wheel slightly
to the left and right as you turn the ig-
nition switch.
If the key is attached to a keyholder
or to a large bunch of other keys, cen-
trifugal force may act on it as the vehi-
cle moves, resulting in unwanted turn-
ing of the ignition switch. Also, if a
large keyholder is attached to the key,
your knees or hands may accidentally
touch it in a way that turns the ignition switch.
ACC
In this position the electrical accessories
(radio, cigarette lighter, etc.) can be used.
ON
This is the normal operating position after
the engine is started.
START
The engine is started in this position. The
starter cranks the engine to start it. When
the key is released (after the engine has
started), the key automatically returns to
the
ON position.
For vehicle with immobilizer
If your registered key fails to start the en-
gine, pull out the key once (the security in-
dicator light will blink), and then insert the
key in the ignition switch and turn it to the START position and again try to start the
engine.
NOTE
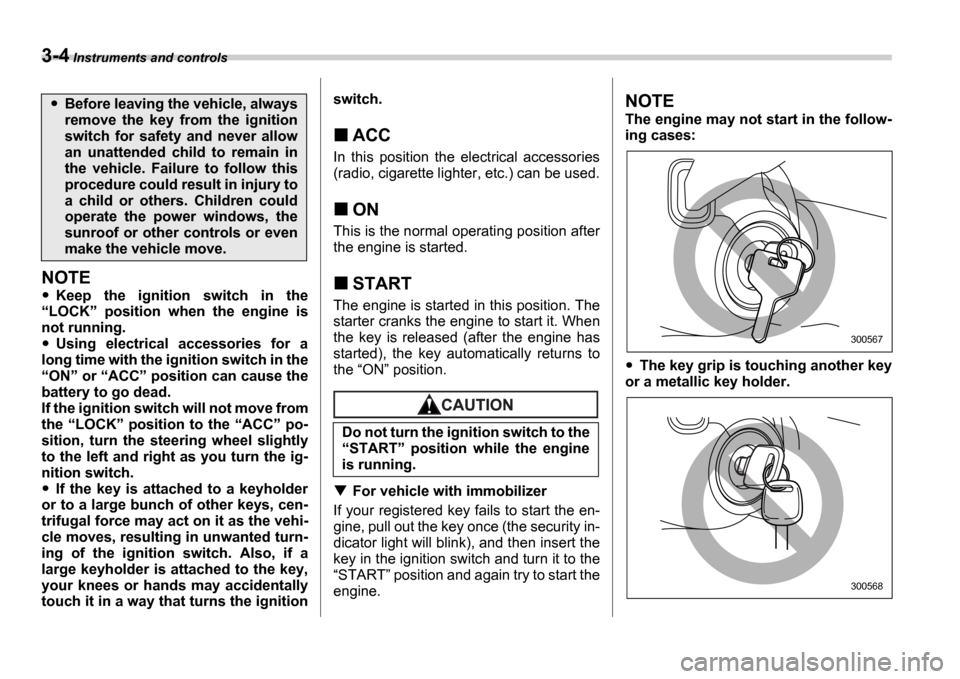
The engine may not start in the follow-
ing cases:
The key grip is touching another key
or a metallic key holder.
Before leaving the vehicle, always
remove the key from the ignition
switch for safety and never allow
an unattended child to remain in
the vehicle. Failure to follow this
procedure could result in injury to
a child or others. Children could
operate the power windows, the
sunroof or other controls or even
make the vehicle move.
Do not turn the ignition switch to the START position while the engine
is running.
300567
300568
Page 139 of 365
3-26 Instruments and controls
Front fog light button (if
equipped)
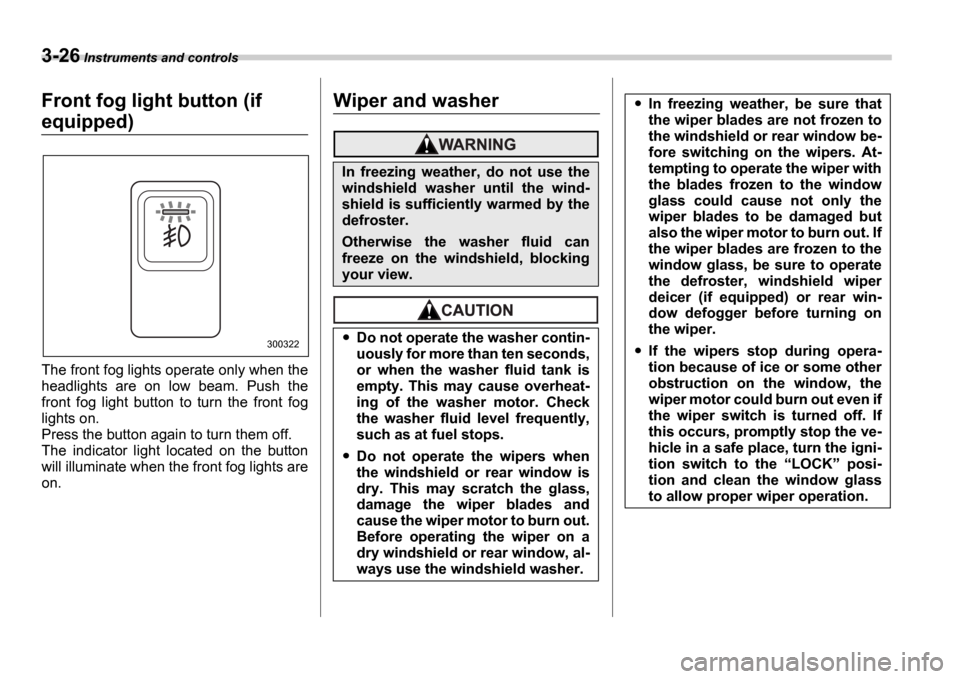
The front fog lights operate only when the
headlights are on low beam. Push the
front fog light button to turn the front fog
lights on.
Press the button again to turn them off.
The indicator light located on the button
will illuminate when the front fog lights are
on.
Wiper and washer
300322
In freezing weather, do not use the
windshield washer until the wind-
shield is sufficiently warmed by the
defroster.
Otherwise the washer fluid can
freeze on the windshield, blocking
your view.
Do not operate the washer contin-
uously for more than ten seconds,
or when the washer fluid tank is
empty. This may cause overheat-
ing of the washer motor. Check
the washer fluid level frequently,
such as at fuel stops.
Do not operate the wipers when
the windshield or rear window is
dry. This may scratch the glass,
damage the wiper blades and
cause the wiper motor to burn out.
Before operating the wiper on a
dry windshield or rear window, al-
ways use the windshield washer.
In freezing weather, be sure that
the wiper blades are not frozen to
the windshield or rear window be-
fore switching on the wipers. At-
tempting to operate the wiper with
the blades frozen to the window
glass could cause not only the
wiper blades to be damaged but
also the wiper motor to burn out. If
the wiper blades are frozen to the
window glass, be sure to operate
the defroster, windshield wiper
deicer (if equipped) or rear win-
dow defogger before turning on
the wiper.
If the wipers stop during opera-
tion because of ice or some other
obstruction on the window, the
wiper motor could burn out even if
the wiper switch is turned off. If
this occurs, promptly stop the ve-
hicle in a safe place, turn the igni-
tion switch to the LOCK posi-
tion and clean the window glass
to allow proper wiper operation.
Page 140 of 365
Instruments and controls 3-27
CONTINUED
NOTE
The wiper operates only when the ig-
nition switch is in the ON or ACC
position.
Clean your wiper blades and window
glass periodically with a washer solu-
tion to prevent streaking, and to re-
move accumulations of road salt or
road film. Keep the washer button de-
pressed at least for 1 second so that
washer solution will be sprinkled all
over the windshield or rear window.
Grease, wax, insects or other materi-
al on the windshield or the wiper blade results in jerky wiper operation and
streaking on the glass. If you cannot
remove those streaks after operating
the washer or if the wiper operation is
jerky, clean the outer surface of the
windshield or rear window and the wip-
er blades using a sponge or soft cloth
with a neutral detergent or mild-abra-
sive cleaner. After cleaning, rinse the
window glass and wiper blades with
clean water. The glass is clean if no
beads form on the glass when you
rinse with water.
If you cannot eliminate the streaking
even after following this procedure, re-
place the wiper blades with new ones.
Refer to the Replacement of wiper
blades section (chapter 11) for re-
placement instructions.
Windshield wiper and washer
switches
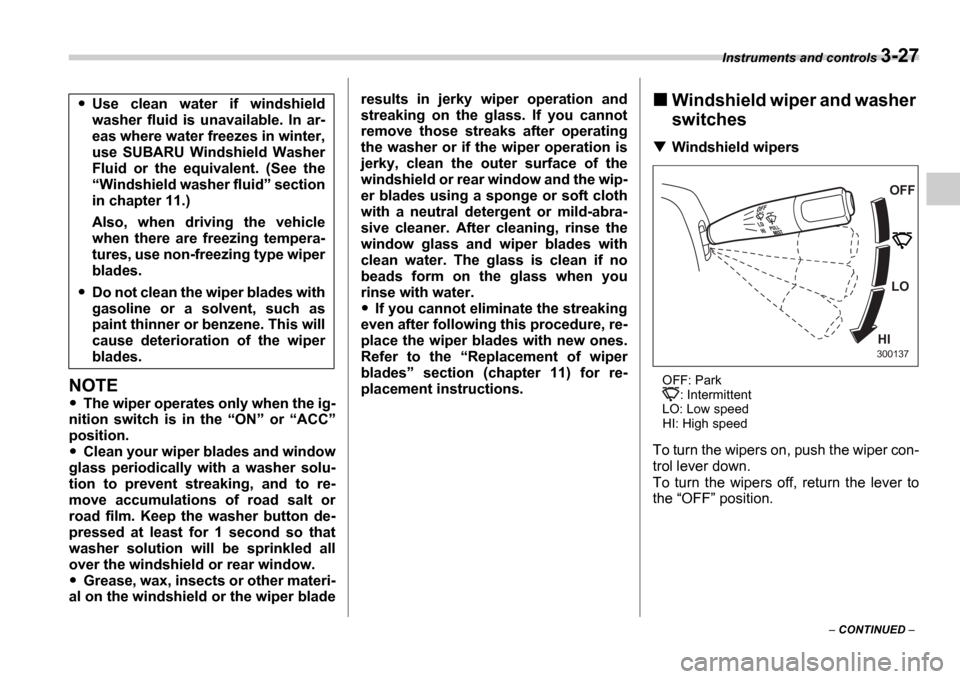
Windshield wipers
OFF: Park : Intermittent
LO: Low speed
HI: High speed
To turn the wipers on, push the wiper con-
trol lever down.
To turn the wipers off, return the lever to
the OFF position.
Use clean water if windshield
washer fluid is unavailable. In ar-
eas where water freezes in winter,
use SUBARU Windshield Washer
Fluid or the equivalent. (See the Windshield washer fluid section
in chapter 11.)
Also, when driving the vehicle
when there are freezing tempera-
tures, use non-freezing type wiper
blades.
Do not clean the wiper blades with
gasoline or a solvent, such as
paint thinner or benzene. This will
cause deterioration of the wiper
blades.
OFF
LO
HI
300137