2006 SUBARU IMPREZA transmission
[x] Cancel search: transmissionPage 116 of 365
Instruments and controls 3-3
CONTINUED
Instrum ents and controlsIgnition switch
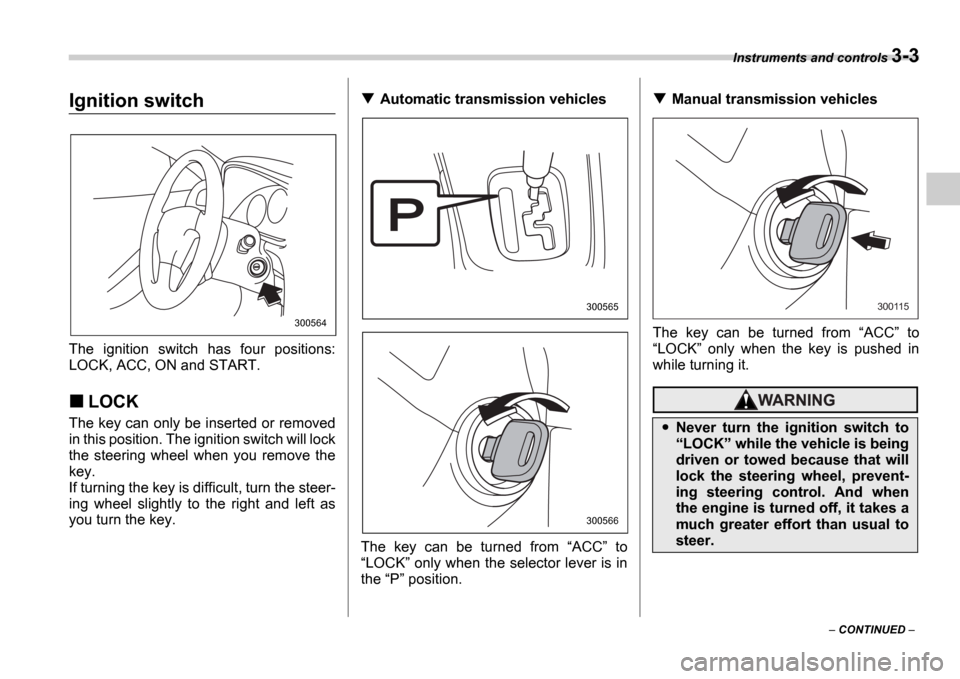
The ignition switch has four positions:
LOCK, ACC, ON and START.
LOCK
The key can only be inserted or removed
in this position. The ignition switch will lock
the steering wheel when you remove the
key.
If turning the key is difficult, turn the steer-
ing wheel slightly to the right and left as
you turn the key.
Automatic transmission vehicles
The key can be turned from ACC to
LOCK only when the selector lever is in
the P position.Manual transmission vehicles
The key can be turned from ACC to
LOCK only when the key is pushed in
while turning it.
300564
300565
300566
Never turn the ignition switch to LOCK while the vehicle is being
driven or towed because that will
lock the steering wheel, prevent-
ing steering control. And when
the engine is turned off, it takes a
much greater effort than usual to
steer.
300115
Page 130 of 365
Instruments and controls 3-17
CONTINUED
is at the proper level but the light remains
on, contact your nearest SUBARU dealer
immediately.
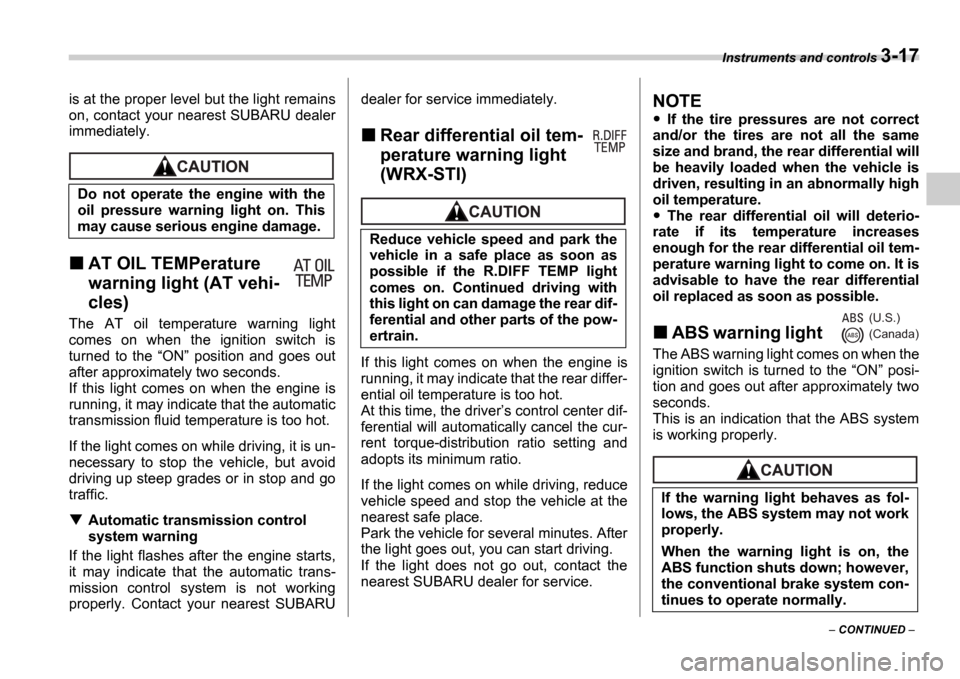
AT OIL TEMPerature
warning light (AT vehi-
cles)
The AT oil temperature warning light
comes on when the ignition switch is
turned to the
ON position and goes out
after approximately two seconds.
If this light comes on when the engine is
running, it may indicate that the automatic
transmission fluid temperature is too hot.
If the light comes on while driving, it is un-
necessary to stop the vehicle, but avoid
driving up steep grades or in stop and go
traffic.
Automatic transmission control
system warning
If the light flashes after the engine starts,
it may indicate that the automatic trans-
mission control system is not working
properly. Contact your nearest SUBARU dealer for service immediately.
Rear differential oil tem-
perature warning light
(WRX-STI)
If this light comes on when the engine is
running, it may indicate that the rear differ-
ential oil temperature is too hot.
At this time, the driver
s control center dif-
ferential will automatically cancel the cur-
rent torque-distribution ratio setting and
adopts its minimum ratio.
If the light comes on while driving, reduce
vehicle speed and stop the vehicle at the
nearest safe place.
Park the vehicle for several minutes. After
the light goes out, you can start driving.
If the light does not go out, contact the
nearest SUBARU dealer for service.
NOTE
If the tire pressures are not correct
and/or the tires are not all the same
size and brand, the rear differential will
be heavily loaded when the vehicle is
driven, resulting in an abnormally high
oil temperature.
The rear differential oil will deterio-
rate if its temperature increases
enough for the rear differential oil tem-
perature warning light to come on. It is
advisable to have the rear differential
oil replaced as soon as possible.
ABS warning light
The ABS warning light comes on when the
ignition switch is turned to the ON posi-
tion and goes out after approximately two
seconds.
This is an indication that the ABS system
is working properly.
Do not operate the engine with the
oil pressure warning light on. This
may cause serious engine damage.
Reduce vehicle speed and park the
vehicle in a safe place as soon as
possible if the R.DIFF TEMP light
comes on. Continued driving with
this light on can damage the rear dif-
ferential and other parts of the pow-
ertrain.
If the warning light behaves as fol-
lows, the ABS system may not work
properly.
When the warning light is on, the
ABS function shuts down; however,
the conventional brake system con-
tinues to operate normally.
(U.S.)
(Canada)
Page 136 of 365
Instruments and controls 3-23
CONTINUED
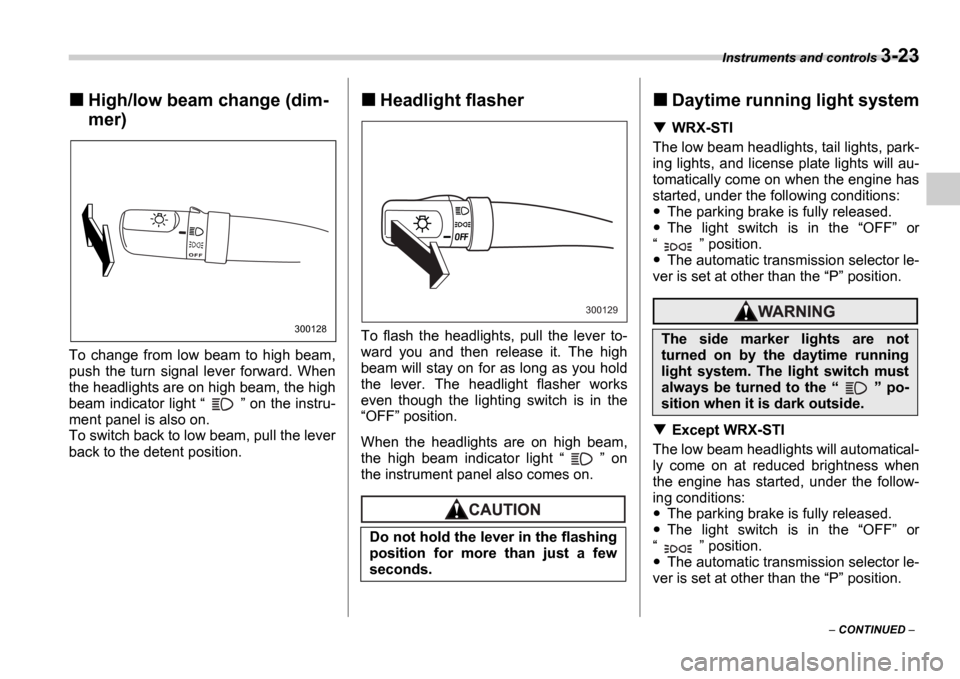
High/low beam change (dim-
mer)
To change from low beam to high beam,
push the turn signal lever forward. When
the headlights are on high beam, the high
beam indicator light on the instru-
ment panel is also on.
To switch back to low beam, pull the lever
back to the detent position.
Headlight flasher
To flash the headlights, pull the lever to-
ward you and then release it. The high
beam will stay on for as long as you hold
the lever. The headlight flasher works
even though the lighting switch is in the OFF position.
When the headlights are on high beam,
the high beam indicator light on
the instrument panel also comes on.
Daytime running light system
WRX-STI
The low beam headlights, tail lights, park-
ing lights, and license plate lights will au-
tomatically come on when the engine has
started, under the following conditions:
The parking brake is fully released.
The light switch is in the OFF or
position.
The automatic transmission selector le-
ver is set at other than the P position.
Except WRX-STI
The low beam headlights will automatical-
ly come on at reduced brightness when
the engine has started, under the follow-
ing conditions:
The parking brake is fully released.
The light switch is in the OFF or
position.
The automatic transmission selector le-
ver is set at other than the P position.
300128
Do not hold the lever in the flashing
position for more than just a few
seconds.
300129
The side marker lights are not
turned on by the daytime running
light system. The light switch must
always be turned to the po-
sition when it is dark outside.
Page 183 of 365

5-20 Audio
To insert a disc
1. Press one of the Disc select buttons
(3) (numbered from 1 to 6) for which the
disc indicator light (2) is OFF .
The disc indicator lights are located direct-
ly above the corresponding Disc select
buttons.
2. The indicator will begin blinking. The
blinking will last for 15 seconds.
During this period, insert a desired disc,
and the disc will begin to play. (If any disc
is not inserted during this period, the Disc
slot (1) door will close. Repeat Step 1.)
Be sure to hold a disc with the label side
(the side where titles are printed) up.
3. To insert another disc, repeat Steps 1
and 2 choosing a different disc select but-
ton.
To insert six discs at a time
1. Press and hold the Disc select button
number 1 until all disc indicators begin
blinking (approximately 1.5 seconds). 2. The indicators will blink for 15 seconds.
During this period, insert desired six discs.
3. When all discs are loaded, the first disc
will begin to play. (If no disc is inserted
within this 15 seconds, the entire disc load
sequence will be canceled.)
To remove a disc
1. Press the desired one of the Disc se-
lect buttons (3) (numbered from 1 to 6) for
which the disc indicator light is on.
2. Press the Eject button (4). The select-
ed disc will be ejected and the indicator
light will begin blinking.
3. To remove another disc, repeat Steps
1 and 2 choosing a different Disc select
button.
(To remove discs when the ignition switch
is in the Lock position, press the Eject
button, and the first disc will be ejected.
Press the Eject button again, and the
next disc will be ejected and so on. At this
time, the Disc select buttons are dis-
abled.)
To remove all discs at one time
1. Press and hold the Eject button (4)
until all Disc indicators begin blinking
(approximately 1.5 seconds), and the first
disc will be ejected.
2. When the disc is removed, the next
one will be ejected, and so on.
To replace a playing disc with an-
other
Simply press the desired one of Disc se-
lect buttons (3) (numbered from 1 to 6) or
press the Disc select button on the radio
unit to select the desired disc, and the disc
will begin to play.
Disc indicators
Lit: when the corresponding storage tray
is occupied by a disc.
Blinking: Disc player is either in loading,
eject or changing mode.
OFF: No disc is loaded or the ignition
switch is in the LOCK position.
Open/Closed disc slot indicator
When the disc slot is open, the disc indica-
tors on both sides of the slot illuminate.
Function control
Refer to CD changer control operating in-
structions described in the Type B audio
set (if equipped) section.
Do not insert or remove any disc
when the automatic transmission
selector lever is in the park posi-
tion; the selector lever in that po-
sition can interfere with disc in-
sertion or removal, causing
scratches on the disc surface (for
AT vehicles).
Page 198 of 365

7
Starting and operating
Fuel ...................................................................... 7-2
Fuel requirements ................................. ................. 7-2
Fuel filler lid and cap ........................... ................... 7-4
State emission testing (U.S. only) ................ .... 7-5
Preparing to drive ................................ .............. 7-6
Starting the engine ............................... .............. 7-7
Manual transmission vehicle ....................... .......... 7-7
Automatic transmission vehicle .................... ........ 7-7
Stopping the engine ............................... ............ 7-8
Manual transmission 6 speeds (WRX-STI) ... 7-9
Selecting reverse gear ............................ ............... 7-9
Shifting speeds ................................... .................... 7-9
Driving tips ...................................... ........................ 7-10
Manual transmission 5 speeds (except
WRX-STI) .......................................... ................ 7-11
Shifting speeds ................................... .................... 7-11
Driving tips ...................................... ........................ 7-12
Driver s Control Center Differential (DCCD)
(WRX-STI) ......................................... ............... 7-12
Auto mode ......................................... ...................... 7-13
Manual mode ....................................... .................... 7-13
Temporary release ................................. ................. 7-15
Automatic transmission ............................ ........ 7-16
Selector lever for automatic transmission ......... .. 7-16
Shift lock release ................................ .................... 7-19
Limited slip differential (LSD) (if equipped) ..... 7-20
Power steering .................................... ............... 7-21Braking ...........................................
..................... 7-21
Braking tips ...................................... ....................... 7-21
Brake system ...................................... .................... 7-21
Disc brake pad wear warning indicators ............ .. 7-22
ABS (Anti-lock Brake System) ...................... .... 7-22
ABS system self-check ............................. ............. 7-22
ABS warning light ................................. .................. 7-23
Electronic Brake Force Distribution (EBD) system ............................................ .................. 7-24
Steps to take if EBD system fails ................. ......... 7-24
Parking your vehicle .............................. ............ 7-25
Parking brake ..................................... ..................... 7-25
Parking tips ...................................... ....................... 7-25
Cruise control .................................... ................. 7-27
To set cruise control ............................. ................. 7-27
To temporarily cancel the cruise control .......... ... 7-28
To turn off the cruise control .................... ............. 7-28
To change the cruising speed ...................... ......... 7-28
Page 203 of 365
7-6 Starting and operating
The EPA has issued regulations for in-
specting the On-Board Diagnostic (OBD)
system as part of the state emissions in-
spection. The OBD system is designed to
detect engine and transmission problems
that might cause vehicle emissions to ex-
ceed allowable limits. These inspections
apply to all 1996 model year and newer
passenger cars and light trucks. Over 30
states plus the District of Columbia have
implemented the OBD system inspection.
The inspection of the OBD system con-
sists of a visual operational check of the CHECK ENGINE warning light/malfunc-
tion indicator lamp (MIL) and an examina-
tion of the OBD system with an electronic
scan tool while the engine is running.
A vehicle passes the OBD system in-
spection if proper the CHECK ENGINE
warning light/MIL illumination is observed,
there is no stored diagnostic trouble
codes, and the OBD system readiness
monitors are complete.
A vehicle fails the OBD inspection if the
CHECK ENGINE warning light/MIL is
not properly operating or there is one or
more diagnostic trouble codes stored in
vehicle s computer with the CHECK EN-
GINE warning light/MIL illuminated.
A state emission inspection may reject
(not pass or fail) a vehicle if the number of
OBD system readiness monitors Not
Ready is greater than one. Under this
condition, the vehicle operator should be
instructed to drive his/her vehicle for a few
days to set the monitors and return for an
emission re-inspection.
Owners of rejected or failing vehicles
should contact their Subaru Dealer for
service.
Preparing to drive
You should perform the following checks
and adjustments every day before you
start driving.
1. Check that all windows, mirrors, and
lights are clean and unobstructed.
2. Check the appearance and condition of
the tires. Also check tires for proper infla-
tion.
3. Look under the vehicle for any sign of
leaks.
4. Check that the hood, trunk (Sedan)
and rear gate (Wagon) are fully closed.
5. Check the adjustment of the seat.
6. Check the adjustment of the inside and
outside mirrors.
7. Fasten your seatbelt. Check that your
passengers have fastened their seatbelts.
8. Check the operation of the warning and
indicator lights when the ignition switch is
turned to the ON position.
9. Check the gauges, indicator and warn-
ing lights after starting the engine.
NOTE
Engine oil, engine coolant, brake fluid,
washer fluid and other fluid levels
should be checked daily, weekly or at
fuel stops.
Resultant vehicle damage due to im-
proper testing is not covered under
the SUBARU Limited Warranty and
is the responsibility of the state in-
spection program or its contractors
or licensees.
Page 204 of 365
Starting and operating 7-7
CONTINUED
Starting the engine
Manual transmission vehicle
1. Apply the parking brake.
2. Turn off unnecessary lights and acces-
sories.
3. Press the clutch pedal to the floor and
shift the shift lever into neutral. Hold the
clutch pedal to the floor while starting the
engine.
The starter motor will only operate when
the clutch pedal is pressed fully to the
floor.
4. Turn the ignition switch to the ON po-
sition and check the operation of the warn-
ing and indicator lights. Refer to the Warning and indicator lights section
(chapter 3).
5. Turn the ignition switch to the START
position without depressing the accelera-
tor pedal. Release the key immediately af-
ter the engine has started. If the engine does not start, try the follow-
ing.
1) Turn the ignition switch to the OFF
position and wait for at least 10 sec-
onds. After checking that the parking
brake is firmly set, turn the ignition
switch to the START position while de-
pressing the accelerator pedal slightly
(approximately a quarter of the full
stroke). Release the accelerator pedal
as soon as the engine starts.
2) If this fails to start the engine, turn the
ignition switch back to the OFF posi-
tion and wait for at least 10 seconds.
Then fully depress the accelerator ped-
al and turn the ignition switch to the START position. If the engine starts,
quickly release the accelerator pedal.
3) If this fails to start the engine, turn the
ignition switch again to the OFF posi-
tion. After waiting for 10 seconds or
longer, turn the ignition switch to the START position without depressing
the accelerator pedal.
4) If the engine still refuses to start, con-
tact your nearest SUBARU dealer for
assistance.
6. Confirm that all warning and indicator
lights have gone off after the engine has
started. The fuel injection system auto-
matically lowers the idle speed as the en-
gine warms up.
NOTE
The engine may be difficult to start
when the battery has been disconnect-
ed and reconnected (for maintenance
or other purposes). This difficulty is
caused by the electronically controlled
throttle s self-diagnosis function. To
overcome it, keep the ignition switch in
the ON position for approximately 10
seconds before starting the engine.
Automatic transmission vehi-
cle
1. Apply the parking brake.
2. Turn off unnecessary lights and acces-
sories.
3. Shift the selector lever to the P or N
position (preferably P position).
The starter motor will only operate when
the select lever is at the P or N position.
4. Turn the ignition switch to the ON po-
sition and check the operation of the warn-
ing and indicator lights. Refer to the Warning and indicator lights section
(chapter 3).
5. Turn the ignition switch to the START
position without depressing the accelera-
tor pedal. Release the key immediately af-
ter the engine has started.
If the engine does not start, try the follow-
Do not operate the starter motor
continuously for more than ten sec-
onds. If the engine fails to start after
operating the starter for five to ten
seconds, wait for ten seconds or
more before trying again.
Page 206 of 365
Starting and operating 7-9
CONTINUED
Manual transmission 6
speeds (WRX-STI)
The manual transmission is a fully syn-
chromeshed, 6-forward-speed and 1-re-
verse-speed transmission.
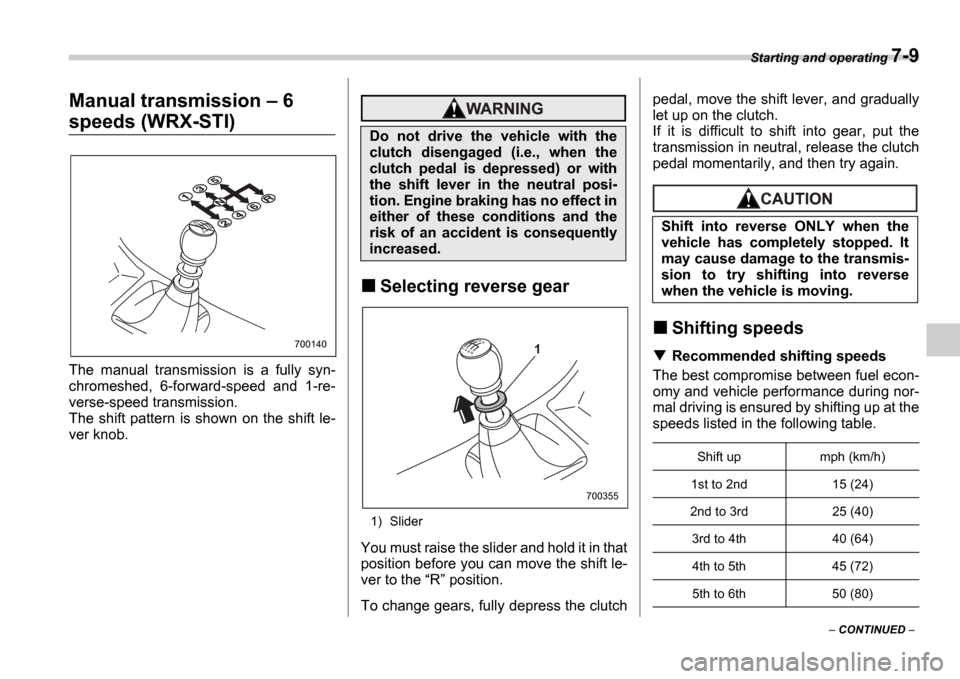
The shift pattern is shown on the shift le-
ver knob.
Selecting reverse gear
1) Slider
You must raise the slider and hold it in that
position before you can move the shift le-
ver to the R position.
To change gears, fully depress the clutch pedal, move the shift lever, and gradually
let up on the clutch.
If it is difficult to shift into gear, put the
transmission in neutral, release the clutch
pedal momentarily, and then try again.
Shifting speeds
Recommended shifting speeds
The best compromise between fuel econ-
omy and vehicle performance during nor-
mal driving is ensured by shifting up at the
speeds listed in the following table.
700140
Do not drive the vehicle with the
clutch disengaged (i.e., when the
clutch pedal is depressed) or with
the shift lever in the neutral posi-
tion. Engine braking has no effect in
either of these conditions and the
risk of an accident is consequently
increased.
1
700355
Shift into reverse ONLY when the
vehicle has completely stopped. It
may cause damage to the transmis-
sion to try shifting into reverse
when the vehicle is moving.
Shift up mph (km/h)
1st to 2nd 15 (24)
2nd to 3rd 25 (40) 3rd to 4th 40 (64)
4th to 5th 45 (72)
5th to 6th 50 (80)