2006 SUBARU IMPREZA coolant level
[x] Cancel search: coolant levelPage 122 of 365
Instruments and controls 3-9
CONTINUED
We recommend that you drive moderately
until the pointer of the temperature gauge
reaches near the middle of the range. En-
gine operation is optimum with the engine
coolant at this temperature range and high
revving operation when the engine is not
warmed up enough should be avoided.
Outside temperature indica-
tor
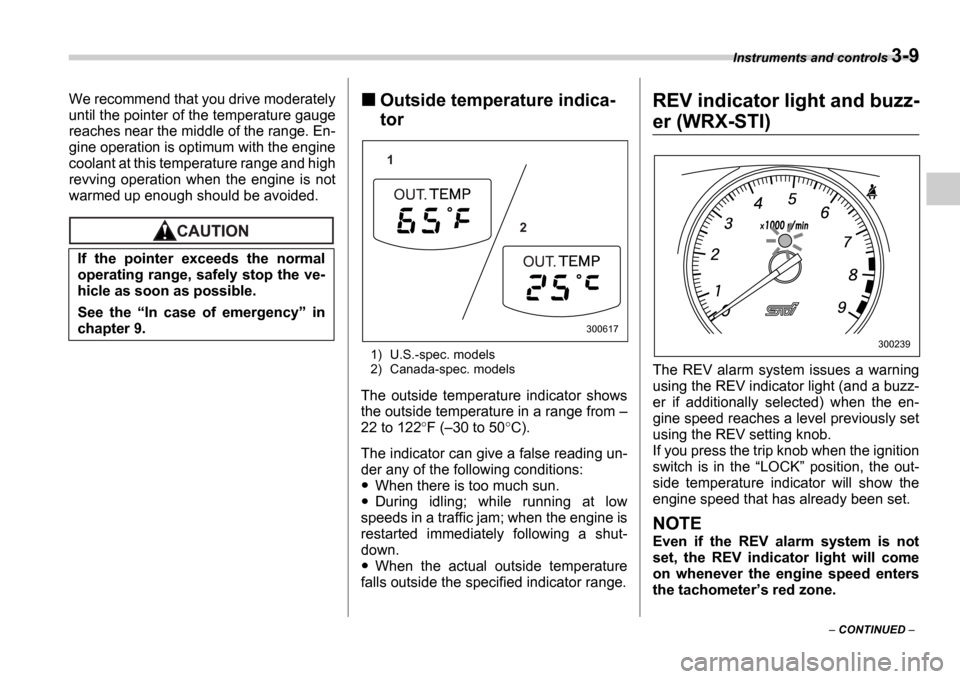
1) U.S.-spec. models
2) Canada-spec. models
The outside temperature indicator shows
the outside temperature in a range from
22 to 122 F ( 30 to 50 C).
The indicator can give a false reading un-
der any of the following conditions:
When there is too much sun.
During idling; while running at low
speeds in a traffic jam; when the engine is
restarted immediately following a shut-
down.
When the actual outside temperature
falls outside the specified indicator range.
REV indicator light and buzz-
er (WRX-STI)
The REV alarm system issues a warning
using the REV indicator light (and a buzz-
er if additionally selected) when the en-
gine speed reaches a level previously set
using the REV setting knob.
If you press the trip knob when the ignition
switch is in the LOCK position, the out-
side temperature indicator will show the
engine speed that has already been set.
NOTE
Even if the REV alarm system is not
set, the REV indicator light will come
on whenever the engine speed enters
the tachometer s red zone.
If the pointer exceeds the normal
operating range, safely stop the ve-
hicle as soon as possible.
See the
In case of emergency in
chapter 9.
1
2
300617
300239
Page 203 of 365
7-6 Starting and operating
The EPA has issued regulations for in-
specting the On-Board Diagnostic (OBD)
system as part of the state emissions in-
spection. The OBD system is designed to
detect engine and transmission problems
that might cause vehicle emissions to ex-
ceed allowable limits. These inspections
apply to all 1996 model year and newer
passenger cars and light trucks. Over 30
states plus the District of Columbia have
implemented the OBD system inspection.
The inspection of the OBD system con-
sists of a visual operational check of the CHECK ENGINE warning light/malfunc-
tion indicator lamp (MIL) and an examina-
tion of the OBD system with an electronic
scan tool while the engine is running.
A vehicle passes the OBD system in-
spection if proper the CHECK ENGINE
warning light/MIL illumination is observed,
there is no stored diagnostic trouble
codes, and the OBD system readiness
monitors are complete.
A vehicle fails the OBD inspection if the
CHECK ENGINE warning light/MIL is
not properly operating or there is one or
more diagnostic trouble codes stored in
vehicle s computer with the CHECK EN-
GINE warning light/MIL illuminated.
A state emission inspection may reject
(not pass or fail) a vehicle if the number of
OBD system readiness monitors Not
Ready is greater than one. Under this
condition, the vehicle operator should be
instructed to drive his/her vehicle for a few
days to set the monitors and return for an
emission re-inspection.
Owners of rejected or failing vehicles
should contact their Subaru Dealer for
service.
Preparing to drive
You should perform the following checks
and adjustments every day before you
start driving.
1. Check that all windows, mirrors, and
lights are clean and unobstructed.
2. Check the appearance and condition of
the tires. Also check tires for proper infla-
tion.
3. Look under the vehicle for any sign of
leaks.
4. Check that the hood, trunk (Sedan)
and rear gate (Wagon) are fully closed.
5. Check the adjustment of the seat.
6. Check the adjustment of the inside and
outside mirrors.
7. Fasten your seatbelt. Check that your
passengers have fastened their seatbelts.
8. Check the operation of the warning and
indicator lights when the ignition switch is
turned to the ON position.
9. Check the gauges, indicator and warn-
ing lights after starting the engine.
NOTE
Engine oil, engine coolant, brake fluid,
washer fluid and other fluid levels
should be checked daily, weekly or at
fuel stops.
Resultant vehicle damage due to im-
proper testing is not covered under
the SUBARU Limited Warranty and
is the responsibility of the state in-
spection program or its contractors
or licensees.
Page 266 of 365
In case of emergency 9-11
CONTINUED
Engine overheating
If the engine overheats, safely pull off the
road and stop the vehicle in a safe place.
If steam is coming from the
engine compartment
Turn off the engine and get everyone
away from the vehicle until it cools down.
If no steam is coming from
the engine compartment
1. Keep the engine running at idling
speed.
2. Open the hood to ventilate the engine
compartment.
Confirm that the cooling fan is turning. If
the fan is not turning, immediately turn off the engine and contact your authorized
dealer for repair.
3. After the engine coolant temperature
has dropped, turn off the engine.
If the temperature gauge stays at the
overheated zone, turn off the engine.
4. After the engine has fully cooled down,
check the coolant level in the reserve
tank.
If the coolant level is below the
LOW
mark, add coolant up to the FULL mark.
5. If there is no coolant in the reserve
tank, add coolant to the reserve tank.
Then remove the radiator cap and fill the
radiator with coolant.
If you remove the radiator cap from a hot
radiator, first wrap a thick cloth around the
radiator cap, then turn the cap counter-
clockwise slowly without pressing down
until it stops. Release the pressure from
the radiator. After the pressure has been
fully released, remove the cap by pressing
down and turning it.
Towing
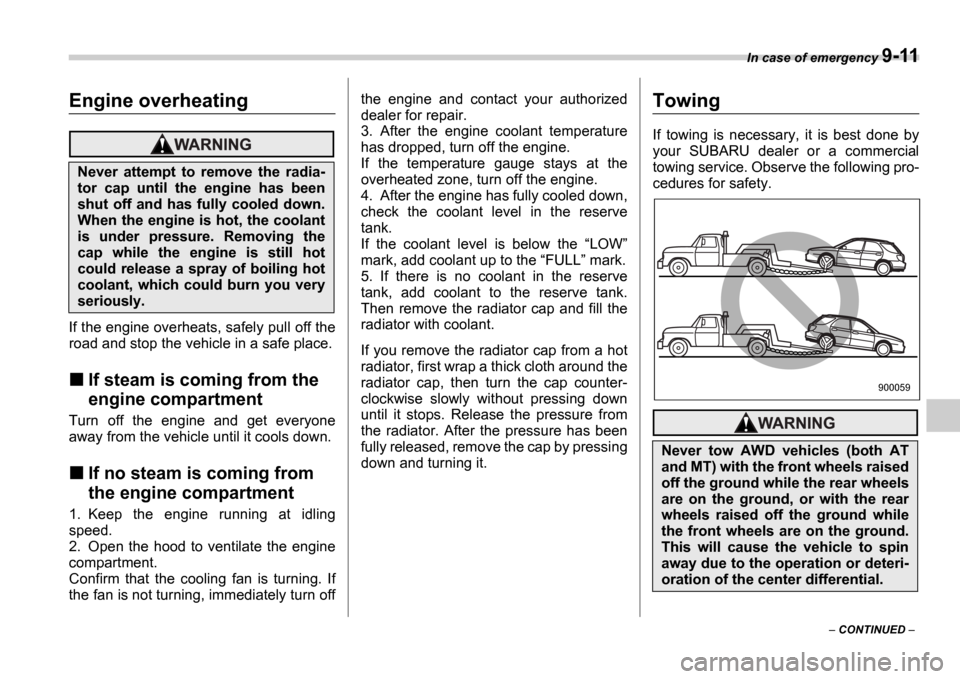
If towing is necessary, it is best done by
your SUBARU dealer or a commercial
towing service. Observe the following pro-
cedures for safety.
Never attempt to remove the radia-
tor cap until the engine has been
shut off and has fully cooled down.
When the engine is hot, the coolant
is under pressure. Removing the
cap while the engine is still hot
could release a spray of boiling hot
coolant, which could burn you very
seriously.
Never tow AWD vehicles (both AT
and MT) with the front wheels raised
off the ground while the rear wheels
are on the ground, or with the rear
wheels raised off the ground while
the front wheels are on the ground.
This will cause the vehicle to spin
away due to the operation or deteri-
oration of the center differential.
900059
Page 280 of 365
11
Maintenance and service
Maintenance schedule ....................................... 11-3
Maintenance precautions ........................... ....... 11-3
Before checking or servicing in the engine compartment ....................................... ................. 11-4
When you do checking or servicing in the engine
compartment while the engine is running ......... 11 -4
Engine hood ....................................... ................ 11-4
Engine compartment overview ....................... .. 11-6
Non-turbo models .................................. ................. 11-6
Turbo models ...................................... .................... 11-7
Engine oil ........................................ .................... 11-8
Checking the oil level ............................ ................. 11-8
Changing the oil and oil filter ................... ............. 11-8
Recommended grade and viscosity ................... .. 11-10
Recommended grade and viscosity under severe driving conditions ......................... ........... 11-11
Synthetic oil ..................................... ....................... 11-11
Cooling system .................................... .............. 11-12
Cooling fan, hose and connections ................. ..... 11-12
Engine coolant .................................... .................... 11-12
Air cleaner element ............................... ............. 11-15
Replacing the air cleaner element ................. ........ 11-15
Spark plugs ....................................... .................. 11-17
Recommended spark plugs ........................... ........ 11-17
Drive belts ....................................... .................... 11-18
Manual transmission oil ........................... ......... 11-18
Checking the oil level ............................ ................. 11-18
Recommended grade and viscosity ................... .. 11-19Automatic transmission fluid ......................
...... 11-20
Checking the fluid level .......................... ................ 11-20
Recommended fluid ................................. .............. 11-21
Front differential gear oil (AT vehicles) ......... ... 11-21
Checking the oil level ............................ ................. 11-21
Recommended grade and viscosity ................... .. 11-22
Rear differential gear oil ........................ ............ 11-22
Checking the gear oil level ....................... ............. 11-22
Recommended grade and viscosity ................... .. 11-23
Power steering fluid .............................. ............. 11-24
Checking the fluid level .......................... ................ 11-24
Recommended fluid ................................. .............. 11-24
Brake fluid ....................................... .................... 11-25
Checking the fluid level .......................... ................ 11-25
Recommended brake fluid ........................... .......... 11-25
Clutch fluid (MT vehicles) ........................ .......... 11-26
Checking the fluid level .......................... ................ 11-26
Recommended clutch fluid .......................... .......... 11-26
Brake booster ..................................... ................ 11-27
Brake pedal ....................................... .................. 11-27
Checking the brake pedal free play ................ ...... 11-27
Checking the brake pedal reserve distance ......... 11-27
Clutch pedal (MT vehicles) ........................ ........ 11-28
Checking the clutch function ...................... .......... 11-28
Checking the clutch pedal free play ............... ...... 11-28
Replacement of brake pad and lining ............... 11-28
Breaking-in of new brake pads and linings ......... . 11-29
Parking brake stroke .............................. ............ 11-29
Page 285 of 365

11-6 Maintenance and service
Engine compartment overview
Non-turbo models
1 2 3 4 5 6
7
8
9
10
11
13 12
B00464
1) Air cleaner element (page 11-15)
2) Manual transmission oil level gauge
(MT) (page 11-18) or Differential gear
oil level gauge (AT) (page 11-21)
3) Clutch fluid reservoir (page 11-26)
4) Automatic transmission fluid level gauge (page 11-20)
5) Brake fluid reservoir (page 11-25)
6) Fuse box (page 11-41)
7) Battery (page 11-40)
8) Windshield washer tank (page 11-36)
9) Engine coolant reservoir (page 11-
12)
10) Engine oil level gauge (page 11-8)
11) Engine oil filler cap (page 11-8)
12) Radiator cap (page 11-12)
13) Power steering fluid reservoir (page
11-24)
Page 286 of 365

Maintenance and service 11-7
Turbo models
1 2 3 4 5 6
7
8
9
10
11
12
13
B00466
1) Air cleaner element (page 11-15)
2) Manual transmission oil level gauge
(MT) (page 11-18) or Differential gear
oil level gauge (AT) (page 11-21)
3) Automatic transmission fluid level gauge (page 11-20)
4) Clutch fluid reservoir (page 11-26)
5) Brake fluid reservoir (page 11-25)
6) Fuse box (page 11-41)
7) Battery (page 11-40)
8) Windshield washer tank (page 11-36)
9) Engine oil filler cap (page 11-8)
10) Engine coolant reservoir (page 11- 12)
11) Engine oil level gauge (page 11-8)
12) Radiator cap (page 11-12)
13) Power steering fluid reservoir (page
11-24)
Page 291 of 365
11-12 Maintenance and service
Cooling system
Cooling fan, hose and con-
nections
Your vehicle employs an electric cooling
fan which is thermostatically controlled to
operate when the engine coolant reaches
a specific temperature.
If the radiator cooling fan does not operate
even when the engine coolant tempera-
ture gauge exceeds the normal operating
range, the cooling fan circuit may be de-
fective. Check the fuse and replace it if
necessary. If the fuse is not blown, have
the cooling system checked by your
SUBARU dealer.
If frequent addition of coolant is neces-
sary, there may be a leak in the engine
cooling system. It is recommended that
the cooling system and connections be
checked for leaks, damage, or looseness.
Engine coolant
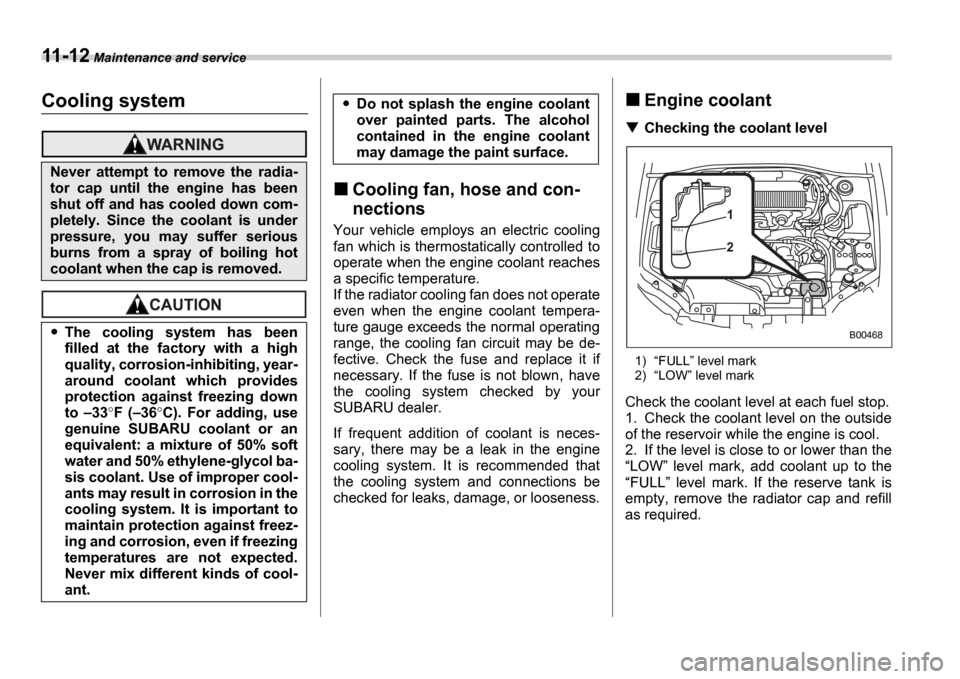
Checking the coolant level
1)FULL level mark
2) LOW level mark
Check the coolant level at each fuel stop.
1. Check the coolant level on the outside
of the reservoir while the engine is cool.
2. If the level is close to or lower than the LOW level mark, add coolant up to the
FULL level mark. If the reserve tank is
empty, remove the radiator cap and refill
as required.
Never attempt to remove the radia-
tor cap until the engine has been
shut off and has cooled down com-
pletely. Since the coolant is under
pressure, you may suffer serious
burns from a spray of boiling hot
coolant when the cap is removed.
The cooling system has been
filled at the factory with a high
quality, corrosion-inhibiting, year-
around coolant which provides
protection against freezing down
to 33 F ( 36 C). For adding, use
genuine SUBARU coolant or an
equivalent: a mixture of 50% soft
water and 50% ethylene-glycol ba-
sis coolant. Use of improper cool-
ants may result in corrosion in the
cooling system. It is important to
maintain protection against freez-
ing and corrosion, even if freezing
temperatures are not expected.
Never mix different kinds of cool-
ant.
Do not splash the engine coolant
over painted parts. The alcohol
contained in the engine coolant
may damage the paint surface.
F U L L
L OW1 2
B00468
Page 292 of 365
Maintenance and service 11-13
CONTINUED
3. After refilling the reserve tank and the
radiator, reinstall the caps and check that
the rubber gaskets inside the radiator cap
are in the proper position.
Changing the coolant
Always add genuine Subaru cooling sys-
tem conditioner whenever the coolant is
replaced.
Change the engine coolant and add gen-
uine Subaru cooling system conditioner
using the following procedures according
to the maintenance schedule.
1. Remove the under cover.
2. Place a proper container under the
drain plug and loosen the drain plug.
3. Loosen the radiator cap to drain the
coolant from the radiator. Then drain the
coolant from the reserve tank. Tighten the
drain plug securely.
NOTE (Turbo model only)
The cap (without tabs) on top of the ra-
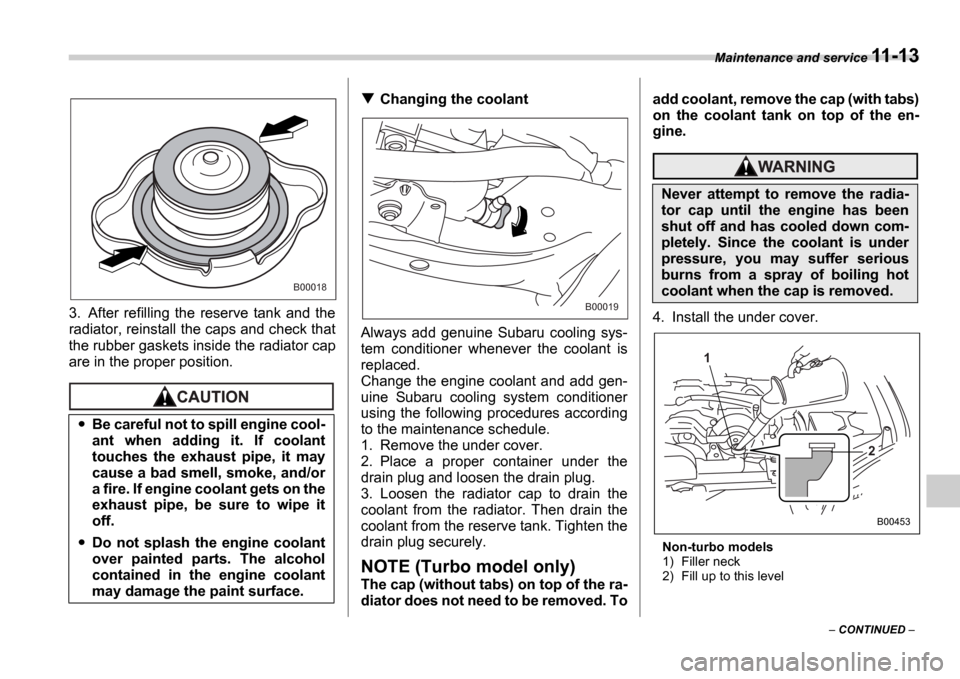
diator does not need to be removed. To add coolant, remove the cap (with tabs)
on the coolant tank on top of the en-
gine.
4. Install the under cover.
Non-turbo models
1) Filler neck
2) Fill up to this level
Be careful not to spill engine cool-
ant when adding it. If coolant
touches the exhaust pipe, it may
cause a bad smell, smoke, and/or
a fire. If engine coolant gets on the
exhaust pipe, be sure to wipe it
off.
Do not splash the engine coolant
over painted parts. The alcohol
contained in the engine coolant
may damage the paint surface.
B00018
B00019
Never attempt to remove the radia-
tor cap until the engine has been
shut off and has cooled down com-
pletely. Since the coolant is under
pressure, you may suffer serious
burns from a spray of boiling hot
coolant when the cap is removed.
1
2
B00453