2006 SUBARU IMPREZA tow
[x] Cancel search: towPage 196 of 365
Interior equipment 6-11
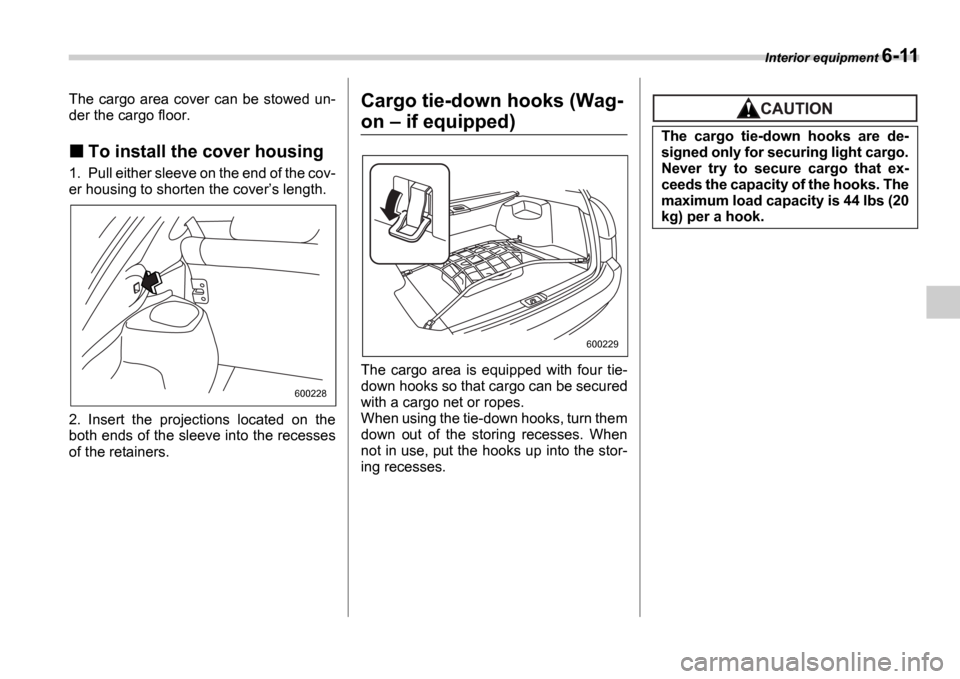
The cargo area cover can be stowed un-
der the cargo floor.
To install the cover housing
1. Pull either sleeve on the end of the cov-
er housing to shorten the cover s length.
2. Insert the projections located on the
both ends of the sleeve into the recesses
of the retainers.
Cargo tie-down hooks (Wag-
on if equipped)
The cargo area is equipped with four tie-
down hooks so that cargo can be secured
with a cargo net or ropes.
When using the tie-down hooks, turn them
down out of the storing recesses. When
not in use, put the hooks up into the stor-
ing recesses.
600228
600229
The cargo tie-down hooks are de-
signed only for securing light cargo.
Never try to secure cargo that ex-
ceeds the capacity of the hooks. The
maximum load capacity is 44 lbs (20
kg) per a hook.
Page 212 of 365
Starting and operating 7-15
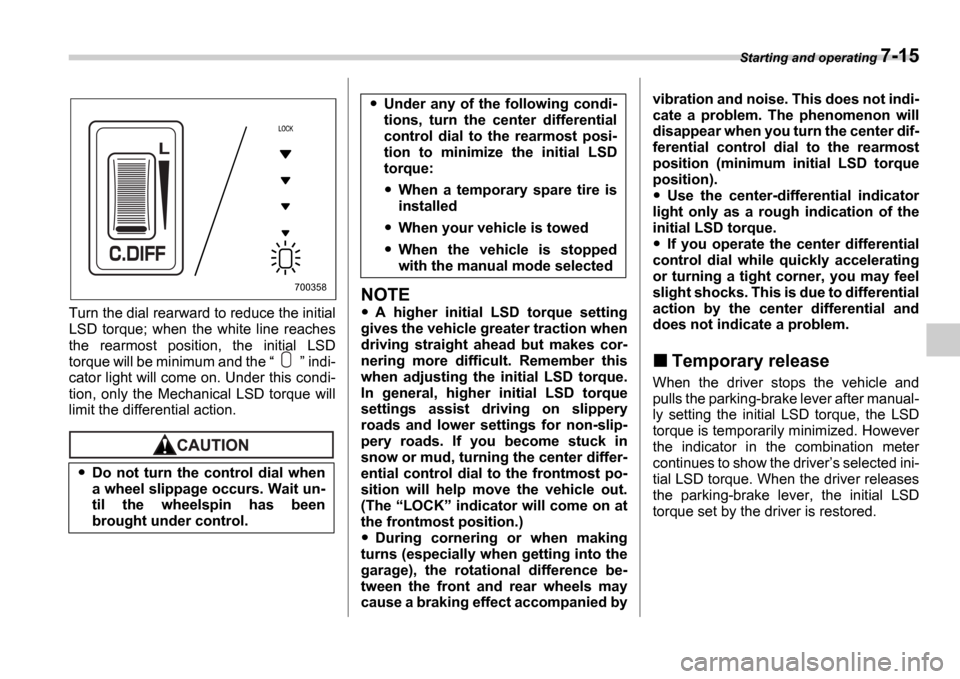
Turn the dial rearward to reduce the initial
LSD torque; when the white line reaches
the rearmost position, the initial LSD
torque will be minimum and the indi-
cator light will come on. Under this condi-
tion, only the Mechanical LSD torque will
limit the differential action.
NOTE
A higher initial LSD torque setting
gives the vehicle greater traction when
driving straight ahead but makes cor-
nering more difficult. Remember this
when adjusting the initial LSD torque.
In general, higher initial LSD torque
settings assist driving on slippery
roads and lower settings for non-slip-
pery roads. If you become stuck in
snow or mud, turning the center differ-
ential control dial to the frontmost po-
sition will help move the vehicle out.
(The LOCK indicator will come on at
the frontmost position.)
During cornering or when making
turns (especially when getting into the
garage), the rotational difference be-
tween the front and rear wheels may
cause a braking effect accompanied by vibration and noise. This does not indi-
cate a problem. The phenomenon will
disappear when you turn the center dif-
ferential control dial to the rearmost
position (minimum initial LSD torque
position).
Use the center-differential indicator
light only as a rough indication of the
initial LSD torque.
If you operate the center differential
control dial while quickly accelerating
or turning a tight corner, you may feel
slight shocks. This is due to differential
action by the center differential and
does not indicate a problem.
Temporary release
When the driver stops the vehicle and
pulls the parking-brake lever after manual-
ly setting the initial LSD torque, the LSD
torque is temporarily minimized. However
the indicator in the combination meter
continues to show the driver s selected ini-
tial LSD torque. When the driver releases
the parking-brake lever, the initial LSD
torque set by the driver is restored.
Do not turn the control dial when
a wheel slippage occurs. Wait un-
til the wheelspin has been
brought under control.
700358
Under any of the following condi-
tions, turn the center differential
control dial to the rearmost posi-
tion to minimize the initial LSD
torque:
When a temporary spare tire is
installed
When your vehicle is towed
When the vehicle is stopped
with the manual mode selected
Page 221 of 365
7-24 Starting and operating
Electronic Brake Force Dis-
tribution (EBD) system
The EBD system maximizes the effective-
ness of the brakes by allowing the rear
brakes to supply a greater proportion of
the braking force. It functions by adjusting
the distribution of braking force to the rear
wheels in accordance with the vehicle s
loading condition and speed.
The EBD system is an integral part of the
ABS system and uses some of the ABS
system s components to perform its func-
tion of optimizing the distribution of brak-
ing force. If any of the ABS components
used by the EBD function fails, the EBD
system also stops working.
When the EBD system is operating, you
may hear a chattering noise or feel a slight
vibration in the brake pedal. This is normal
and does not indicate a malfunction.
Steps to take if EBD system
fails
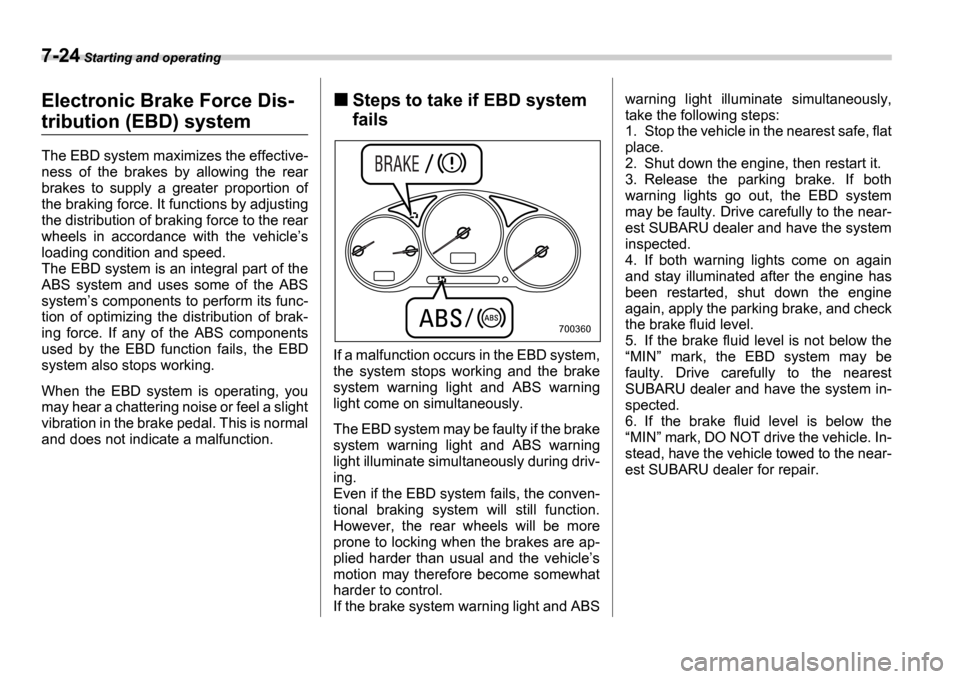
If a malfunction occurs in the EBD system,
the system stops working and the brake
system warning light and ABS warning
light come on simultaneously.
The EBD system may be faulty if the brake
system warning light and ABS warning
light illuminate simultaneously during driv-
ing.
Even if the EBD system fails, the conven-
tional braking system will still function.
However, the rear wheels will be more
prone to locking when the brakes are ap-
plied harder than usual and the vehicle s
motion may therefore become somewhat
harder to control.
If the brake system warning light and ABS warning light illuminate simultaneously,
take the following steps:
1. Stop the vehicle in the nearest safe, flat
place.
2. Shut down the engine, then restart it.
3. Release the parking brake. If both
warning lights go out, the EBD system
may be faulty. Drive carefully to the near-
est SUBARU dealer and have the system
inspected.
4. If both warning lights come on again
and stay illuminated after the engine has
been restarted, shut down the engine
again, apply the parking brake, and check
the brake fluid level.
5. If the brake fluid level is not below the
MIN mark, the EBD system may be
faulty. Drive carefully to the nearest
SUBARU dealer and have the system in-
spected.
6. If the brake fluid level is below the MIN mark, DO NOT drive the vehicle. In-
stead, have the vehicle towed to the near-
est SUBARU dealer for repair.
700360
Page 222 of 365
Starting and operating 7-25
CONTINUED
Parking your vehicle
Parking brake
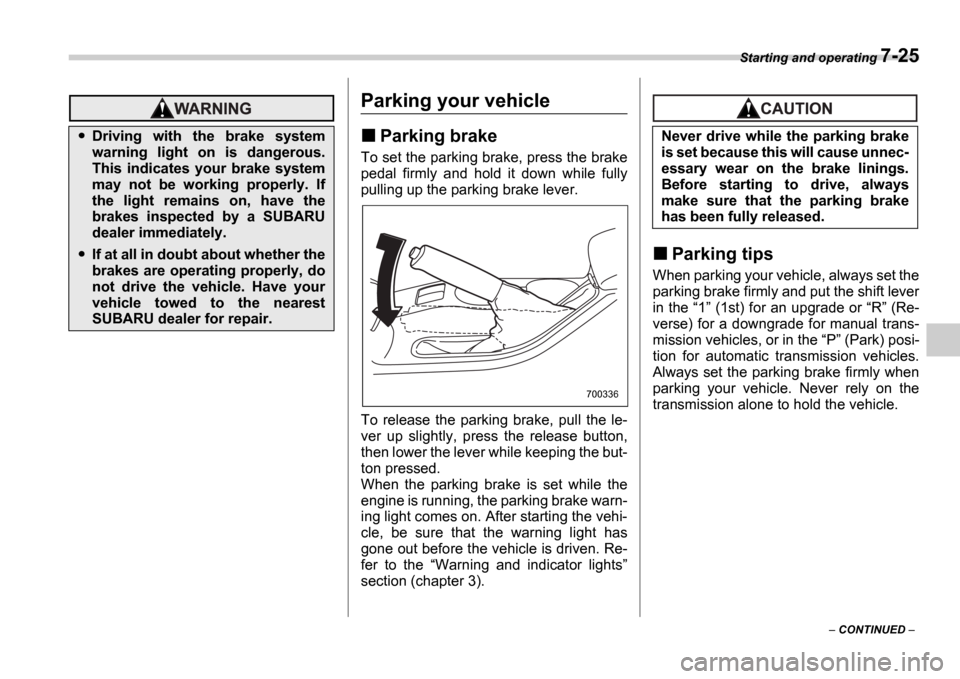
To set the parking brake, press the brake
pedal firmly and hold it down while fully
pulling up the parking brake lever.
To release the parking brake, pull the le-
ver up slightly, press the release button,
then lower the lever while keeping the but-
ton pressed.
When the parking brake is set while the
engine is running, the parking brake warn-
ing light comes on. After starting the vehi-
cle, be sure that the warning light has
gone out before the vehicle is driven. Re-
fer to the Warning and indicator lights
section (chapter 3).
Parking tips
When parking your vehicle, always set the
parking brake firmly and put the shift lever
in the 1 (1st) for an upgrade or R (Re-
verse) for a downgrade for manual trans-
mission vehicles, or in the P (Park) posi-
tion for automatic transmission vehicles.
Always set the parking brake firmly when
parking your vehicle. Never rely on the
transmission alone to hold the vehicle.
Driving with the brake system
warning light on is dangerous.
This indicates your brake system
may not be working properly. If
the light remains on, have the
brakes inspected by a SUBARU
dealer immediately.
If at all in doubt about whether the
brakes are operating properly, do
not drive the vehicle. Have your
vehicle towed to the nearest
SUBARU dealer for repair.
700336
Never drive while the parking brake
is set because this will cause unnec-
essary wear on the brake linings.
Before starting to drive, always
make sure that the parking brake
has been fully released.
Page 228 of 365

8
Driving tips
New vehicle break-in driving the first 1,000
miles (1,600 km) .................................. ............ 8-2
Fuel economy hints ................................ ........... 8-2
Engine exhaust gas (Carbon monoxide) ......... 8-2
Catalytic converter ............................... .............. 8-3
Periodic inspections .............................. ............ 8-4
Driving in foreign countries ...................... ........ 8-4
Driving tips for AWD vehicles ..................... ...... 8-5
Off road driving .................................. ................ 8-6
All AWD models except OUTBACK SPORT and vehicles with 17 inch tires ....................... ............ 8-6
OUTBACK SPORT ..................................... ............. 8-6
Winter driving .................................... ................. 8-8
Operation during cold weather ..................... ......... 8-8
Driving on snowy and icy roads .................... ........ 8-9
Corrosion protection .............................. ................ 8-10
Snow tires ........................................ ....................... 8-10
Tire chains ....................................... ........................ 8-11
Rocking the vehicle ............................... ................. 8-12
Loading your vehicle .............................. ........... 8-12
Vehicle capacity weight ........................... .............. 8-13
GVWR and GAWR (Gross Vehicle Weight Rating and Gross Axle Weight Rating) ..................... ...... 8-14
Roof rail and crossbar (if equipped) .............. ....... 8-14
Trailer hitch (if equipped) ....................... ........... 8-17
Connecting a trailer .............................. .................. 8-17
When you do not tow a trailer ..................... .......... 8-19Trailer towing ....................................
.................. 8-19
Warranties and maintenance ........................ ......... 8-19
Maximum load limits ............................... ............... 8-20
Trailer hitches ................................... ...................... 8-23
Connecting a trailer .............................. .................. 8-24
Trailer towing tips ............................... .................... 8-25
Page 232 of 365
Driving tips 8-5
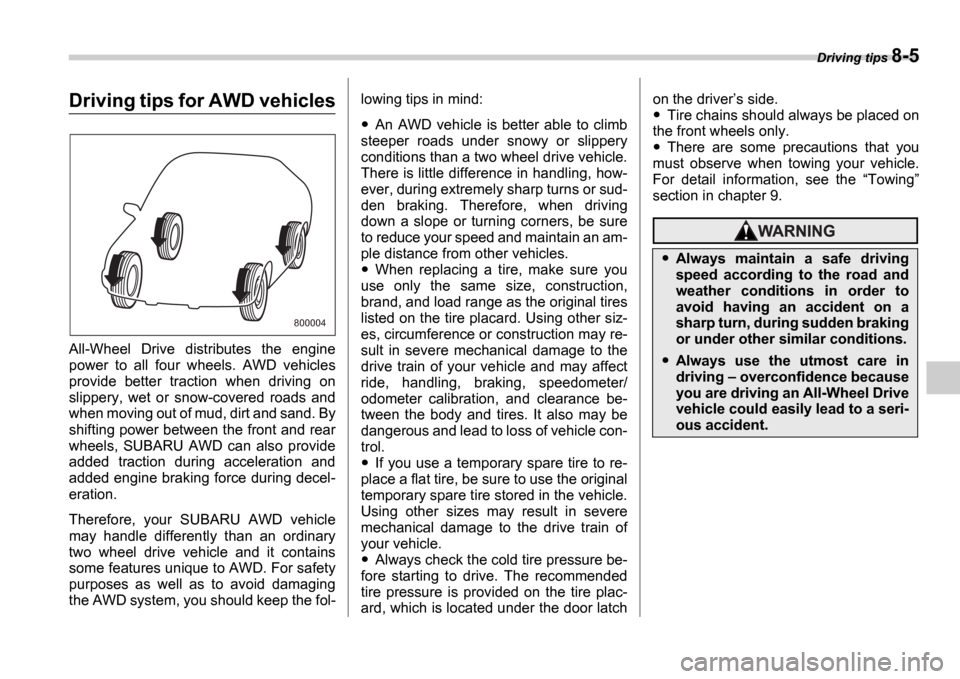
Driving tips for AWD vehicles
All-Wheel Drive distributes the engine
power to all four wheels. AWD vehicles
provide better traction when driving on
slippery, wet or snow-covered roads and
when moving out of mud, dirt and sand. By
shifting power between the front and rear
wheels, SUBARU AWD can also provide
added traction during acceleration and
added engine braking force during decel-
eration.
Therefore, your SUBARU AWD vehicle
may handle differently than an ordinary
two wheel drive vehicle and it contains
some features unique to AWD. For safety
purposes as well as to avoid damaging
the AWD system, you should keep the fol- lowing tips in mind:
An AWD vehicle is better able to climb
steeper roads under snowy or slippery
conditions than a two wheel drive vehicle.
There is little difference in handling, how-
ever, during extremely sharp turns or sud-
den braking. Therefore, when driving
down a slope or turning corners, be sure
to reduce your speed and maintain an am-
ple distance from other vehicles.
When replacing a tire, make sure you
use only the same size, construction,
brand, and load range as the original tires
listed on the tire placard. Using other siz-
es, circumference or construction may re-
sult in severe mechanical damage to the
drive train of your vehicle and may affect
ride, handling, braking, speedometer/
odometer calibration, and clearance be-
tween the body and tires. It also may be
dangerous and lead to loss of vehicle con-
trol.
If you use a temporary spare tire to re-
place a flat tire, be sure to use the original
temporary spare tire stored in the vehicle.
Using other sizes may result in severe
mechanical damage to the drive train of
your vehicle.
Always check the cold tire pressure be-
fore starting to drive. The recommended
tire pressure is provided on the tire plac-
ard, which is located under the door latch on the driver
s side.
Tire chains should always be placed on
the front wheels only.
There are some precautions that you
must observe when towing your vehicle.
For detail information, see the Towing
section in chapter 9.
800004
Always maintain a safe driving
speed according to the road and
weather conditions in order to
avoid having an accident on a
sharp turn, during sudden braking
or under other similar conditions.
Always use the utmost care in
driving overconfidence because
you are driving an All-Wheel Drive
vehicle could easily lead to a seri-
ous accident.
Page 233 of 365
8-6 Driving tips
Off road drivingAll AWD models except
OUTBACK SPORT and vehi-
cles with 17 inch tires
Your AWD vehicle is neither a convention-
al off-road vehicle nor an all terrain vehi-
cle. It is a passenger vehicle designed pri-
marily for on-road use. The AWD feature
gives it some limited off-road capabilities
in situations in which driving surfaces are
relatively level, obstruction-free and other-
wise similar to on-road driving conditions.
Operating it under other than those condi-
tions could subject the vehicle to exces-
sive stress which might result in damage
not eligible for repair under warranty. If
you do take your SUBARU off road, you
should review the common sense precau-
tions in the next section (applicable to the
OUTBACK SPORT) for general guidance.
But please keep in mind that your vehi-
cles off-road capabilities are more limited
than those of the OUTBACK SPORT.
Never attempt to drive through pools and
puddles, or roads flooded with water. Wa-
ter entering the engine air intake or the ex-
haust pipe or water splashing onto electri-
cal parts may damage your vehicle and
may cause it to stall.
OUTBACK SPORT
Your Subaru can be driven on ordinary roads or off-road. But please keep in mind
that an AWD SUBARU is a passenger ve-
hicle and is neither a conventional off-road
vehicle nor an all-terrain vehicle. If you do
take your Subaru off-road, certain com-
mon sense precautions such as the fol-
lowing should be taken:
Make certain that you and all of your
passengers are wearing seatbelts.
Carry some emergency equipment,
such as a towing rope or chain, a shovel,
wheel blocks, first aid kit and cell phone or
citizens band radio.
Drive carefully. Do not take unneces-
sary risks by driving in dangerous areas or
over rough terrain.
Slow down and employ extra caution at
all times. When driving off-road, you will
not have the benefit of marked traffic
lanes, banked curves, traffic signs and the
like.
Do not drive across steep slopes. In-
stead, drive either straight up or straight
down the slopes. A vehicle can much
more easily tip over sideways than it can
end over end. Avoid driving straight up or
down slopes that are too steep.
Avoid sharp turning maneuvers, espe-
cially at higher speeds.
Do not grip the inside or spokes of the
steering wheel. A bad bump could jerk the
wheel and injure your hands. Instead drive
Always maintain a safe driving
speed according to the road and
weather conditions in order to
avoid having an accident on a
sharp turn, during sudden braking
or under other similar conditions.
Always use the utmost care in
driving overconfidence because
you are driving an All-Wheel Drive
vehicle could easily lead to a seri-
ous accident.
Do not drive on rough roads or over
curbs in a vehicle that has 17-inch or
other ultra-low-profile tires. The
wheels and tires could be damaged
by shock forces, leading to abnor-
mal vibration or poor straight-line
tracking. Driving would then be
more difficult.
Page 243 of 365
8-16 Driving tips
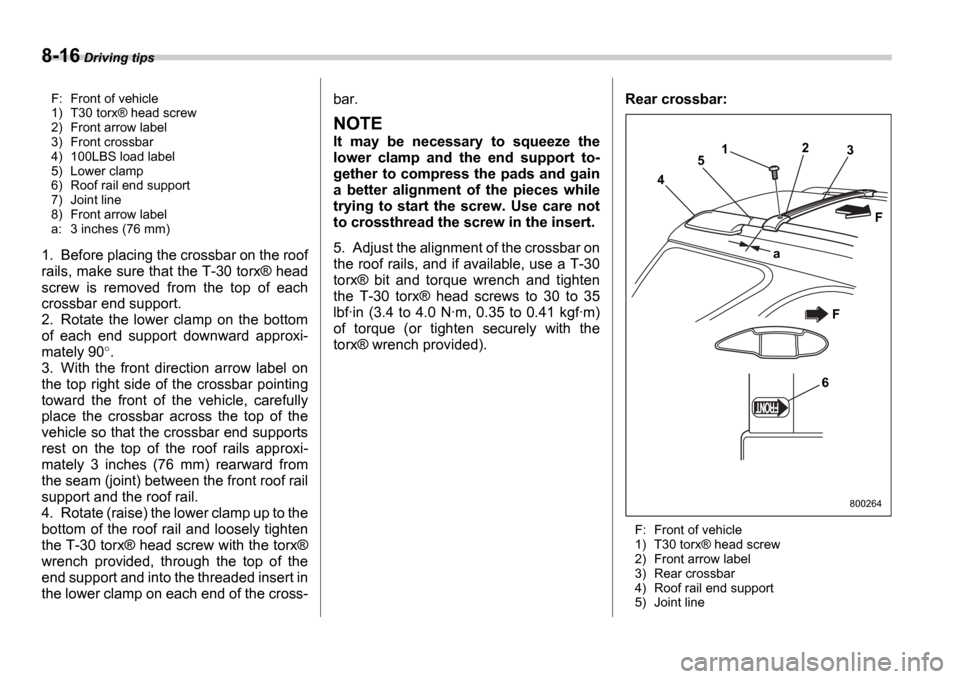
F: Front of vehicle
1) T30 torx Æ head screw
2) Front arrow label
3) Front crossbar
4) 100LBS load label
5) Lower clamp
6) Roof rail end support
7) Joint line
8) Front arrow label
a: 3 inches (76 mm)
1. Before placing the crossbar on the roof
rails, make sure that the T-30 torx Æ head
screw is removed from the top of each
crossbar end support.
2. Rotate the lower clamp on the bottom
of each end support downward approxi-
mately 90 .
3. With the front direction arrow label on
the top right side of the crossbar pointing
toward the front of the vehicle, carefully
place the crossbar across the top of the
vehicle so that the crossbar end supports
rest on the top of the roof rails approxi-
mately 3 inches (76 mm) rearward from
the seam (joint) between the front roof rail
support and the roof rail.
4. Rotate (raise) the lower clamp up to the
bottom of the roof rail and loosely tighten
the T-30 torx Æ head screw with the torx Æ
wrench provided, through the top of the
end support and into the threaded insert in
the lower clamp on each end of the cross- bar.
NOTE
It may be necessary to squeeze the
lower clamp and the end support to-
gether to compress the pads and gain
a better alignment of the pieces while
trying to start the screw. Use care not
to crossthread the screw in the insert.
5. Adjust the alignment of the crossbar on
the roof rails, and if available, use a T-30
torx
Æ bit and torque wrench and tighten
the T-30 torx Æ head screws to 30 to 35
lbf ∑in (3.4 to 4.0 N ∑m, 0.35 to 0.41 kgf ∑m)
of torque (or tighten securely with the
torx Æ wrench provided). Rear crossbar:
F: Front of vehicle
1) T30 torx
Æ head screw
2) Front arrow label
3) Rear crossbar
4) Roof rail end support
5) Joint line
6 3
F
2
1
5
a
4
F
800264