2006 SUBARU IMPREZA tow
[x] Cancel search: towPage 129 of 365
3-16 Instruments and controls
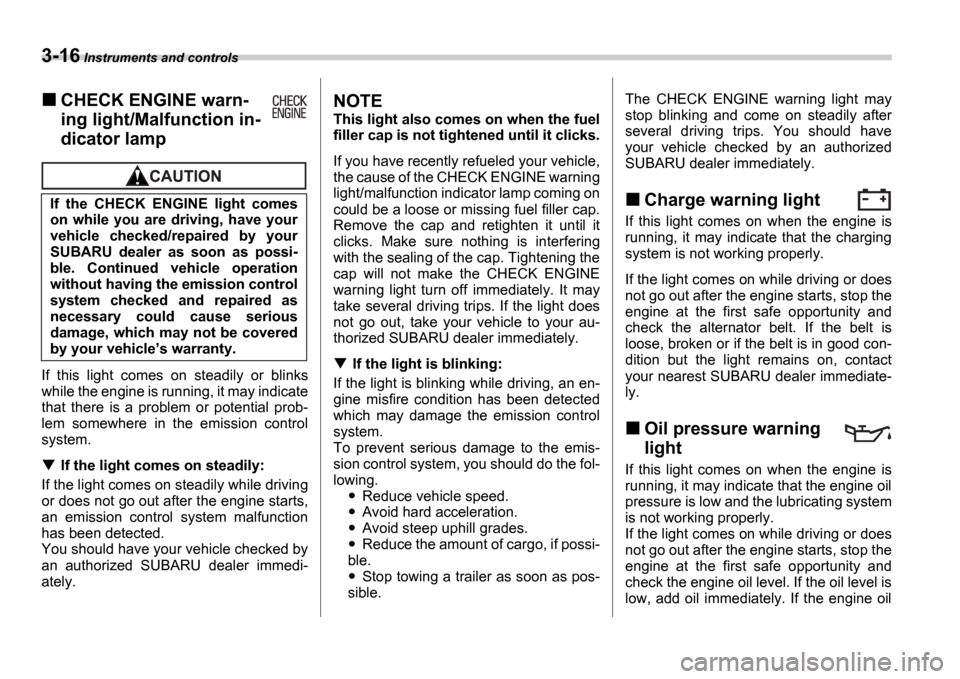
CHECK ENGINE warn-
ing light/Malfunction in-
dicator lamp
If this light comes on steadily or blinks
while the engine is running, it may indicate
that there is a problem or potential prob-
lem somewhere in the emission control
system.
If the light comes on steadily:
If the light comes on steadily while driving
or does not go out after the engine starts,
an emission control system malfunction
has been detected.
You should have your vehicle checked by
an authorized SUBARU dealer immedi-
ately.
NOTE
This light also comes on when the fuel
filler cap is not tightened until it clicks.
If you have recently refueled your vehicle,
the cause of the CHECK ENGINE warning
light/malfunction indicator lamp coming on
could be a loose or missing fuel filler cap.
Remove the cap and retighten it until it
clicks. Make sure nothing is interfering
with the sealing of the cap. Tightening the
cap will not make the CHECK ENGINE
warning light turn off immediately. It may
take several driving trips. If the light does
not go out, take your vehicle to your au-
thorized SUBARU dealer immediately.
If the light is blinking:
If the light is blinking while driving, an en-
gine misfire condition has been detected
which may damage the emission control
system.
To prevent serious damage to the emis-
sion control system, you should do the fol-
lowing.
Reduce vehicle speed.
Avoid hard acceleration.
Avoid steep uphill grades.
Reduce the amount of cargo, if possi-
ble.
Stop towing a trailer as soon as pos-
sible. The CHECK ENGINE warning light may
stop blinking and come on steadily after
several driving trips. You should have
your vehicle checked by an authorized
SUBARU dealer immediately.
Charge warning light
If this light comes on when the engine is
running, it may indicate that the charging
system is not working properly.
If the light comes on while driving or does
not go out after the engine starts, stop the
engine at the first safe opportunity and
check the alternator belt. If the belt is
loose, broken or if the belt is in good con-
dition but the light remains on, contact
your nearest SUBARU dealer immediate-
ly.
Oil pressure warning
light
If this light comes on when the engine is
running, it may indicate that the engine oil
pressure is low and the lubricating system
is not working properly.
If the light comes on while driving or does
not go out after the engine starts, stop the
engine at the first safe opportunity and
check the engine oil level. If the oil level is
low, add oil immediately. If the engine oil
If the CHECK ENGINE light comes
on while you are driving, have your
vehicle checked/repaired by your
SUBARU dealer as soon as possi-
ble. Continued vehicle operation
without having the emission control
system checked and repaired as
necessary could cause serious
damage, which may not be covered
by your vehicle
s warranty.
Page 131 of 365
3-18 Instruments and controls
With a vehicle equipped with an EBD sys-
tem, the ABS warning light comes on to-
gether with the brake system warning light
if the EBD system becomes faulty. For fur-
ther details of the EBD system fault warn-
ing, refer to Brake system warning light .
NOTE
If the warning light behavior is as de-
scribed in the following, the ABS sys-
tem may be considered normal.
The warning light comes on right af-
ter the engine is started but goes out
immediately, remaining off.
The warning light remains on after the engine has been started, but it goes
out when the vehicle speed reaches
approximately 8 mph (12 km/h).
The warning light comes on during
driving, but it goes out immediately
and remains off.
When driving with an insufficient battery
voltage such as when the engine is jump
started, the ABS warning light may come
on. This is due to the low battery voltage
and does not indicate a malfunction.
When the battery becomes fully charged,
the light will go out.
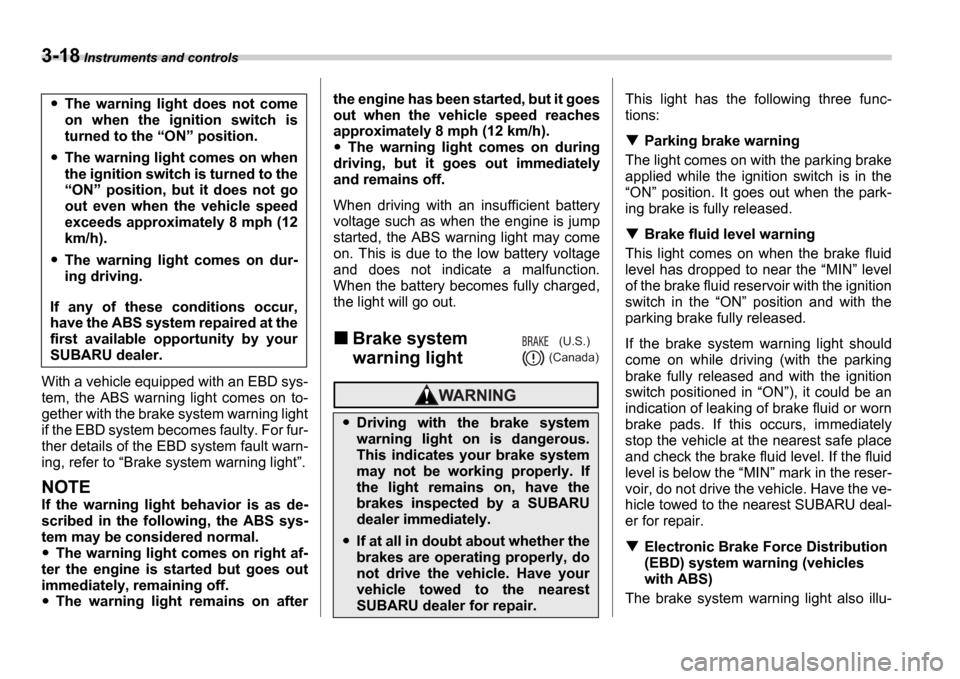
Brake system
warning light
This light has the following three func-
tions:
Parking brake warning
The light comes on with the parking brake
applied while the ignition switch is in the ON position. It goes out when the park-
ing brake is fully released.
Brake fluid level warning
This light comes on when the brake fluid
level has dropped to near the MIN level
of the brake fluid reservoir with the ignition
switch in the ON position and with the
parking brake fully released.
If the brake system warning light should
come on while driving (with the parking
brake fully released and with the ignition
switch positioned in ON ), it could be an
indication of leaking of brake fluid or worn
brake pads. If this occurs, immediately
stop the vehicle at the nearest safe place
and check the brake fluid level. If the fluid
level is below the MIN mark in the reser-
voir, do not drive the vehicle. Have the ve-
hicle towed to the nearest SUBARU deal-
er for repair.
Electronic Brake Force Distribution
(EBD) system warning (vehicles
with ABS)
The brake system warning light also illu-
The warning light does not come
on when the ignition switch is
turned to the ON position.
The warning light comes on when
the ignition switch is turned to the ON position, but it does not go
out even when the vehicle speed
exceeds approximately 8 mph (12
km/h).
The warning light comes on dur-
ing driving.
If any of these conditions occur,
have the ABS system repaired at the
first available opportunity by your
SUBARU dealer.
Driving with the brake system
warning light on is dangerous.
This indicates your brake system
may not be working properly. If
the light remains on, have the
brakes inspected by a SUBARU
dealer immediately.
If at all in doubt about whether the
brakes are operating properly, do
not drive the vehicle. Have your
vehicle towed to the nearest
SUBARU dealer for repair.
(U.S.)
(Canada)
Page 132 of 365
Instruments and controls 3-19
CONTINUED
minates if a malfunction occurs in the EBD
system. In that event, it comes on together
with the ABS warning light.
The EBD system may be malfunctioning if
the brake system warning light and ABS
warning light illuminate simultaneously
during driving.
Even if the EBD system fails, the conven-
tional braking system will still function.
However, the rear wheels will be more
prone to locking when the brakes are ap-
plied harder than usual and the vehicle
s
motion may therefore become somewhat
harder to control.
If the brake system warning light and ABS
warning light illuminate simultaneously,
take the following steps:
1. Stop the vehicle in the nearest safe, flat
place.
2. Shut down the engine, then restart it.
3. Release the parking brake. If both
warning lights go out, the EBD system
may be faulty. Drive carefully to the near-
est SUBARU dealer and have the system
inspected.
4. If both warning lights come on again
and stay illuminated after the engine has
been restarted, shut down the engine
again, apply the parking brake, and check
the brake fluid level.
5. If the brake fluid level is not below the MIN mark, the EBD system may be faulty. Drive carefully to the nearest
SUBARU dealer and have the system in-
spected.
6. If the brake fluid level is below the
MIN mark, DO NOT drive the vehicle. In-
stead, have the vehicle towed to the near-
est SUBARU dealer for repair.
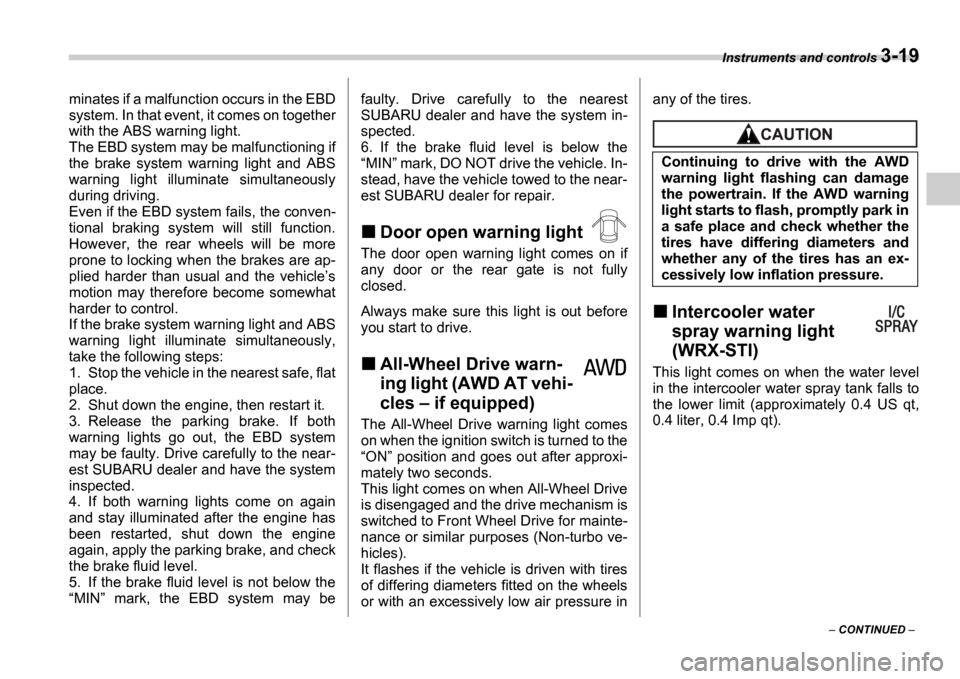
Door open warning light
The door open warning light comes on if
any door or the rear gate is not fully
closed.
Always make sure this light is out before
you start to drive.
All-Wheel Drive warn-
ing light (AWD AT vehi-
cles if equipped)
The All-Wheel Drive warning light comes
on when the ignition switch is turned to the ON position and goes out after approxi-
mately two seconds.
This light comes on when All-Wheel Drive
is disengaged and the drive mechanism is
switched to Front Wheel Drive for mainte-
nance or similar purposes (Non-turbo ve-
hicles).
It flashes if the vehicle is driven with tires
of differing diameters fitted on the wheels
or with an excessively low air pressure in any of the tires.
Intercooler water
spray warning light
(WRX-STI)
This light comes on when the water level
in the intercooler water spray tank falls to
the lower limit (approximately 0.4 US qt,
0.4 liter, 0.4 Imp qt).
Continuing to drive with the AWD
warning light flashing can damage
the powertrain. If the AWD warning
light starts to flash, promptly park in
a safe place and check whether the
tires have differing diameters and
whether any of the tires has an ex-
cessively low inflation pressure.
Page 141 of 365
3-28 Instruments and controls
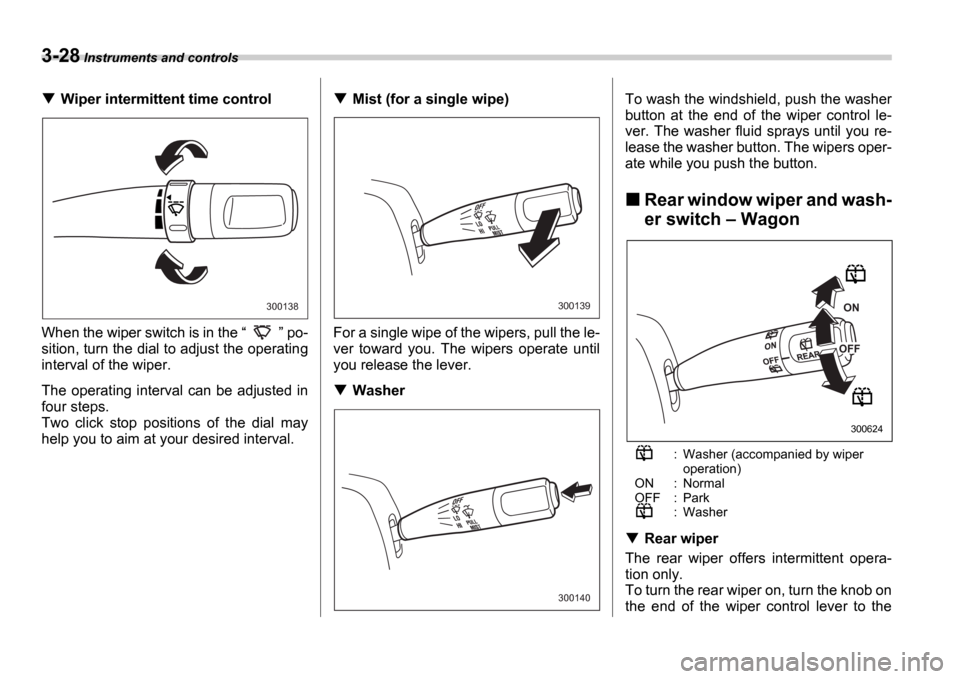
Wiper intermittent time control
When the wiper switch is in the po-
sition, turn the dial to adjust the operating
interval of the wiper.
The operating interval can be adjusted in
four steps.
Two click stop positions of the dial may
help you to aim at your desired interval.Mist (for a single wipe)
For a single wipe of the wipers, pull the le-
ver toward you. The wipers operate until
you release the lever.
Washer To wash the windshield, push the washer
button at the end of the wiper control le-
ver. The washer fluid sprays until you re-
lease the washer button. The wipers oper-
ate while you push the button.
Rear window wiper and wash-
er switch
Wagon
: Washer (accompanied by wiper operation)
ON : Normal
OFF : Park
: Washer
Rear wiper
The rear wiper offers intermittent opera-
tion only.
To turn the rear wiper on, turn the knob on
the end of the wiper control lever to the
300138300139
300140
ON
OFF
300624
Page 145 of 365
3-32 Instruments and controls
Mirrors
Always check that the inside and outside
mirrors are properly adjusted before you
start driving.
Inside mirror
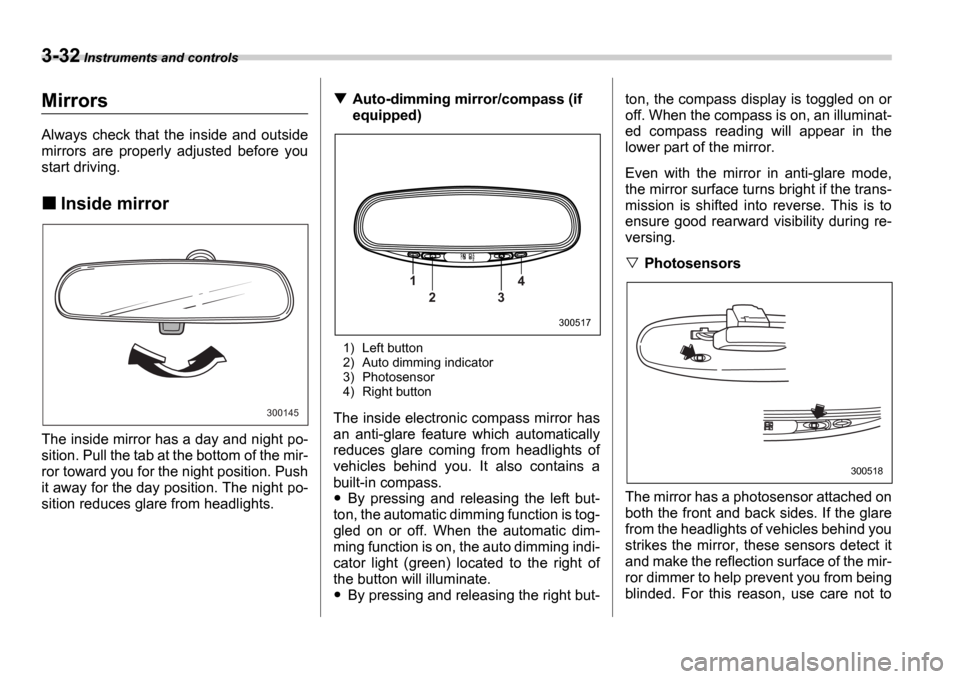
The inside mirror has a day and night po-
sition. Pull the tab at the bottom of the mir-
ror toward you for the night position. Push
it away for the day position. The night po-
sition reduces glare from headlights.
Auto-dimming mirror/compass (if
equipped)
1) Left button
2) Auto dimming indicator
3) Photosensor
4) Right button
The inside electronic compass mirror has
an anti-glare feature which automatically
reduces glare coming from headlights of
vehicles behind you. It also contains a
built-in compass.
By pressing and releasing the left but-
ton, the automatic dimming function is tog-
gled on or off. When the automatic dim-
ming function is on, the auto dimming indi-
cator light (green) located to the right of
the button will illuminate.
By pressing and releasing the right but- ton, the compass display is toggled on or
off. When the compass is on, an illuminat-
ed compass reading will appear in the
lower part of the mirror.
Even with the mirror in anti-glare mode,
the mirror surface turns bright if the trans-
mission is shifted into reverse. This is to
ensure good rearward visibility during re-
versing.
Photosensors
The mirror has a photosensor attached on
both the front and back sides. If the glare
from the headlights of vehicles behind you
strikes the mirror, these sensors detect it
and make the reflection surface of the mir-
ror dimmer to help prevent you from being
blinded. For this reason, use care not to
300145
1 2 3 4
300517
300518
Page 154 of 365
Climate control 4-5
CONTINUED
Heater operation
Defrosting or defogging the wind-
shield
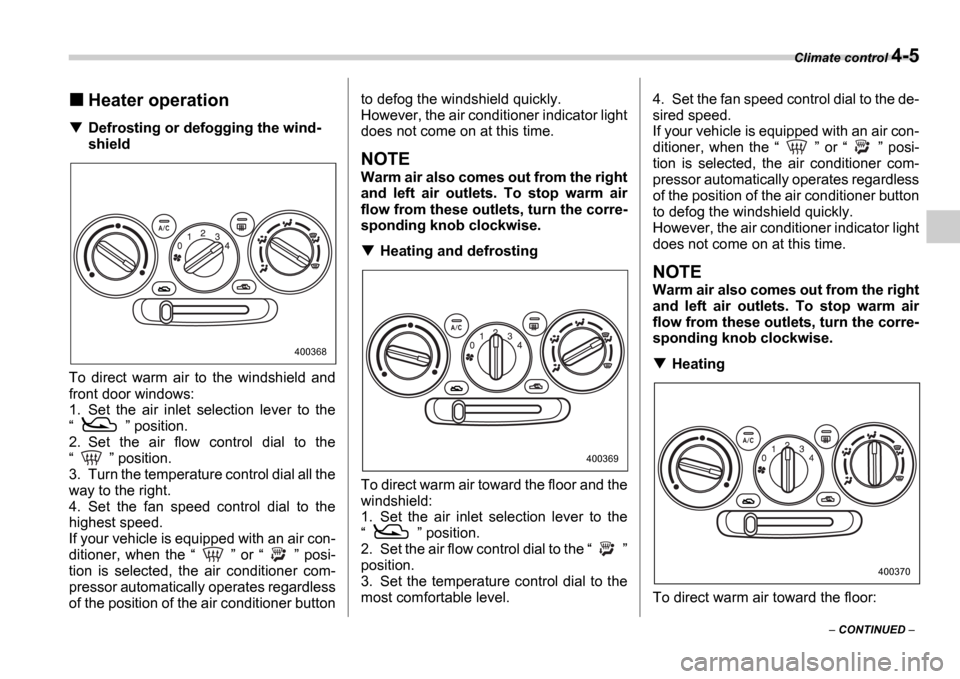
To direct warm air to the windshield and
front door windows:
1. Set the air inlet selection lever to the
position.
2. Set the air flow control dial to the
position.
3. Turn the temperature control dial all the
way to the right.
4. Set the fan speed control dial to the
highest speed.
If your vehicle is equipped with an air con-
ditioner, when the or posi-
tion is selected, the air conditioner com-
pressor automatically operates regardless
of the position of the air conditioner button to defog the windshield quickly.
However, the air conditioner indicator light
does not come on at this time.
NOTE
Warm air also comes out from the right
and left air outlets. To stop warm air
flow from these outlets, turn the corre-
sponding knob clockwise.
Heating and defrosting
To direct warm air toward the floor and the
windshield:
1. Set the air inlet selection lever to the
position.
2. Set the air flow control dial to the
position.
3. Set the temperature control dial to the
most comfortable level. 4. Set the fan speed control dial to the de-
sired speed.
If your vehicle is equipped with an air con-
ditioner, when the
or posi-
tion is selected, the air conditioner com-
pressor automatically operates regardless
of the position of the air conditioner button
to defog the windshield quickly.
However, the air conditioner indicator light
does not come on at this time.
NOTE
Warm air also comes out from the right
and left air outlets. To stop warm air
flow from these outlets, turn the corre-
sponding knob clockwise.
Heating
To direct warm air toward the floor:
400368
400369
400370
Page 186 of 365
6
Interior equipment
Interior light ........................................................ 6-2
Dome light ........................................ ....................... 6-2
Cargo area light (if equipped) .................... ............ 6-2
Map light (if equipped) ........................... ............ 6-2
Sun visors ........................................ ................... 6-3
Vanity mirror (if equipped) ....................... .............. 6-3
Storage compartments .............................. ........ 6-4
Glove box ......................................... ....................... 6-4
Center console .................................... .................... 6-4
Coin tray ......................................... ......................... 6-4
Cup holder ........................................ .................. 6-5
Front passenger s cup holder ............................... 6-5
Rear passenger s cup holder ................................ 6-5
Accessory power outlet (if equipped) .............. 6-5
Cigarette lighter socket .......................... ........... 6-6
Use with a cigarette lighter ...................... .............. 6-7
Using as an accessory power outlet ................ ..... 6-7
Ashtray ........................................... ..................... 6-8
Floor mat (if equipped) ........................... ........... 6-9
Coat hook ......................................... ................... 6-9
Cargo area cover (Wagon if equipped) ......... 6-10
Using the cover ................................... .................... 6-10
To remove the cover ............................... ............... 6-10
Stowage of the cover .............................. ............... 6-10
To install the cover housing ...................... ............ 6-11
Cargo tie-down hooks (Wagon if equipped) .................................... 6 -11Cargo area bars ...................................
............... 6-12
Under-floor storage compartment (if equipped) ..................................... ................ 6-12
Page 195 of 365
6-10 Interior equipment
Cargo area cover (Wagon if
equipped)
The cargo area cover is provided for cov-
ering the cargo area and to protect its con-
tents from direct sunlight. This cover is de-
tachable to make room for additional car-
go.
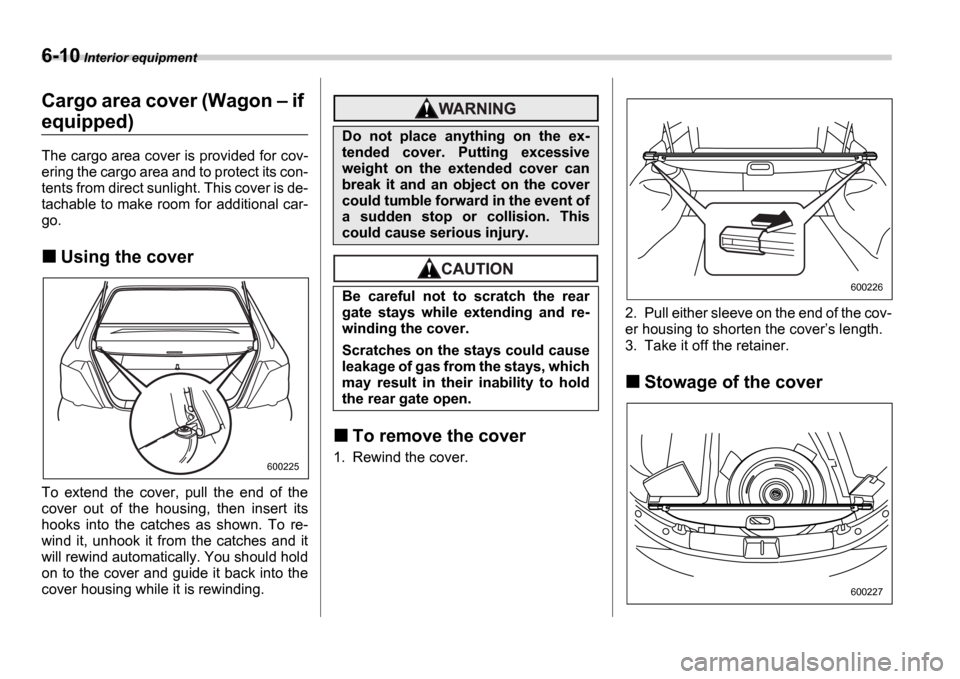
Using the cover
To extend the cover, pull the end of the
cover out of the housing, then insert its
hooks into the catches as shown. To re-
wind it, unhook it from the catches and it
will rewind automatically. You should hold
on to the cover and guide it back into the
cover housing while it is rewinding.
To remove the cover
1. Rewind the cover. 2. Pull either sleeve on the end of the cov-
er housing to shorten the cover
s length.
3. Take it off the retainer.
Stowage of the cover
600225
Do not place anything on the ex-
tended cover. Putting excessive
weight on the extended cover can
break it and an object on the cover
could tumble forward in the event of
a sudden stop or collision. This
could cause serious injury.
Be careful not to scratch the rear
gate stays while extending and re-
winding the cover.
Scratches on the stays could cause
leakage of gas from the stays, which
may result in their inability to hold
the rear gate open.
600226
600227