2006 SUBARU IMPREZA wiper
[x] Cancel search: wiperPage 142 of 365
Instruments and controls 3-29
CONTINUED
ON position.
To turn the wiper off, return the knob on
the end of the lever to the OFF position.
Washer
To wash the rear window while the rear
wiper is operating, turn the knob on the
end of the wiper control lever counter-
clockwise to the position. The
washer fluid sprays until you release the
knob.
To wash the rear window when the rear
wiper is not in use, turn the knob on the
end of the wiper control lever clockwise to
the position. The washer fluid
sprays and the wiper operates until you
release the knob.
Rear window defogger but-
ton
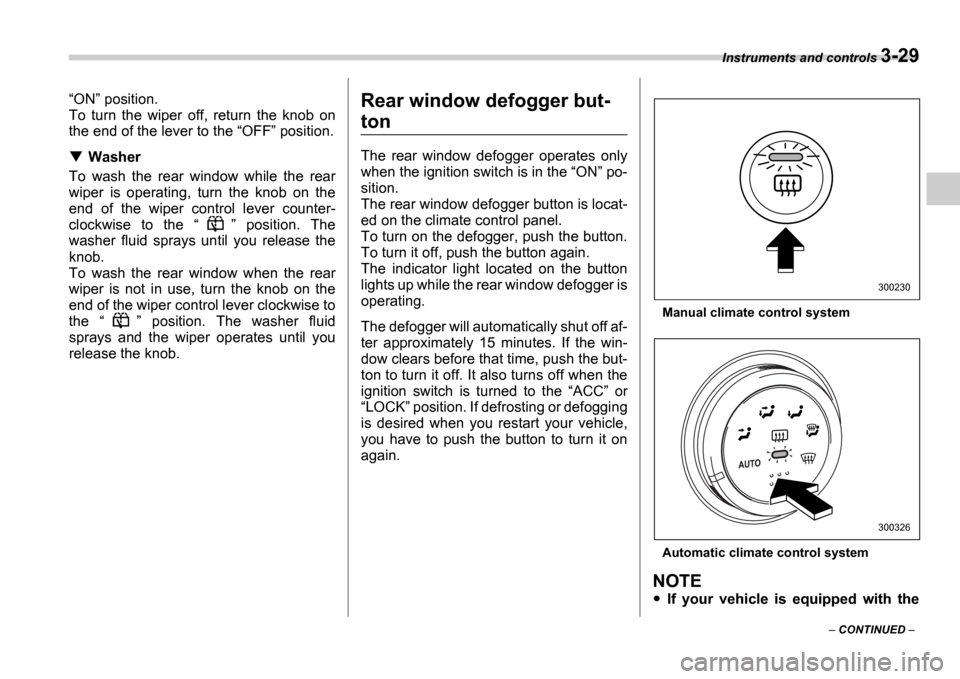
The rear window defogger operates only
when the ignition switch is in the ON po-
sition.
The rear window defogger button is locat-
ed on the climate control panel.
To turn on the defogger, push the button.
To turn it off, push the button again.
The indicator light located on the button
lights up while the rear window defogger is
operating.
The defogger will automatically shut off af-
ter approximately 15 minutes. If the win-
dow clears before that time, push the but-
ton to turn it off. It also turns off when the
ignition switch is turned to the ACC or
LOCK position. If defrosting or defogging
is desired when you restart your vehicle,
you have to push the button to turn it on
again.
Manual climate control system
Automatic climate control system
NOTE
If your vehicle is equipped with the
300230
300326
Page 143 of 365
3-30 Instruments and controls
outside mirror defogger, the outside
mirror defogger operates while the rear
window defogger is operating.
Turn on the rear window defogger if
the wiper is frozen to the glass.
Windshield wiper deicer (if
equipped)
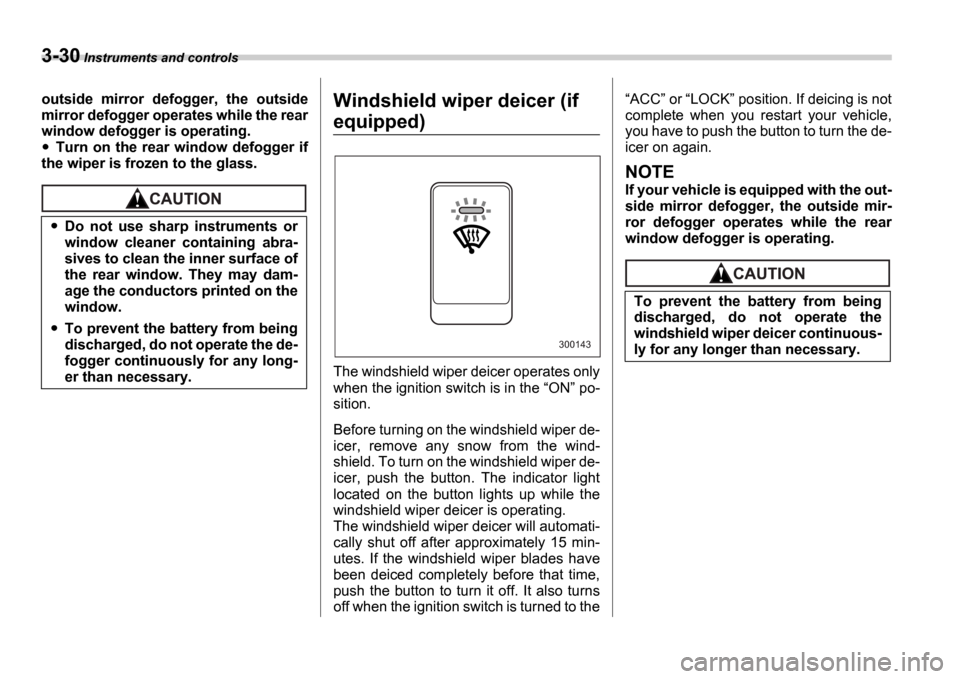
The windshield wiper deicer operates only
when the ignition switch is in the ON po-
sition.
Before turning on the windshield wiper de-
icer, remove any snow from the wind-
shield. To turn on the windshield wiper de-
icer, push the button. The indicator light
located on the button lights up while the
windshield wiper deicer is operating.
The windshield wiper deicer will automati-
cally shut off after approximately 15 min-
utes. If the windshield wiper blades have
been deiced completely before that time,
push the button to turn it off. It also turns
off when the ignition switch is turned to the
ACC or LOCK position. If deicing is not
complete when you restart your vehicle,
you have to push the button to turn the de-
icer on again.
NOTE
If your vehicle is equipped with the out-
side mirror defogger, the outside mir-
ror defogger operates while the rear
window defogger is operating.
Do not use sharp instruments or
window cleaner containing abra-
sives to clean the inner surface of
the rear window. They may dam-
age the conductors printed on the
window.
To prevent the battery from being
discharged, do not operate the de-
fogger continuously for any long-
er than necessary.
300143
To prevent the battery from being
discharged, do not operate the
windshield wiper deicer continuous-
ly for any longer than necessary.
Page 236 of 365
Driving tips 8-9
CONTINUED
do so and check under the fenders period-
ically.
Parking in cold weather
Do not use the parking brake when park-
ing for long periods in cold weather since
it could freeze in that position. Instead, ob-
serve the following.
1. Place the shift lever in 1 or R for
manual transmission vehicles, and in P
for automatic transmission vehicles.
2. Use tire stops under the tires to prevent
the vehicle from moving.
When the vehicle is parked in snow or
when it snows, raise the wiper blades off
the glass to prevent damage to them.
When the vehicle has been left parked af-
ter use on roads heavily covered with
snow, or has been left parked during a
snowstorm, icing may develop on the
brake system, which could cause poor
braking action. Check for snow or ice
buildup on the suspension, disc brakes
and brake hoses underneath the vehicle.
If there is caked snow or ice, remove it,
being careful not to damage the disc
brakes and brake hoses and ABS har-
ness.
Refueling in cold weather
To help prevent moisture from forming in
the fuel system and the risk of its freezing,
use of an antifreeze additive in the fuel
tank is recommended during cold weath-
er.
Use only additives that are specifically de-
signed for this purpose. When an anti-
freeze additive is used, its effect lasts
longer if the tank is refilled whenever the
fuel level reaches half empty.
If your SUBARU is not going to be used for
an extended period, it is best to have the
fuel tank filled to capacity.
Driving on snowy and icy
roads
To prevent skidding and slipping, avoid
sudden braking, abrupt acceleration, high-
speed driving, and sharp turning when
driving on snowy or icy roads.
Always maintain ample distance between your vehicle and the vehicle ahead of you
to avoid the need for sudden braking.
To supplement the foot brake, use the en-
gine brake effectively to control the vehi-
cle speed. (Shift into a lower gear when
necessary.)
Avoid shifting down abruptly. Such behav-
ior can cause the wheels to lock, possibly
leading to loss of vehicle control.
An anti-lock brake system (ABS) enhanc-
es your vehicle
s braking performance on
snowy and icy roads. Refer to the ABS
(Anti-lock Brake System) section in chap-
ter 7 for information on braking on slippery
surfaces.
NOTE
The following tires are summer tires.
Compared with winter and all-season
tires, summer tires give significantly
less grip on snowy and icy road surfac-
es. Avoid driving on snowy and icy
road surface with summer tires.
225/45R17 tires for WRX-STI
Snow can trap dangerous exhaust
gases under your vehicle. Keep
snow clear of the exhaust pipe and
from around your vehicle if you park
the vehicle in snow with the engine
running.
Do not use the cruise control on
slippery roads such as snowy or icy
roads. This may cause loss of vehi-
cle control.
Page 237 of 365
8-10 Driving tips
Wiper operation when snowing
Before driving in cold weather, make sure
the wiper blades are not frozen to the
windshield or rear window. If the wiper
blades are frozen to the windshield or rear
window, use the defroster with the airflow
control dial in the position and the
temperature control dial set for maximum
warmth until the wiper blades are com-
pletely thawed out. If your vehicle is
equipped with a wiper deicer, it is helpful
to thaw the windshield wiper blades. To
thaw out the rear wiper blade, use the rear
window defogger.
When driving in snow, if frozen snow
starts to stick on the surface of the wind-
shield despite wiper operation, use the de-
froster with the airflow control dial in
and the temperature control dial
set for maximum warmth. After the wind-
shield gets warmed enough to melt the
frozen snow on it, wash it away using the windshield washer.
Snow stuck on the wiper arm prevents the
wiper from working effectively. If snow is
stuck on the wiper arm, pull off the road to
a safe place, then remove it. If you stop
the vehicle at road side, use the hazard
warning flasher to alert other drivers.
We recommend use of non-freezing type
wiper blades (winter blades) during the
seasons you could have snow and sub-
zero temperatures. Blades of this type
give superior wiping performance in
snowy conditions. Be sure to use blades
that are suitable for your vehicle.
NOTE
When the season requiring non-freez-
ing type wiper blades is over, replace
them with standard wiper blades.
Corrosion protection
Refer to the
Corrosion protection section
(chapter 10).
Snow tires
All models except WRX-STIAvoid prolonged continuous driving
in snowstorms. Snow will enter the
engine s intake system and may
hinder the air flow, which could re-
sult in engine shutdown or even
breakdown.
During high-speed driving, non-
freezing type wiper blades may not
perform as well as standard wiper
blades. If this happens, reduce the
vehicle speed.
When replacing original tires with
winter (snow) tires, make sure you
use only the same size, construc-
tion and load range as the original
tires listed on the tire placard. Us-
ing other sizes and construction
may affect speedometer/odome-
ter calibration and clearance be-
tween the body and tires. It also
may be dangerous and lead to
loss of vehicle control.
You must install four winter tires
that are of the same size, con-
struction, brand, and load range.
Mixing other sizes or construc-
tions may result in severe me-
chanical damage to the drive train
of your vehicle and may affect
ride, handling, braking and speed-
ometer/odometer calibration. It
also may be dangerous and lead
to loss of vehicle control.
Page 275 of 365
10-2 Appearance care
Appearance careExterior care
Washing
NOTE
When having your vehicle washed in
an automatic car wash, make sure be-
forehand that the car wash is of suit-
able type.
The best way to preserve your vehicle s
beauty is frequent washing. Wash the ve-
hicle at least once a month to avoid con-
tamination by road grime.
Wash dirt off with a wet sponge and plenty
of lukewarm or cold water. Do not wash
the vehicle with hot water and in direct
sunlight.
Salt, chemicals, insects, tar, soot, tree
sap, and bird droppings should be washed
off by using a light detergent, as required.
If you use a light detergent, make certain
that it is a neutral detergent. Do not use
strong soap or chemical detergents. All
cleaning agents should be promptly
flushed from the surface and not allowed
to dry there. Rinse the vehicle thoroughly
When washing the vehicle, the
brakes may get wet. As a result,
the brake stopping distance will
be longer. To dry the brakes, drive
the vehicle at a safe speed while
lightly pressing the brake pedal to
heat up the brakes.
Do not wash the engine compart-
ment and area adjacent to it. If wa-
ter enters the engine air intake,
electrical parts or the power steer-
ing fluid reservoir, it will cause en-
gine trouble or faulty power steer-
ing respectively.
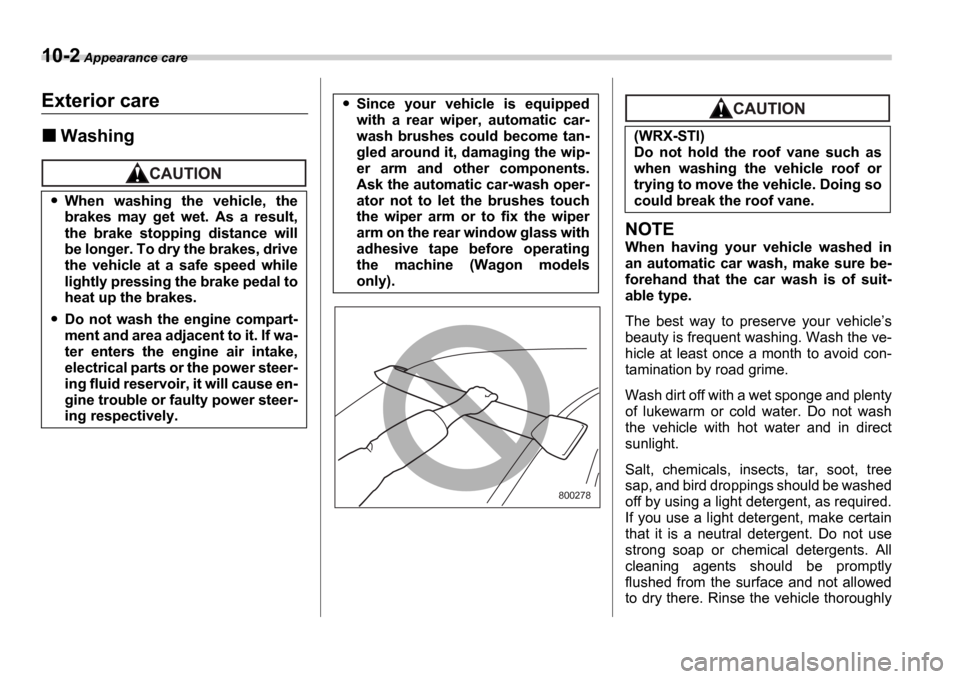
Since your vehicle is equipped
with a rear wiper, automatic car-
wash brushes could become tan-
gled around it, damaging the wip-
er arm and other components.
Ask the automatic car-wash oper-
ator not to let the brushes touch
the wiper arm or to fix the wiper
arm on the rear window glass with
adhesive tape before operating
the machine (Wagon models
only).
800278
(WRX-STI)
Do not hold the roof vane such as
when washing the vehicle roof or
trying to move the vehicle. Doing so
could break the roof vane.
Page 281 of 365

Maintenance and service
Tires and wheels ................................................ 11-30
Types of tires .................................... ...................... 11-30
Tire inspection ................................... ..................... 11-30
Tire pressures and wear ........................... ............. 11-30
Wheel balance ..................................... ................... 11-32
Wear indicators ................................... .................... 11-33
Tire rotation ..................................... ........................ 11-33
Tire replacement .................................. ................... 11-33
Wheel replacement ................................. ................ 11-34
Aluminum wheels ................................... ............ 11-35
Intercooler water spray (WRX-STI) ................. .. 11-35
Windshield washer fluid ........................... ......... 11-36
Replacement of wiper blades ....................... ..... 11-37
Windshield wiper blades assembly .................. .... 11-37
Windshield wiper blade rubber ..................... ........ 11-38
Rear window wiper blade assembly .................. ... 11-38
Rear window wiper blade rubber .................... ...... 11-39
Battery ........................................... ...................... 11-40
Fuses ............................................. ...................... 11-41
Main fuse ......................................... .................... 11-43
Installation of accessories ....................... ......... 11-43
Replacing bulbs ................................... ............... 11-44
Headlights (WRX-STI) .............................. ............... 11-45
Headlights (Except WRX-STI) ....................... ......... 11-46
Front turn signal light bulbs ..................... ............. 11-48
Parking light ..................................... ....................... 11-48
Front fog light ................................... ...................... 11-48
Rear combination lights ........................... .............. 11-48
License plate light ............................... ................... 11-50
Dome light, map light and cargo area light ........ .. 11-50Trunk light .......................................
........................ 11-51
High mount stop light ............................. ............... 11-51
Page 283 of 365
11-4 Maintenance and service
Before checking or servicing
in the engine compartment
When you do checking or ser-
vicing in the engine compart-
ment while the engine is run-
ning
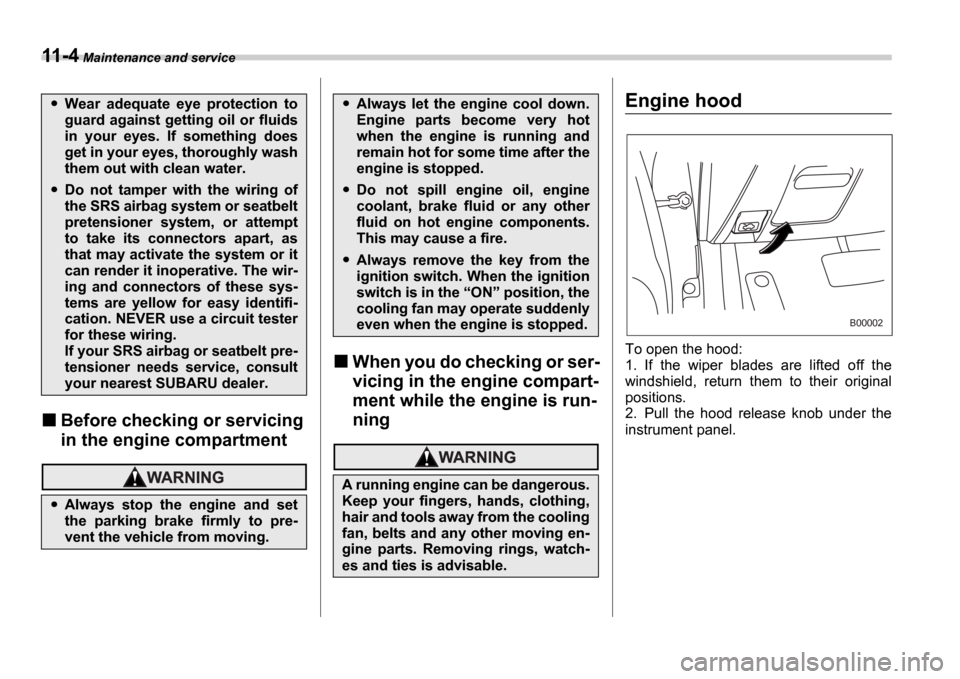
Engine hood
0
To open the hood:
1. If the wiper blades are lifted off the
windshield, return them to their original
positions.
2. Pull the hood release knob under the
instrument panel.
Wear adequate eye protection to
guard against getting oil or fluids
in your eyes. If something does
get in your eyes, thoroughly wash
them out with clean water.
Do not tamper with the wiring of
the SRS airbag system or seatbelt
pretensioner system, or attempt
to take its connectors apart, as
that may activate the system or it
can render it inoperative. The wir-
ing and connectors of these sys-
tems are yellow for easy identifi-
cation. NEVER use a circuit tester
for these wiring.
If your SRS airbag or seatbelt pre-
tensioner needs service, consult
your nearest SUBARU dealer.
Always stop the engine and set
the parking brake firmly to pre-
vent the vehicle from moving.
Always let the engine cool down.
Engine parts become very hot
when the engine is running and
remain hot for some time after the
engine is stopped.
Do not spill engine oil, engine
coolant, brake fluid or any other
fluid on hot engine components.
This may cause a fire.
Always remove the key from the
ignition switch. When the ignition
switch is in the ON position, the
cooling fan may operate suddenly
even when the engine is stopped.
A running engine can be dangerous.
Keep your fingers, hands, clothing,
hair and tools away from the cooling
fan, belts and any other moving en-
gine parts. Removing rings, watch-
es and ties is advisable.
B00002
Page 316 of 365
Maintenance and service 11-37
CONTINUED
used previously, purge the old fluid from
the piping between the reservoir tank and
washer nozzles by operating the washer
for a certain period of time. Otherwise, if
the concentration of the fluid remaining in
the piping is too low for the outside tem-
perature, it may freeze and block the noz-
zles.
Replacement of wiper blades
Grease, wax, insects, or other material on
the windshield or the wiper blade results in
jerky wiper operation and streaking on the
glass. If you cannot remove the streaks af-
ter operating the windshield washer or if
the wiper operation is jerky, clean the out-
er surface of the windshield (or rear win-
dow) and the wiper blades using a sponge
or soft cloth with a neutral detergent or
mild-abrasive cleaner. After cleaning,
rinse the windshield and wiper blades with
clean water. The windshield is clean if
beads do not form when you rinse the
windshield with water.
If you cannot eliminate the streaking even
after following this method, replace the
wiper blades using the following proce-
dures:
Windshield wiper blades as-
sembly
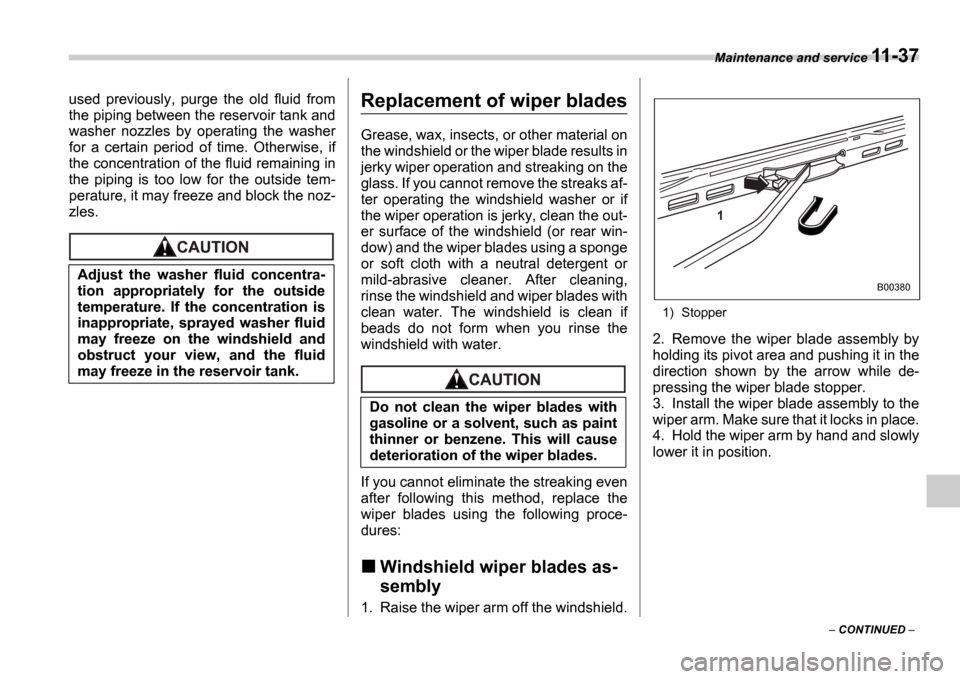
1. Raise the wiper arm off the windshield.
1) Stopper
2. Remove the wiper blade assembly by
holding its pivot area and pushing it in the
direction shown by the arrow while de-
pressing the wiper blade stopper.
3. Install the wiper blade assembly to the
wiper arm. Make sure that it locks in place.
4. Hold the wiper arm by hand and slowly
lower it in position.
Adjust the washer fluid concentra-
tion appropriately for the outside
temperature. If the concentration is
inappropriate, sprayed washer fluid
may freeze on the windshield and
obstruct your view, and the fluid
may freeze in the reservoir tank.
Do not clean the wiper blades with
gasoline or a solvent, such as paint
thinner or benzene. This will cause
deterioration of the wiper blades.
1
B00380