2006 PONTIAC GRAND PRIX ECO mode
[x] Cancel search: ECO modePage 85 of 472

Power Door Locks
To lock or unlock all doors
from inside the vehicle,
use the power door
lock switch located on
either front door.
Move the switch on the driver’s door to the right to lock
or to the left to unlock the doors. Move the switch on
the passenger’s door to the left to lock or to the right to
unlock the doors.
If the vehicle has the content theft-deterrent system, the
vehicle may be programmed to arm the system with
the power door lock switch. See “Lock Switch Arm”
underDIC Controls and Displays (Base Level DIC) on
page 3-52orDIC Controls and Displays (Uplevel
DIC with Trip Computer) on page 3-60for more
information on programming the system.
Delayed Locking
This feature delays the locking of the vehicle’s doors for
�ve seconds after the last door is closed. Two chimes
will sound when the power door lock switch or the LOCK
button on the remote keyless entry transmitter is
pressed when a door is open. The chimes indicate that
the delayed locking feature is on.
The doors can be locked immediately by pressing the
power door lock switch or the LOCK button on the
transmitter a second time.
The delayed locking feature will not activate when the
ignition is in RUN or ACC.
You can program this feature on or off through the
Driver Information Center (DIC) See “Personal
Programming Mode Screens” underDIC Controls and
Displays (Base Level DIC) on page 3-52orDIC Controls
and Displays (Uplevel DIC with Trip Computer) on
page 3-60. Driver’s Side
2-11
Page 93 of 472
Disarming with the Remote Keyless
Entry Transmitter
The alarm system will disarm when the remote keyless
entry transmitter is used to unlock the doors. The
red light will go out to show that the system is disarmed.
Disarming with Your Key
The alarm system will disarm when the key is used to
unlock the doors. The red light will stop �ashing
when the system is disarmed. If you would like the key
to disarm the alarm system, see “Personal Programming
Mode Screens” underDIC Controls and Displays
(Base Level DIC) on page 3-52orDIC Controls and
Displays (Uplevel DIC with Trip Computer) on page 3-60
for more information.
PASS-Key®III
Your PASS-Key®III system operates on a radio
frequency subject to Federal Communications
Commission (FCC) Rules and with Industry Canada.This device complies with Part 15 of the FCC Rules.
Operation is subject to the following two conditions:
1. This device may not cause harmful interference.
2. This device must accept any interference received,
including interference that may cause undesired
operation.
This device complies with RSS-210 of Industry Canada.
Operation is subject to the following two conditions:
1. This device may not cause interference.
2. This device must accept any interference received,
including interference that may cause undesired
operation of the device.
Changes or modi�cations to this system by other than
an authorized service facility could void authorization to
use this equipment.
PASS-Key
®III uses a radio frequency transponder in
the key that matches a decoder in your vehicle.
2-19
Page 99 of 472
Displacement on Demand™ (DoD™)
(5.3L Engine)
Your vehicle’s engine may be equipped with
Displacement on Demand™ (DoD™). This system
allows the engine to operate on either all or half of its
cylinders, depending on your driving conditions.
When less power is required, such as cruising at a
constant vehicle speed, the system will operate in the
half cylinder mode, allowing your vehicle to achieve
better fuel economy. When greater power demands are
required, such as accelerating from a stop, passing,
or merging onto a freeway, the system will maintain
full-cylinder operation.
When greater power demands are required, such as
accelerating from a stop, passing, or merging onto
a freeway, the system will maintain eight-cylinder
operation. When less power is required, such a
cruising at a constant vehicle speed, the system will
automatically enable the four-cylinder mode, allowing
your vehicle to achieve better fuel economy.
Automatic Transaxle Operation
The shift lever for the automatic transaxle is located on
the console between the seats.
Maximum engine speed is limited when the vehicle is in
PARK (P) or NEUTRAL (N) to protect driveline
components from improper operation.
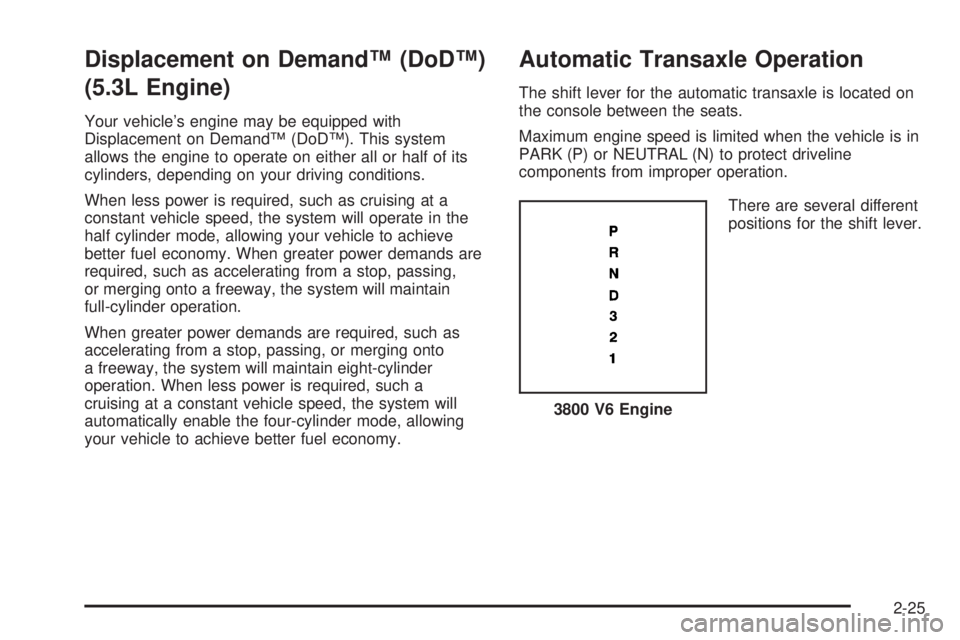
There are several different
positions for the shift lever.
3800 V6 Engine
2-25
Page 103 of 472
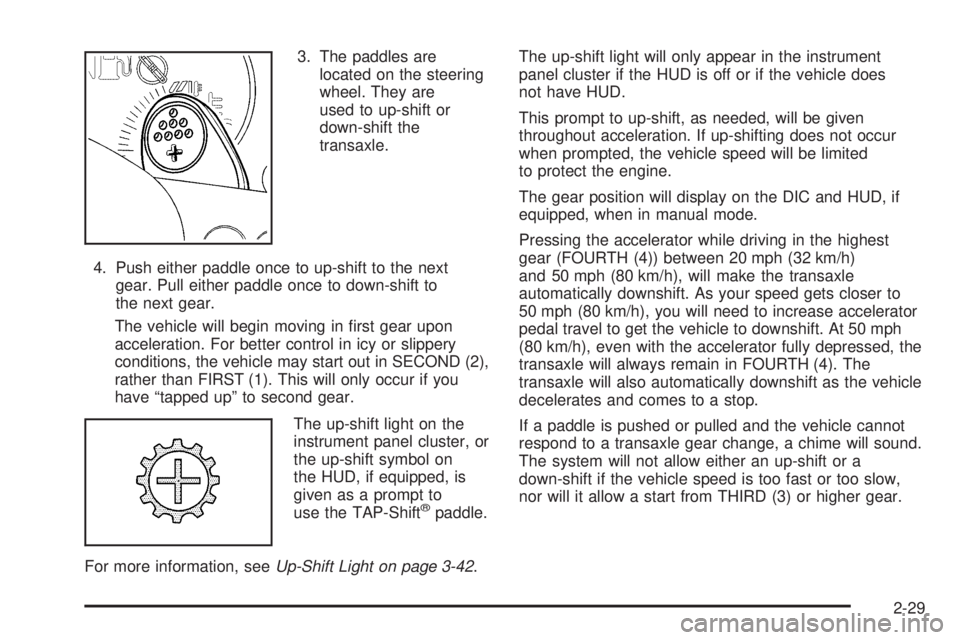
3. The paddles are
located on the steering
wheel. They are
used to up-shift or
down-shift the
transaxle.
4. Push either paddle once to up-shift to the next
gear. Pull either paddle once to down-shift to
the next gear.
The vehicle will begin moving in �rst gear upon
acceleration. For better control in icy or slippery
conditions, the vehicle may start out in SECOND (2),
rather than FIRST (1). This will only occur if you
have “tapped up” to second gear.
The up-shift light on the
instrument panel cluster, or
the up-shift symbol on
the HUD, if equipped, is
given as a prompt to
use the TAP-Shift
®paddle.
For more information, seeUp-Shift Light on page 3-42.The up-shift light will only appear in the instrument
panel cluster if the HUD is off or if the vehicle does
not have HUD.
This prompt to up-shift, as needed, will be given
throughout acceleration. If up-shifting does not occur
when prompted, the vehicle speed will be limited
to protect the engine.
The gear position will display on the DIC and HUD, if
equipped, when in manual mode.
Pressing the accelerator while driving in the highest
gear (FOURTH (4)) between 20 mph (32 km/h)
and 50 mph (80 km/h), will make the transaxle
automatically downshift. As your speed gets closer to
50 mph (80 km/h), you will need to increase accelerator
pedal travel to get the vehicle to downshift. At 50 mph
(80 km/h), even with the accelerator fully depressed, the
transaxle will always remain in FOURTH (4). The
transaxle will also automatically downshift as the vehicle
decelerates and comes to a stop.
If a paddle is pushed or pulled and the vehicle cannot
respond to a transaxle gear change, a chime will sound.
The system will not allow either an up-shift or a
down-shift if the vehicle speed is too fast or too slow,
nor will it allow a start from THIRD (3) or higher gear.
2-29
Page 110 of 472
Compass Variance
Compass variance is the difference between earth’s
magnetic north and true geographic north. If not
adjusted to account for compass variance, the mirror’s
compass could give false readings. The mirror is
set in zone eight upon leaving the factory. It will be
necessary to adjust the compass to compensate
for compass variance if you live outside zone eight.
Under certain circumstances, as during a long distance
cross-country trip, it will be necessary to adjust for
compass variance.
To adjust for compass variance:
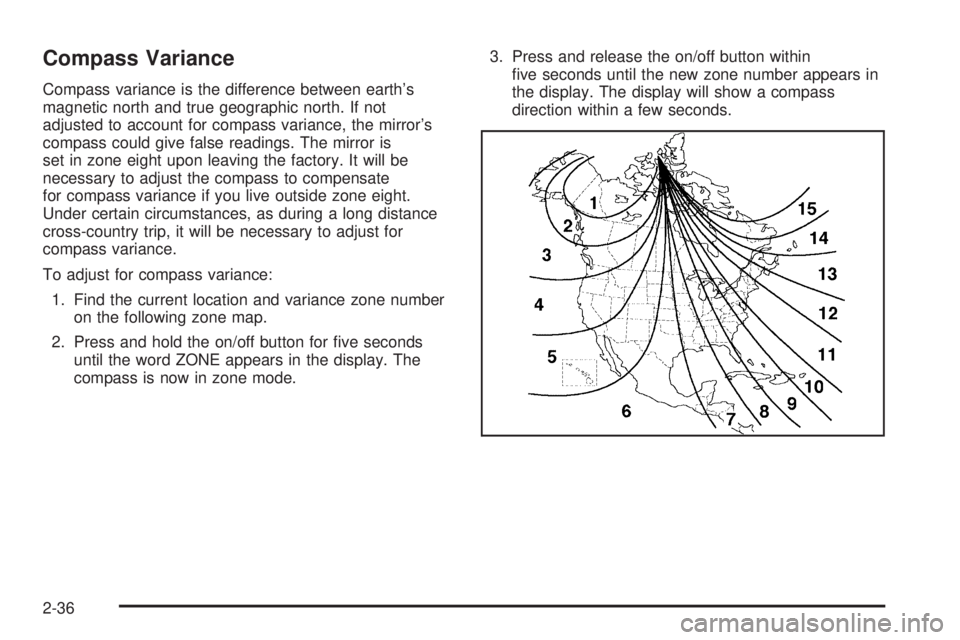
1. Find the current location and variance zone number
on the following zone map.
2. Press and hold the on/off button for �ve seconds
until the word ZONE appears in the display. The
compass is now in zone mode.3. Press and release the on/off button within
�ve seconds until the new zone number appears in
the display. The display will show a compass
direction within a few seconds.
2-36
Page 127 of 472
Flash-to-Pass
This feature allows the use of the high-beam headlamps
to signal the driver in front of you that you want to pass.
Pull and hold the exterior lamps control lever to use this
feature. When this is done, the following will occur:
The high-beam headlamps will turn on, while
the headlamps are off, in low-beam, or in Daytime
Running Lamps (DRL) mode. They will stay on
as long as the lever is held in this position. Release
the lever to turn them off.
The headlamps will switch to low beam if the
headlamps had been in the high-beam mode.
To return to high-beam, push the lever.
If the vehicle is equipped with the Head-Up
Display (HUD), an arrow will appear on the display to
indicate that the high beams are on.
Windshield Wiper Lever
Be sure to clear ice and snow from the wiper blades
before using them. If they are frozen to the windshield,
gently loosen or thaw them. Damaged wiper blades may
not clear the windshield well, making it harder to see and
drive safely. If the blades do become damaged, install
new blades or blade inserts. For more information, see
Windshield Wiper Blade Replacement on page 5-60.Heavy snow or ice can overload the wiper motor. A
circuit breaker will stop the motor until it cools down.
Clear away snow or ice to prevent an overload.
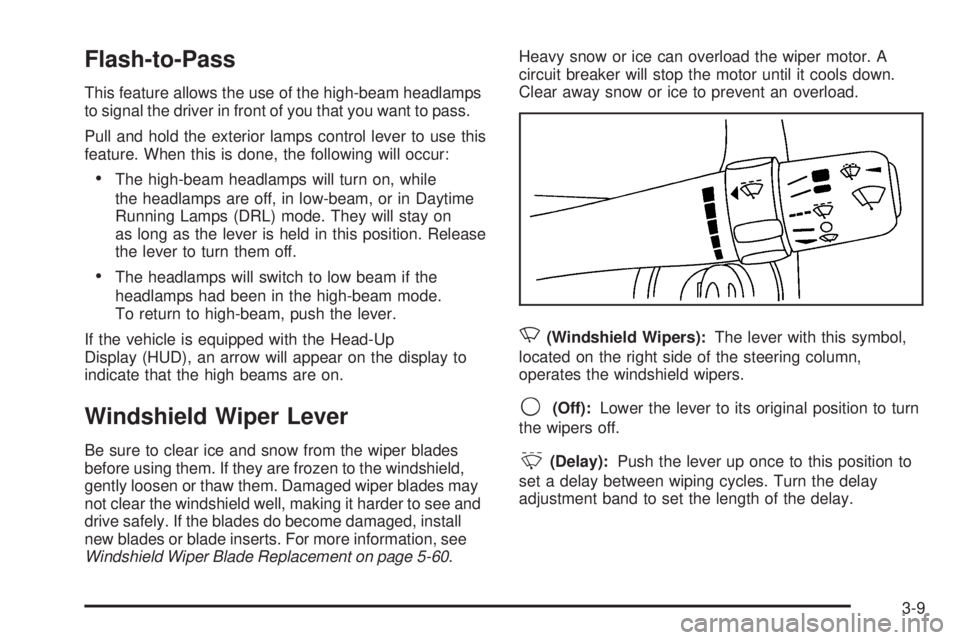
N(Windshield Wipers):The lever with this symbol,
located on the right side of the steering column,
operates the windshield wipers.
9(Off):Lower the lever to its original position to turn
the wipers off.
&(Delay):Push the lever up once to this position to
set a delay between wiping cycles. Turn the delay
adjustment band to set the length of the delay.
3-9
Page 128 of 472

x(Delay Adjustment):Turn the band, located on
the left of the windshield wiper lever, to set the length of
the delay between wiper cycles when using the delay
feature. There are �ve delay adjustment settings.
Turn the band up to make the delays shorter in between
wiper cycles. Turn the band down to make the delays
longer between wiper cycles. The windshield wiper lever
must be in delay for this feature to work.
6(Low Speed):Push the lever up to the second
position for steady wiping cycles at a slow speed.
1(High Speed):Push the lever up to the third
position for steady wiping cycles at a high speed.
7(Mist):For a single wiping cycle, push the
lever down once and let go. The wipers will stop after
one cycle. For additional cycles, hold the lever down.
About 30 seconds after the wipers are on, the
headlamps, taillamps, and instrument panel lighting will
come on, and the Driver Information Center (DIC)
back lighting will decrease to the night time mode. About
ten seconds after the wipers are turned off, all the
lamps will go back to the AUTO (Automatic) mode. See
Exterior Lamps on page 3-15.
Windshield Washer
{CAUTION:
In freezing weather, do not use your washer
until the windshield is warmed. Otherwise the
washer �uid can form ice on the windshield,
blocking your vision.
The windshield washer button is located at the end of
the windshield wiper lever.
K(Washer Fluid):Press this button to activate the
washer �uid to spray onto the windshield. The wipers
will run for a few cycles to clear the windshield. For more
wash cycles, press and hold the button.
If the vehicle is low on washer �uid, the LOW WASHER
FLUID message will appear on the Driver Information
Center (DIC) display. See “LOW WASHER FLUID”
underDIC Warnings and Messages on page 3-72for
more information.
3-10
Page 137 of 472
Delayed Entry Lighting
The delayed lighting feature will continue to light the
interior of the vehicle for 25 seconds after all the doors
have been closed. Delayed lighting will not occur
while the ignition is in RUN or ACC. After 25 seconds
have elapsed, the interior lamps will slowly fade out. The
lamps will fade out before the 25 seconds have
elapsed if one of the following is done:
The ignition is turned to RUN or ACC.
The doors are locked using the remote keyless
entry transmitter.
The doors are locked using the power door
lock switch.
To turn the delayed lighting feature off or on, see
“Personal Programming Modes” underDIC Controls and
Displays (Base Level DIC) on page 3-52orDIC
Controls and Displays (Uplevel DIC with Trip Computer)
on page 3-60DIC Controls and Displays.
Delayed Exit Lighting
For exiting the vehicle at night, the vehicle is equipped
with the delayed exit lighting feature. After the key
is removed from the ignition, the interior lamps will light
for up the amount of seconds set in the Driver
Information Center (DIC). See “Personal Programming
Mode Screens” underDIC Controls and Displays
(Base Level DIC) on page 3-52orDIC Controls and
Displays (Uplevel DIC with Trip Computer) on
page 3-60. After the set time has elapsed, the interior
lamps will slowly fade. The lamps will fade before the set
time has elapsed if one of the following is done:
The ignition is turned to RUN or ACC.
The doors are locked using the remote keyless
entry transmitter.
The doors are locked using the power door
lock switch.
When any door is opened, delayed exit lighting is
cancelled. The interior lamps will stay on while any door
is opened and will slowly fade out when all the doors
are closed. The interior lamps will stay on for the
set time after all the doors have been closed if they
have not been locked.
To turn the delayed exit lighting feature off or on, see
“Personal Programming Mode Screens” underDIC
Controls and Displays (Base Level DIC) on page 3-52
orDIC Controls and Displays (Uplevel DIC with Trip
Computer) on page 3-60.
3-19